10分钟使用腾讯云知识引擎带你接入DeepSeek
我看文档中有知识库的建立与使用,后面可以试试看这个希望通过本篇文章,10分钟也就能通过腾讯云接入调用起Deepseek的能力了。
10分钟使用腾讯云知识引擎带你接入DeepSeek
一、前言
最近的DeepSeek好火,它是由杭州深度求索人工智能基础技术研究有限公司出品的一款先进的人工智能产品。DeepSeek以其强大的技术实力和创新应用,迅速在人工智能领域崭露头角,成为行业关注的焦点。
DeepSeek官网:DeepSeek | 深度求索
不过在使用chat聊天的功能中,经常出现服务器繁忙,请稍后再试的问题
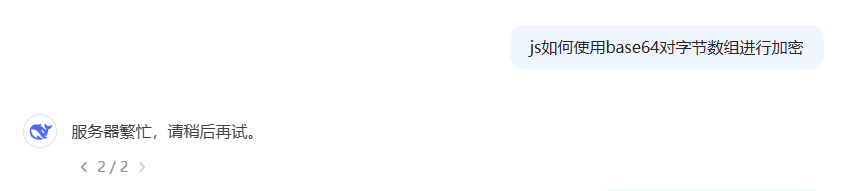
这有服务器资源的原因,也有境外势力攻击的原因。总的来说,DeepSeek产品爆火后,带来巨大的关注与流量的同时,也要看DeepSeek能否稳稳地吃下这波流量。
好在什么,腾讯云知识引擎推出了快速接入DeepSeek的API,只需要10分钟,带你接入体验DeepSeek。
接入文档:知识引擎原子能力 DeepSeek API 接口-API 文档-文档中心-腾讯云
二、代码
那么直接开始,我以前主要以Java为主,但这次我看Java有点繁琐,并且在文档中,也没有Java对应的代码示例,只有python的。
那好吧,直接来挑战一下python调起
在编码之前,我们需要去获取secret_id、secret_key,这是属于腾讯云的,控制台链接如下
生成后记得好好保存
文档中的示例代码中将响应结果直接打印,发现挺混乱的,响应报文如下
data:{"Choices":[{"Delta":{"Role":"assistant"},"FinishReason":"","Index":0}],"Created":1738697505,"Id":"60c97fbd7cfd14db07b75d56069a131f","Model":"deepseek-r1","Object":"chat.completion.chunk","Usage":{"InputTokens":0,"OutputTokens":0,"TotalTokens":0}}

data:{"Choices":[{"Delta":{"Content":"您好"},"FinishReason":"","Index":0}],"Created":1738697505,"Id":"60c97fbd7cfd14db07b75d56069a131f","Model":"deepseek-r1","Object":"chat.completion.chunk","Usage":{"InputTokens":0,"OutputTokens":0,"TotalTokens":0}}

data:[DONE]
摘抄了几条,主要是里面的Content,需要解析获取
那么真实的代码如下
# -*- coding: utf-8 -*-
import hashlib
import hmac
import json
import sys
import time
from datetime import datetime
if sys.version_info[0] <= 2:
    from httplib import HTTPSConnection
else:
    from http.client import HTTPSConnection


def sign(key, msg):
    return hmac.new(key, msg.encode("utf-8"), hashlib.sha256).digest()

# 实例化一个认证对象,入参需要传入腾讯云账户 SecretId 和 SecretKey,此处还需注意密钥对的保密
# 代码泄露可能会导致 SecretId 和 SecretKey 泄露,并威胁账号下所有资源的安全性。以下代码示例仅供参考,建议采用更安全的方式来使用密钥,请参见:https://cloud.tencent.com/document/product/1278/85305
# 密钥可前往官网控制台 https://console.cloud.tencent.com/cam/capi 进行获取
secret_id = ""
secret_key = ""
token = ""

service = "lkeap"
host = "lkeap.tencentcloudapi.com"
region = "ap-shanghai"
version = "2024-05-22"
action = "ChatCompletions"
payload = """{"Model":"deepseek-r1","Messages":[{"Role":"user","Content":"请问你是?"}],"Stream":true,"Temperature":0.6}"""
params = json.loads(payload)
endpoint = "https://lkeap.tencentcloudapi.com"
algorithm = "TC3-HMAC-SHA256"
timestamp = int(time.time())
date = datetime.utcfromtimestamp(timestamp).strftime("%Y-%m-%d")

# ************* 步骤 1:拼接规范请求串 *************
http_request_method = "POST"
canonical_uri = "/"
canonical_querystring = ""
ct = "application/json; charset=utf-8"
canonical_headers = "content-type:%s\nhost:%s\nx-tc-action:%s\n" % (ct, host, action.lower())
signed_headers = "content-type;host;x-tc-action"
hashed_request_payload = hashlib.sha256(payload.encode("utf-8")).hexdigest()
canonical_request = (http_request_method + "\n" +
                     canonical_uri + "\n" +
                     canonical_querystring + "\n" +
                     canonical_headers + "\n" +
                     signed_headers + "\n" +
                     hashed_request_payload)

# ************* 步骤 2:拼接待签名字符串 *************
credential_scope = date + "/" + service + "/" + "tc3_request"
hashed_canonical_request = hashlib.sha256(canonical_request.encode("utf-8")).hexdigest()
string_to_sign = (algorithm + "\n" +
                  str(timestamp) + "\n" +
                  credential_scope + "\n" +
                  hashed_canonical_request)

# ************* 步骤 3:计算签名 *************
secret_date = sign(("TC3" + secret_key).encode("utf-8"), date)
secret_service = sign(secret_date, service)
secret_signing = sign(secret_service, "tc3_request")
signature = hmac.new(secret_signing, string_to_sign.encode("utf-8"), hashlib.sha256).hexdigest()

# ************* 步骤 4:拼接 Authorization *************
authorization = (algorithm + " " +
                 "Credential=" + secret_id + "/" + credential_scope + ", " +
                 "SignedHeaders=" + signed_headers + ", " +
                 "Signature=" + signature)

# ************* 步骤 5:构造并发起请求 *************
headers = {
    "Authorization": authorization,
    "Content-Type": "application/json; charset=utf-8",
    "Host": host,
    "X-TC-Action": action,
    "X-TC-Timestamp": timestamp,
    "X-TC-Version": version
}
if region:
    headers["X-TC-Region"] = region
if token:
    headers["X-TC-Token"] = token

try:
    req = HTTPSConnection(host)
    req.request("POST", "/", headers=headers, body=payload.encode("utf-8"))
    resp = req.getresponse()
    body = resp.read().decode('utf-8')
    lines = body.split('\n')
    # 遍历每一行
    for line in lines:
        if line.startswith('data:'):
            # 提取 JSON 字符串
            json_str = line[5:].strip()  # 去掉 'data:' 和前后的空白字符
            if json_str:  # 确保不是空字符串
                # 解析 JSON 数据
                data = json.loads(json_str)
                # 处理 JSON 数据,例如打印 Content
                if 'Choices' in data:
                    for choice in data['Choices']:
                        content = choice.get('Delta', {}).get('Content')
                        if content:
                            print(content, end='')
except Exception as err:
    print(err)
运行查看结果

调用是成功了,但有两个小问题
- 在结束的时候有报错,这是因为收尾的代码没有处理好导致的
- 调用的提示词是写死的,希望可以通过参数传入
- 调用完一次之后,整个脚本也就结束了
三、改进
针对上面这两个小问题,做出以下改动
- 报错的问题,这个简单,就是自己写代码没有做好处理导致的
- 提示词入参这个目前是固定的,我想通过控制台键入文本的方式提供给接口
- 让脚本可以循环多走几次调用,完成对话的效果
改造代码如下
# -*- coding: utf-8 -*-
import hashlib
import hmac
import json
import sys
import time
from datetime import datetime, timezone
if sys.version_info[0] <= 2:
    from httplib import HTTPSConnection
else:
    from http.client import HTTPSConnection

def sign(key, msg):
    return hmac.new(key, msg.encode("utf-8"), hashlib.sha256).digest()

# 实例化一个认证对象,入参需要传入腾讯云账户 SecretId 和 SecretKey
# 注意:密钥泄露可能会导致安全风险,请确保代码安全存储密钥
secret_id = ""
secret_key = ""
token = ""

service = "lkeap"
host = "lkeap.tencentcloudapi.com"
region = "ap-shanghai"
version = "2024-05-22"
action = "ChatCompletions"
endpoint = "https://lkeap.tencentcloudapi.com"
algorithm = "TC3-HMAC-SHA256"

# 获取当前时间戳并格式化日期
timestamp = int(time.time())
date = datetime.fromtimestamp(timestamp, timezone.utc).strftime("%Y-%m-%d")

while True:
    try:
        # 从用户输入获取消息内容
        user_input = input("请输入消息(输入 'exit' 退出):")
        if user_input.lower() == 'exit':
            print("退出程序。")
            break

        # 构建新的 payload
        payload = json.dumps({
            "Model": "deepseek-r1",
            "Messages": [{"Role": "user", "Content": user_input}],
            "Stream": True,
            "Temperature": 0.6
        })

        # ************* 步骤 1:拼接规范请求串 *************
        http_request_method = "POST"
        canonical_uri = "/"
        canonical_querystring = ""
        ct = "application/json; charset=utf-8"
        canonical_headers = "content-type:%s\nhost:%s\nx-tc-action:%s\n" % (ct, host, action.lower())
        signed_headers = "content-type;host;x-tc-action"
        hashed_request_payload = hashlib.sha256(payload.encode("utf-8")).hexdigest()
        canonical_request = (http_request_method + "\n" +
                            canonical_uri + "\n" +
                            canonical_querystring + "\n" +
                            canonical_headers + "\n" +
                            signed_headers + "\n" +
                            hashed_request_payload)

        # ************* 步骤 2:拼接待签名字符串 *************
        credential_scope = date + "/" + service + "/" + "tc3_request"
        hashed_canonical_request = hashlib.sha256(canonical_request.encode("utf-8")).hexdigest()
        string_to_sign = (algorithm + "\n" +
                        str(timestamp) + "\n" +
                        credential_scope + "\n" +
                        hashed_canonical_request)

        # ************* 步骤 3:计算签名 *************
        secret_date = sign(("TC3" + secret_key).encode("utf-8"), date)
        secret_service = sign(secret_date, service)
        secret_signing = sign(secret_service, "tc3_request")
        signature = hmac.new(secret_signing, string_to_sign.encode("utf-8"), hashlib.sha256).hexdigest()

        # ************* 步骤 4:拼接 Authorization *************
        authorization = (algorithm + " " +
                        "Credential=" + secret_id + "/" + credential_scope + ", " +
                        "SignedHeaders=" + signed_headers + ", " +
                        "Signature=" + signature)

        # ************* 步骤 5:构造并发起请求 *************
        headers = {
            "Authorization": authorization,
            "Content-Type": "application/json; charset=utf-8",
            "Host": host,
            "X-TC-Action": action,
            "X-TC-Timestamp": timestamp,
            "X-TC-Version": version
        }
        if region:
            headers["X-TC-Region"] = region
        if token:
            headers["X-TC-Token"] = token

        req = HTTPSConnection(host)
        req.request("POST", "/", headers=headers, body=payload.encode("utf-8"))
        resp = req.getresponse()
        body = resp.read().decode('utf-8')
        lines = body.split('\n')

        # 处理响应
        print("AI回复:", end='')
        for line in lines:
            if line.startswith('data:'):
                json_str = line[5:].strip()
                if json_str.startswith('['):
                    break
                if json_str:
                    data = json.loads(json_str)
                    if 'Choices' in data:
                        for choice in data['Choices']:
                            content = choice.get('Delta', {}).get('Content')
                            if content and content.strip():
                                print(content, end='')
        print('')
    except KeyboardInterrupt:
        # 捕获 Ctrl+C 中断,优雅退出
        print("\n程序被用户中断。")
        break
    except Exception as err:
        print(f"\n发生错误: {err}")
        break  # 或者根据需要继续循环
完成后,我们就用最近非常火的对话来向它提问,效果也是相当哇塞

四、最后
我看文档中有知识库的建立与使用,后面可以试试看这个
希望通过本篇文章,10分钟也就能通过腾讯云接入调用起Deepseek的能力了。

欢迎加入DeepSeek 技术社区。在这里,你可以找到志同道合的朋友,共同探索AI技术的奥秘。
更多推荐


 11
11 0
0- 0


 已为社区贡献2条内容

所有评论(0)