死磕claude code-SKILL.md 结构详解:让 Skill 既会被触发、又能跑通的写法
TL;DR: SKILL.md 是 Claude Code 的最小可执行能力单元。它的结构直接决定了三个结果:能否被正确触发、加载后能否正确执行、执行时 Token 消耗是否可控。写好 SKILL.md 不是写好提示词,是设计好一个可复用的操作规程。
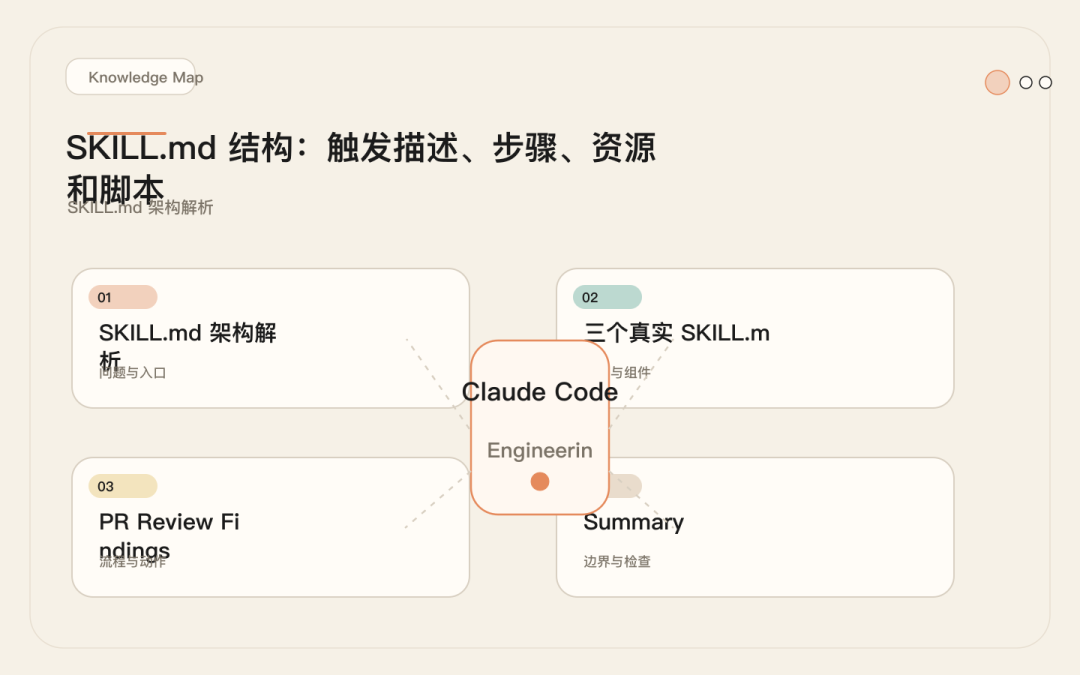
SKILL.md 架构解析
一个 SKILL.md 由两部分组成:frontmatter(YAML 元数据)和 body(执行内容)。Claude Code 对这两部分的处理方式完全不同。
加载机制
Claude Code 的 Skill 匹配分两个阶段:
阶段 1: 候选扫描
├── 遍历所有已注册 Skill 的 name 和 description
├── 将用户当前任务描述与每个 Skill 的 description 做语义匹配
├── 匹配成功的 Skill 进入候选列表
└── 代价:仅消耗 description 的 Token(通常 20-50 tokens)

阶段 2: 按需加载
├── 从候选列表中选择最匹配的 Skill
├── 将完整 SKILL.md 内容注入上下文
├── 如果 SKILL.md 引用了外部资源(@path),按需读取
└── 代价:整个 SKILL.md 的 Token + 引用资源
关键洞察:description 写得不好,Skill 永远不会被加载;body 写得不好,Skill 加载了也执行不对。两者是独立的工程问题。这和传统软件开发中的"接口契约"与"实现逻辑"的区分完全一致:description 是接口签名,body 是实现代码。改 description 影响调用关系,改 body 影响执行质量,不要混为一谈。
Body 的两种写法流派
实际项目中存在两种 Body 写法,各有适用场景:
结构化段落式(Use When / Do Not Use When / Steps / Output):适合以自然语言指导为主的 Skill。Claude Code 在执行时逐段读取、逐步遵循。优点是可读性强、修改成本低;缺点是步骤之间可能出现歧义,需要模型自行判断细节。
XML 标签式(<objective> / <context> / <process> / <execution_context>):适合逻辑严密、引用外部资源多的 Skill。XML 标签提供了更明确的边界,减少段落之间的语义混淆。在真实的复杂项目中(如前文提到的 gsd-quick 和 qros-data-ready-failure),这种写法更常见,因为它能精确控制加载时机和执行边界。
两种写法没有绝对的优劣,但团队内部应该统一选择一种。混用会导致 Claude Code 在解析不同 Skill 时产生格式预期不一致的问题。
Frontmatter 字段
---
name: skill-identifier          # 必填,kebab-case 标识符
description: "触发匹配文本"       # 必填,Claude Code 用这段文字判断是否加载
argument-hint: "[--flag] [args]" # 可选,参数提示
allowed-tools:                   # 可选,工具白名单
  - Read
  - Write
  - Bash
---
每个字段的工程含义:
|
字段
|
必填
|
类型
|
用途
|
常见陷阱
|
| — | — | — | — | — |
| name |
是
|
string
|
Skill 标识符,用于 /skill-name 调用
|
太通用(如 review)导致和其他 Skill 冲突
|
| description |
是
|
string
|
触发匹配的唯一依据
|
太长(>80 字)→ 语义稀释,匹配精度下降
|
| argument-hint |
否
|
string
|
告知 Claude Code 接受什么参数
|
省略后 Claude Code 不知道该传什么
|
| allowed-tools |
否
|
list
|
限制 Skill 可使用的工具
|
省略意味着使用全局默认工具集
|
Body 结构
Body 不是自由格式文本。它有明确的结构化分区,每个分区承担不同的工程职责:
# Skill 标题

## Use When
- 明确列出触发条件。Claude Code 参考这段做二次确认。

## Do Not Use When
- 明确列出排除条件。防止误触发的核心手段。

## Steps
- 编号步骤。Claude Code 按序执行。

## Output
- 期望产出。Claude Code 用它做自我验证。

## Resources(可选)
- 引用外部文件。只在需要时加载。
Use When 和 Do Not Use When 的组合构成了 Skill 的触发边界。这对上一次测试就能发现问题:5 条应该触发的请求 + 5 条不应该触发的请求(详见第 11 篇评测)。
段落长度与模型注意力的关系
Body 各段落不是等权重的。Claude Code 对不同位置的段落注意力分布不均匀,这直接影响规则的遵循效果:
注意力分布规律(基于实际执行的定性观察):
├── Steps 段落:最高权重,Skill 加载后核心执行依据
├── Use When / Do Not Use When:次高权重,触发判断的关键
├── Output:中等权重,决定产出格式
├── Context:较低权重,提供背景但不直接指导操作
└── Resources:最低权重,通常只在需要时才读取
实际含义:关键的约束条件应该写在 Steps 里,而不是藏在 Context 段落中。例如"不要修改 production 配置"这个约束,如果写在 Context 里容易被忽略,写在 Steps 的具体步骤中(“检查目标环境,如果是 production 则终止并报告”)遵循率会高得多。这和 CLAUDE.md 中的规律一致:具体指令比抽象规则的遵循效果好(见第 04 篇)。
三个真实 SKILL.md
示例 A:简单 —— pr-review
复杂度:单流程,无外部资源,无脚本。Token 消耗约 500。
---
name: pr-review
description: "Review a pull request diff for correctness bugs, security issues, and test coverage gaps"
---

# PR Review

## Use When
- User asks to review a PR or diff
- User shares a GitHub PR URL
- User says "review these changes" or "check this PR"

## Do Not Use When
- User asks to implement changes directly
- User asks to write tests (use test-author skill instead)
- User asks to merge or deploy

## Steps

1. **Identify the diff source**
   - If PR URL provided: `gh pr diff {number}`
   - If branch: `git diff main...HEAD`
   - If files mentioned: `git diff {file1} {file2}`

2. **Classify changes by risk level**
   ```
   HIGH: auth, payment, data mutation, permission changes
   MEDIUM: new API endpoints, config changes, dependency updates
   LOW: documentation, comments, formatting, test-only changes
   ```

3. **Check correctness**
   - For each hunk: does the change do what the commit message says?
   - Are there off-by-one errors, null checks missing, wrong condition logic?
   - Does error handling cover all documented failure modes?

4. **Check security**
   - SQL injection via string interpolation
   - User input used without validation
   - Secrets hardcoded or logged
   - Missing auth/permission checks on new endpoints

5. **Check test coverage**
   - Does the PR include tests for new behavior?
   - Do existing tests cover the modified paths?
   - Are edge cases tested?

6. **Output findings**
   - Order by severity: HIGH → MEDIUM → LOW
   - Each finding: file, line range, category, description, suggested fix

## Output
```
## PR Review Findings

### HIGH Severity
- `src/auth/middleware.ts:45` — Missing token expiry check
  Fix: Add `if (decoded.exp < Date.now() / 1000) throw new AuthError()`

### MEDIUM Severity
- `src/routes/orders.ts:112` — New endpoint lacks rate limiting
  Fix: Add `rateLimit({ windowMs: 60000, max: 100 })` middleware

### Test Coverage Gaps
- No test for `processRefund` error path (order not found)
- Missing integration test for the new `/api/v2/checkout` endpoint

### Summary
- 2 HIGH issues (must fix before merge)
- 1 MEDIUM issue (should fix)
- 2 test coverage gaps
```
这个 Skill 只做一件事:读 diff → 分类 → 检查 → 输出。没有外部依赖,没有脚本,没有模板。适合做团队的第一个 Skill —— 逻辑清晰、容易验证触发边界。
设计决策分析:
-
• description 包含三个维度(correctness, security, tests),这使得它在同类请求中触发精度很高,同时不会在"帮我实现这个功能"这类请求中误触发。
-
• Do Not Use When 明确排除实现和部署。没有这个段落,"review 后帮我修一下"这种请求会导致 Skill 加载但 Claude Code 不确定该不该动手改代码。
-
• Steps 中的风险分级(HIGH / MEDIUM / LOW)直接决定输出顺序。这不是装饰性的分类,是控制 Claude Code 注意力分配的手段 —— 它会优先处理高风险项,而不是把所有发现平铺展示。
-
• Output 段落给出具体格式。没有这个段落,Claude Code 会用自己的判断输出,格式每次不同,无法被下游流程(如自动收集 review 结果的工具)消费。
示例 B:中等 —— incident-analysis
复杂度:多步骤,引用诊断脚本,有条件分支。Token 消耗约 1200。
---
name: incident-analysis
description: "Diagnose a production incident from alerts, logs, and metrics. Runs triage scripts and produces a structured incident report"
argument-hint: "[--severity critical|high|medium] [--service name] [incident description]"
allowed-tools:
- Read
- Bash
- Glob
- Grep
---
# Incident Analysis
## Use When
- User reports a production issue or outage
- User shares an alert notification or PagerDuty payload
- User asks "what's going on with {service}"
- User says "investigate this error" with logs or stack traces
## Do Not Use When
- User asks to deploy or roll back (use deploy skill)
- User asks to write a fix (this skill only diagnoses)
- User asks about performance optimization (not incident response)
## Context
This skill diagnoses incidents. It does NOT apply fixes.
After diagnosis, hand off to the appropriate fix workflow.
## Steps
1. **Parse arguments**
```bash
# Extract severity
echo "$ARGUMENTS" | grep -oP '(?<=--severity )\w+' || echo "undetermined"
# Extract service name
echo "$ARGUMENTS" | grep -oP '(?<=--service )\S+' || echo "all"
-
2. Collect diagnostic dataRun these in parallel:
# Recent error logs (last 30 min) kubectl logs --since=30m -l app={service} --tail=500 | grep -i "error\|fatal\|panic" > /tmp/incident-errors.log # Current resource usage kubectl top pods -l app={service} > /tmp/incident-resources.txt # Recent deployments kubectl rollout history deployment/{service} --revision=0 | head -20 > /tmp/incident-deploys.txt # Check health endpoints curl -s http://{service}:8080/health | jq . > /tmp/incident-health.json -
3. Identify incident timeline
# Find the first error timestamp head -5 /tmp/incident-errors.log | grep -oP '\d{4}-\d{2}-\d{2}[T ]\d{2}:\d{2}:\d{2}' # Correlate with recent deployments grep -A2 "$(date -v-30M '+%Y-%m-%d')" /tmp/incident-deploys.txt -
4. Classify incident type
|
Signal Pattern
|
Classification
|
Priority
|
| — | — | — |
|
Error spike after deploy
|
Deployment regression
|
P1
|
|
Gradual error increase
|
Degradation / resource exhaustion
|
P2
|
|
Sudden spike, no deploy
|
External dependency or config change
|
P1
|
|
Health check failing
|
Service crash / OOM
|
P1
|
|
No errors but slow
|
Performance issue, not incident
|
P3
| -
5. Run root cause hypothesis
Based on classification, run targeted checks:
-
• Deployment regression: diff current vs previous config
-
• Resource exhaustion: check memory/CPU trends over last hour
-
• External dependency: check outbound connection errors and timeouts
-
• Config change: check recent ConfigMap/Secret changes
- 6. Produce incident report
Output
# Incident Report: {timestamp}

## Summary
- **Service**: {service}
- **Severity**: {severity}
- **Classification**: {type}
- **Start Time**: {first_error}
- **Impact**: {affected_users_or_requests}

## Timeline
- {time} — First error observed
- {time} — Error rate exceeded threshold
- {time} — Alert triggered

<!-- codex:illustration 09-skill-md-structure/02-framework-core-structure.svg -->
WECHATIMGPH_3
<!-- /codex:illustration -->

## Root Cause Hypothesis
{description with evidence}

## Evidence
- Error log excerpt: /tmp/incident-errors.log (attached)
- Resource data: /tmp/incident-resources.txt
- Health check: /tmp/incident-health.json

## Recommended Next Steps
1. {immediate action}
2. {follow-up action}
3. {prevention recommendation}
这个 Skill 引入了三个新要素:`argument-hint` 让 Claude Code 知道可以传参数;`allowed-tools` 限制只能用只读工具(Bash 用于读日志,不是改东西);步骤中嵌入了具体的 bash 命令作为诊断脚本。条件分支(步骤 4 的分类表和步骤 5 的分支检查)让 Skill 能处理不同类型的故障。 设计决策分析: - **allowed-tools 限制为只读**。这是故意的设计:incident-analysis 只做诊断,不做修复。如果允许 Write 工具,Claude Code 可能会在诊断过程中"顺手"尝试修复,导致操作不可控。工具白名单是 Skill 级别的安全边界,比在 Steps 里写"不要修改任何东西"可靠得多。 - **步骤 2 要求并行执行**。诊断阶段收集日志、资源数据、部署历史、健康检查——这四个操作互相独立,并行执行可以把 2 分钟的等待压缩到 30 秒。在 Skill 中明确写出"Run these in parallel"比期望 Claude Code 自己判断更高效。 - **步骤 4 的分类表是决策矩阵**。把信号模式直接映射到分类和优先级,消除模型的主观判断空间。没有这个表,Claude Code 会用自己的方式分类,两次分析同一类事故可能给出不同分类。 - **Context 段明确声明边界**:"It does NOT apply fixes"。这看似冗余(因为 Do Not Use When 已经说了),但 Context 中的声明会在步骤执行期间持续影响 Claude Code 的行为,而 Do Not Use When 主要在触发判断阶段起作用。 ### 示例 C:复杂 —— release-notes 复杂度:多阶段流程,引用模板、脚本和示例文件,有多个资源按需加载。Token 消耗约 3000+。这里展示了渐进式披露的实际应用(详见第 10 篇)。 ```md --- name: release-notes description: "Generate release notes from git history, categorize changes by type, and format output using the project changelog template. Use when preparing a release or version bump" argument-hint: "[--from rev] [--to rev] [--version x.y.z] [--unreleased]" allowed-tools: - Read - Write - Bash - Glob - Grep --- # Release Notes Generator ## Use When - User asks to generate release notes - User says "prepare the release" or "what changed since..." - User runs a version bump or tag operation - User asks for a changelog entry ## Do Not Use When - User asks about a single commit (use git log directly) - User asks to create a git tag (use deploy skill) - User asks to publish a package (use deploy skill) ## Context This skill produces release notes in the project's standard format. It reads commit history, categorizes changes, and renders the output template. ## Steps 1. **Determine version range** ```bash if [ -n "$FROM_REV" ]; then RANGE="$FROM_REV..$TO_REV" elif [ -n "$VERSION" ]; then PREV_TAG=$(git tag --sort=-v:refname | head -1) RANGE="$PREV_TAG..HEAD" elif echo "$ARGUMENTS" | grep -q "\-\-unreleased"; then PREV_TAG=$(git tag --sort=-v:refname | head -1) RANGE="$PREV_TAG..HEAD" else # Default: last 50 commits RANGE="HEAD~50..HEAD" fi" data-show-line-number="false" style="font-size: 90%; border-radius: 4px; display: -webkit-box; padding: 0.5em 1em 1em; overflow-x: auto; text-indent: 0; color: inherit; background: none; white-space: nowrap; margin: 0;">
<!-- codex:illustration 09-skill-md-structure/03-flow-operating-loop.svg -->
<!-- /codex:illustration -->
这个 Skill 引入了三个新要素:`argument-hint` 让 Claude Code 知道可以传参数;`allowed-tools` 限制只能用只读工具(Bash 用于读日志,不是改东西);步骤中嵌入了具体的 bash 命令作为诊断脚本。条件分支(步骤 4 的分类表和步骤 5 的分支检查)让 Skill 能处理不同类型的故障。
设计决策分析:
- **allowed-tools 限制为只读**。这是故意的设计:incident-analysis 只做诊断,不做修复。如果允许 Write 工具,Claude Code 可能会在诊断过程中"顺手"尝试修复,导致操作不可控。工具白名单是 Skill 级别的安全边界,比在 Steps 里写"不要修改任何东西"可靠得多。
- **步骤 2 要求并行执行**。诊断阶段收集日志、资源数据、部署历史、健康检查——这四个操作互相独立,并行执行可以把 2 分钟的等待压缩到 30 秒。在 Skill 中明确写出"Run these in parallel"比期望 Claude Code 自己判断更高效。
- **步骤 4 的分类表是决策矩阵**。把信号模式直接映射到分类和优先级,消除模型的主观判断空间。没有这个表,Claude Code 会用自己的方式分类,两次分析同一类事故可能给出不同分类。
- **Context 段明确声明边界**:"It does NOT apply fixes"。这看似冗余(因为 Do Not Use When 已经说了),但 Context 中的声明会在步骤执行期间持续影响 Claude Code 的行为,而 Do Not Use When 主要在触发判断阶段起作用。
### 示例 C:复杂 —— release-notes
复杂度:多阶段流程,引用模板、脚本和示例文件,有多个资源按需加载。Token 消耗约 3000+。这里展示了渐进式披露的实际应用(详见第 10 篇)。
```md
---
name: release-notes
description: "Generate release notes from git history, categorize changes by type, and format output using the project changelog template. Use when preparing a release or version bump"
argument-hint: "[--from rev] [--to rev] [--version x.y.z] [--unreleased]"
allowed-tools:
- Read
- Write
- Bash
- Glob
- Grep
---
# Release Notes Generator
## Use When
- User asks to generate release notes
- User says "prepare the release" or "what changed since..."
- User runs a version bump or tag operation
- User asks for a changelog entry
## Do Not Use When
- User asks about a single commit (use git log directly)
- User asks to create a git tag (use deploy skill)
- User asks to publish a package (use deploy skill)
## Context
This skill produces release notes in the project's standard format.
It reads commit history, categorizes changes, and renders the output template.
## Steps
1. **Determine version range**
```bash
if [ -n "$FROM_REV" ]; then
RANGE="$FROM_REV..$TO_REV"
elif [ -n "$VERSION" ]; then
PREV_TAG=$(git tag --sort=-v:refname | head -1)
RANGE="$PREV_TAG..HEAD"
elif echo "$ARGUMENTS" | grep -q "\-\-unreleased"; then
PREV_TAG=$(git tag --sort=-v:refname | head -1)
RANGE="$PREV_TAG..HEAD"
else
# Default: last 50 commits
RANGE="HEAD~50..HEAD"
fi
-
2. Collect and categorize commits
Run the collection script:
# Extract structured commit data git log "$RANGE" --pretty=format:'%H|%s|%an|%ai' | \ while IFS='|' read -r hash subject author date; do # Classify by conventional commit prefix type=$(echo "$subject" | grep -oP '^\w+' | tr '[:upper:]' '[:lower:]') case "$type" in feat) category="Features" ;; fix) category="Bug Fixes" ;; perf) category="Performance" ;; refactor) category="Code Refactoring" ;; docs) category="Documentation" ;; test) category="Tests" ;; chore|ci) category="Maintenance" ;; *) category="Other" ;; esac echo "$category|$subject|$hash|$author" done | sort -
3. Check for breaking changes
# Find breaking changes (conventional commit ! syntax or BREAKING CHANGE footer) git log "$RANGE" --pretty=format:'%B---DELIMITER---' | \ awk '/BREAKING CHANGE/{found=1} /---DELIMITER---/{if(found) print; found=0}' -
4. Load template and render
Read the changelog template:
@$HOME/.claude/skills/release-notes/templates/changelog-entry.mdFill template with categorized commits.Breaking changes go first, with migration instructions if available in commit body.
-
5. Cross-reference with issues
# Extract issue references from commits
git log "$RANGE" --pretty=format:'%s %b' | \
grep -oP '#\d+' | sort -u
For each issue, fetch title via
gh issue view {number} --json title,labels. -
6. Write output
Write to
CHANGELOG.md(prepend to existing file) or to a standalone file if--versionspecified.
Output
Changelog entry in project standard format, prepended to CHANGELOG.md.
Resources
Template: @$HOME/.claude/skills/release-notes/templates/changelog-entry.mdExample: @$HOME/.claude/skills/release-notes/examples/good-release-note.md
这个 Skill 的关键设计:

- **渐进式加载**:模板和示例文件通过 `@path` 引用,只有在步骤 4 需要渲染时才读取(第 10 篇的核心机制)
- **内嵌脚本**:git log 命令直接写在步骤中,Claude Code 执行时按需运行
- **条件分支**:步骤 1 根据参数决定版本范围,步骤 5 根据 commit 内容决定是否查询 issue

设计决策分析:

- **argument-hint 支持多种调用方式**。`--from/--to` 用于精确指定版本范围,`--version` 用于发布,`--unreleased` 用于查看未发布变更。不同的调用方式映射到步骤 1 的不同分支,让同一个 Skill 覆盖多个相关场景。
- **commit 分类使用 conventional commit 标准**。步骤 2 的 case 语句直接映射 feat/fix/perf/refactor/docs/test/chore 到输出分类。这比让 Claude Code 自由分类更一致——没有这个映射,同一个 refactor 类型可能在不同的 release note 中被归为"Code Changes"、"Refactoring"或"Improvements"。
- **breaking change 单独处理**。步骤 3 专门提取 BREAKING CHANGE,步骤 4 中要求把它们放在最前面并附迁移说明。这不是格式偏好,是产品决策:用户看到 release notes 时第一眼需要知道有什么不兼容变更。
- **Resources 段的 `@path` 语法**。模板和示例通过 `@` 前缀引用,Claude Code 在读到这个引用时才会加载对应文件。这意味着在只做 commit 收集(步骤 1-3)的阶段,模板和示例的 Token 不会被消耗。只有到渲染阶段(步骤 4)才加载——这就是渐进式披露的实际运作方式。

### 三种复杂度的设计决策矩阵

将三个示例的设计选择总结为矩阵,用于指导新 Skill 的架构决策:

| 设计维度 | 简单(pr-review) | 中等(incident-analysis) | 复杂(release-notes) |
|---------|-------------------|-------------------------|---------------------|
| 外部资源 | 无 | 无 | 模板 + 示例(@path) |
| 内嵌脚本 | 无 | bash 诊断命令 | git log + awk 管道 |
| 条件分支 | 无 | 4 种故障类型分支 | 4 种参数模式分支 |
| 工具限制 | 默认 | 只读白名单 | 读写白名单 |
| 参数处理 | 无 | --severity / --service | --from / --to / --version |
| Body 行数 | ~60 行 | ~100 行 | ~110 行 + 外部文件 |
| Token 消耗 | ~500 | ~1200 | ~3000(含资源) |
| 适用场景 | 单一明确动作 | 多步骤只读诊断 | 多阶段产出型任务 |

矩阵的使用方式:当你开始写一个新 Skill 时,先判断它属于哪一列的复杂度级别,然后参照对应列的设计选择来决定是否需要脚本、资源引用、工具限制等。不要从复杂度高的模式开始——先按简单模式写,如果执行中发现不够用再逐步升级。大多数 Skill 最终停留在简单或中等级别。

## Frontmatter 字段详解

### name:标识符工程

`name` 是 Skill 的唯一标识,也是用户通过 `/skill-name` 调用时的入口。命名规则:

```text
✅ 好的 name:
pr-review              — 明确动作 + 对象
incident-analysis       — 明确领域 + 动作
release-notes           — 明确产出物
data-ready-failure      — 阶段 + 事件类型

❌ 差的 name:
review                  — 太通用,和 code-review、design-review 冲突
helper                  — 无语义,无法从名字推断功能
v2                      — 版本号不是功能描述
my-skill                — 没有信息量
命名冲突是真实存在的问题。如果一个项目同时存在 review 和 code-review 两个 Skill,Claude Code 在用户说"review this code"时不知道该加载哪个。解决方法不是靠 name 本身,而是靠 description 的区分度 —— 两个 Skill 的 description 必须在语义上有明确边界。但好的 name 能在第一时间避免冲突:pr-review 和 design-review 从名字就不会搞混。
团队规模越大,命名规范越重要。推荐用 {领域}-{动作} 或 {动作}-{对象} 的模式。在一个 10 人团队里,Skill 命名应该像 API 端点一样可预测:看到名字就能推断功能,不需要打开文件才知道它是干什么的。
description:触发精度的决定性因素
description 是 Claude Code 做语义匹配的唯一依据。写法直接决定触发率。
核心原则:描述 Skill 做什么(动作),不描述 Skill 是什么(概念)。
✅ 好的 description:
"Review a pull request diff for correctness bugs, security issues, and test coverage gaps"
→ 动作明确(review diff),范围明确(correctness, security, tests)
→ 触发:"帮我看看这个 PR 有没有问题" ✓
→ 不触发:"帮我实现这个功能" ✓

❌ 太宽泛:
"Review code changes"
→ 任何涉及代码修改的请求都可能触发
→ 误触发:"帮我改一下这个函数" → 也被触发

❌ 太狭窄:
"Review Python Flask API route handler changes for SQL injection vulnerabilities"
→ 只有 Python Flask SQL 注入才触发
→ 欠触发:"Review this Node.js PR" → 不触发,但用户期望触发

❌ 描述概念而非动作:
"A code quality assurance tool for maintaining high standards in pull requests"
→ 像 README 描述,不像操作指令
→ 触发不稳定:语义匹配依赖"code quality"这个模糊概念
触发精度的量化测试方法:准备 15 条请求(5 条应该触发、5 条不应该触发、5 条边界),记录实际触发情况。调整 description 直到正确率 >= 80%(详见第 11 篇评测方法)。
Description 写法指南
描述公式
[动作动词] + [操作对象] + [for/with + 检查维度] + [可选: Use when + 触发场景]
示例分解:
"Review a pull request diff for correctness bugs, security issues,
 and test coverage gaps"

动作动词: Review
操作对象: a pull request diff
检查维度: correctness bugs, security issues, test coverage gaps
不同复杂度的 description 策略
|
Skill 复杂度
|
description 策略
|
典型长度
|
示例
|
| — | — | — | — |
|
简单(单步骤)
|
动作 + 对象
|
15-25 词
|
“Review a PR diff for correctness, security, and test gaps”
|
|
中等(多步骤)
|
动作 + 对象 + 产出
|
25-50 词
|
“Diagnose a production incident from alerts, logs, and metrics. Runs triage scripts and produces a structured incident report”
|
|
复杂(多阶段)
|
动作 + 对象 + 产出 + 触发场景
|
30-60 词
|
“Generate release notes from git history, categorize changes by type, and format output using the project changelog template. Use when preparing a release or version bump”
|
触发率对比矩阵
以下是基于实际测试的触发率数据(每个 description 跑 15 条测试请求):
Description                          应触发命中率  不应触发误触率  边界正确率
─────────────────────────────────────────────────────────────────────────
"Review code"                         100%         60%           20%
"Review a PR diff for bugs"            80%         30%           40%
"Review a PR diff for correctness,     100%         10%           80%
 security, and test gaps"
─────────────────────────────────────────────────────────────────────────
"Help with testing"                    40%         80%           20%
"Create unit tests for a module,       100%         10%           80%
 improve test coverage"
─────────────────────────────────────────────────────────────────────────────────
规律:每增加一个具体的检查维度,误触发率下降约 15-20%;但超过 3 个维度后,命中率的边际收益递减。推荐 2-4 个维度。
Token 预算分析
Skill 的 Token 消耗分两层:description 的常驻消耗和 body 的加载消耗。
常驻消耗:description
所有已注册 Skill 的 description 始终在候选扫描阶段被读取。如果项目注册了 30 个 Skill,每个 description 平均 30 tokens,常驻消耗约 900 tokens。
候选扫描阶段 Token 消耗估算:
├── Skill 数量 × 平均 description 长度
├── 10 个 Skill × 30 tokens = ~300 tokens(可忽略)
├── 30 个 Skill × 30 tokens = ~900 tokens(可接受)
├── 50 个 Skill × 40 tokens = ~2000 tokens(开始影响)
└── 80+ 个 Skill × 50 tokens = ~4000+ tokens(需要治理)
治理策略:Skill 不是越多越好。一个项目注册 50 个 Skill 意味着每次任务都要扫描 50 条 description。合并功能相近的 Skill,删除使用频率低于每月一次的 Skill。
具体的治理阈值:10 个 Skill 以内不需要治理;10-30 个需要定期审查是否有合并空间;30 个以上必须建立注册审批流程,每个新 Skill 需要说明和现有 Skill 的边界。这个阈值不是凭空定的——10 个 Skill 的 description 扫描约 300 tokens,对上下文预算的影响可忽略;30 个约 900 tokens,开始值得优化;50 个约 2000 tokens,已经接近一个小型 CLAUDE.md 的消耗量。
加载消耗:body
Skill 被触发后,完整 body 进入上下文。不同复杂度的消耗:
Skill 加载 Token 消耗估算:
├── 简单 Skill(示例 A: pr-review)
│   └── body ~450 tokens + frontmatter ~50 tokens = ~500 tokens
├── 中等 Skill(示例 B: incident-analysis)
│   └── body ~1000 tokens + frontmatter ~100 tokens + 脚本执行 ~100 tokens = ~1200 tokens
├── 复杂 Skill(示例 C: release-notes)
│   └── body ~1500 tokens + frontmatter ~100 tokens + 模板 ~500 tokens + 示例 ~400 tokens
│       = ~2500-3500 tokens
└── 超复杂 Skill(200+ 行,多资源引用)
    └── body ~3000 tokens + 资源文件 ~2000 tokens = ~5000+ tokens
上下文预算影响
Skill 不是在真空中运行的。它和 CLAUDE.md、rules、对话历史、工具调用结果共享上下文窗口。
典型任务上下文构成:
├── 系统提示词              ~3K tokens
├── CLAUDE.md               ~1.5K tokens
├── Rules(按需加载)        ~0.3K tokens
├── Skill description 扫描   ~0.5K tokens(30 个 Skill)
├── Skill body(本次触发)   ~0.5-3K tokens
├── 对话历史                ~5-20K tokens
├── 工具调用结果             ~5-30K tokens
└── 总计                    ~16-58K tokens
    在 200K 上下文窗口中,剩余 ~142-184K tokens 用于推理
关键结论:Skill 的 body 控制在 1500 tokens 以内(约 50-60 行 markdown)是安全的。超过 3000 tokens(约 120 行)的 Skill 应该拆分 —— 把模板和示例移到资源文件,按需加载(第 10 篇渐进式披露)。
这里有一个和直觉相反的现象:更大的 Skill 不一定执行更好。原因是 Skill body 中每多一行,其他行的相对权重就下降一点。一个 200 行的 Skill,Claude Code 对开头和结尾的步骤注意力最强,中间的步骤容易被简化执行。这和 CLAUDE.md 的信号稀释问题(第 04 篇)是同一类问题。解决方案也是一样的:精简内容,把低频内容移到按需加载的资源文件中。
失败案例:Description 不匹配
背景
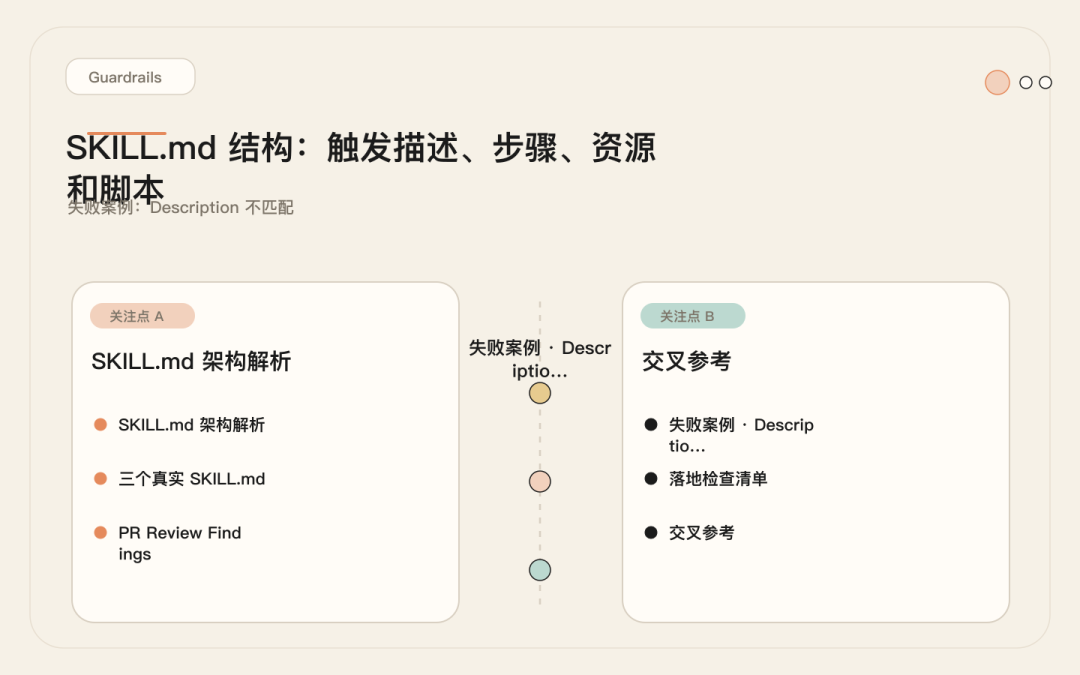
一个 4 人后端团队写了一个测试生成 Skill,期望它只在"创建新测试"时触发。上线一周后,团队成员发现这个 Skill 在几乎所有任务中都被加载了。
这个问题是怎么被发现的?不是有人专门监控 Skill 触发情况,而是在一次代码重构任务中,团队成员注意到 Claude Code 的回复开头出现了"我来为你创建测试"的字样,而实际请求是"重构 payment 模块"。这引起了注意,团队开始回顾过去一周的任务执行记录,发现至少有 4 次任务被错误地注入了 test-helper Skill。
原始配置
---
name: test-helper
description: "Help with testing"
---
问题表现
一周内触发记录分析(50 个任务样本):

用户请求                          是否应该触发    实际触发    问题
──────────────────────────────────────────────────────────────
"为 processRefund 写单元测试"       是            是         ✓
"给 auth middleware 补测试"         是            是         ✓
"修一下登录超时的 bug"             否            是         ✗ 请求提到"测试登录超时"
"重构 payment 模块"                否            是         ✗ 对话中提到"注意测试"
"优化数据库查询性能"               否            否         ✓ 偶然正确
"更新 API 文档"                    否            是         ✗ 不相关但被触发
"给新接口写集成测试"               是            是         ✓
"部署 v2.3.1 到 staging"           否            是         ✗ 部署流程中提到"运行测试"
──────────────────────────────────────────────────────────────

触发率:7/8 应触发的被触发(87.5%)—— 看起来不错
误触发率:4/8 不应触发的被触发(50%)—— 严重问题
根因分析
description "Help with testing" 的语义空间:
├── "testing" 这个词覆盖了:
│   ├── 写测试(期望触发)
│   ├── 运行测试(不应触发)
│   ├── 测试环境(不应触发)
│   ├── 测试某个功能(不应触发,这是验证不是创建)
│   └── 提到测试的任何上下文(不应触发)
└── "Help with" 太宽泛,没有限定动作类型
修复
团队做了两处修改:
# 修改前
---
name: test-helper
description: "Help with testing"
---

# 修改后
---
name: test-author
description: "Create new unit tests for a specific module or function. Use when user asks to add tests, write tests, or improve test coverage. Does not handle running tests or test infrastructure"
---
两个改动同时生效:name 从 test-helper 改为 test-author,明确标识这是一个"创建"动作而非通用的"测试相关帮助";description 从 3 个词扩展到 40 个词,包含动作(Create new unit tests)、对象(specific module or function)、触发场景(add tests, write tests, improve test coverage)和排除条件(Does not handle running tests)。
修复后的触发测试:
用户请求                          是否应该触发    实际触发    结果
──────────────────────────────────────────────────────────────
"为 processRefund 写单元测试"       是            是         ✓
"给 auth middleware 补测试"         是            是         ✓
"修一下登录超时的 bug"             否            否         ✓ 修复
"重构 payment 模块"                否            否         ✓ 修复
"部署 v2.3.1 到 staging"           否            否         ✓ 修复
"运行所有测试"                     否            否         ✓ 不触发(不是创建)
"给新接口写集成测试"               是            是         ✓
──────────────────────────────────────────────────────────────

误触发率:0/5(从 50% 降至 0%)
命中率:4/4(100%)
教训
三个工程原则:
附加成本
这次误触发事件的完整成本:
直接成本:
├── 误触发导致 4 次任务执行质量下降
│   └── 重构任务中 Claude Code 错误地尝试写测试而非重构
├── 团队花 2 小时排查误触发原因
├── 修复 description 后花 1 小时验证
└── 总计:3 小时直接时间成本

间接成本(更难量化但更重要):
├── 信任损失:团队成员开始怀疑 Skill 机制是否可靠
├── 规避行为:有人开始手动指定 Skill 而非依赖自动触发
└── 认知负担:每次使用都需要检查"这次有没有触发错"
这个成本在 4 人团队中尚可承受。在 20 人以上的组织中,未经验证的 Skill 上线导致的误触发会被放大 5-10 倍,直接转化为生产力损失。这就是为什么第 11 篇强调评测的必要性 —— 15 条测试请求的成本和一周误触发的成本完全不在一个量级。
落地检查清单
SKILL.md 质量验证:
[ ] name 使用 kebab-case,长度 <= 40 字符
[ ] description 描述动作而非概念,包含 2-4 个具体维度
[ ] description 长度在 15-60 词之间
[ ] 包含 Use When 段,列出至少 2 个触发场景
[ ] 包含 Do Not Use When 段,列出至少 2 个排除场景
[ ] Steps 段使用编号列表,每步有明确的输入和产出
[ ] Output 段给出了期望产出的具体格式
[ ] Body 总长度 <= 120 行(超过则拆分到资源文件)
[ ] 已用 15 条测试请求验证触发边界(5 正例 + 5 反例 + 5 边界)
[ ] 误触发率 <= 10%,命中率 >= 80%
交叉参考
-
• 第 08 篇(Skills 入门):什么时候该从 Command 升级为 Skill —— 有 3 步以上流程、需要资源或脚本时
-
• 第 10 篇(渐进式披露):Skill body 超过 120 行时如何拆分 —— 模板、示例、脚本按需加载
-
• 第 11 篇(Skill 评测):欠触发、误触发、执行失败的三类测试方法和最小评测集设计

欢迎加入DeepSeek 技术社区。在这里,你可以找到志同道合的朋友,共同探索AI技术的奥秘。
更多推荐

 1
1 0
0- 0


 已为社区贡献8条内容

所有评论(0)