Windows环境安装LiteLLM+OpenCode,提高缓存命中率
DeepSeek有专门的提高缓存命中率的工具Reasonix,但是Qwen没有,所以利用通用的LiteLLM+OpenCode方案,Windows中有两种方法,一种是用Node.JS+Python,一种是用WSL
使用NodeJS+Python
1. 前置条件
Windows安装Python3,安装pip,安装Node.JS 22,Redis,不再赘述
2. 安装LiteLLM
管理员模式,PowerShell或者CMD安装
python -m pip install --no-cache-dir "litellm[proxy]==1.94.0" "fastapi==0.137.0" redisvl3. 创建LiteLLM配置文件
我是放在了D:\litellm\litellm_config.yaml
我这里用了Qwen的Token Plan,所以api_base和model是Qwen的官方配置,api_key: "sk-xxxxxx",填充你自己的API Key,Redis视情况修改
model_list:
  - model_name: qwen3.8-max-preview
    litellm_params:
      model: dashscope/qwen3.8-max-preview
      api_key: "sk-xxxxxx"
      api_base: https://token-plan.cn-beijing.maas.aliyuncs.com/compatible-mode/v1
      rpm: 30
      tpm: 15000
      headers:
        X-DashScope-Wait-Timeout: "60"

  - model_name: qwen3.7-max
    litellm_params:
      model: dashscope/qwen3.7-max
      api_key: "sk-xxxxxx"
      api_base: https://token-plan.cn-beijing.maas.aliyuncs.com/compatible-mode/v1
      rpm: 30
      tpm: 15000
      headers:
        X-DashScope-Wait-Timeout: "60"

  - model_name: qwen3.7-plus
    litellm_params:
      model: dashscope/qwen3.7-plus
      api_key: "sk-xxxxxx"
      api_base: https://token-plan.cn-beijing.maas.aliyuncs.com/compatible-mode/v1
      rpm: 30
      tpm: 15000
      headers:
        X-DashScope-Wait-Timeout: "60"

  - model_name: qwen3.6-flash
    litellm_params:
      model: dashscope/qwen3.6-flash
      api_key: "sk-xxxxxx"
      api_base: https://token-plan.cn-beijing.maas.aliyuncs.com/compatible-mode/v1
      rpm: 60
      tpm: 30000
      headers:
        X-DashScope-Wait-Timeout: "60"

litellm_settings:
  cache: True
  drop_params: true
  cache_params:
    caches:
      - type: "in_memory"
        namespace: "litellm_in_memory"
        max_size: 1000
        ttl: 300
      - type: "redis"
        namespace: "litellm_redis_exact"
        host: "localhost"
        port: 6379
        ttl: 3600
      - type: "redis-semantic"
        namespace: "litellm_redis_semantic"
        similarity_threshold: 0.92
        redis_semantic_cache_embedding_model: "text-embedding-3-small"
        embedding_dimensions: 1536
        host: "localhost"
        port: 6379
        ttl: 3600
        timeout: 5
        retry_on_timeout: true

router_settings:
  routing_strategy: simple-shuffle
  num_retries: 3
  timeout: 60
  cooldown_time: 10
  allowed_fails: 5

general_settings:
  log_level: "INFO"
  disable_auth: true
4. 创建服务启动脚本
我是放在了D:\litellm\service_runner.py
litellm_exe和config_pat,要按实际情况去修改,因为我是用的管理员权限安装的LiteLLM,所以在C:\Program Files\Python312\Scripts\litellm.exe下面
import os
import sys
import subprocess

os.environ["LITELLM_LOCAL_MODEL_COST_MAP"] = "True"
os.environ["REDIS_PASSWORD"] = ""

litellm_exe = r"C:\Program Files\Python312\Scripts\litellm.exe"
config_path = r"D:\litellm\litellm_config.yaml"

if not os.path.exists(litellm_exe):
    print("ERROR: litellm not found at", litellm_exe)
    sys.exit(1)

if not os.path.exists(config_path):
    print("ERROR: Config file not found:", config_path)
    sys.exit(1)

print("Using litellm:", litellm_exe)
print("Using config:", config_path)
print("REDIS_PASSWORD in env:", os.environ.get("REDIS_PASSWORD"))

cmd = [litellm_exe, "--config", config_path, "--port", "4000"]


my_env = os.environ.copy()
my_env["REDIS_PASSWORD"] = ""

subprocess.run(cmd, env=my_env)
5. 验证运行
管理员模式打开CMD,进入D:\litellm,运行
python service_runner.py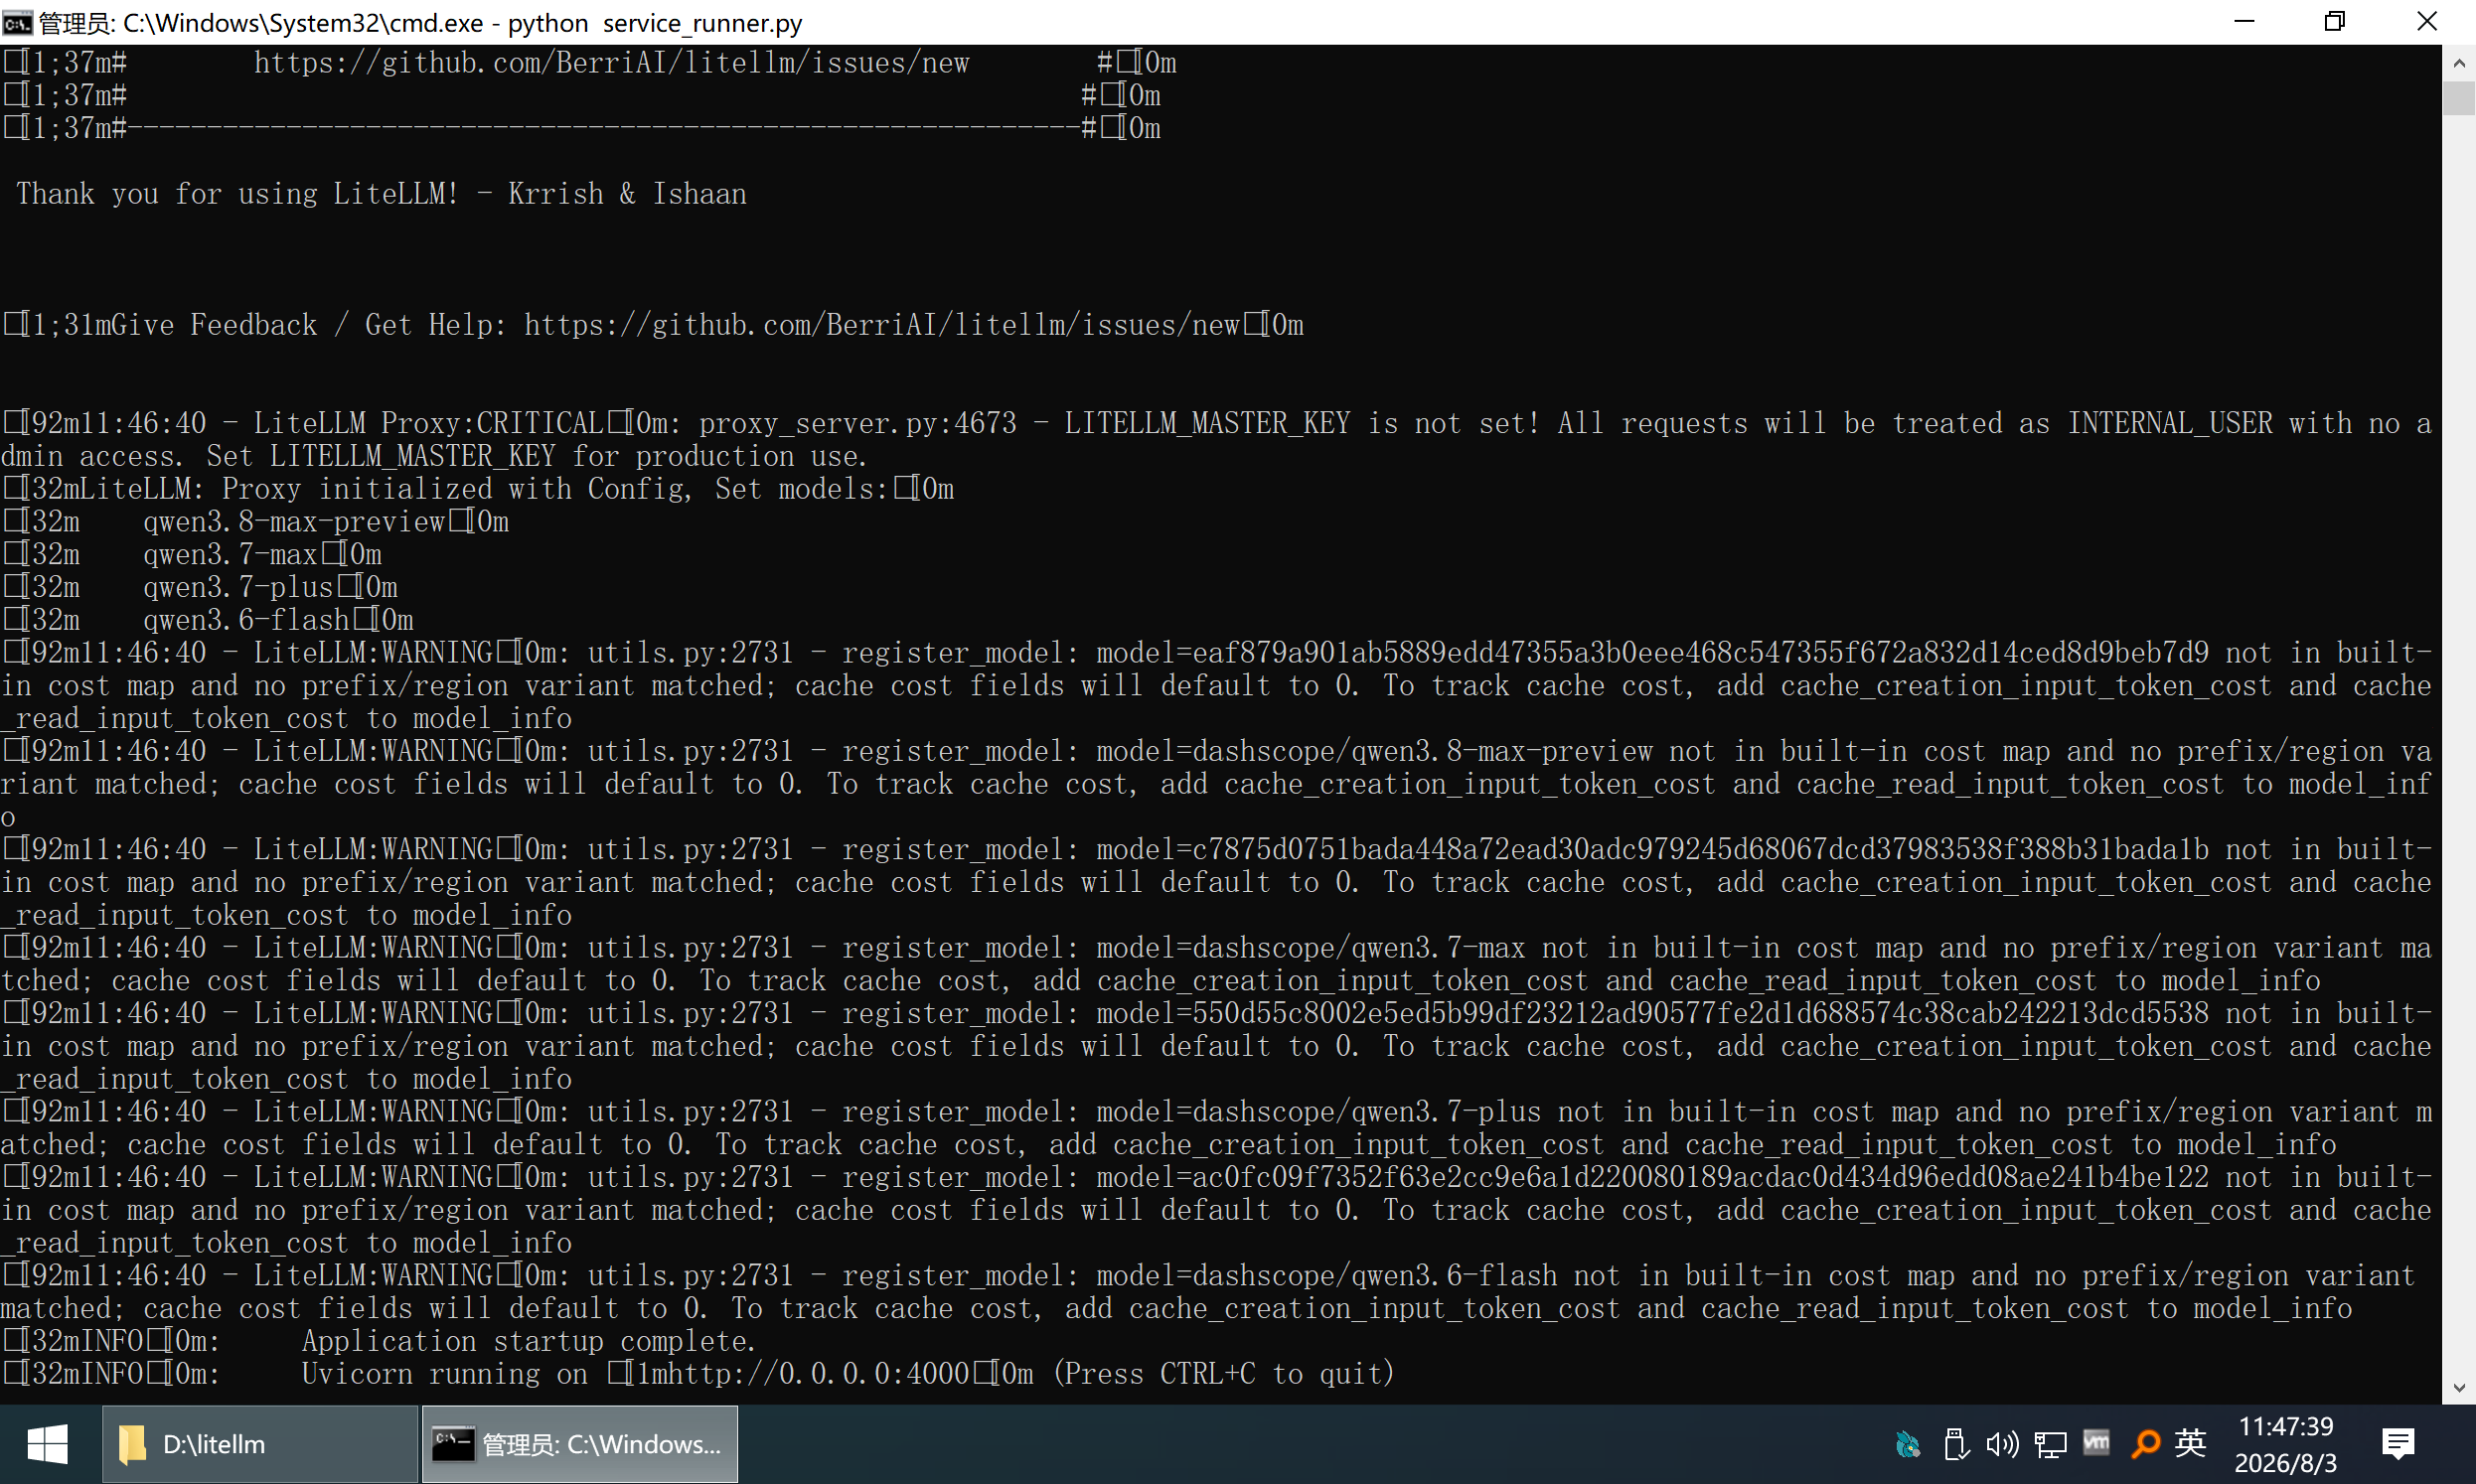
打开PowerShell,测试
获取模型列表
Invoke-RestMethod -Uri "http://localhost:4000/v1/models" | ConvertTo-Json -Depth 10发送聊天请求
Invoke-RestMethod -Uri "http://localhost:4000/v1/chat/completions" `
  -Method Post `
  -Headers @{"Content-Type"="application/json"} `
  -Body '{"model":"qwen3.7-plus","messages":[{"role":"user","content":"你好"}]}'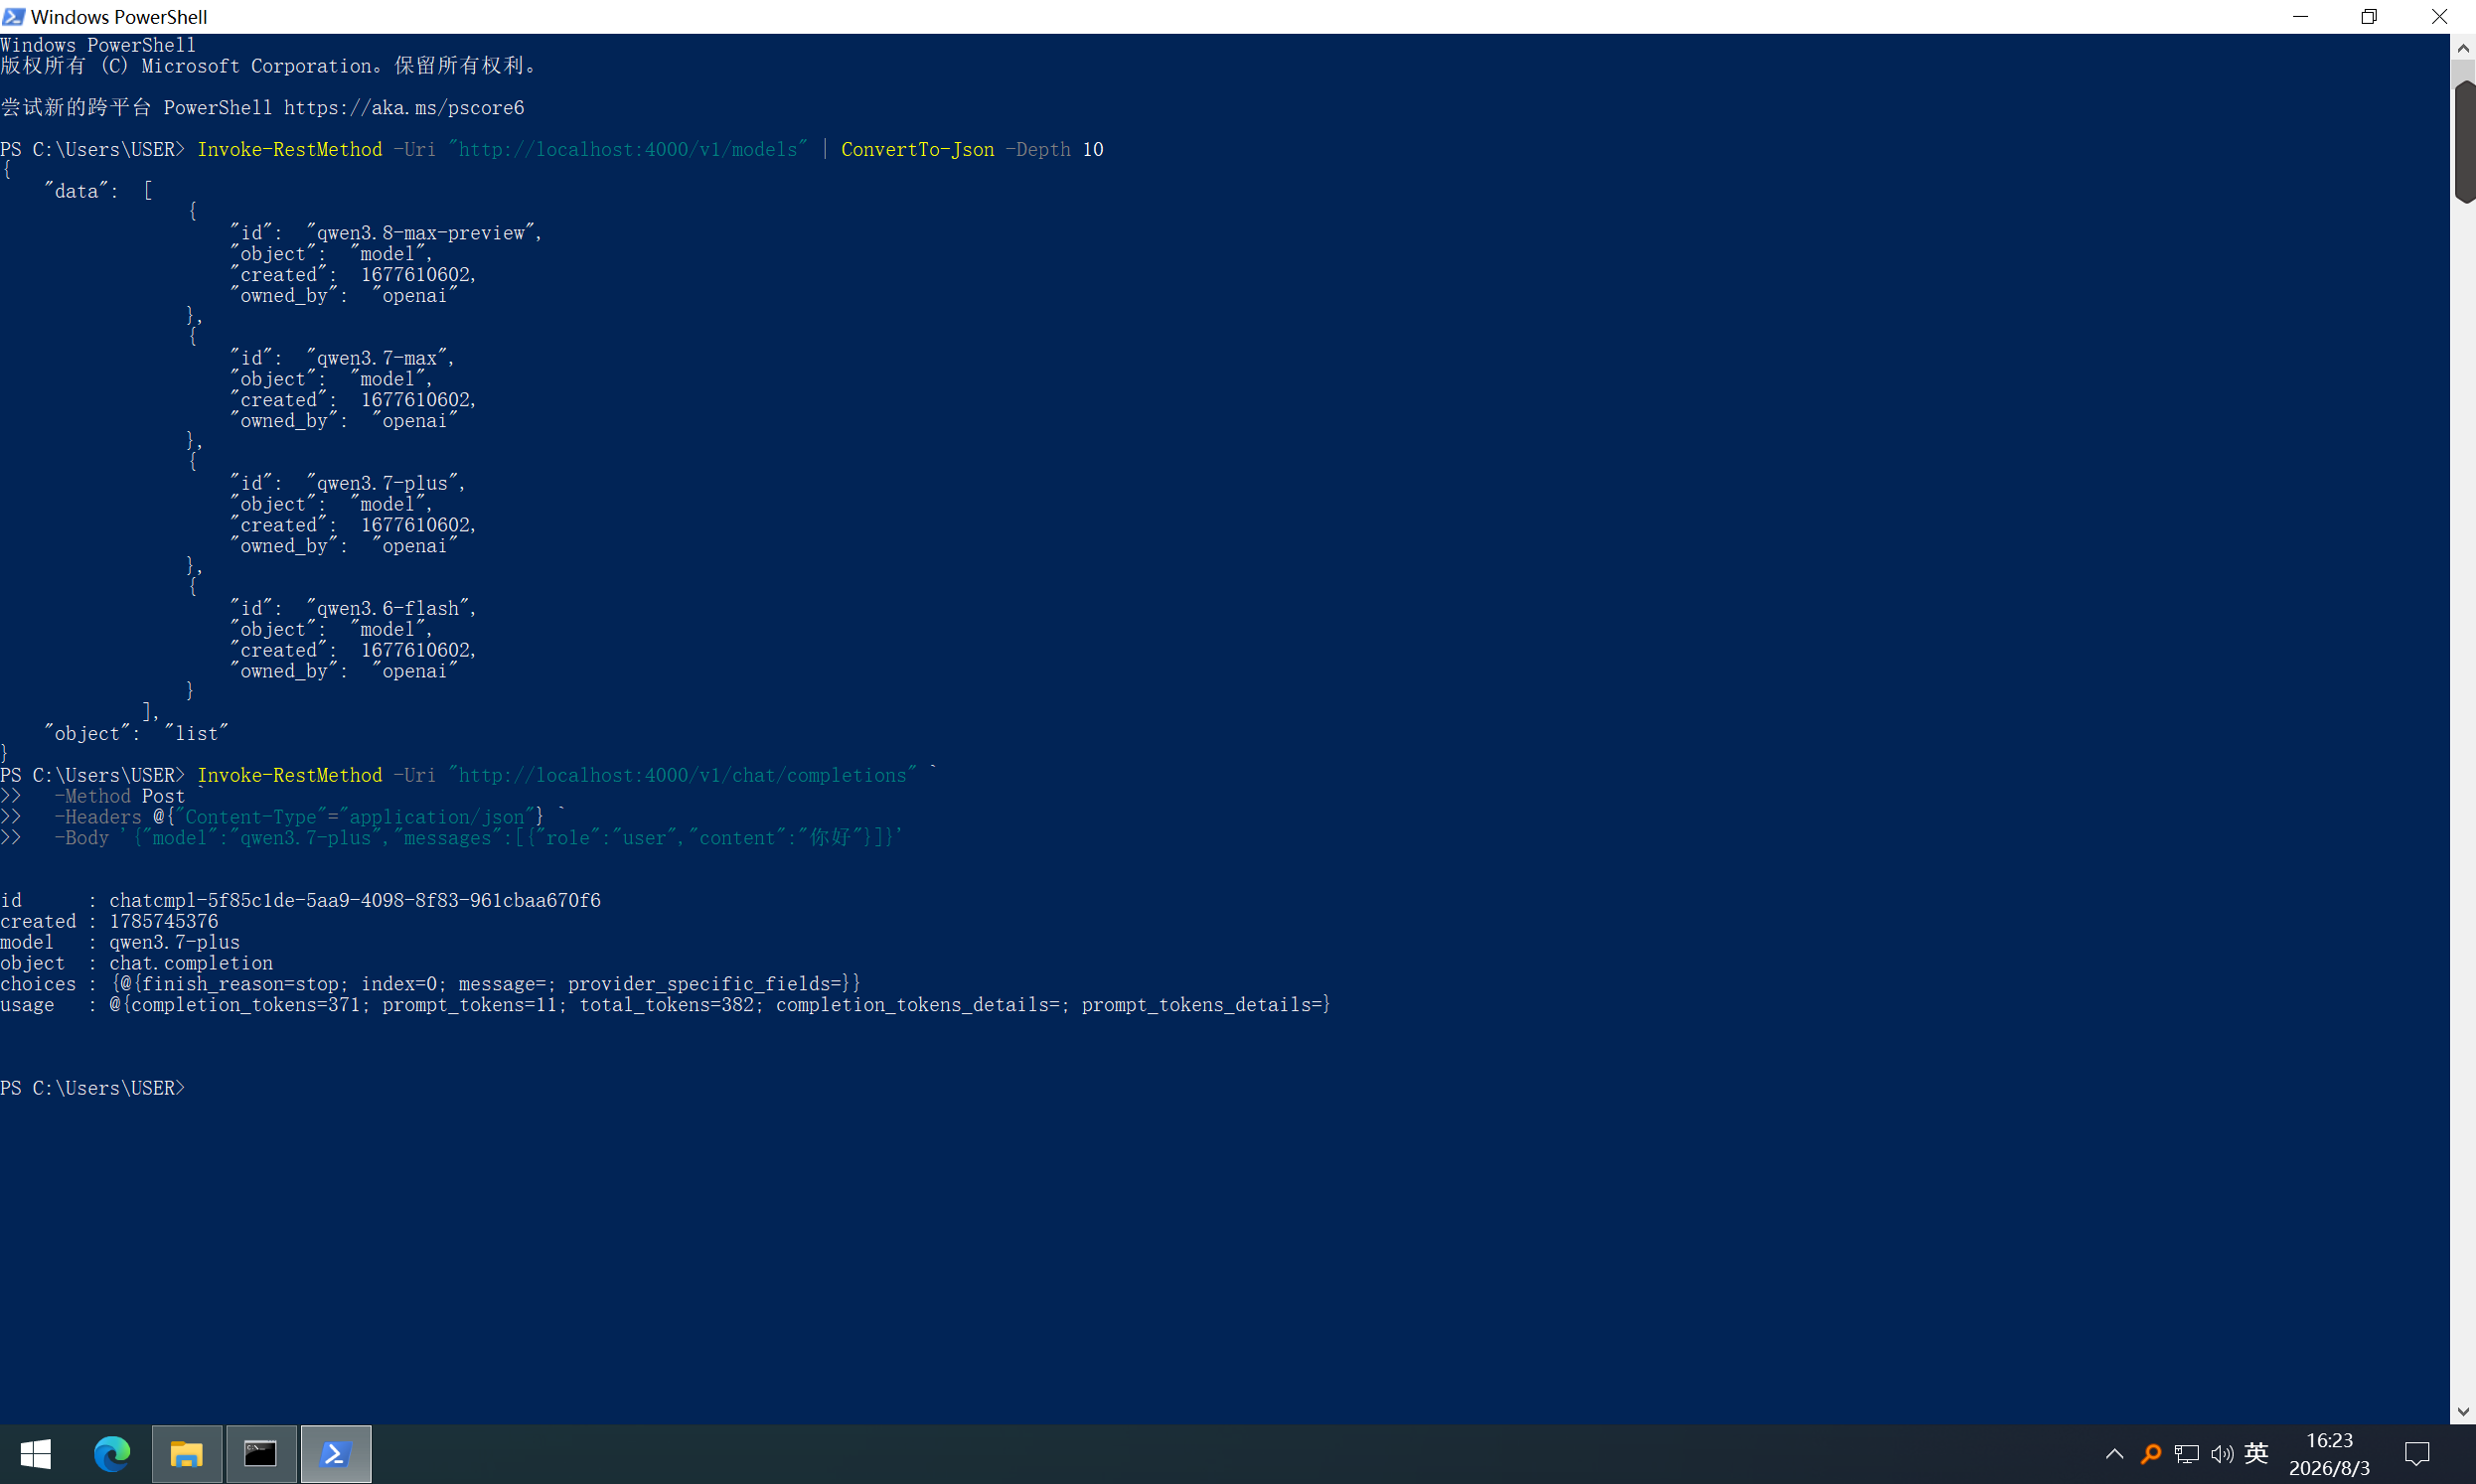
6. LiteLLM自启动
这里用比较简单的Windows任务计划方法
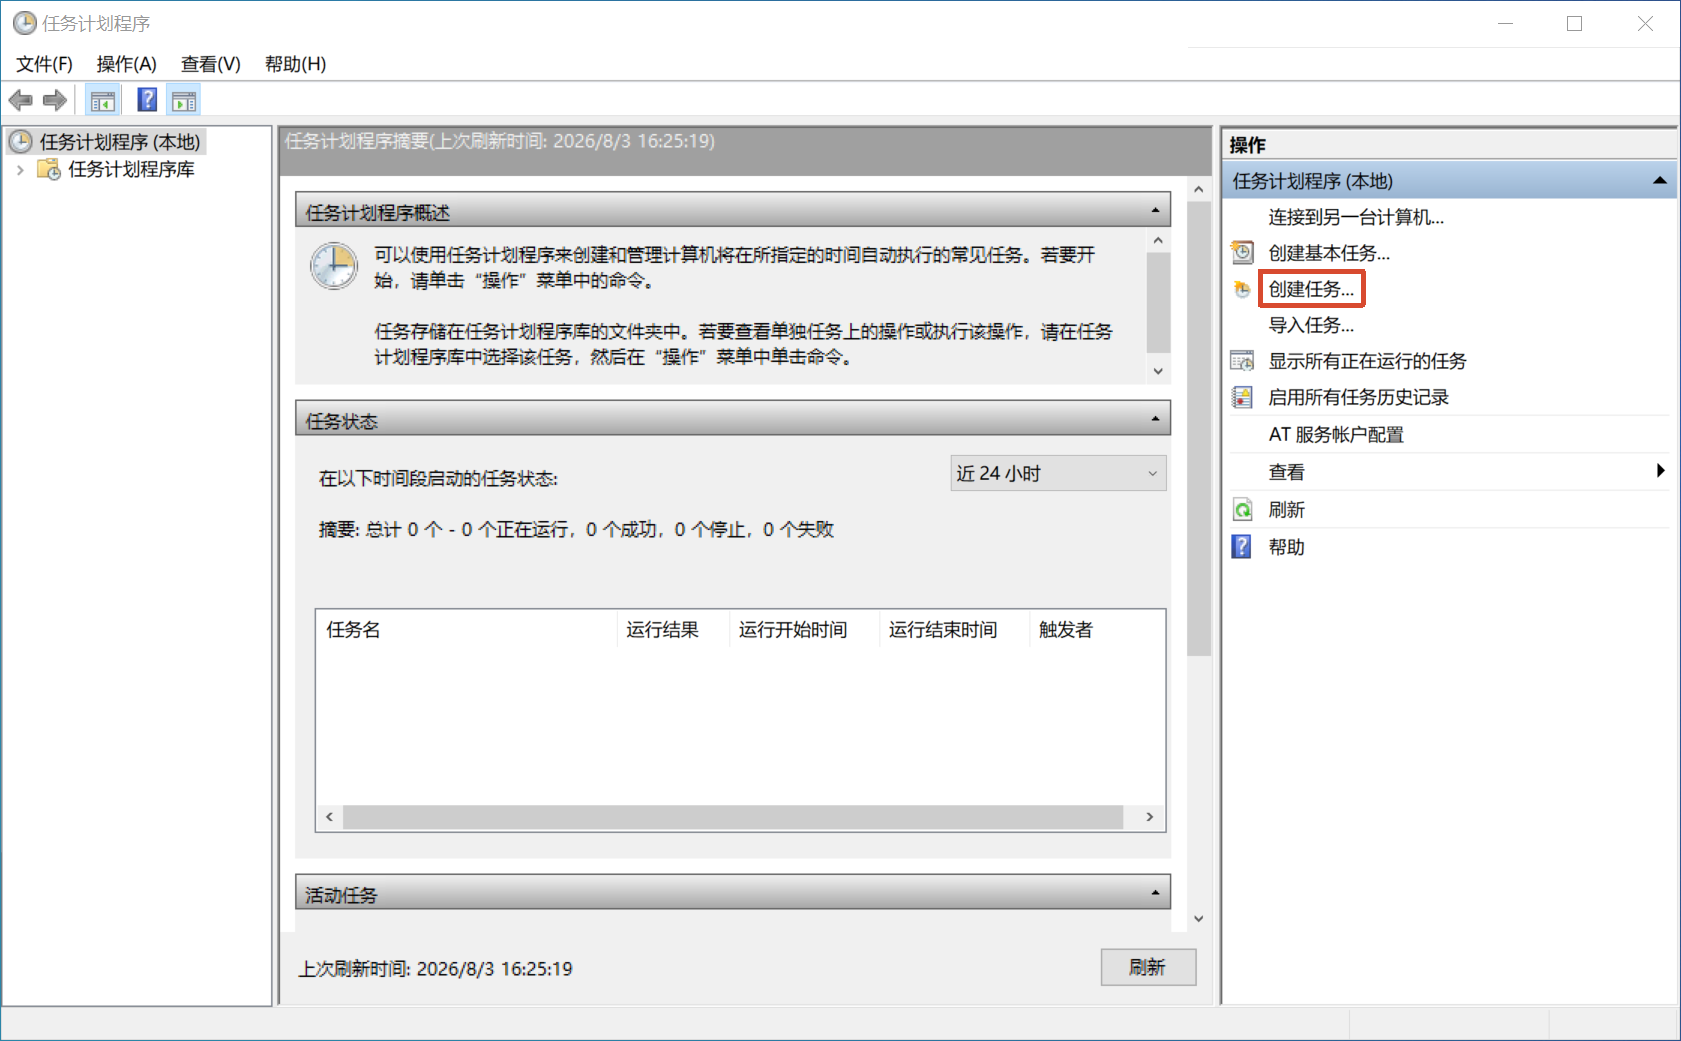
按 Win + R,输入 taskschd.msc,回车打开任务计划程序。
右侧点击 “创建任务”(不要选“创建基本任务”,因为我们需要更多设置)。
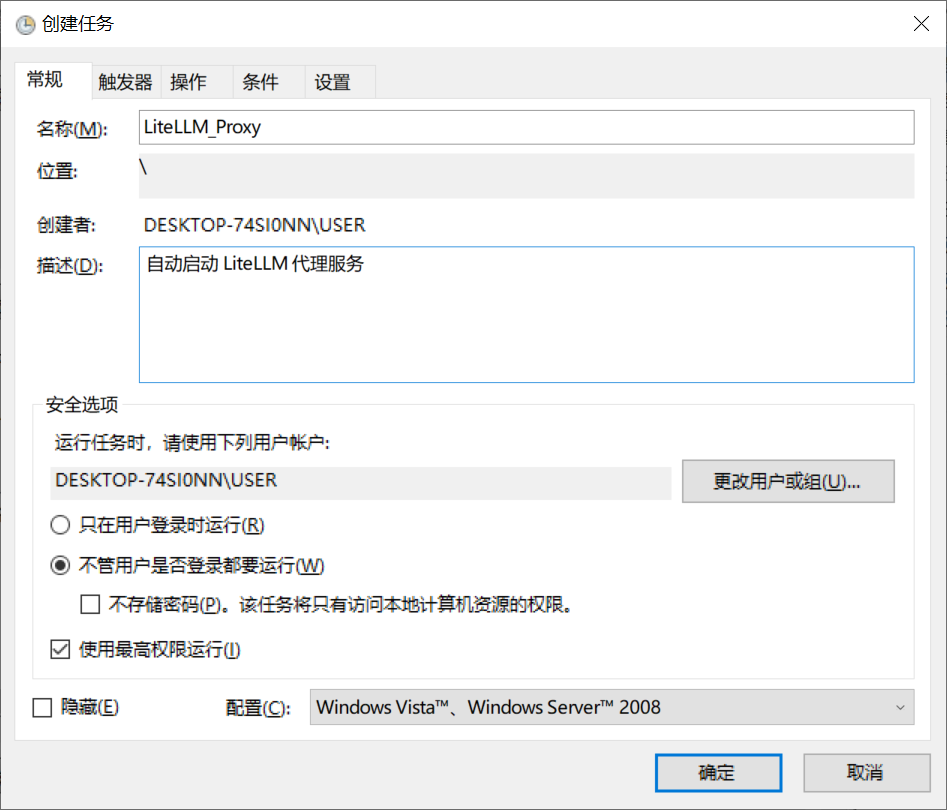
常规 选项卡:
名称:LiteLLM_Proxy
描述:自动启动 LiteLLM 代理服务
勾选 “不管用户是否登录都要运行”(如果想以系统账户运行)或 “只在用户登录时运行”(如果要使用当前用户的环境变量,建议选这个)。
勾选 “使用最高权限运行”(如果需要管理员权限)。
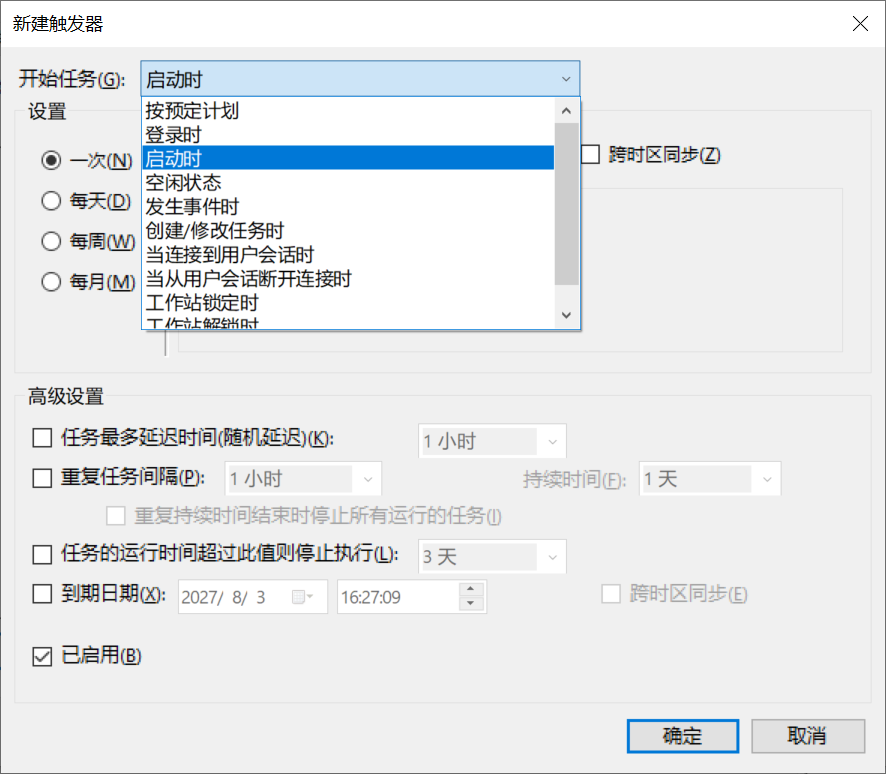
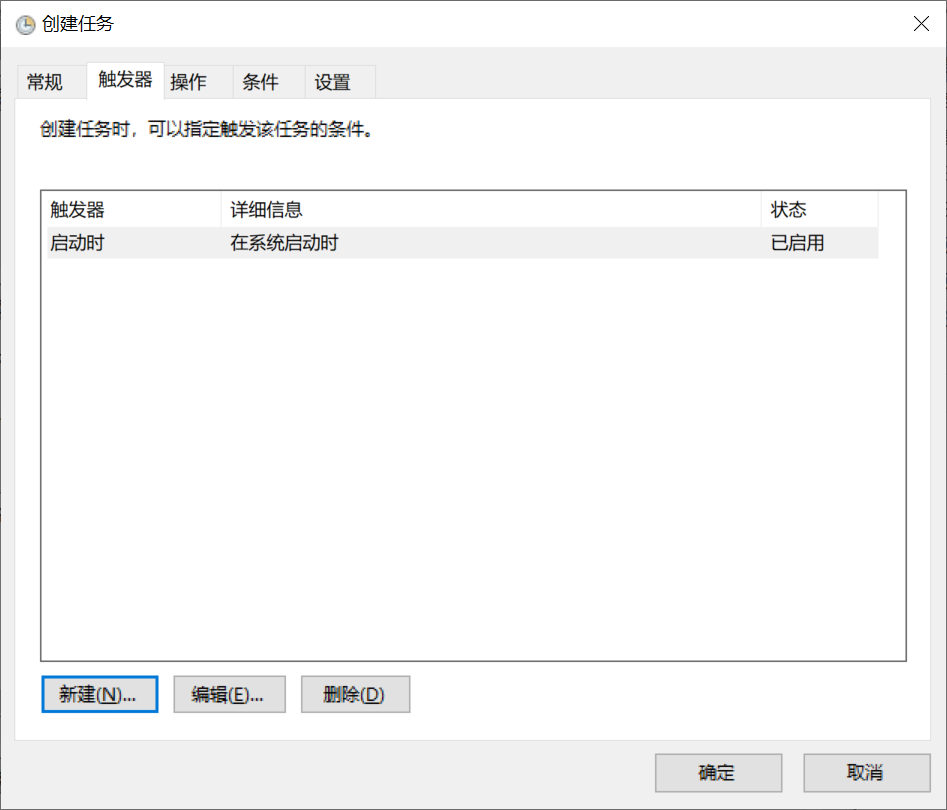
触发器 选项卡 → 新建:
开始任务:启动时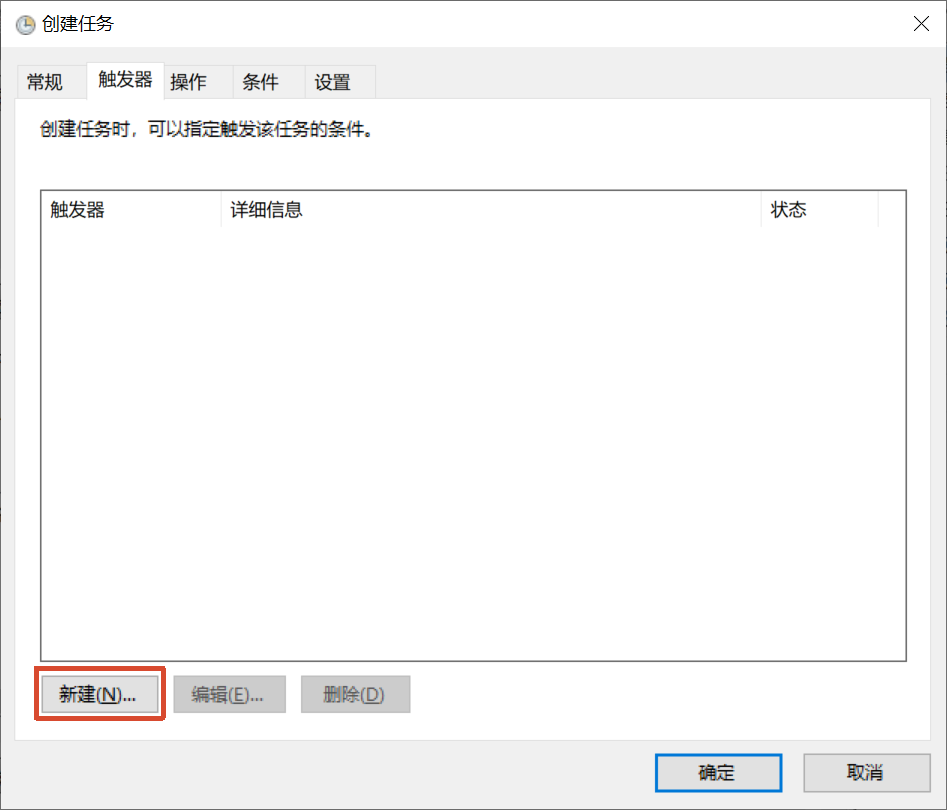
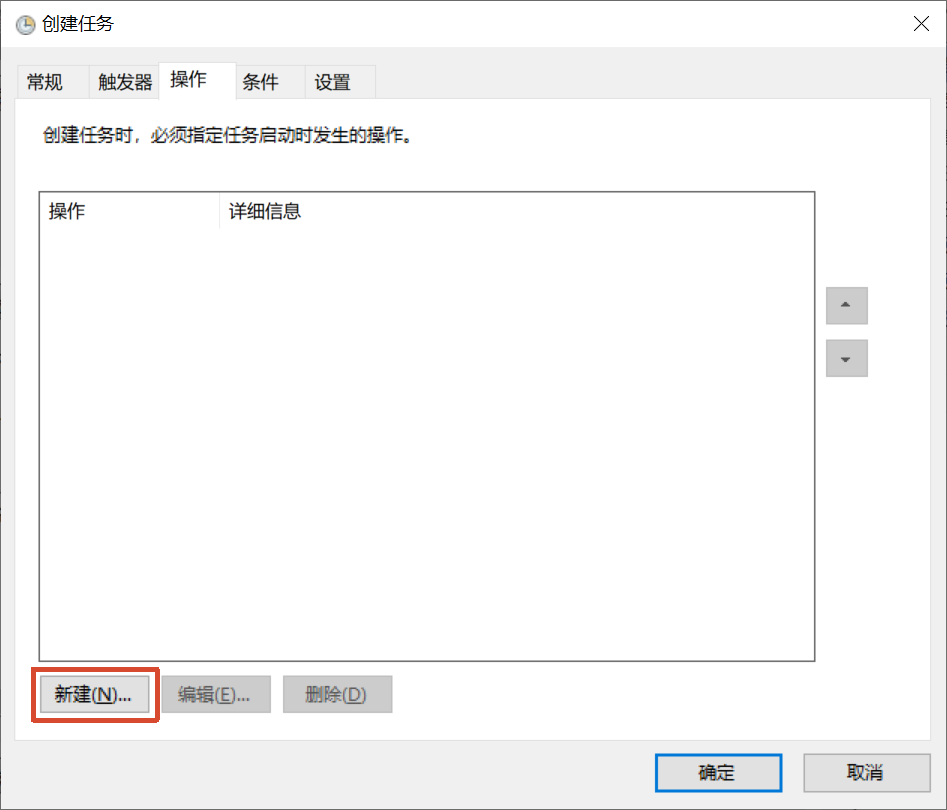
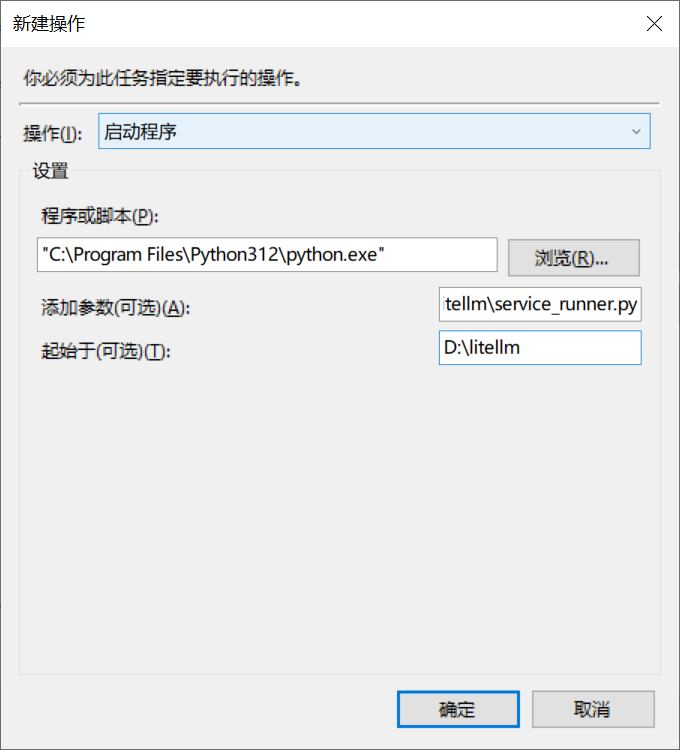
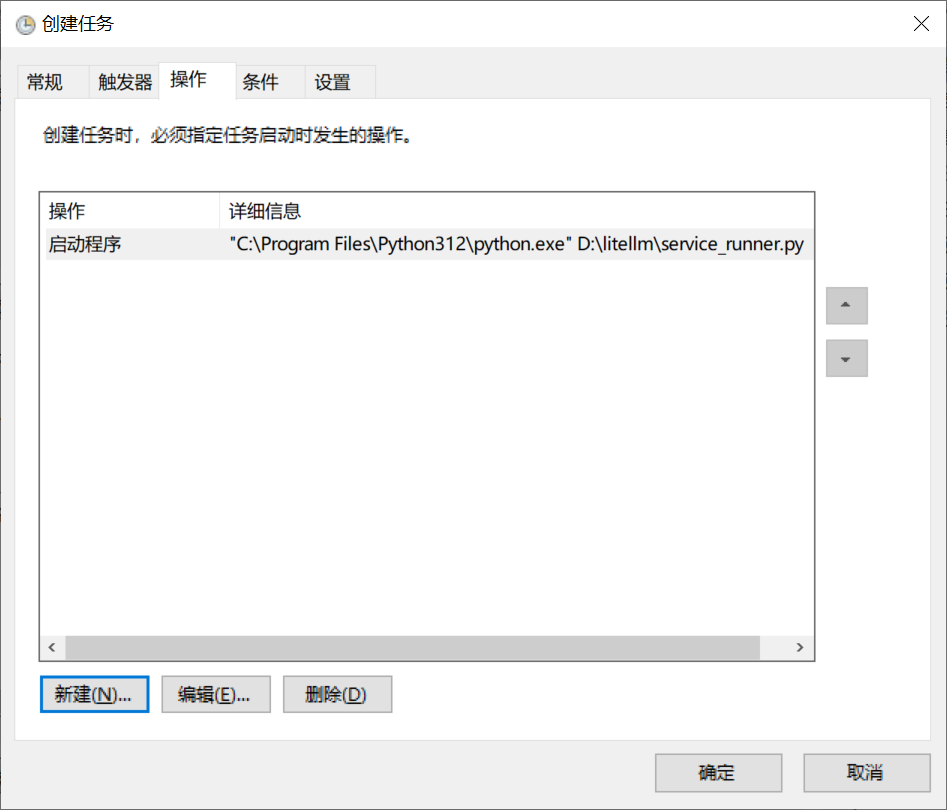
操作 选项卡 → 新建:
操作:启动程序
程序/脚本:"C:\Program Files\Python312\python.exe",按自己的情况修改
添加参数:D:\litellm\service_runner.py,按自己的情况修改
起始于:D:\litellm(确保工作目录正确),按自己的情况修改
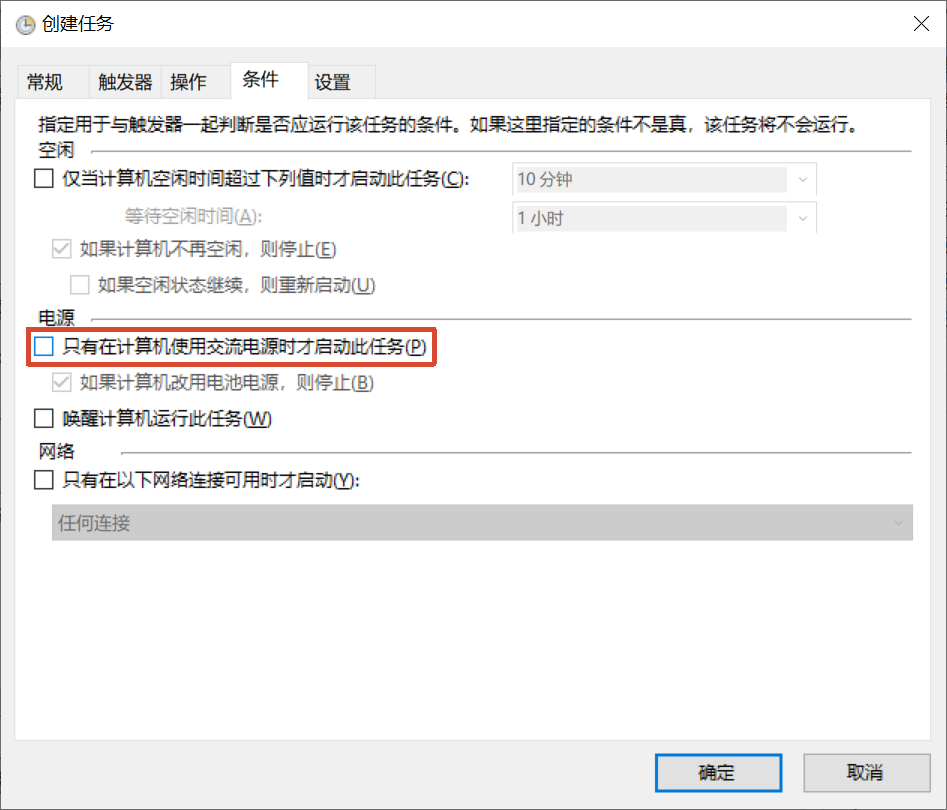
条件 选项卡:
如果想让任务在电池模式下也能运行,取消勾选“只有在计算机使用交流电源时才启动”。
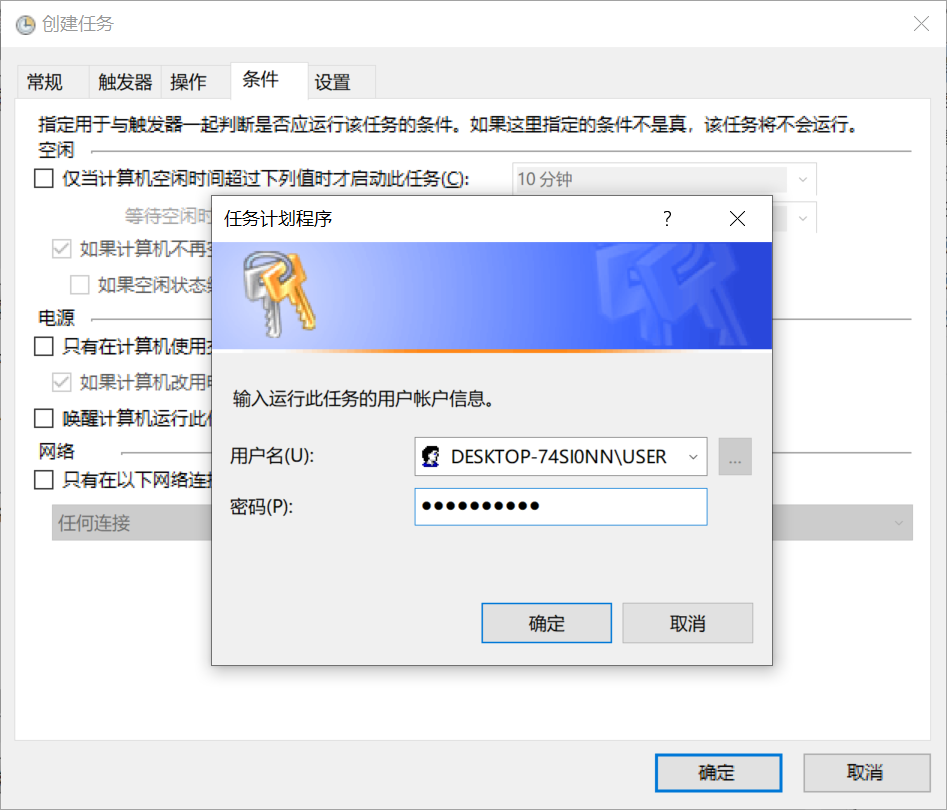
点击 确定,输入当前用户密码(如果选择了“不管用户是否登录都要运行”则需要提供密码)。
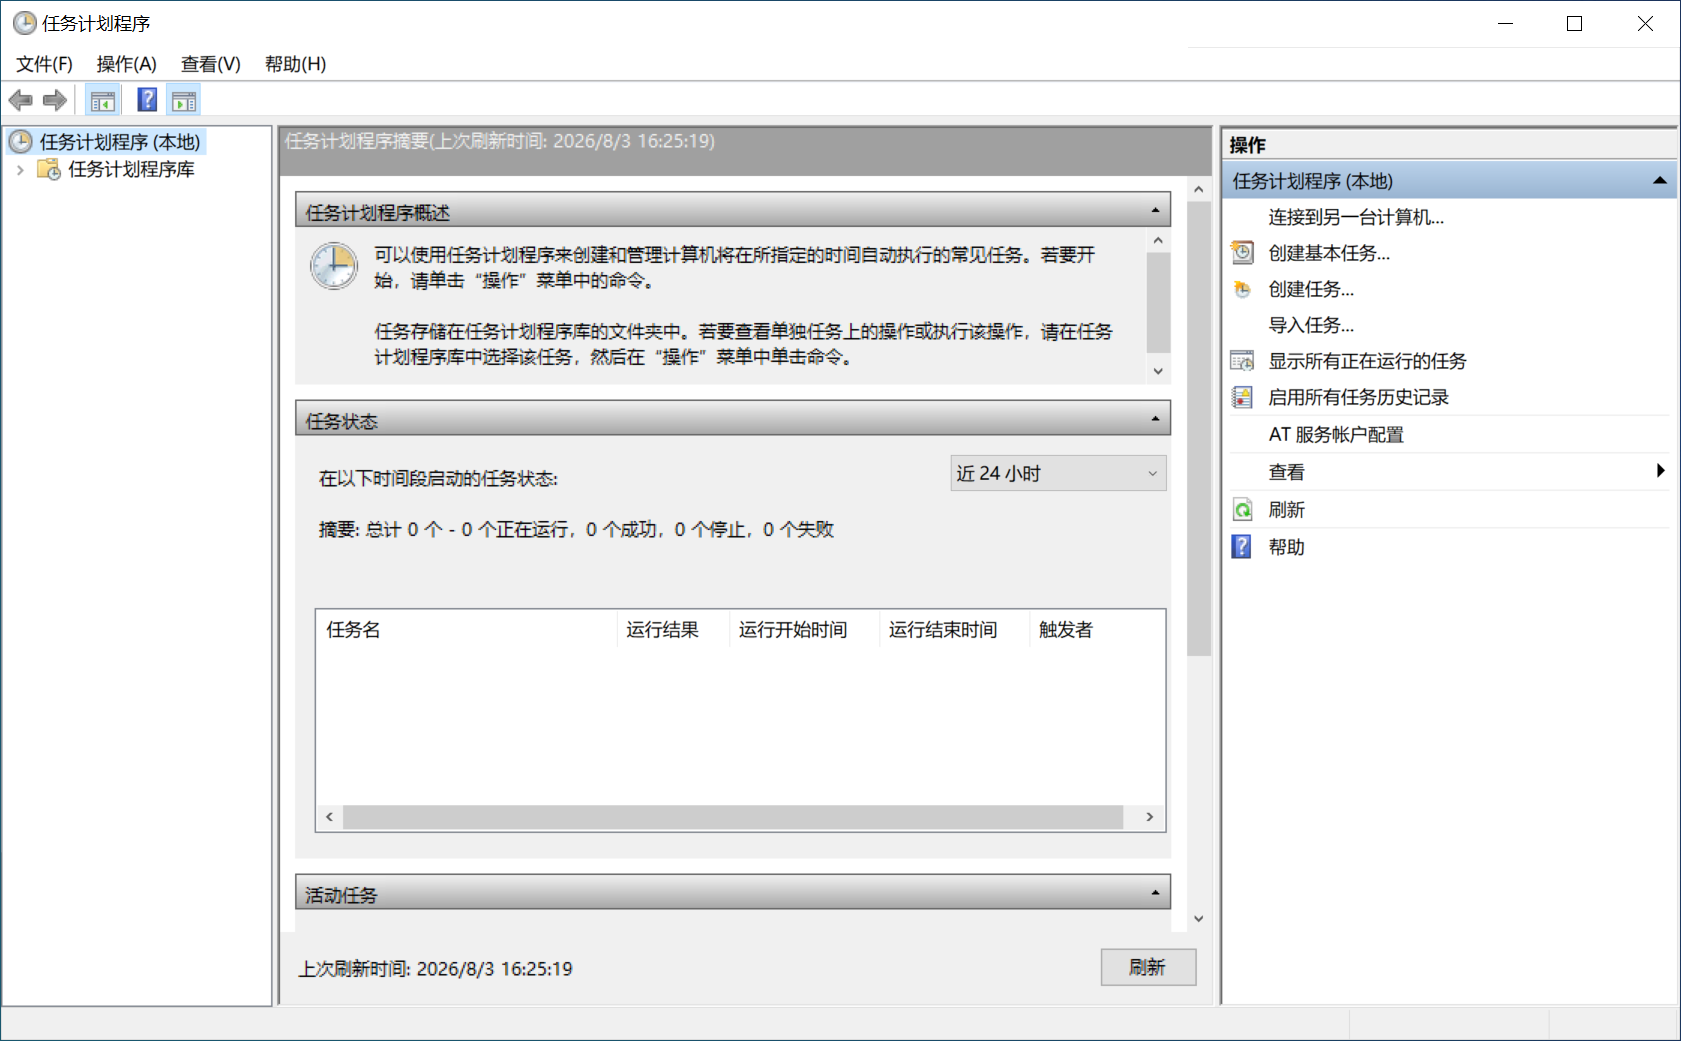
重启再次测试获取模型列表和发送聊天请求
7. 安装OpenCode + 缓存插件
npm安装OpenCode
npm install -g opencode-ai验证安装
opencode --version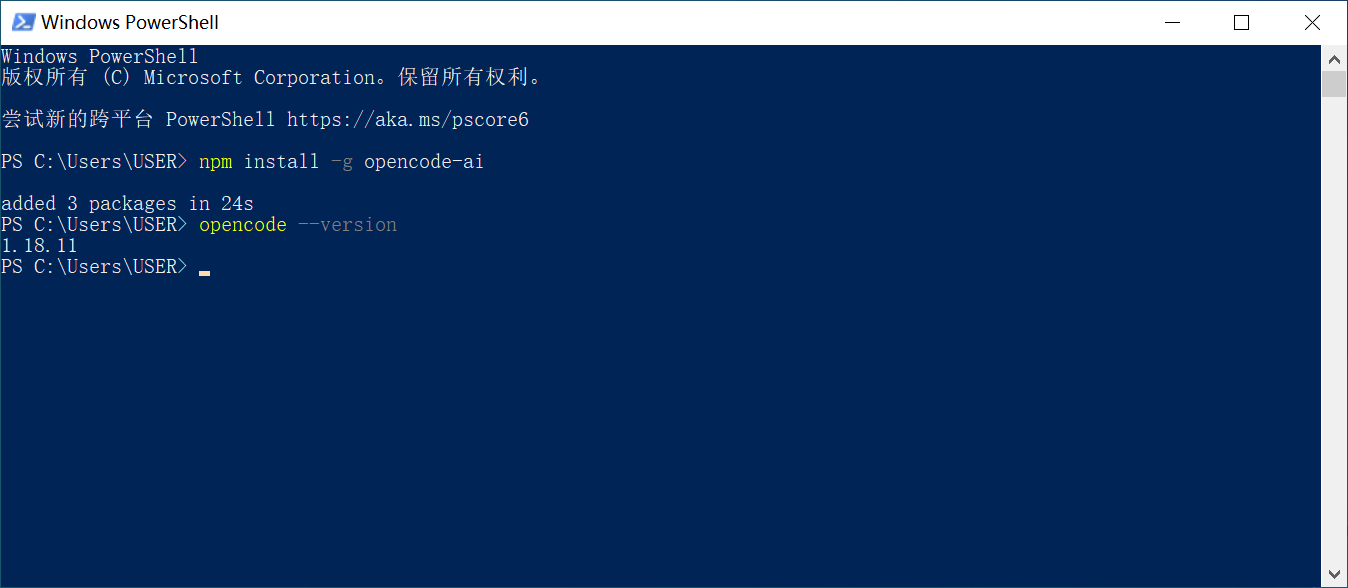
CMD一般没有问题,如果PowerShell中npm不可用
PS C:\Users\USER> npm install -g opencode-ai
npm : 无法加载文件 C:\Program Files\nodejs\npm.ps1,因为在此系统上禁止运行脚本。有关详细信息,请参阅 https:/go.microsoft.com/fwlink/?LinkID=135170 中的 about_Execution_Policies。
所在位置 行:1 字符: 1
+ npm install -g opencode-ai
+ ~~~
+ CategoryInfo : SecurityError: (:) [],PSSecurityException
+ FullyQualifiedErrorId : UnauthorizedAccess
管理员模式打开PowerShell,执行,选A
Set-ExecutionPolicy -ExecutionPolicy RemoteSigned -Scope CurrentUser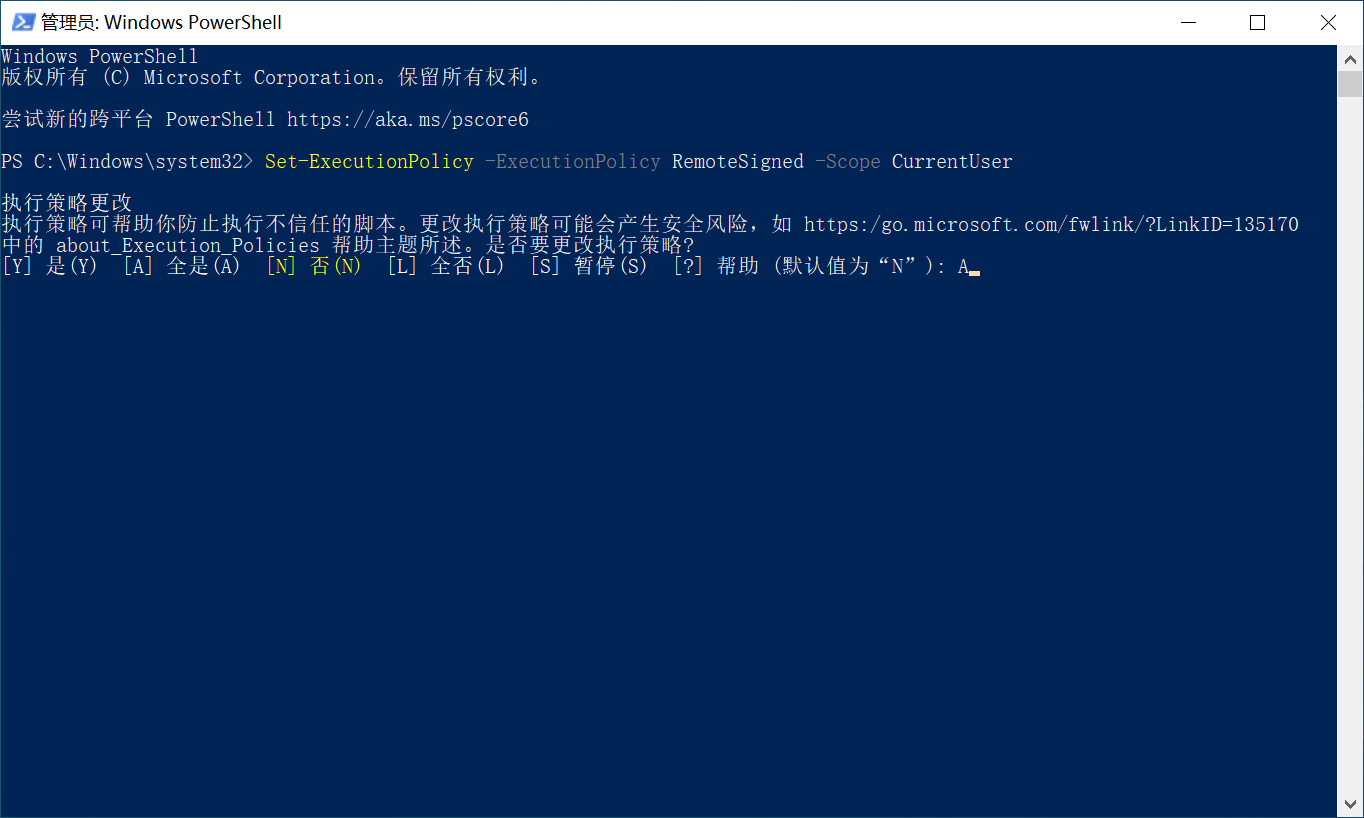
安装插件
opencode plugin opencode-cache-injector
opencode plugin opencode-visual-cache
8. 配置OpenCode
编写opencode.json,放到某个文件夹下,就需要在某个文件夹下运行OpenCode,如果想都可以运行,放到C:\Users\{你的用户名}\.config\opencode\
{
  "$schema": "https://opencode.ai/config.json",
  "provider": {
    "litellm": {
      "npm": "@ai-sdk/openai-compatible",
      "name": "LiteLLM",
      "options": {
        "baseURL": "http://localhost:4000/v1",
        "litellmProxy": true
      },
      "models": {
        "qwen3.8-max-preview": {
          "name": "Qwen 3.8 Max Preview"
        },
        "qwen3.7-max": {
          "name": "Qwen 3.7 Max"
        },
        "qwen3.7-plus": {
          "name": "Qwen 3.7 Plus",
          "limit": {
            "context": 131072,
            "output": 8192
          }
        },
        "qwen3.6-flash": {
          "name": "Qwen 3.6 Flash",
          "limit": {
            "context": 131072,
            "output": 8192
          }
        }
      },
      "defaultModel": "qwen3.6-flash"
    }
  },
  "compaction": {
    "auto": true,
    "prune": true
  },
  "plugin": [
    "opencode-cache-injector",
    "opencode-visual-cache"
  ]
}
9. OpenCode连接LiteLLM
CMD或者PowerShell打开opencode
opencode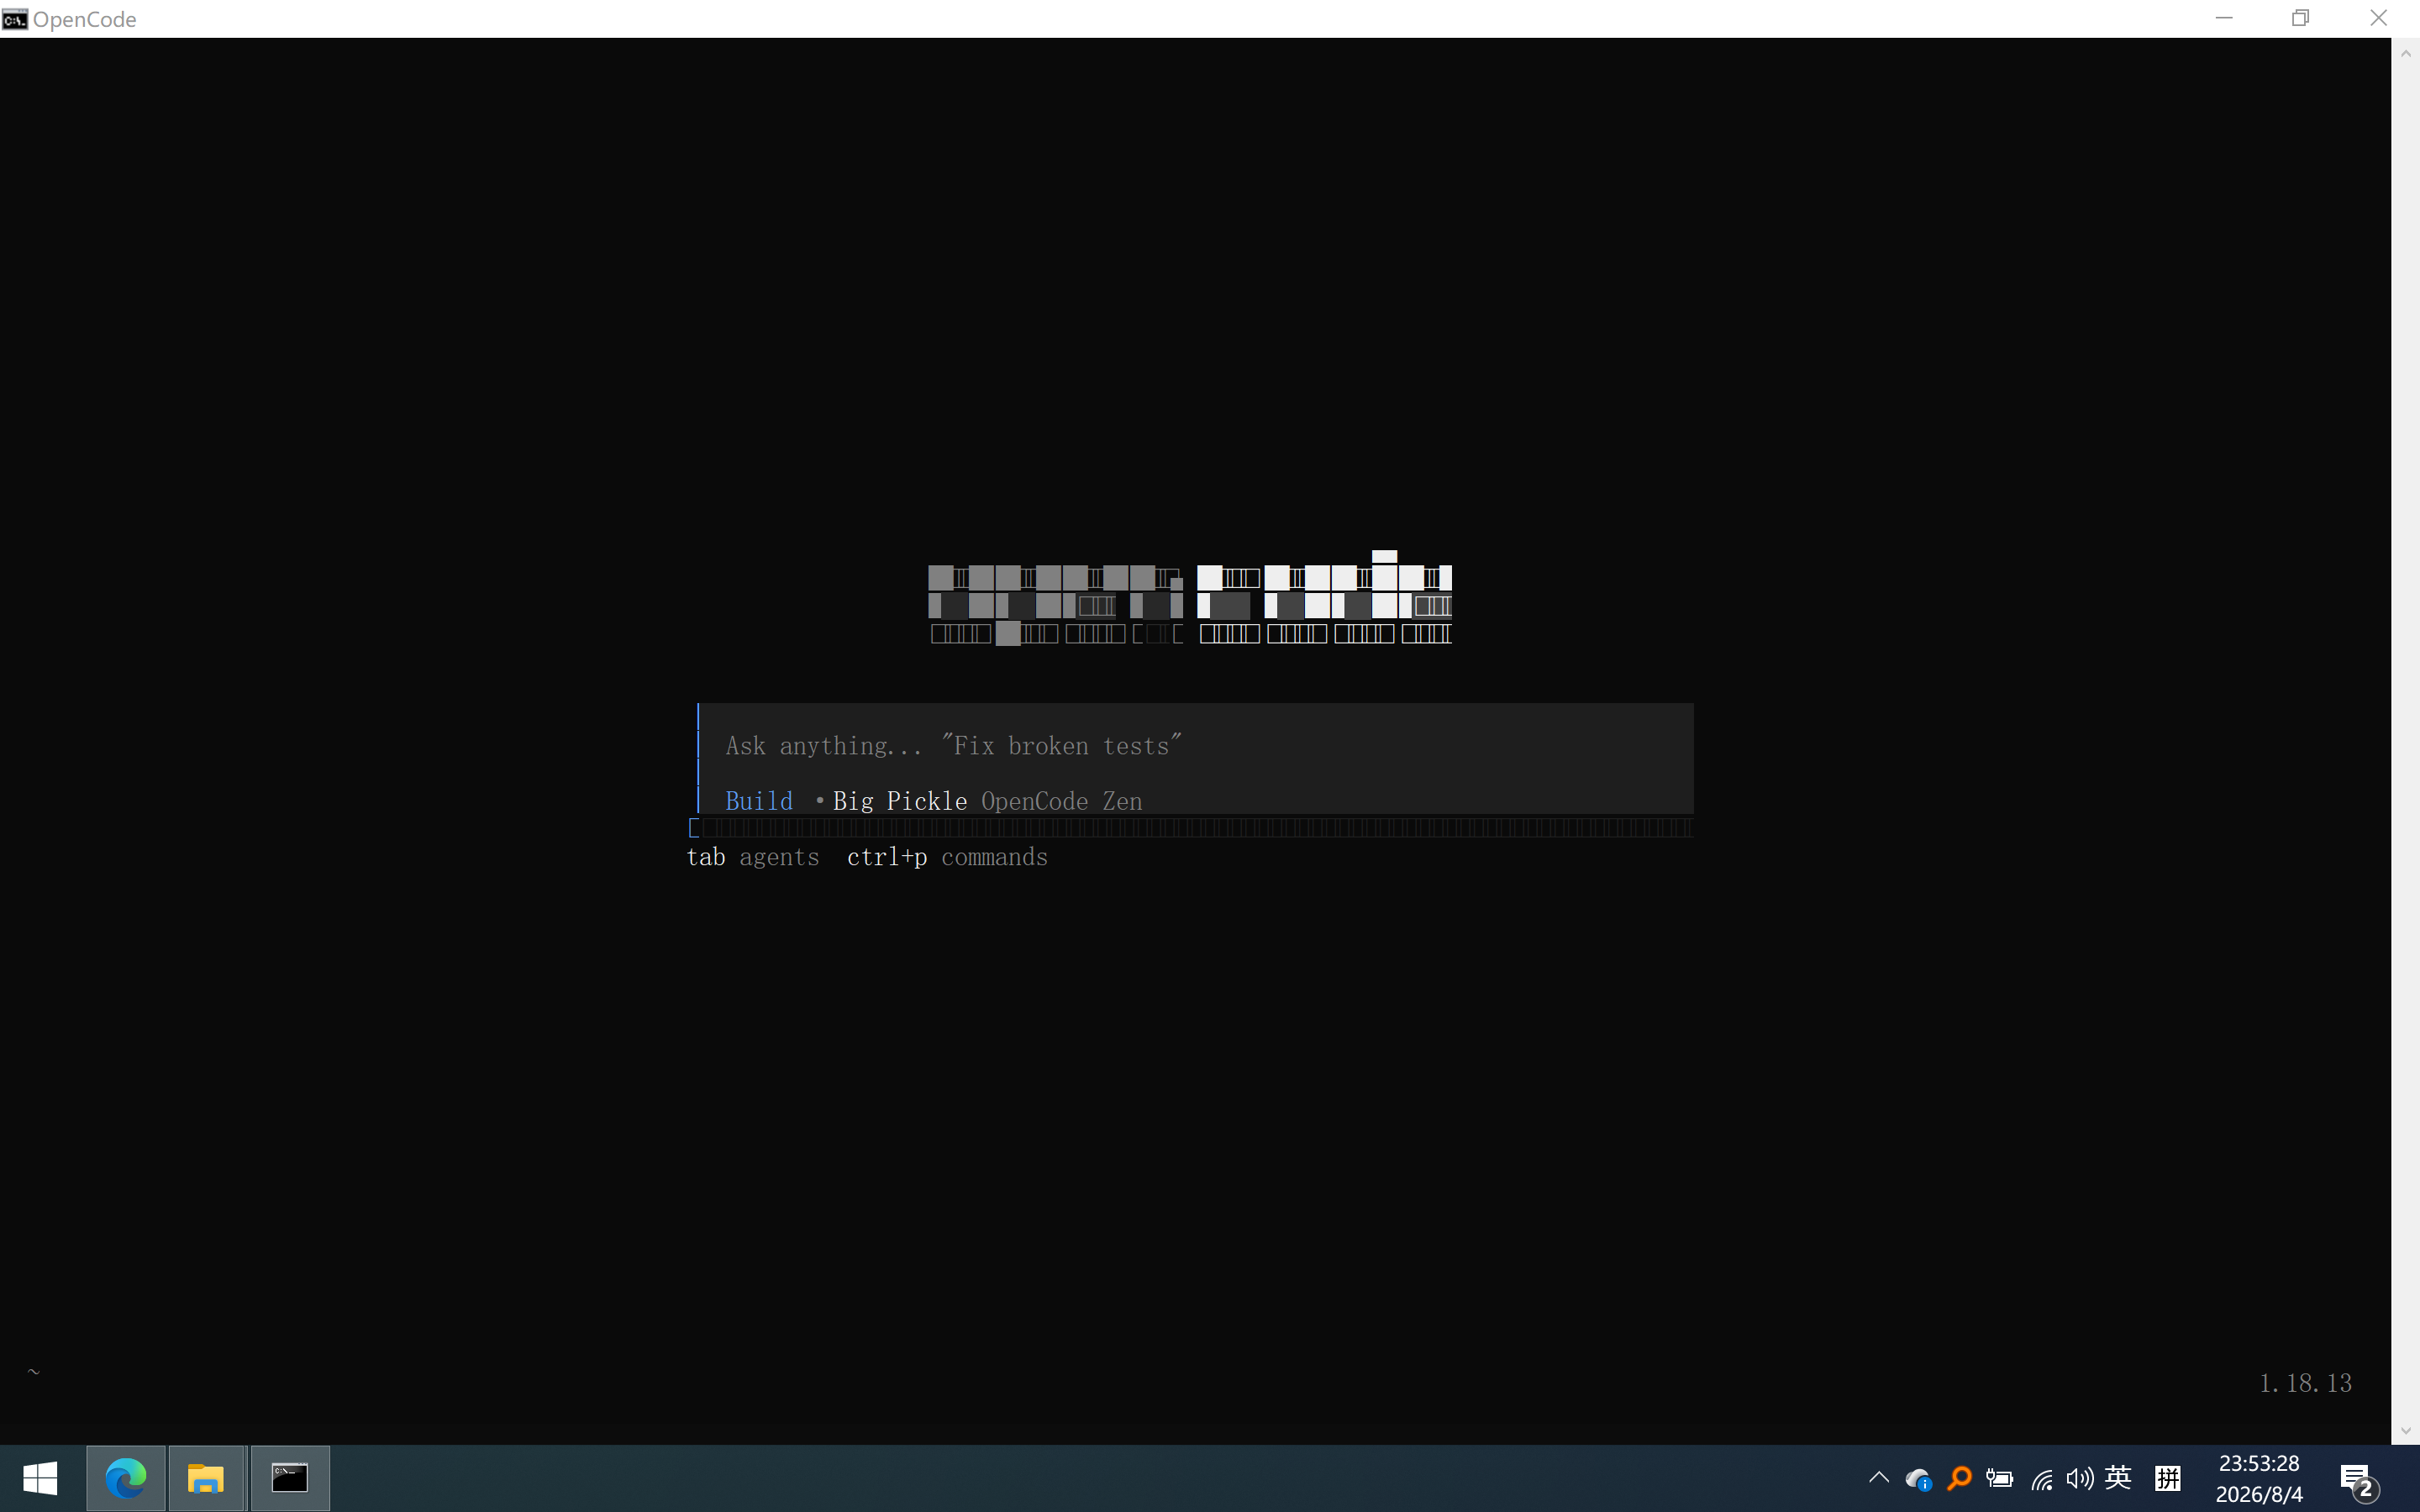
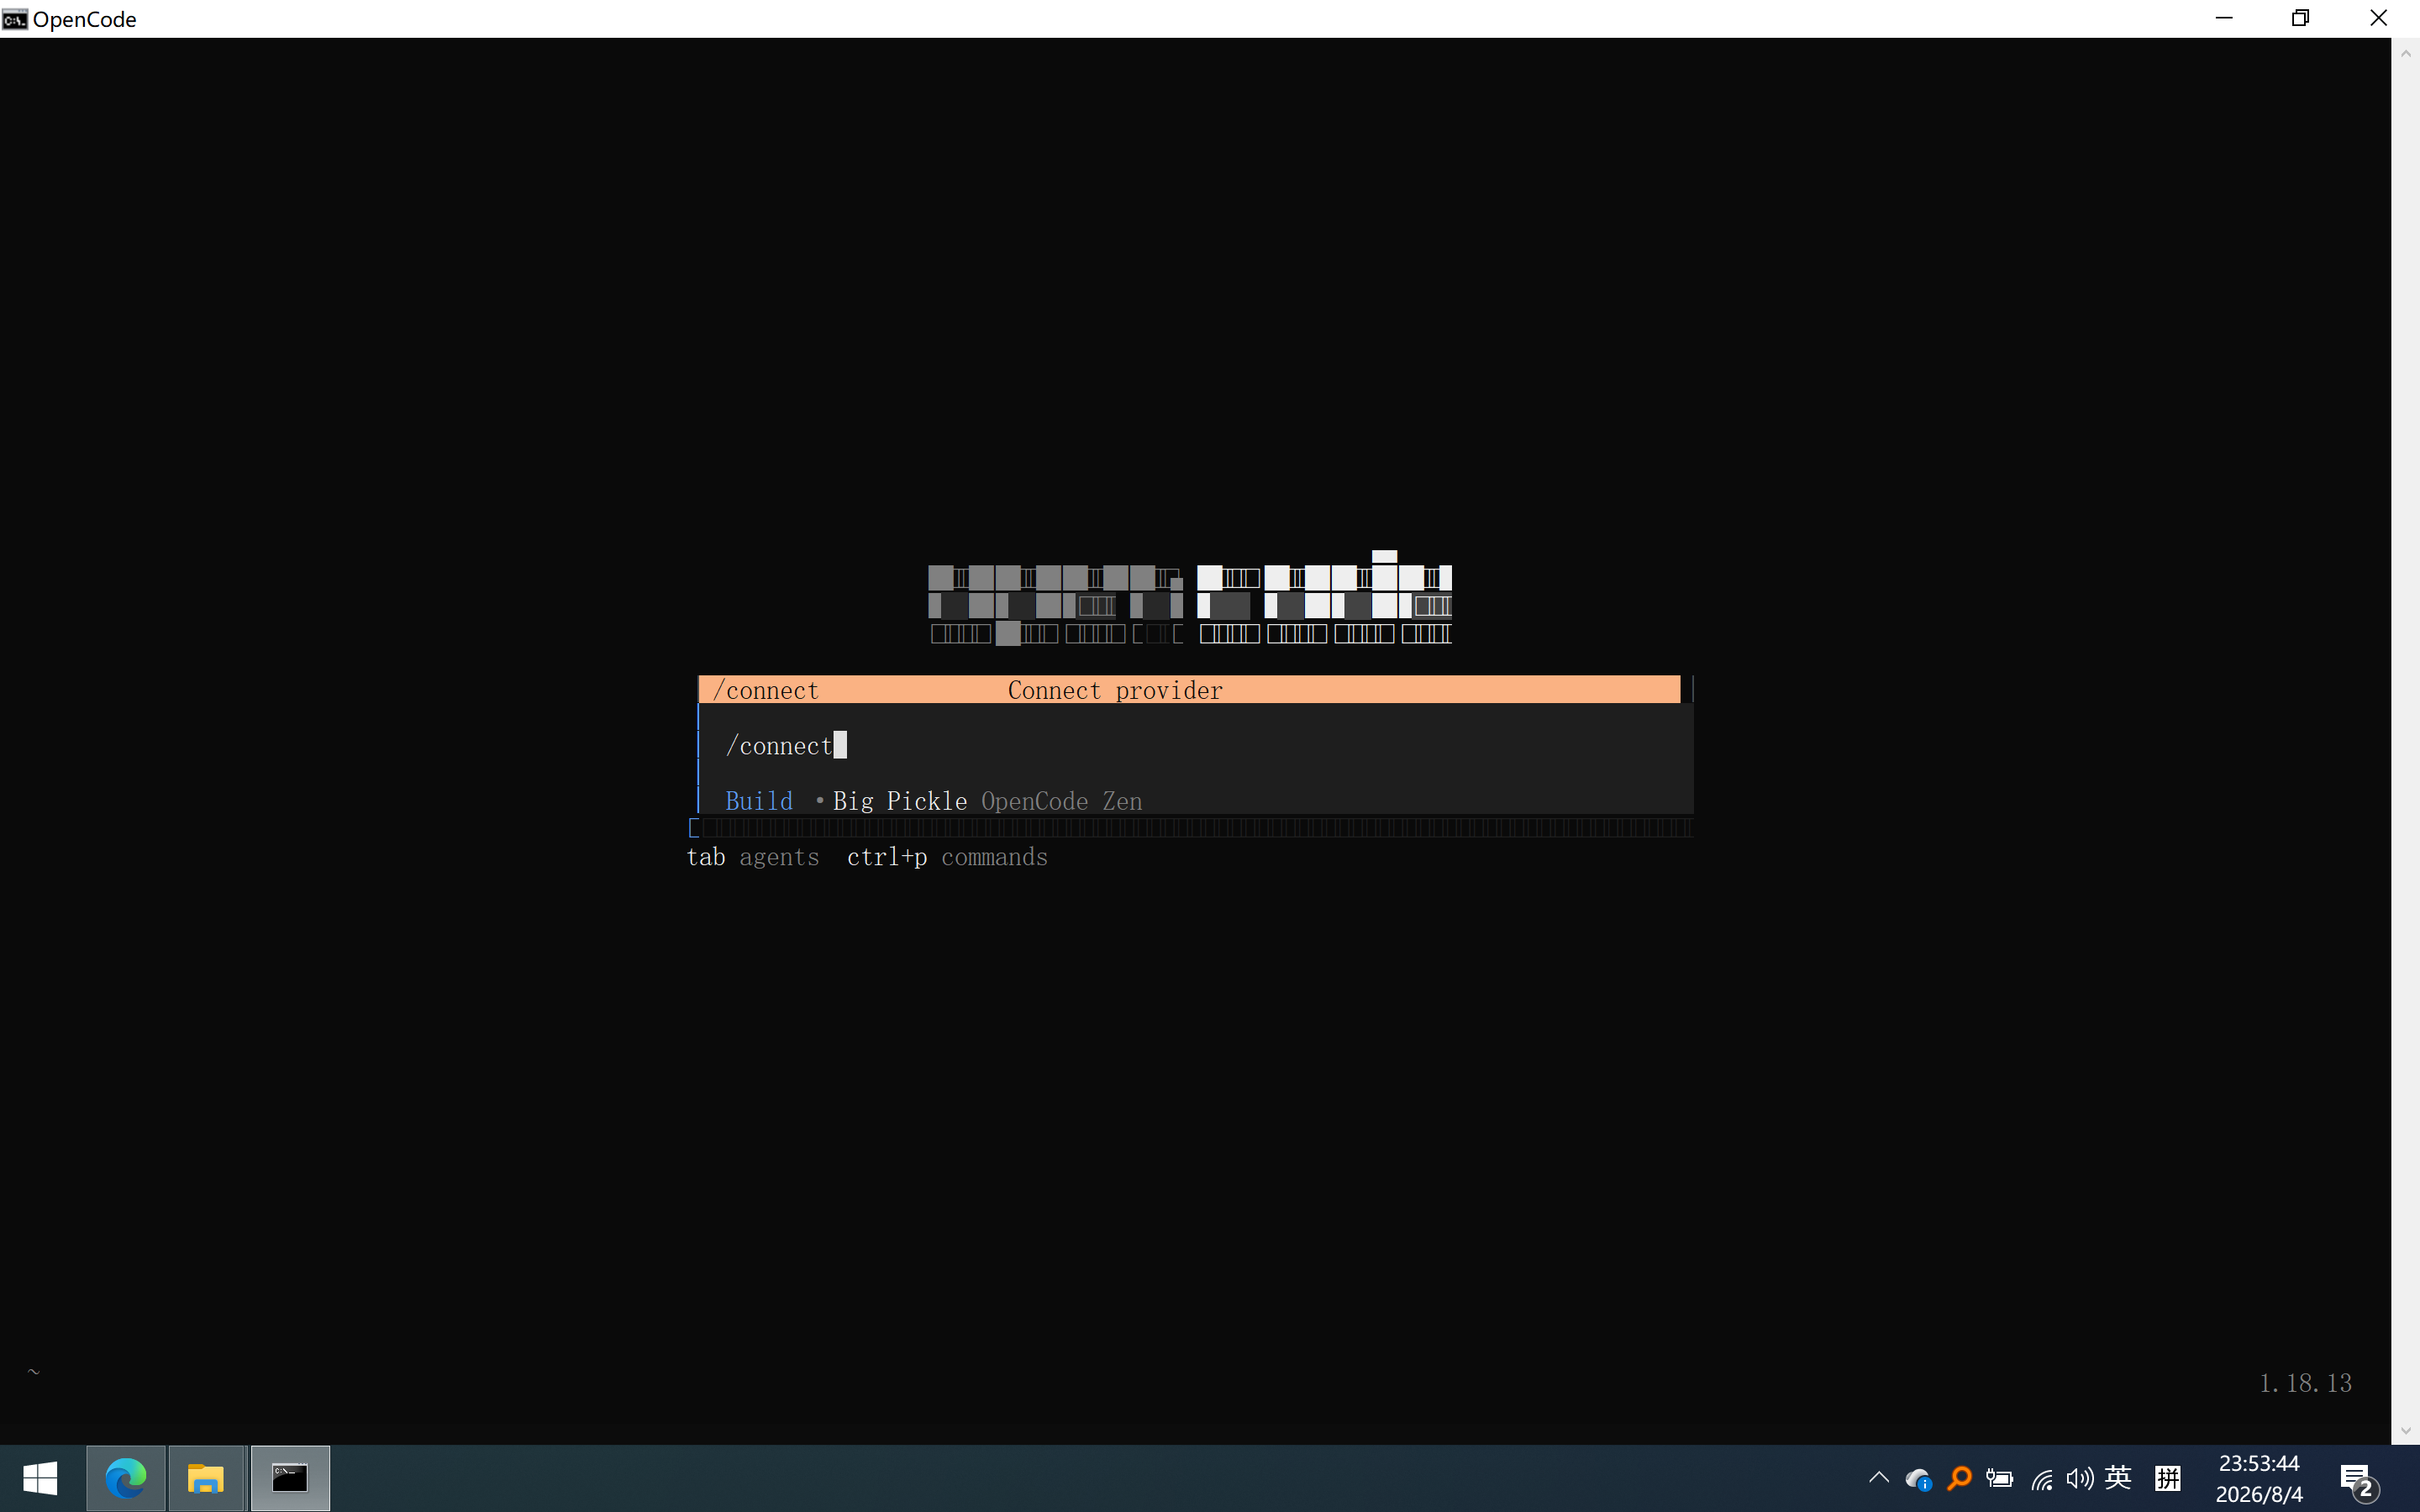
在 OpenCode 聊天界面中执行连接
/connect
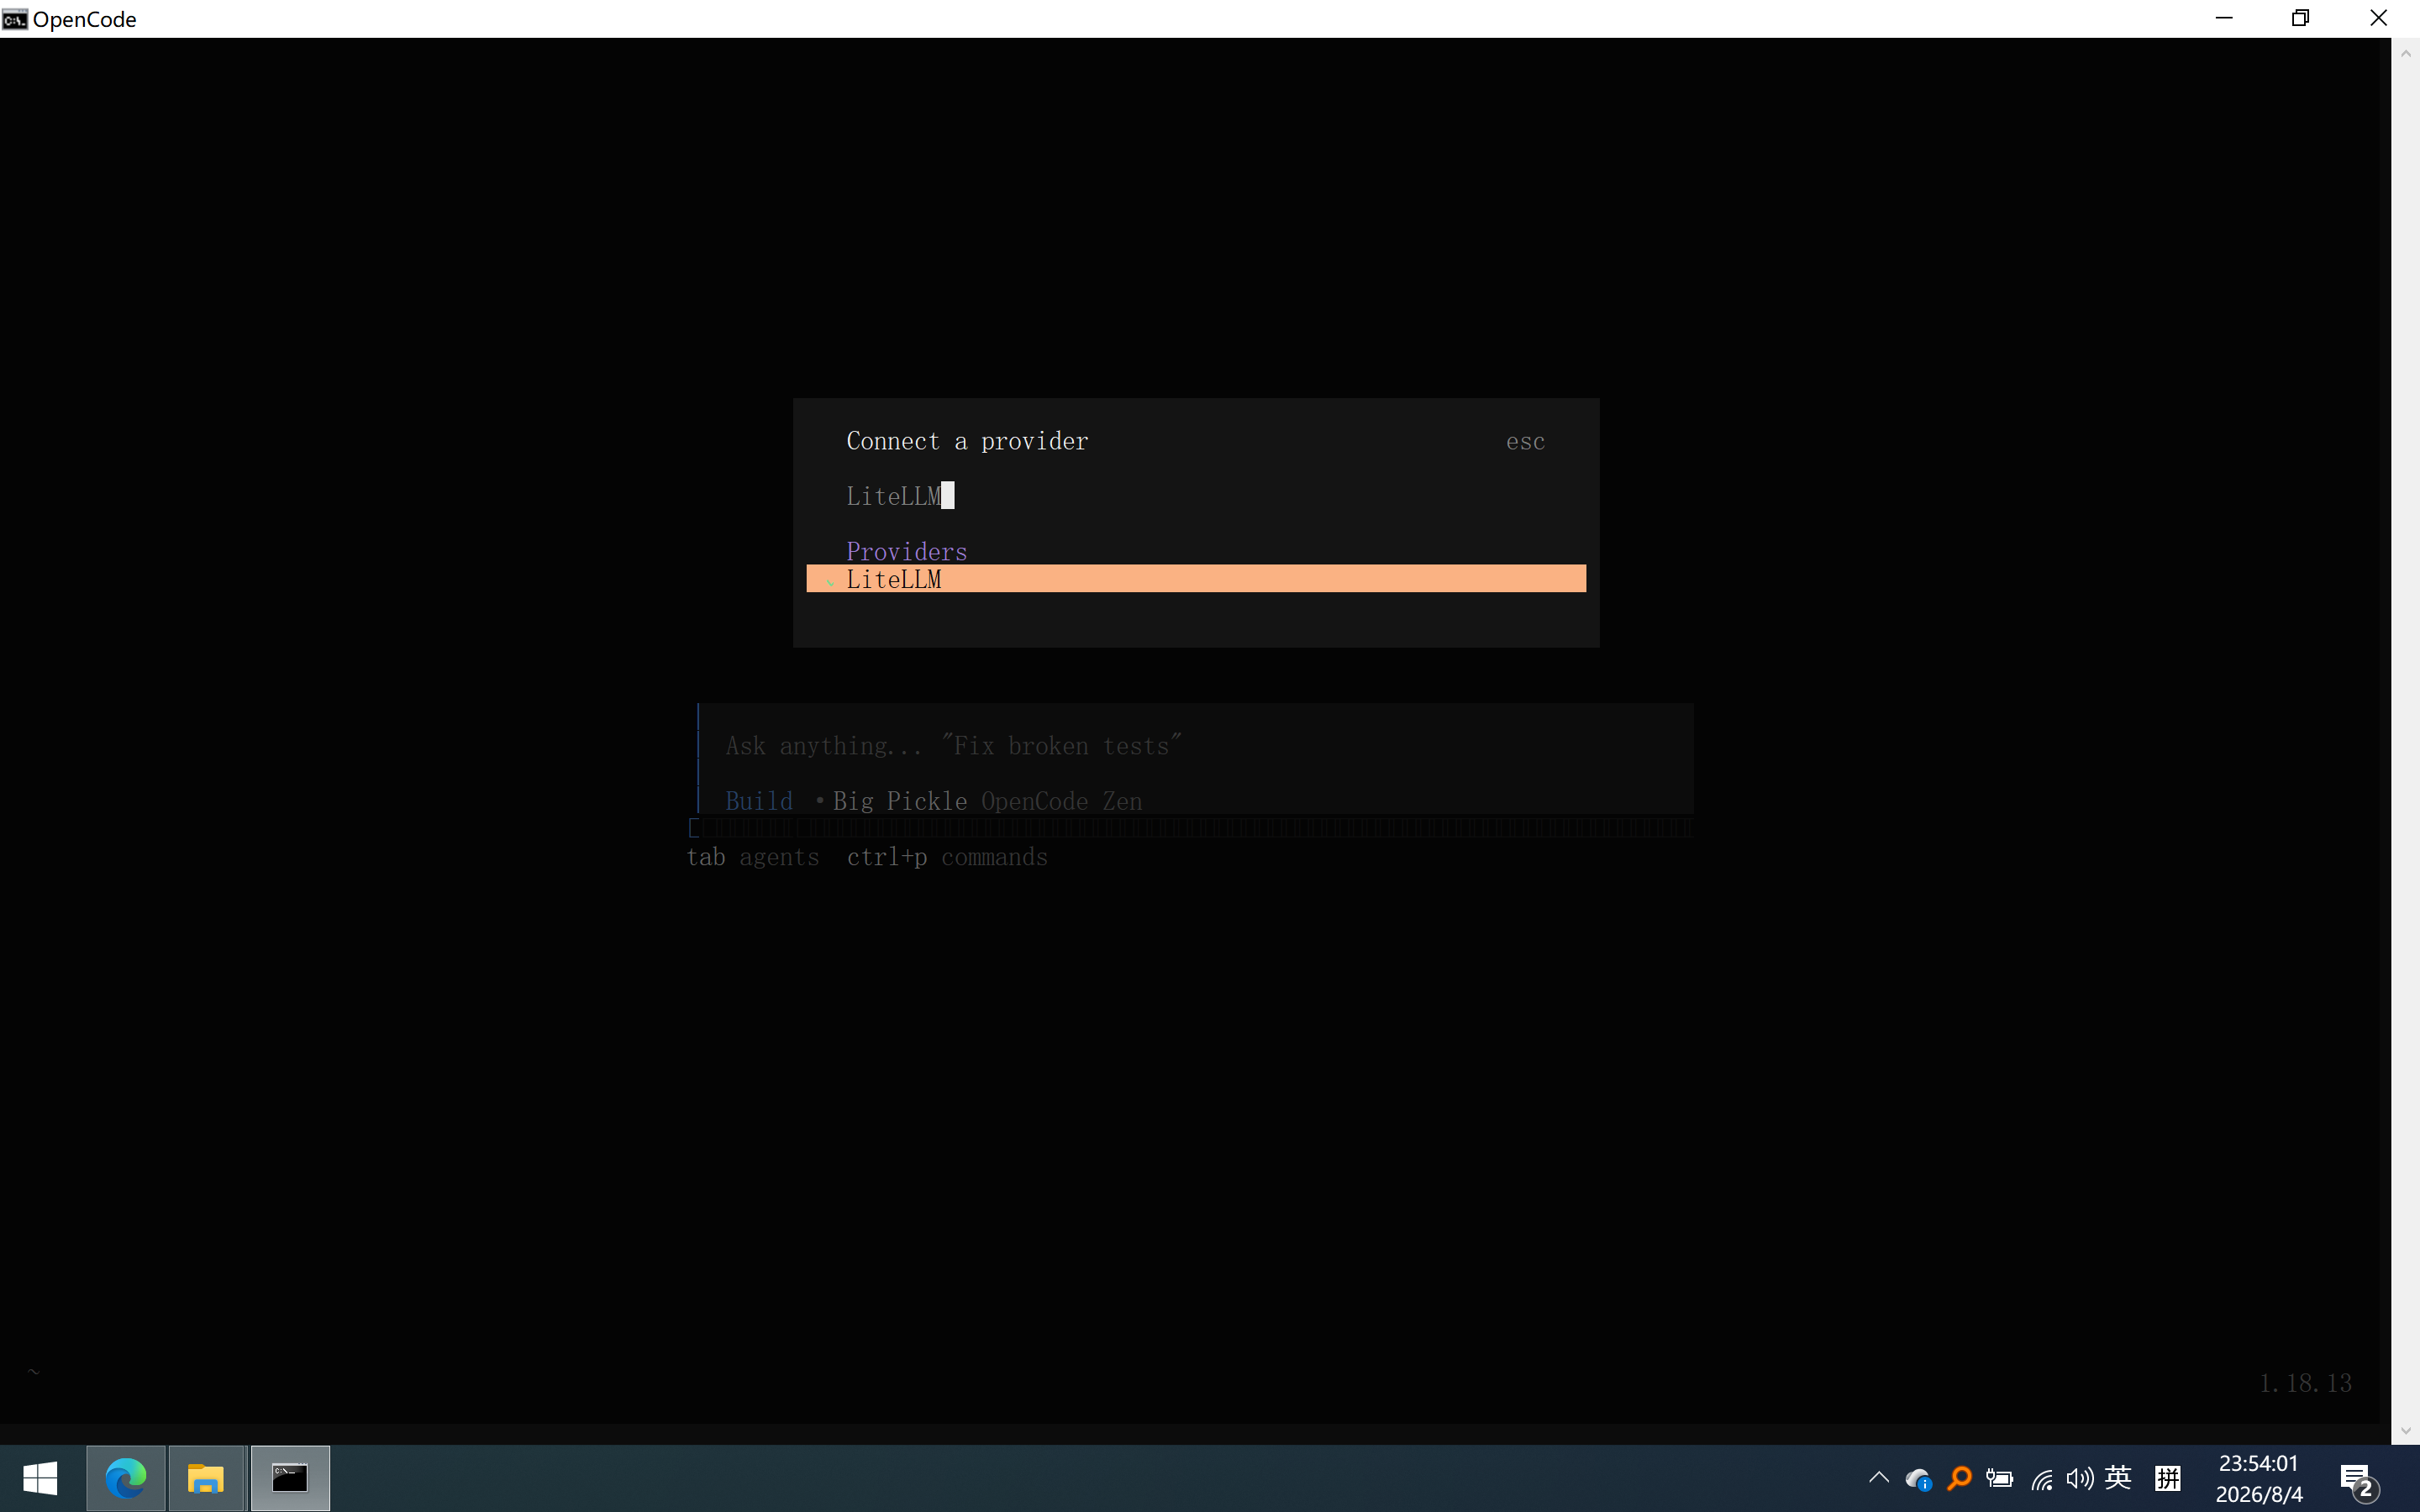
Provider name:LiteLLM(与配置文件中的 "name" 一致)
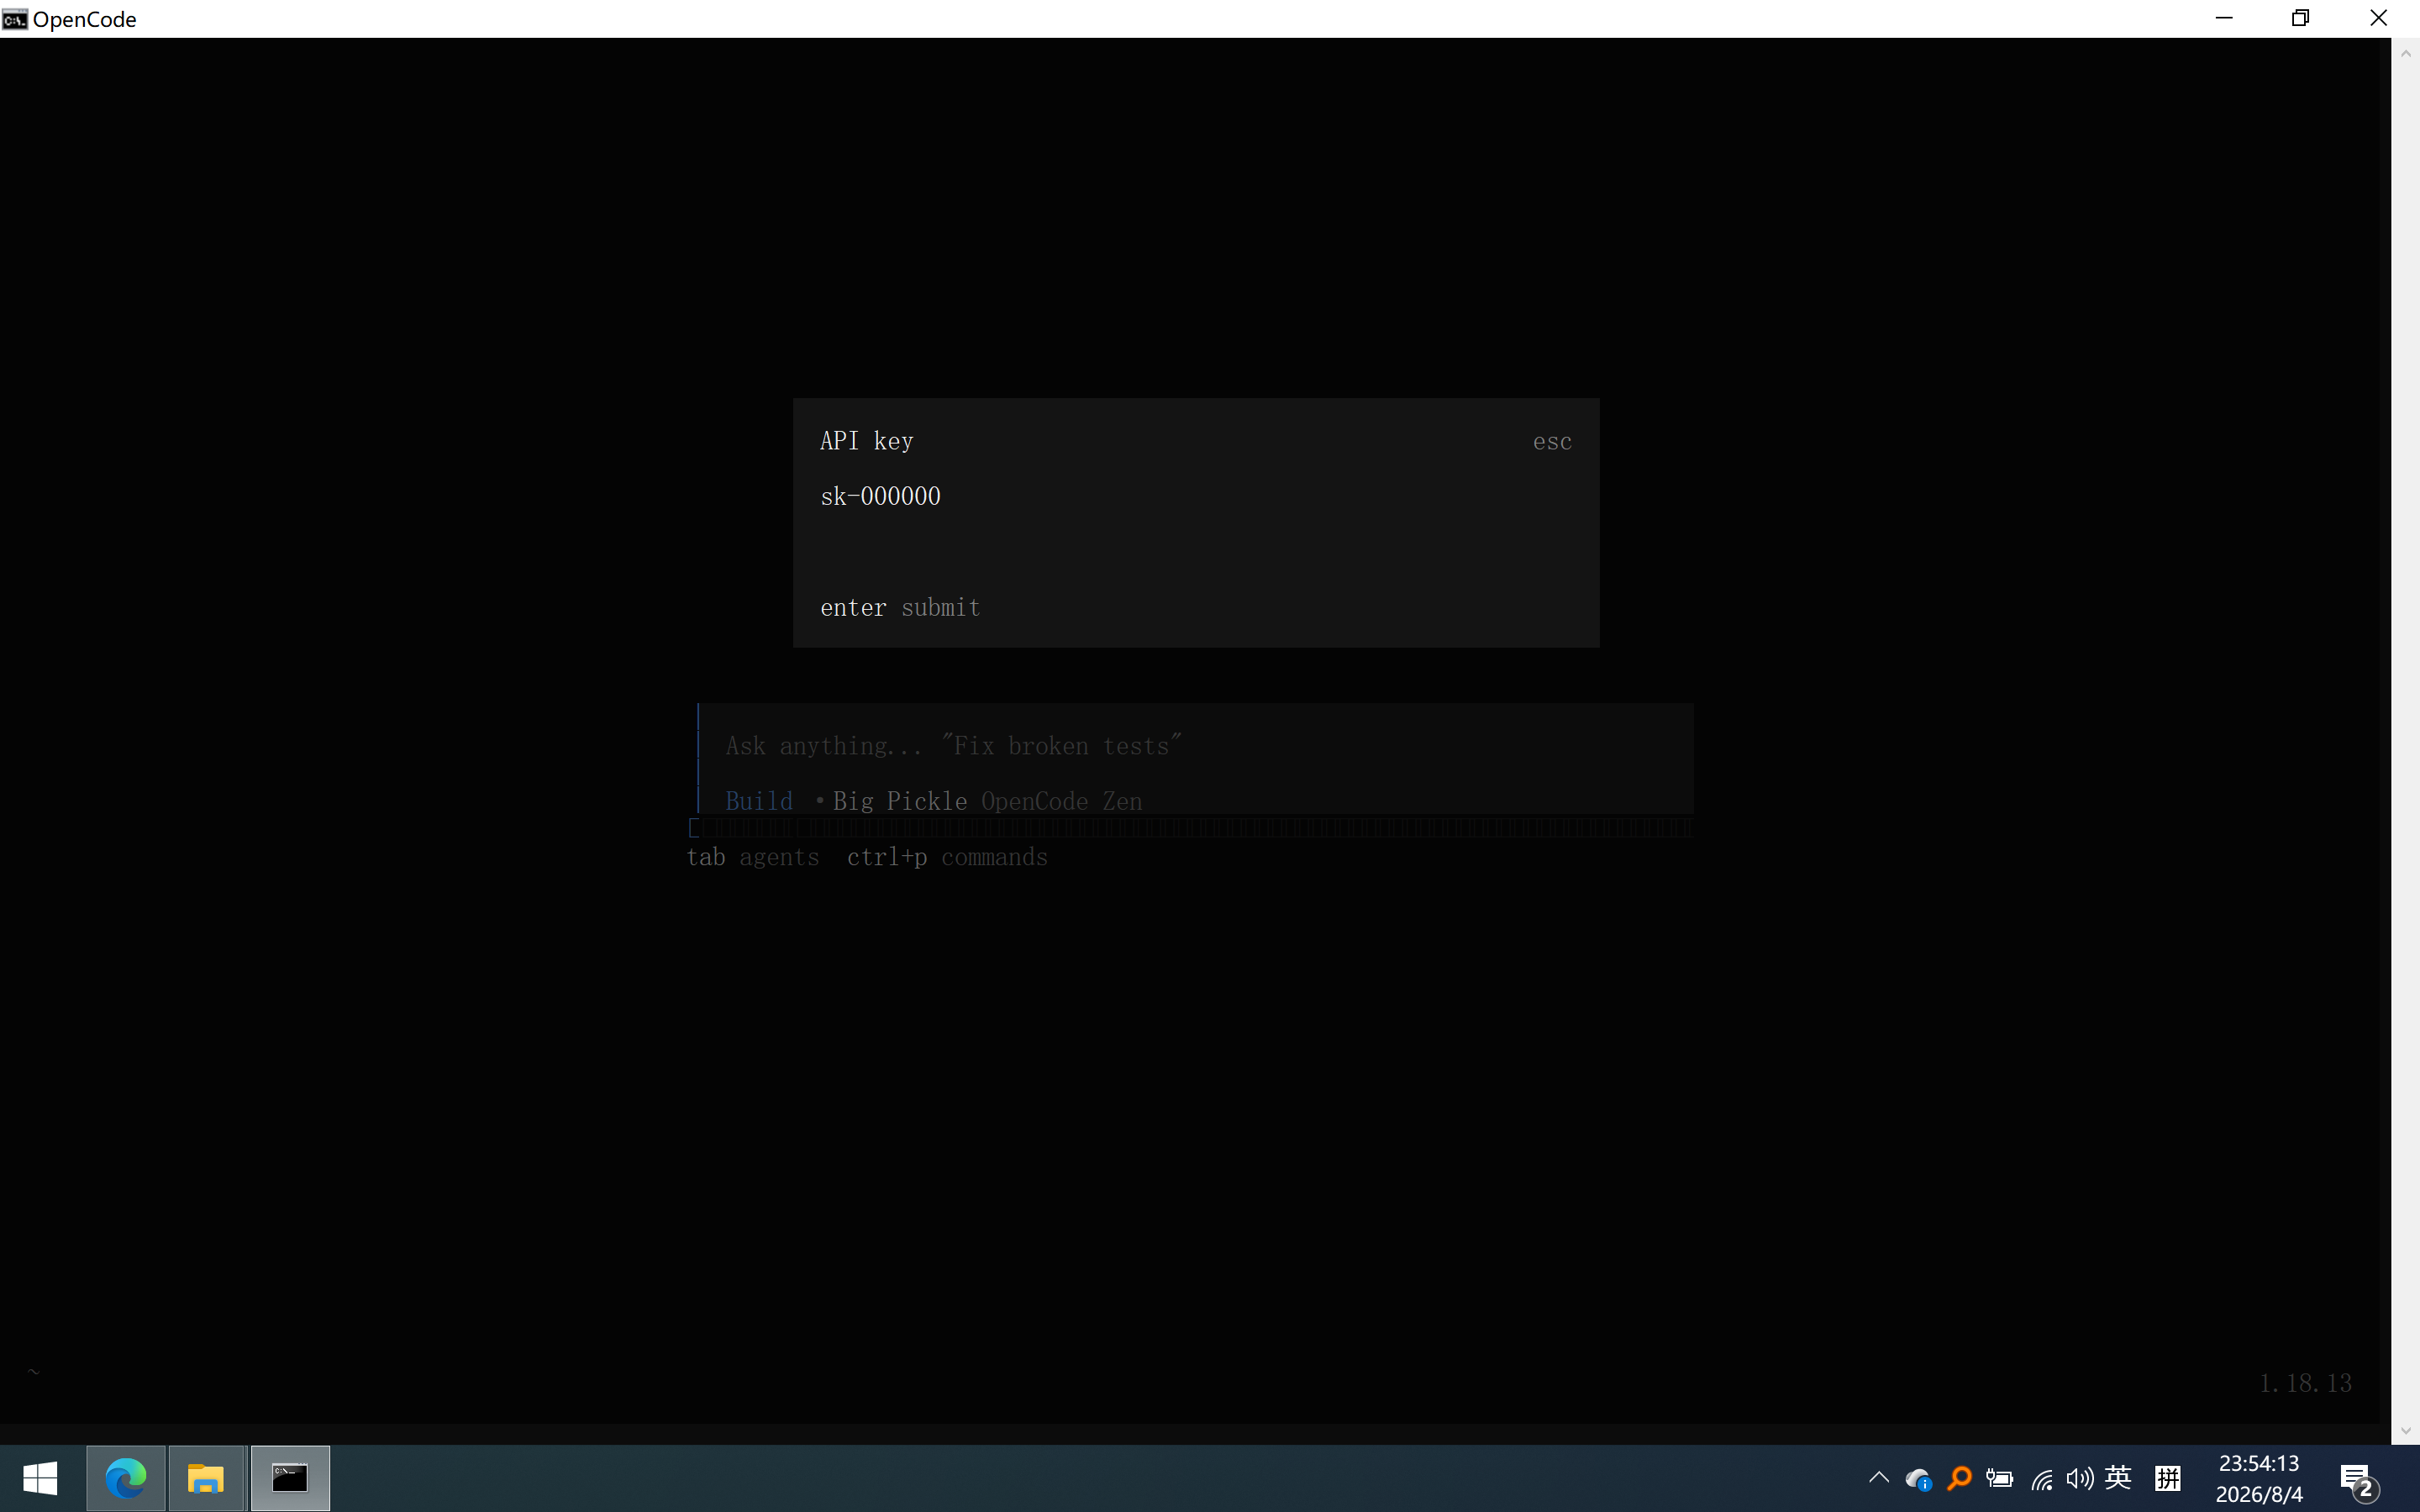
API Key:随意填写(因为 LiteLLM 已关闭认证)
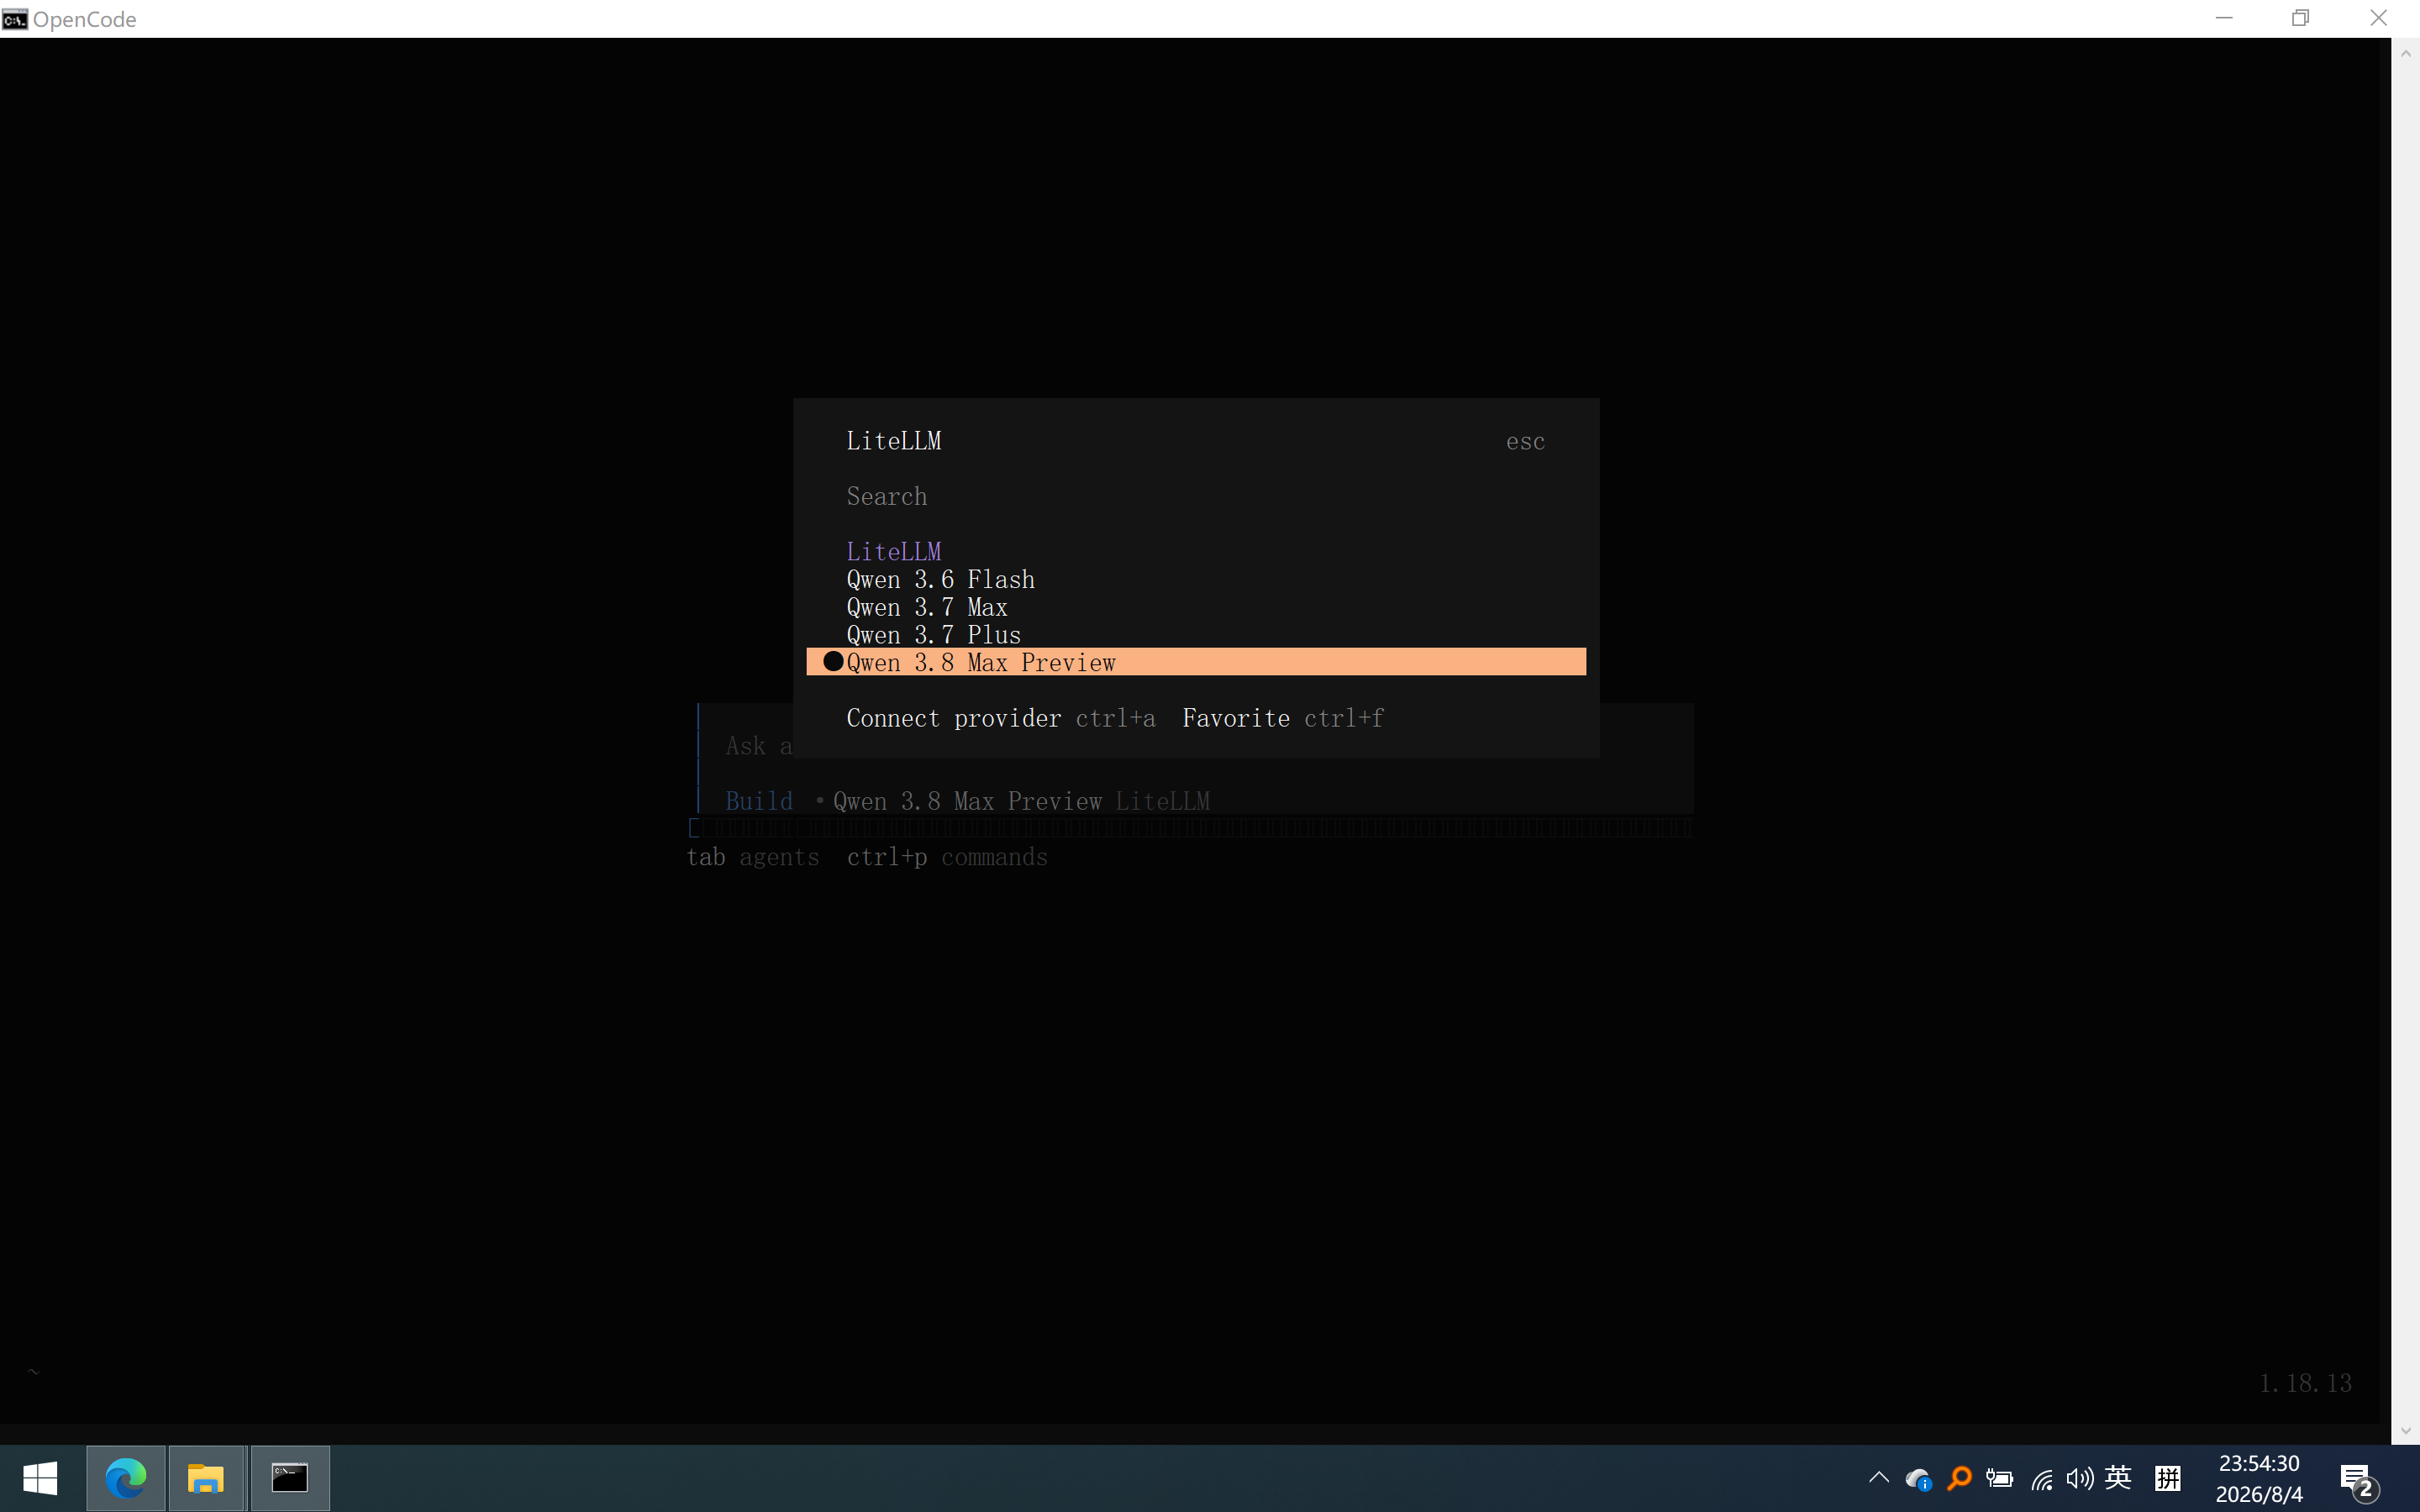
验证模型列表
/models
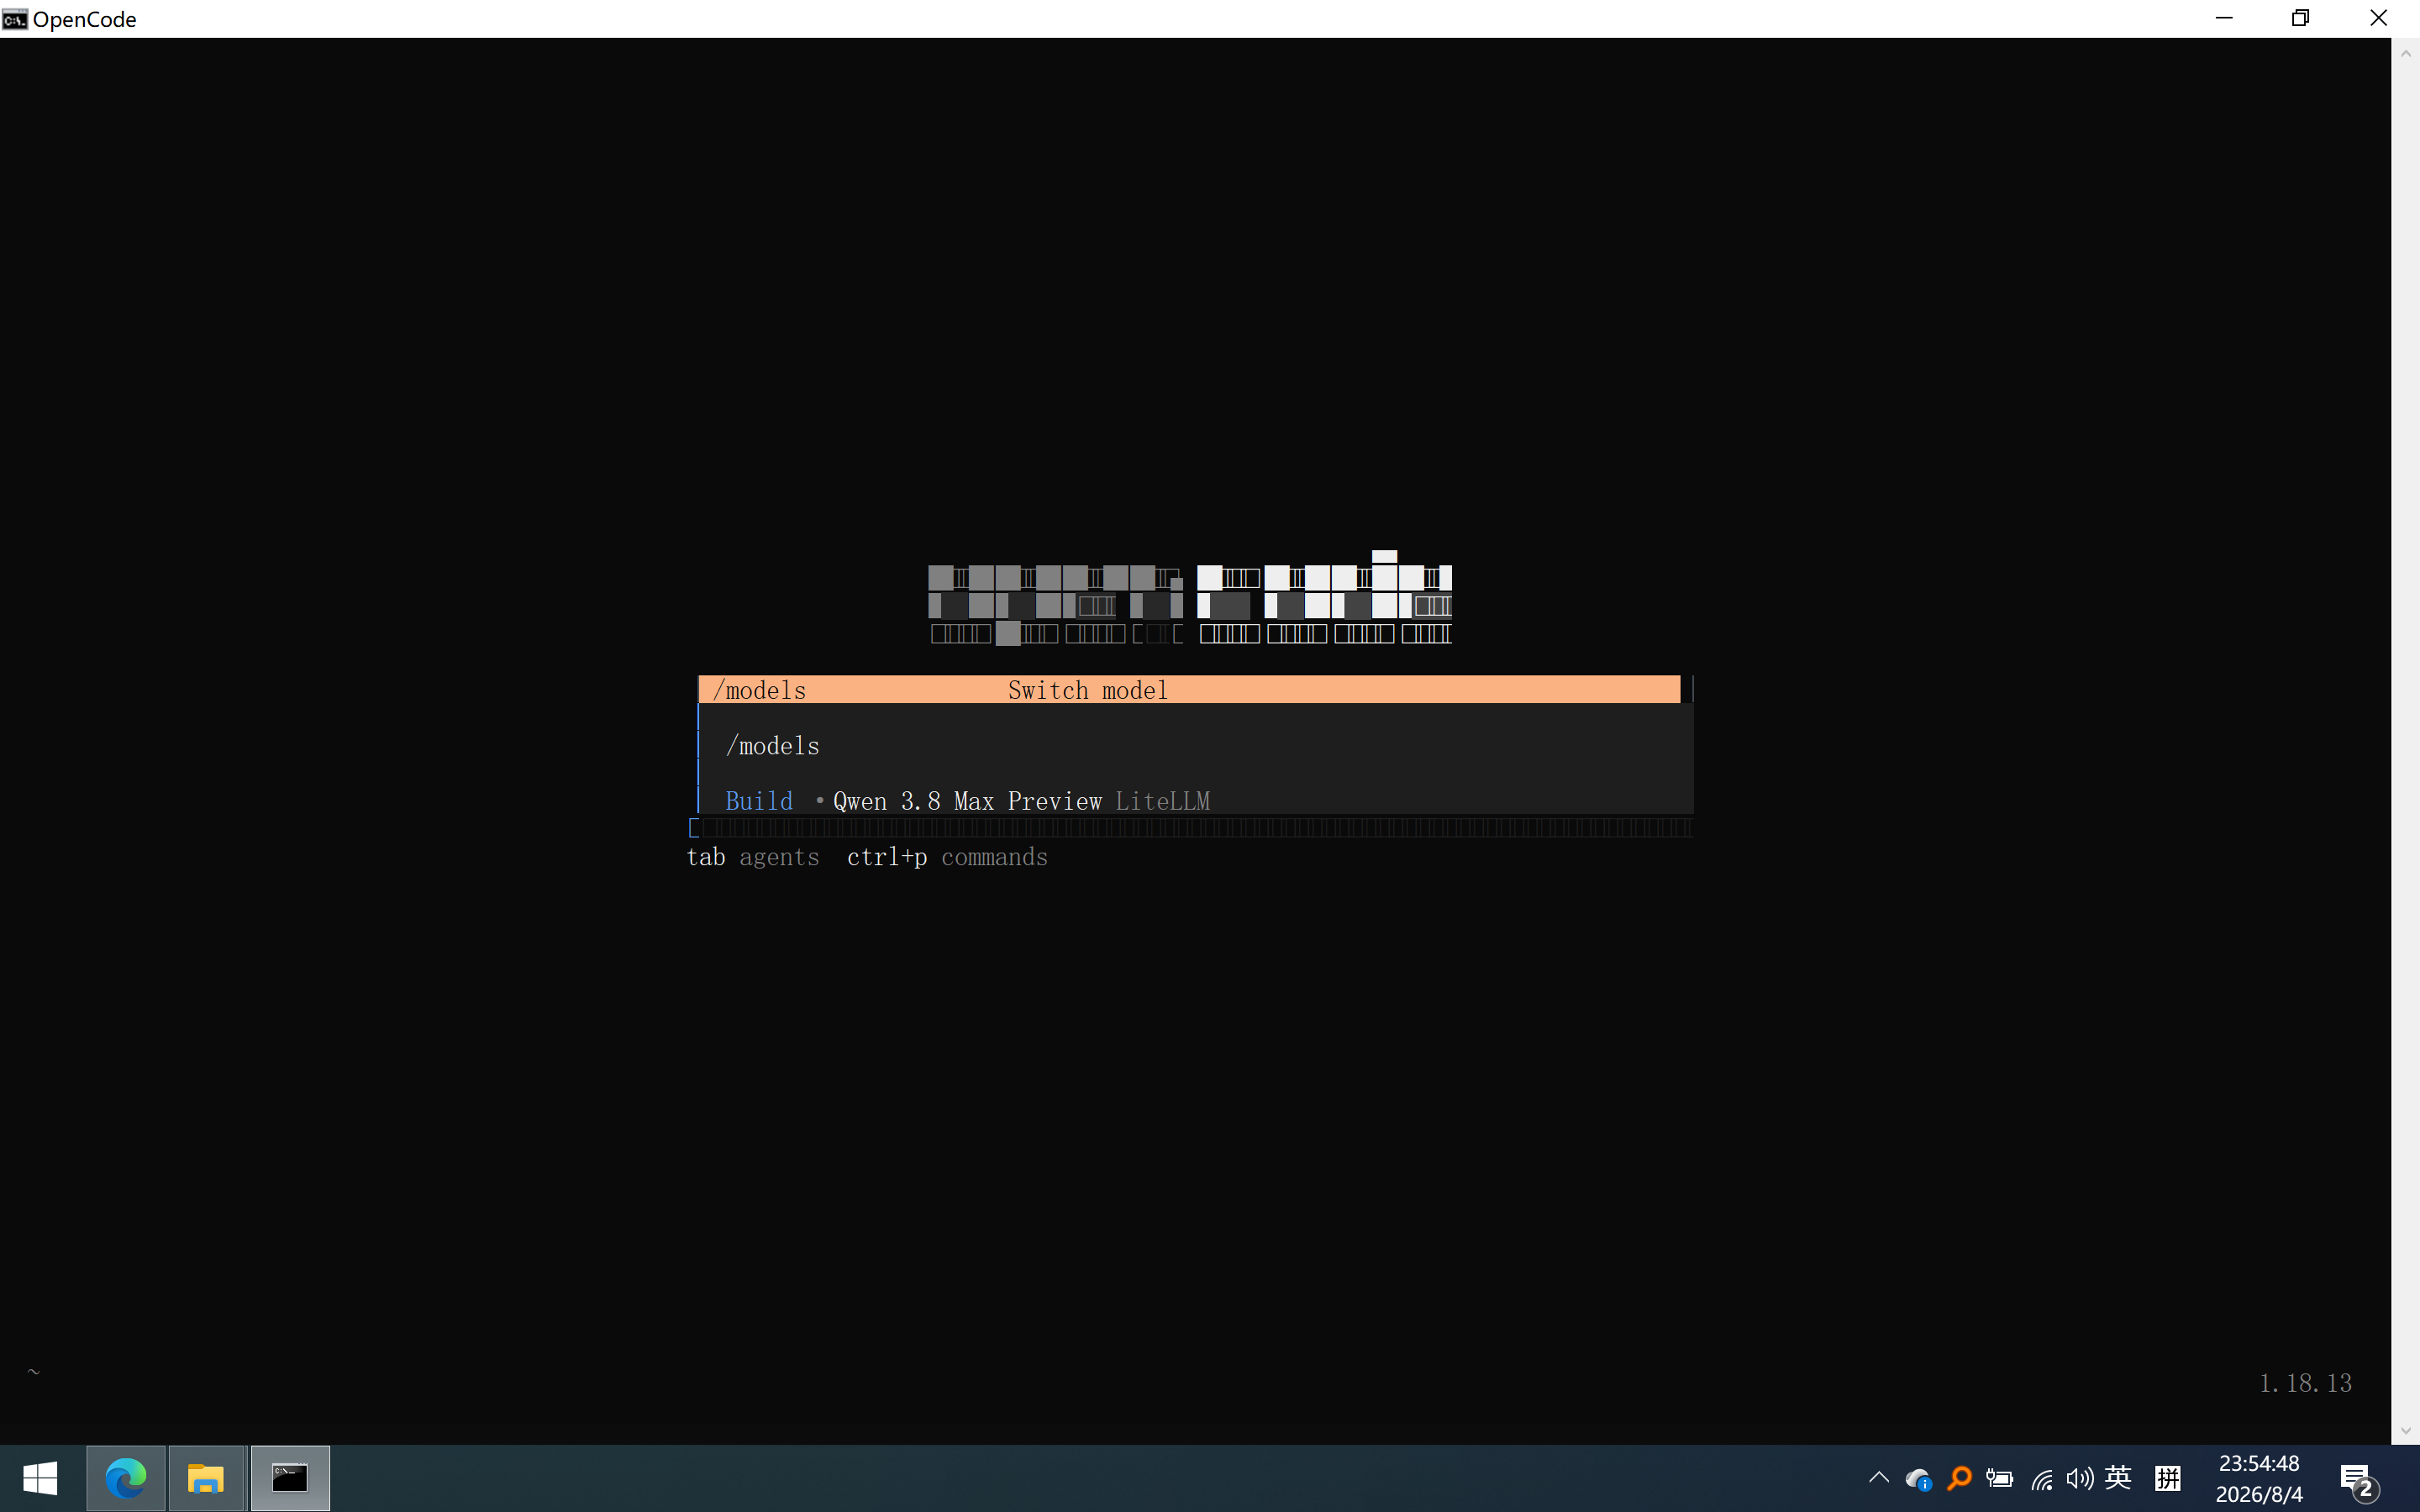
应显示所有已配置的模型
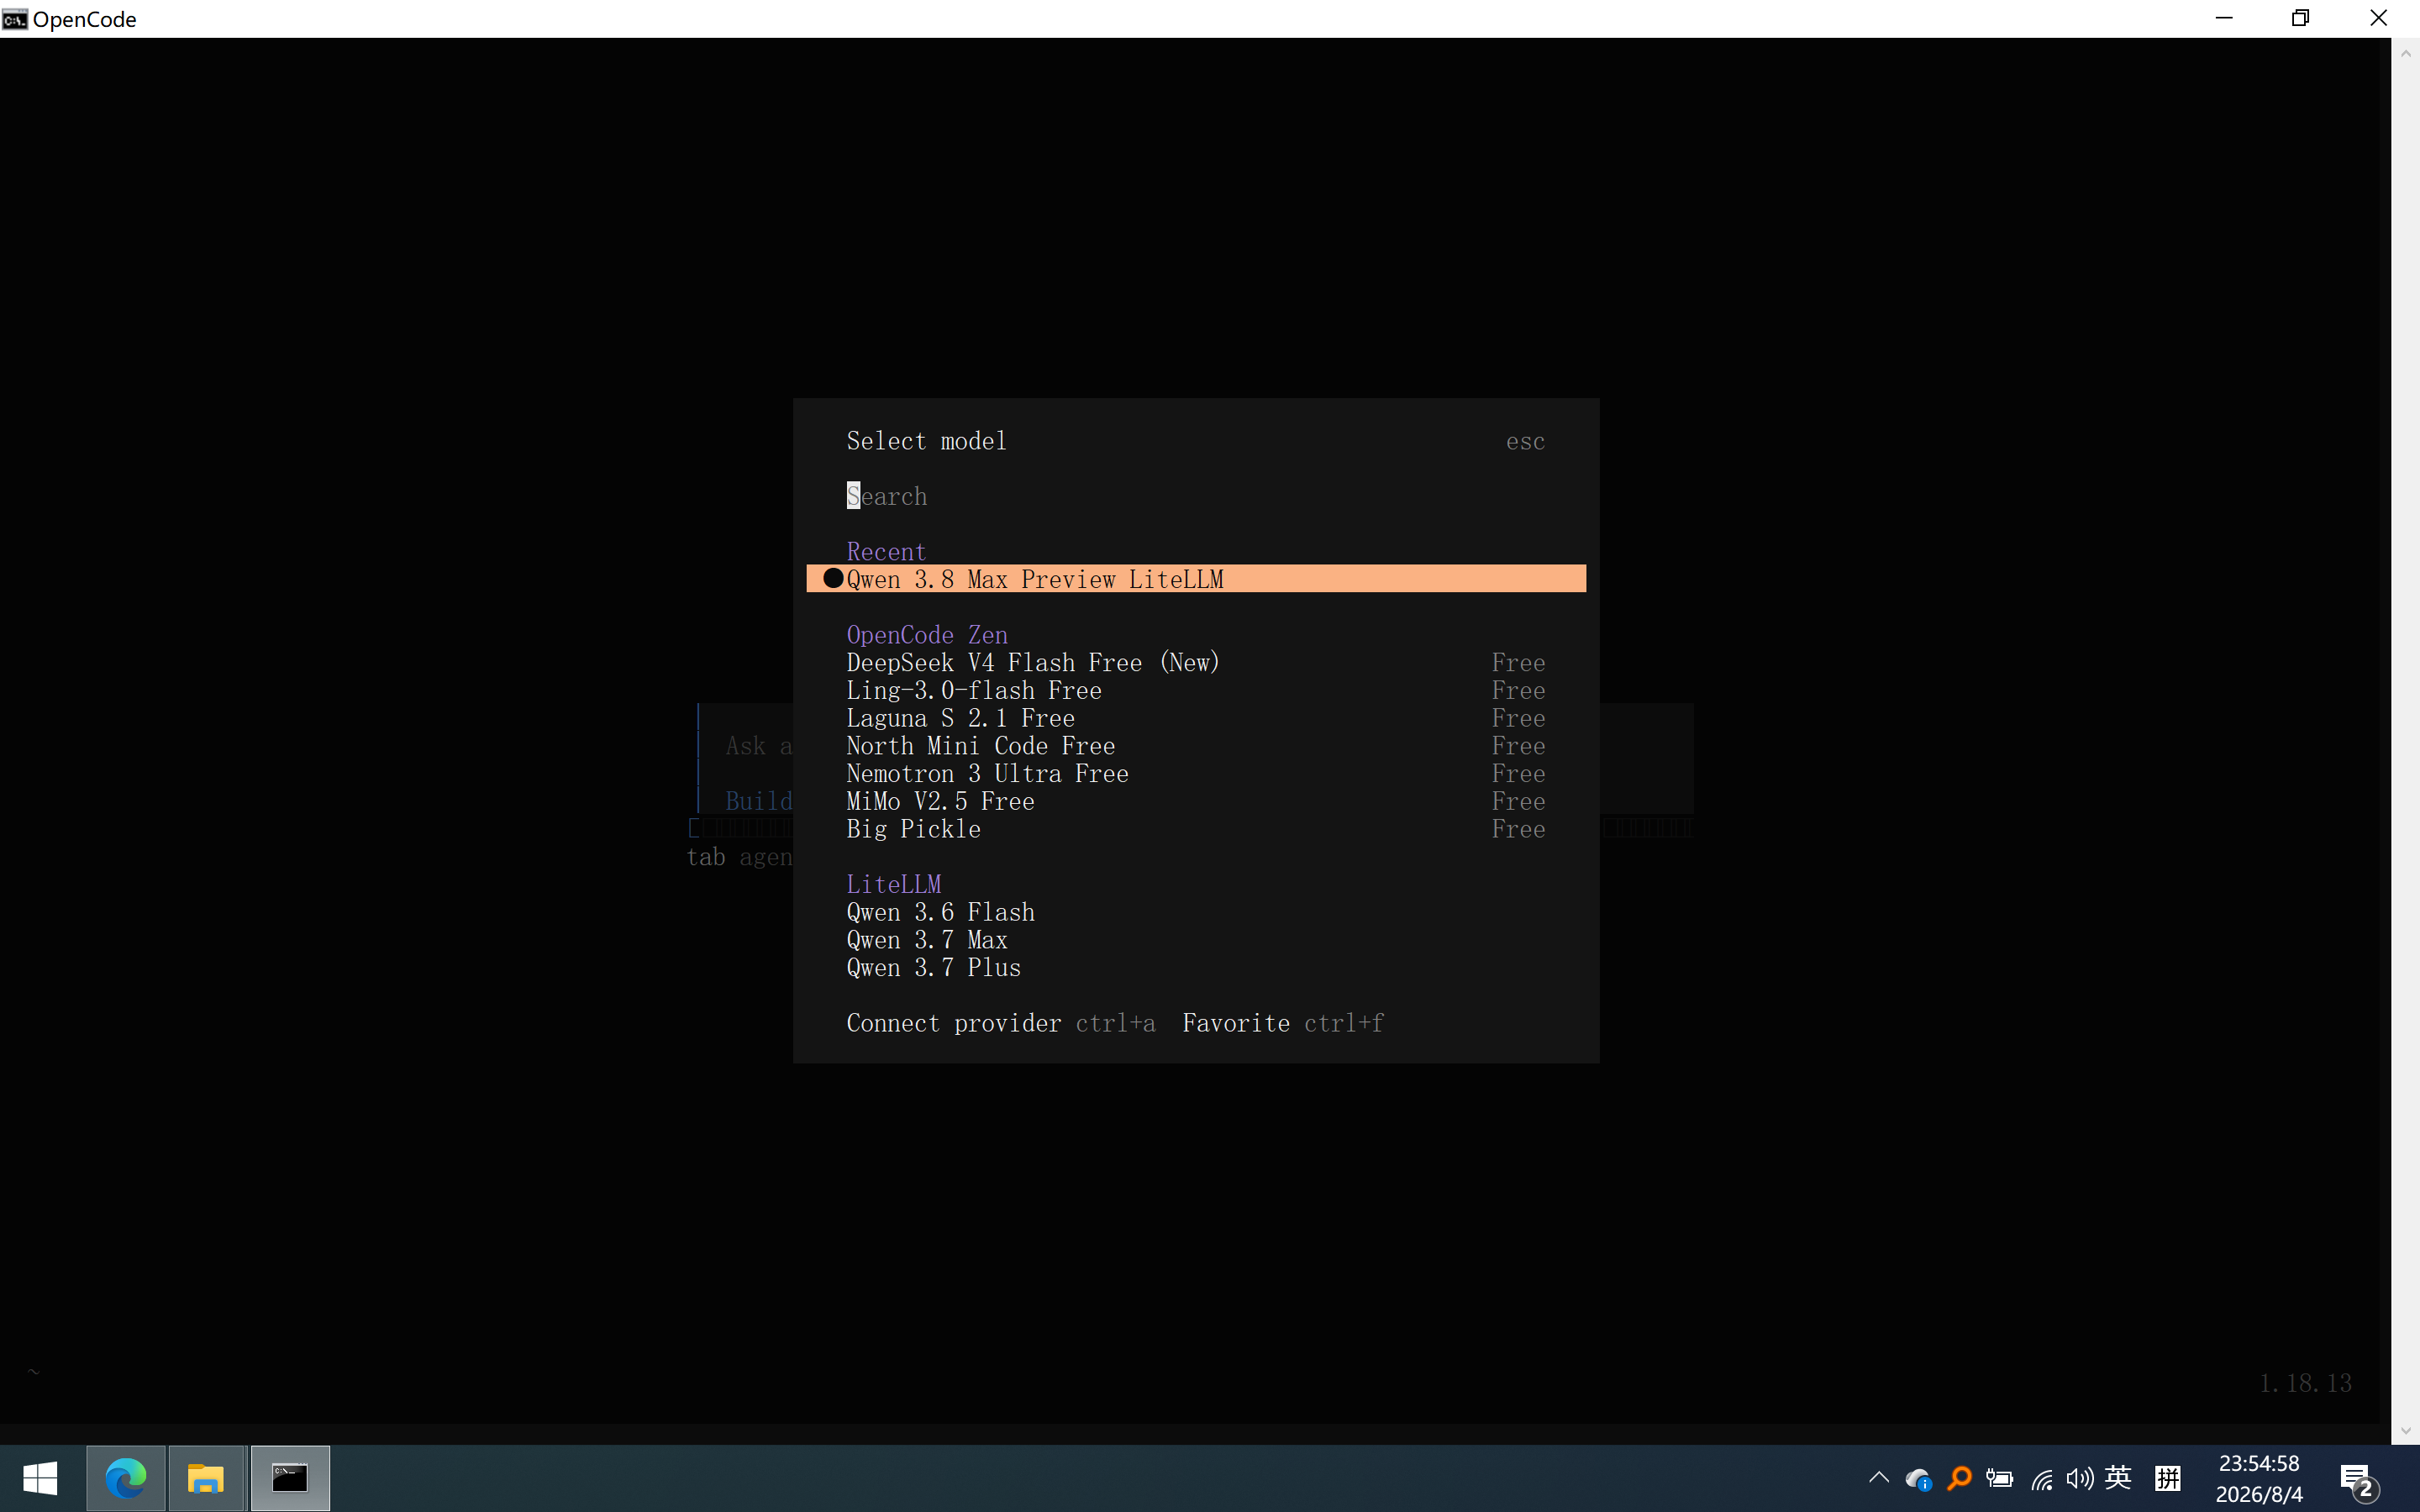
可以自行切换
10. 开始使用
直接在聊天框输入编程任务即可,例如:
- 写一个 Python 快速排序
- 解释这段代码(粘贴代码)
- 优化这个 SQL 查询
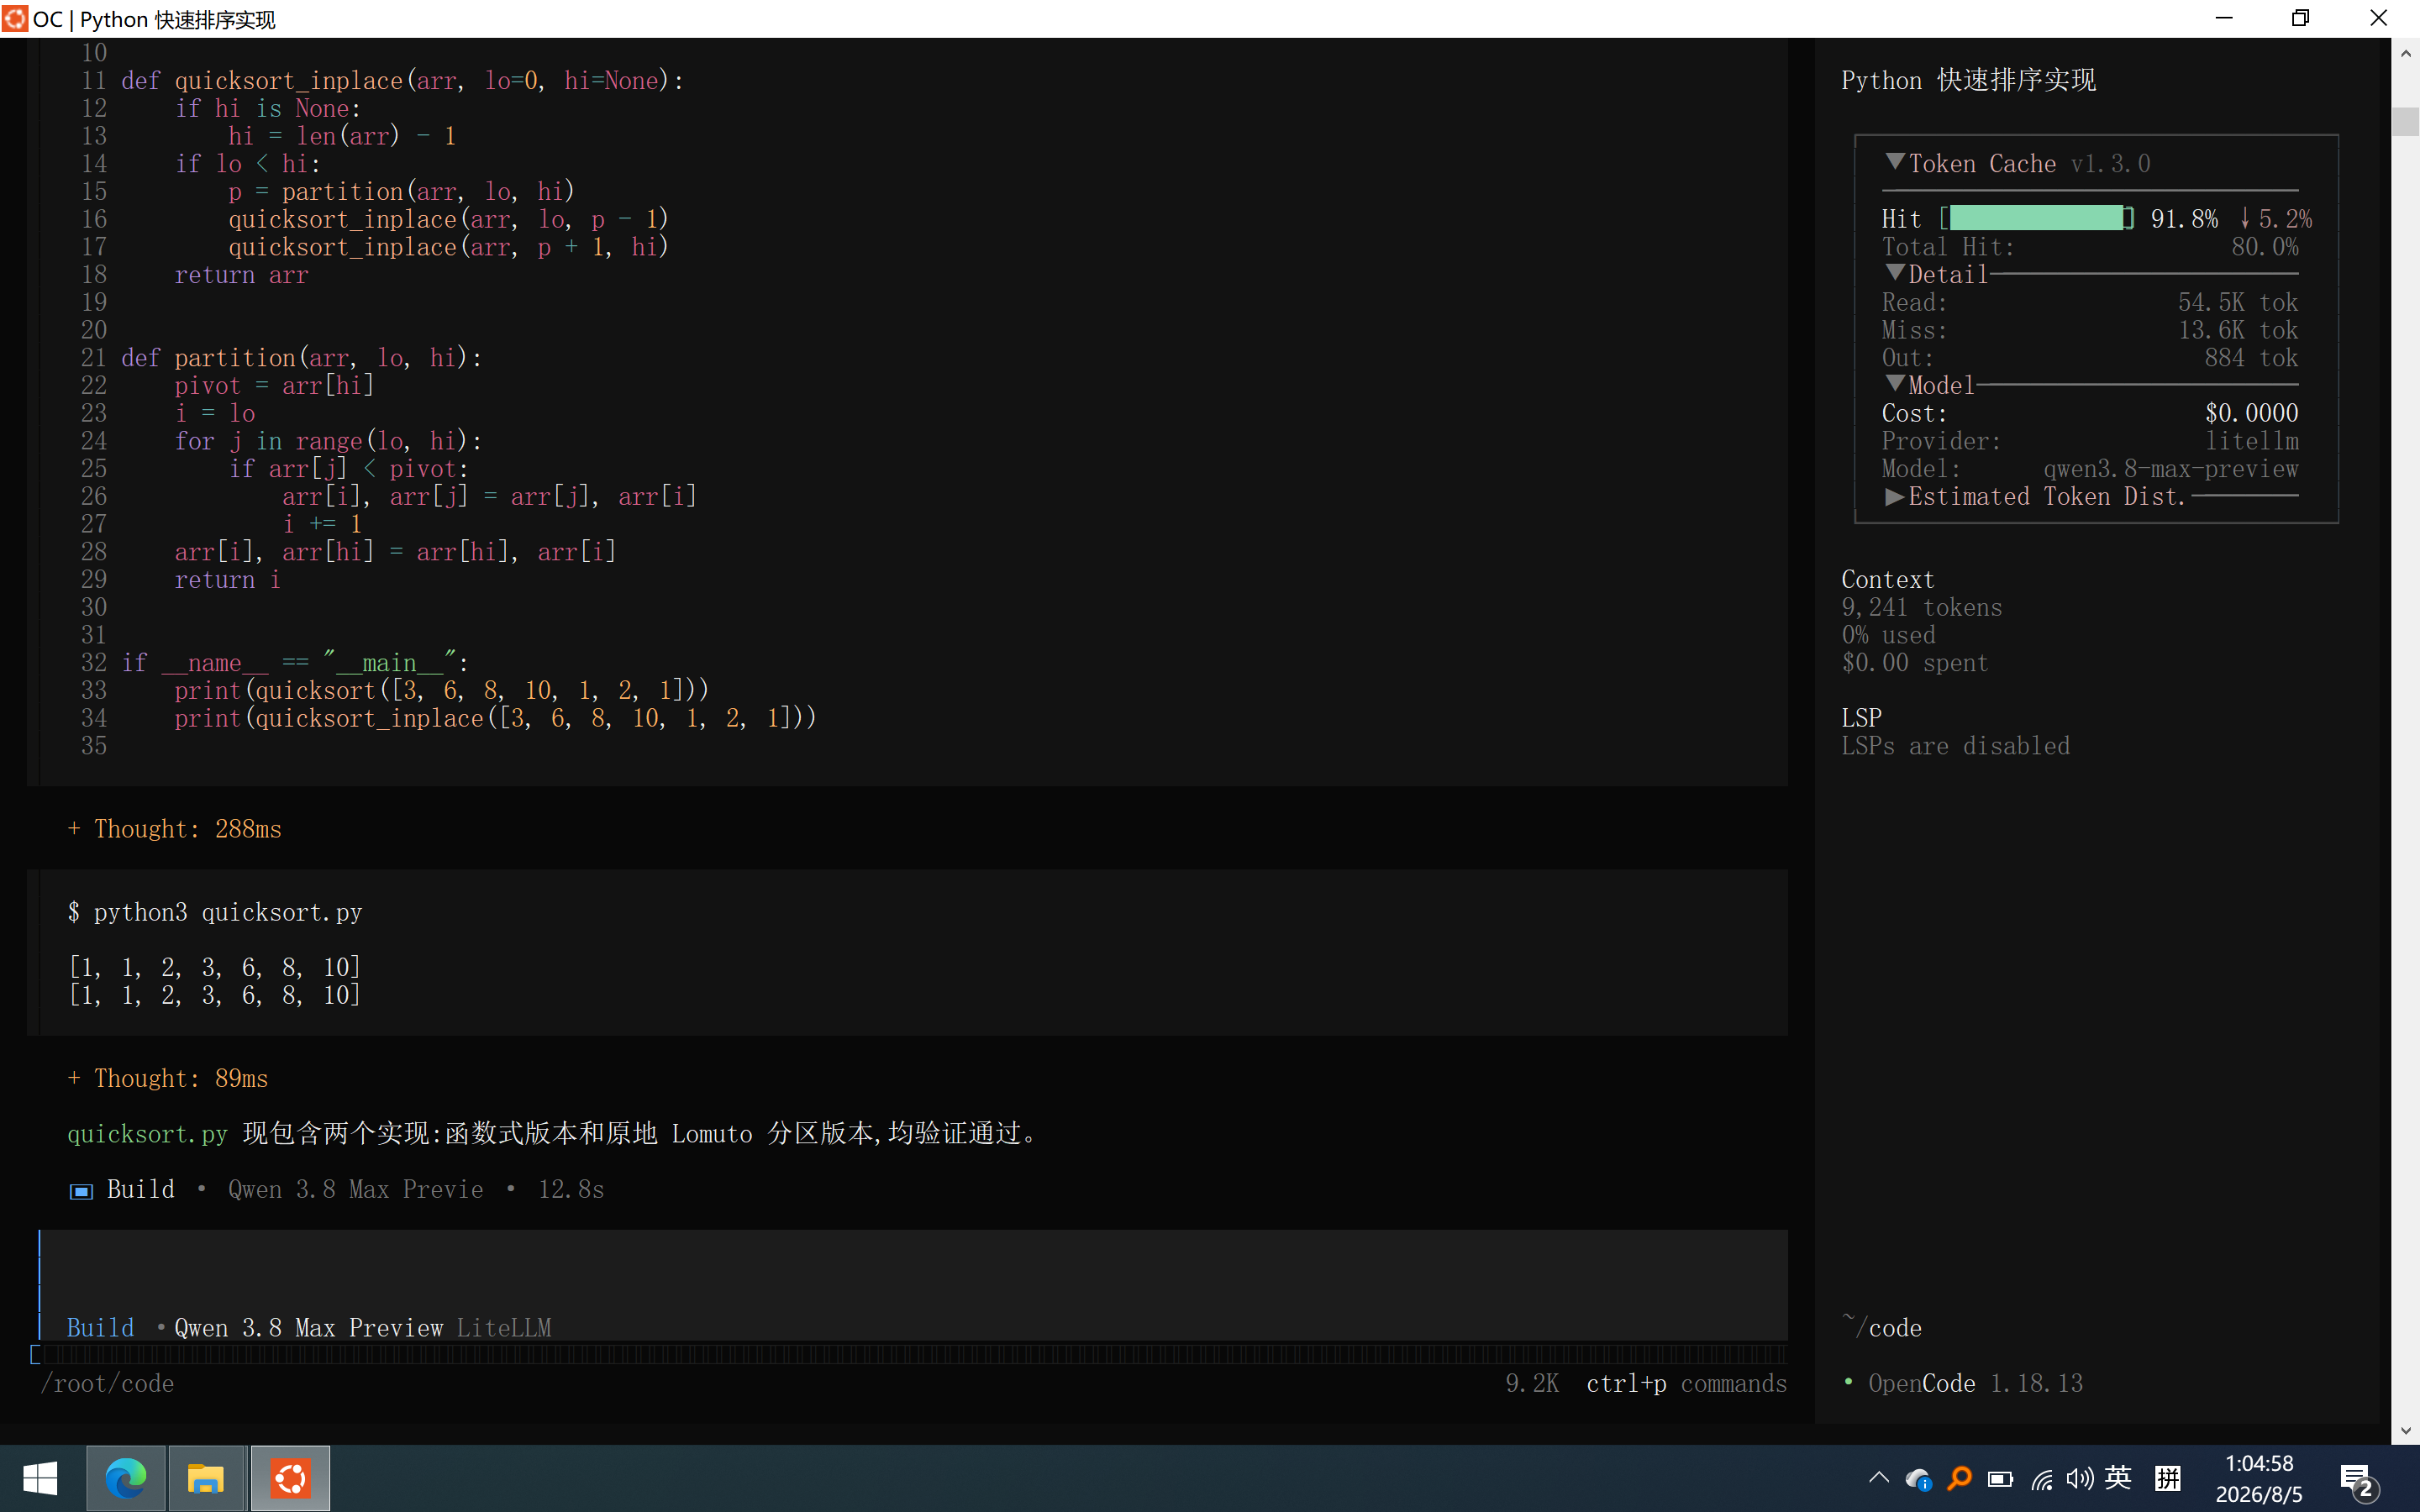
可以看到Cache生效了
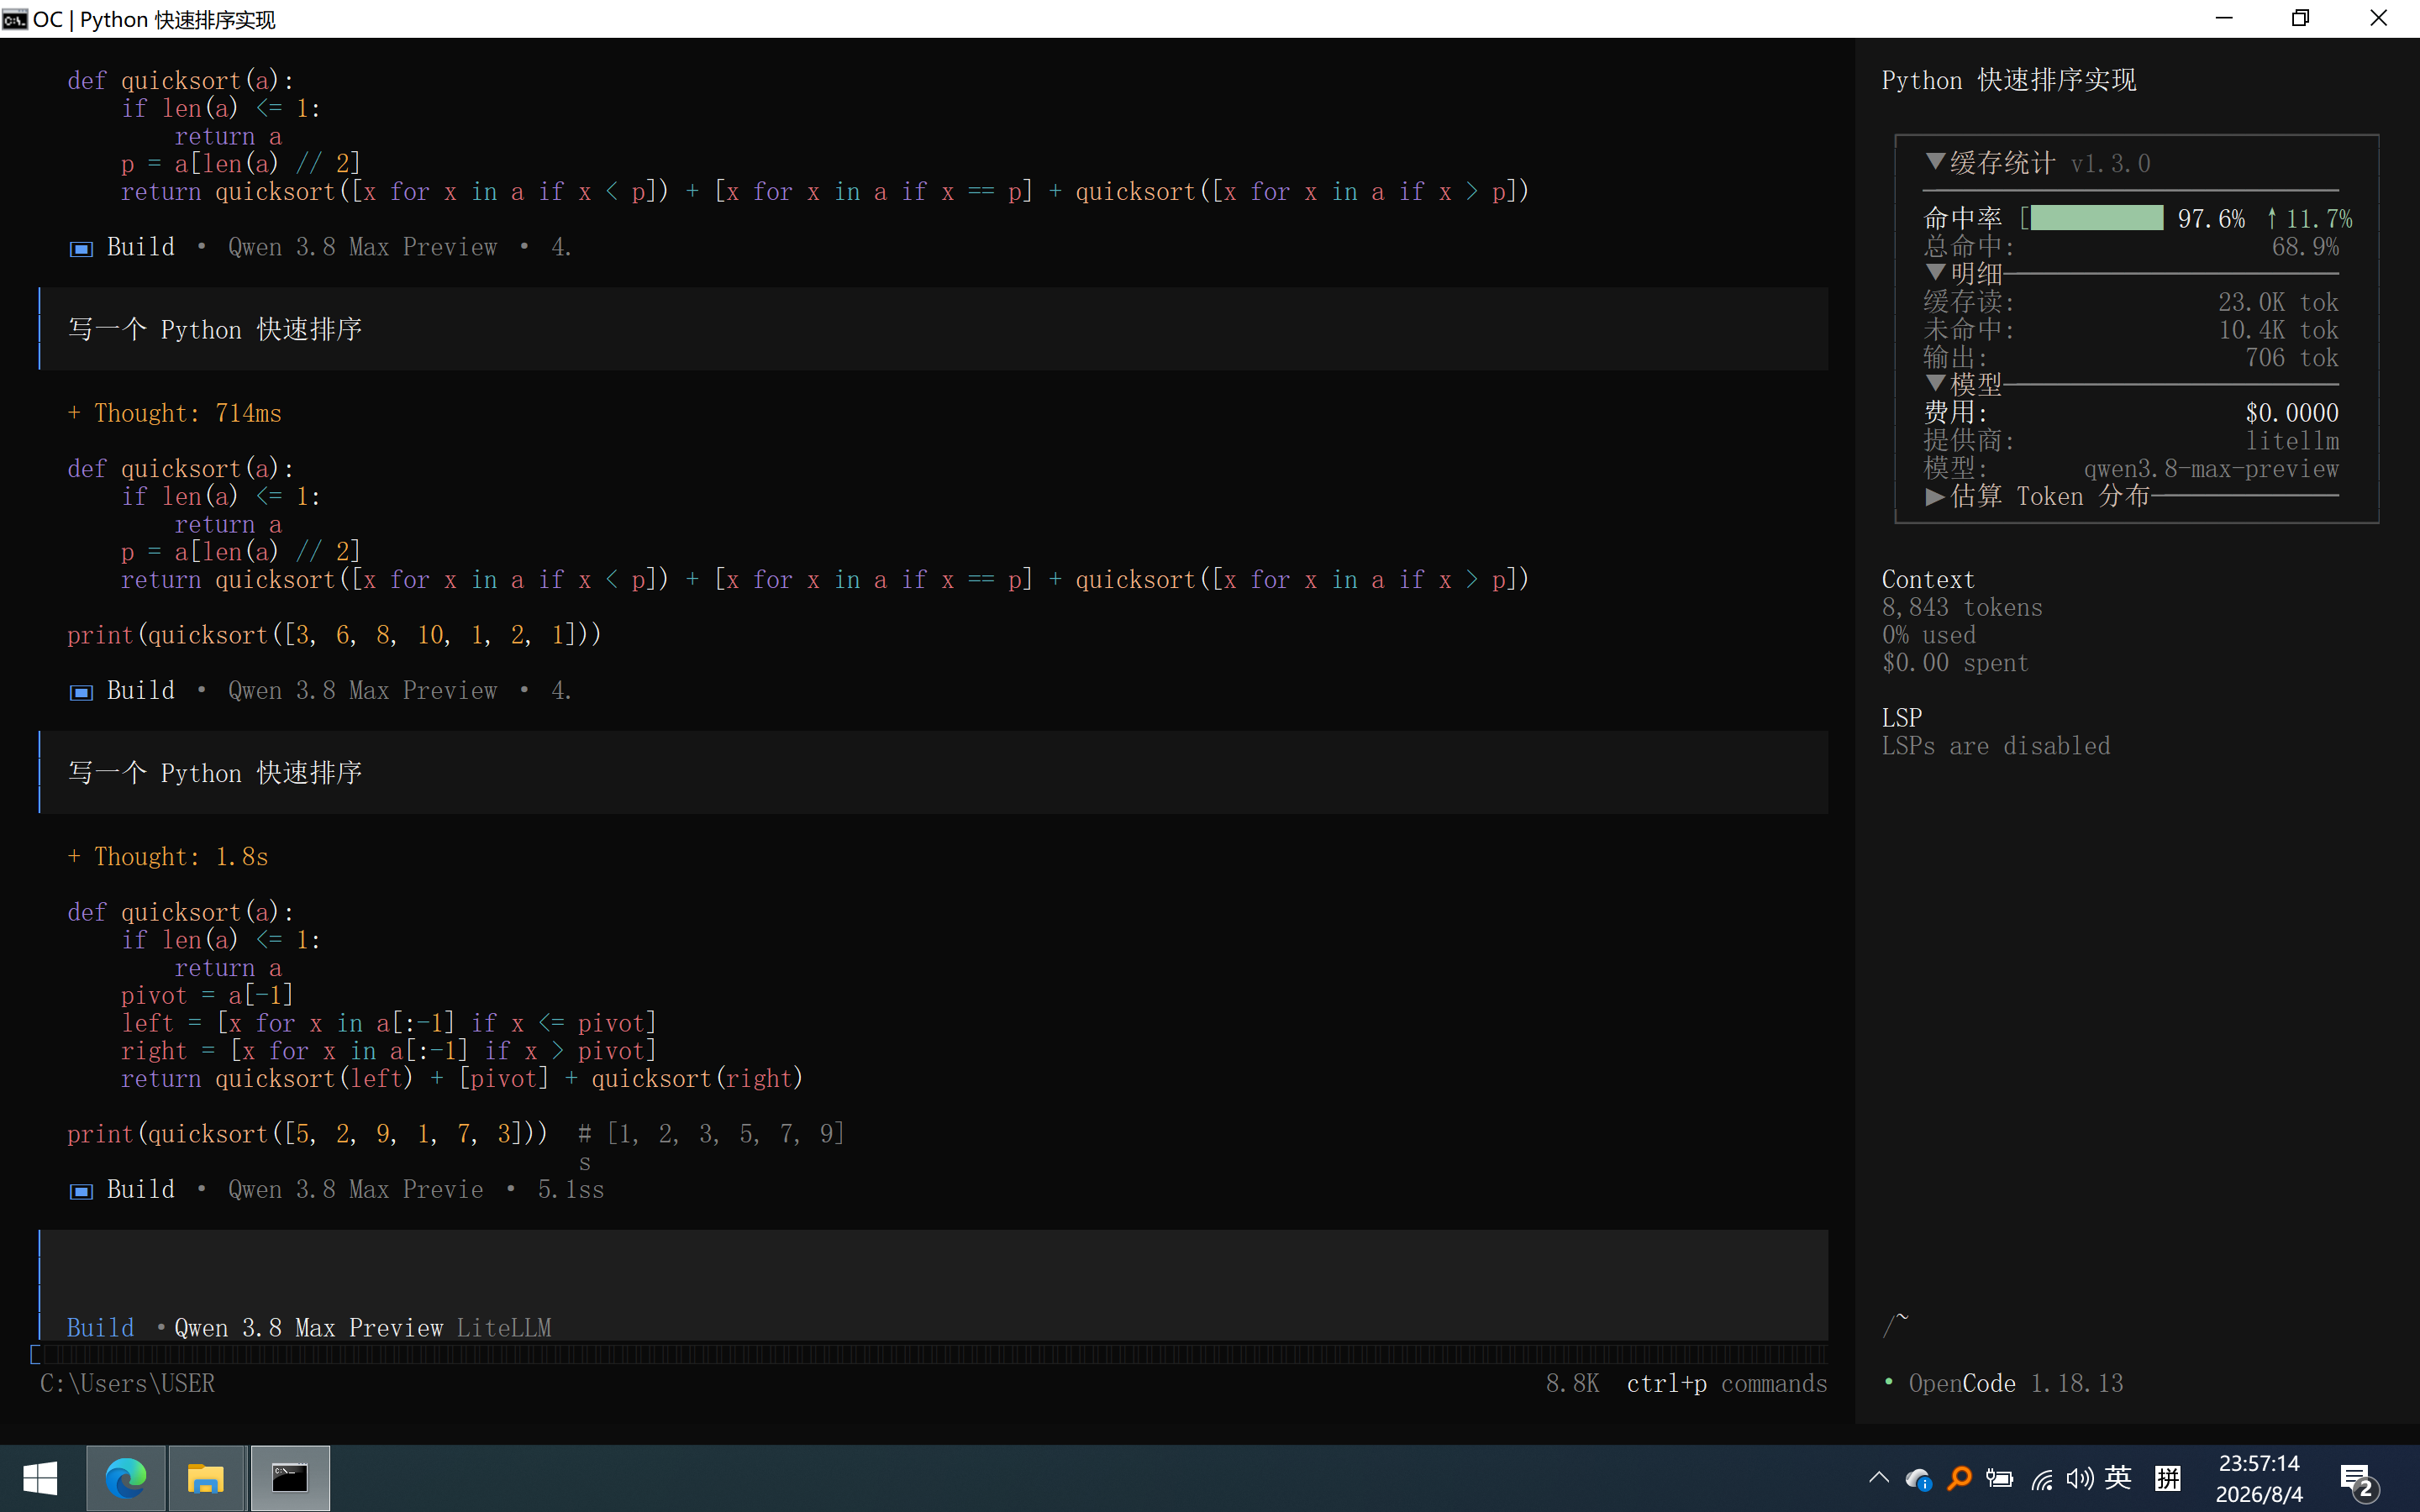
如果要编辑工程,则需要进入工程目录,在CLI敲opencode,即可使用
11. Redis的向量功能
由于原生Redis 8.0才开始,带向量,因此建议在Windows上安装8.0+版本的Redis,或者wsl中运行redis-stack-server,否则litellm_settings需要降级为普通缓存
litellm_settings:
cache: True
cache_params:
type: "redis"
host: "localhost"
port: 6379
ttl: 3600
使用WSL
1. 启用 WSL 功能
先要确保Windows支持WSL2
-
Windows 11:所有版本均完整支持 WSL 2。
-
Windows 10 (x64 系统):版本 1903 或更高,且内部版本号需为 18362.1049 或以上。
-
Windows 10 (ARM64 系统):版本 2004 或更高,内部版本号 19041 或以上。
-
Windows Server:从 Windows Server 2022 开始支持
管理员模式打开PowerShell,执行以下两条命令必须重启
dism.exe /online /enable-feature /featurename:Microsoft-Windows-Subsystem-Linux /all /norestart
dism.exe /online /enable-feature /featurename:VirtualMachinePlatform /all /norestart
重启后查询一下版本是否是WSL2,默认版本:2
wsl --status升级,设置WSL版本为2
wsl --update
wsl --set-default-version 2
如果遇到微软商店异常,wsl --update无法使用或者特别慢,只能手动安装
https://github.com/microsoft/WSL/releases/download/2.7.11/wsl.2.7.11.0.x64.msi
2. 下载镜像
这里用的清华源镜像,Ubuntu 22.04版本
https://mirrors.tuna.tsinghua.edu.cn/ubuntu-releases/22.04/ubuntu-22.04.5-wsl-amd64.wsl
3. 建立安装文件夹,安装镜像
这里安装文件夹设置为C:\WSL\Ubuntu2204,wsl文件地址换成自己的相应地址,注意这种方式安装的Linux都是root权限
New-Item -ItemType Directory -Path C:\WSL\Ubuntu2204 -Force
wsl --import Ubuntu-22.04 "C:\WSL\Ubuntu2204" "C:\Users\USER\Downloads\ubuntu-22.04.5-wsl-amd64.wsl" --version 2
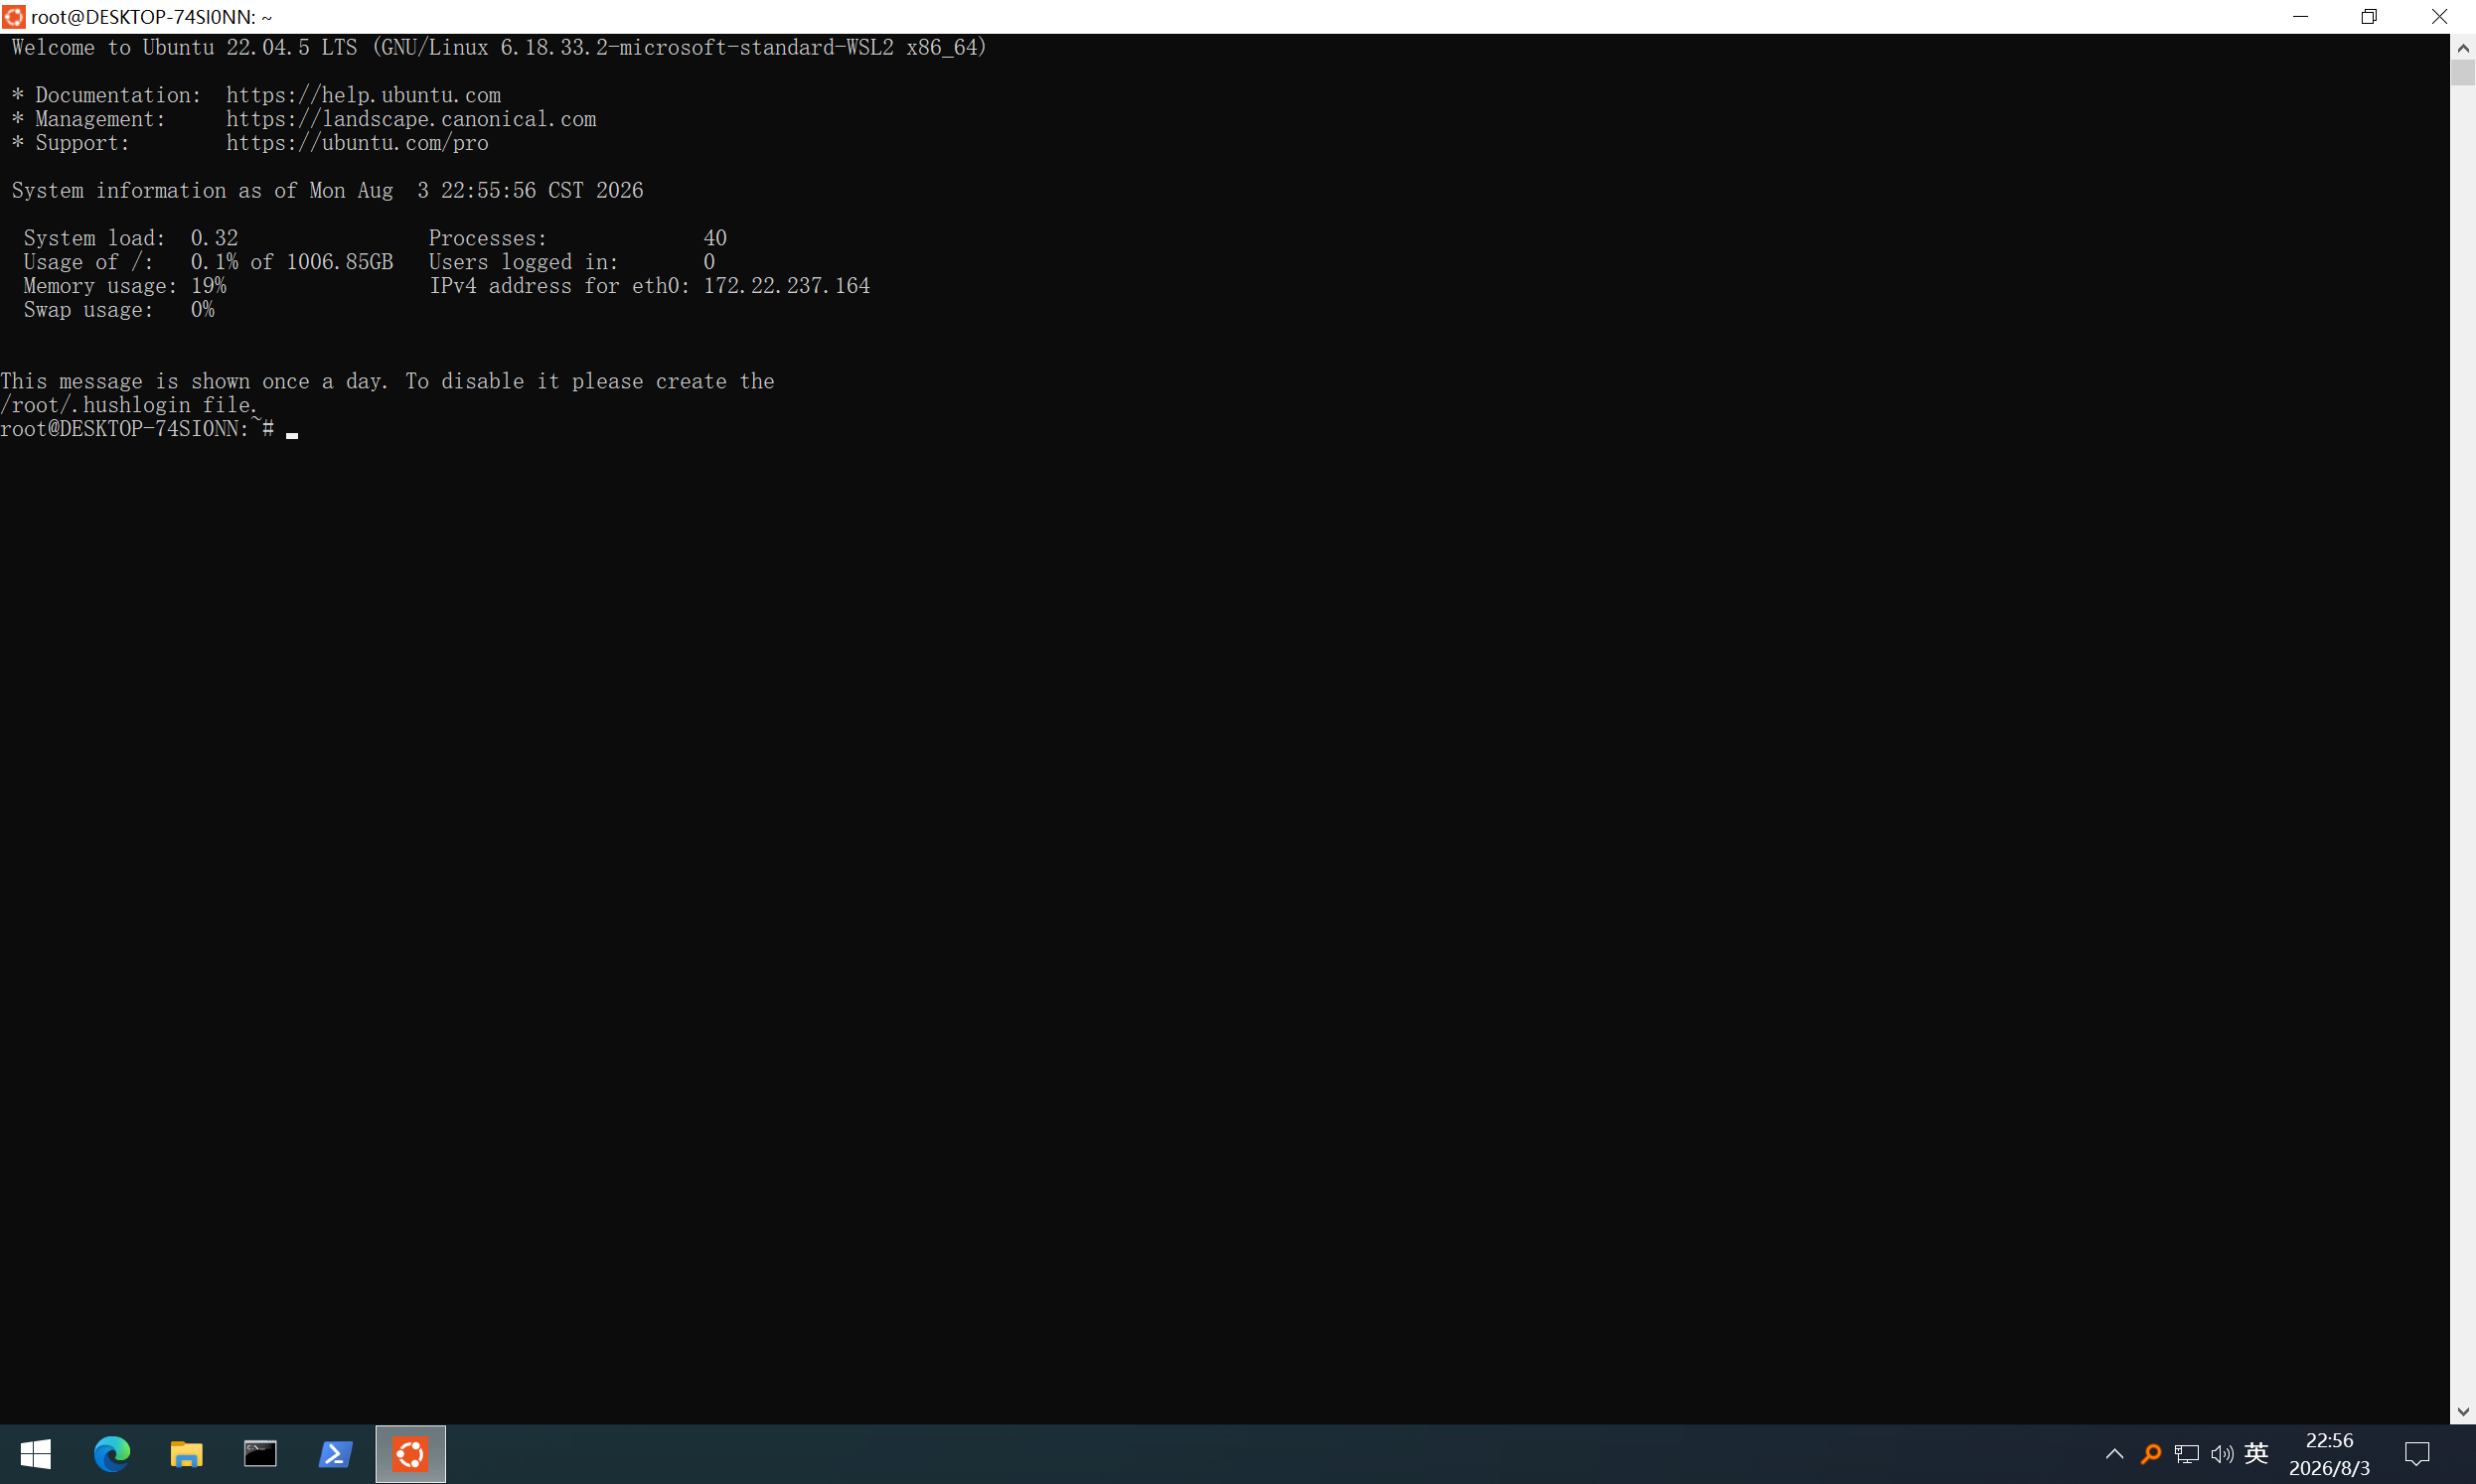
开始菜单打开Ubuntu-22.04
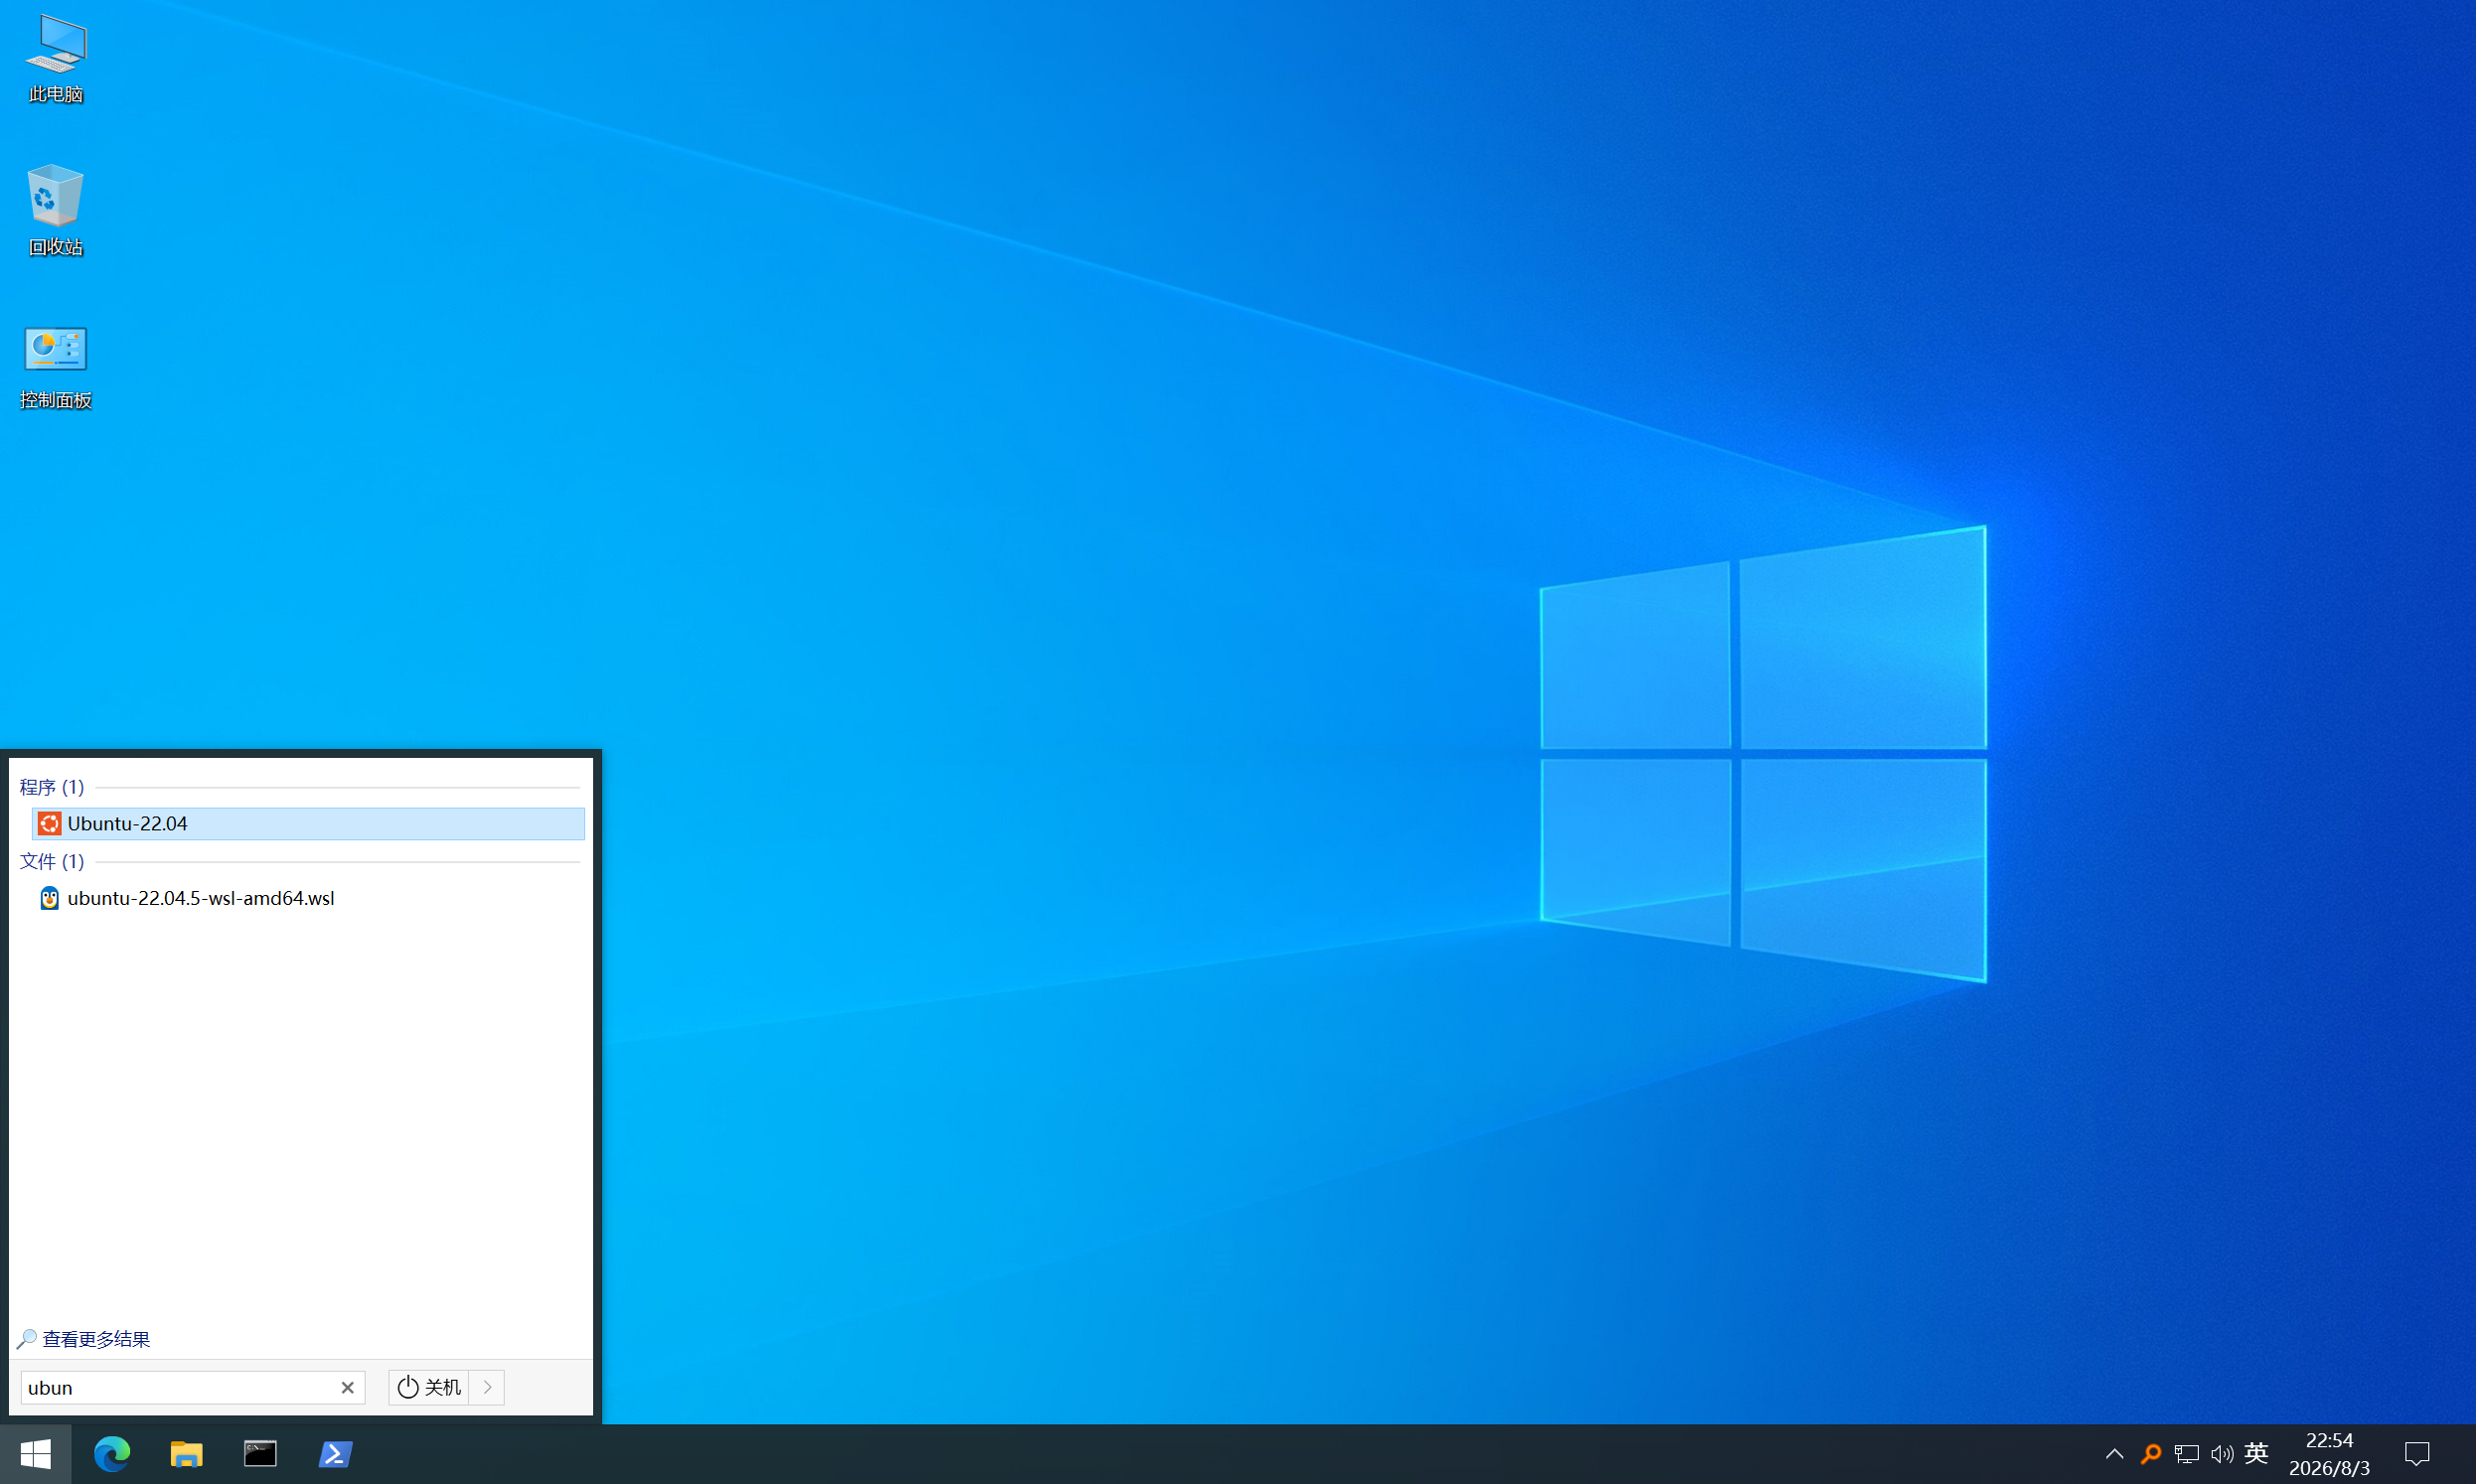
4. 换源,更新,安装基础软件
cp /etc/apt/sources.list /etc/apt/sources.list.bak
sed -i 's|http://archive.ubuntu.com|http://mirrors.aliyun.com|g' /etc/apt/sources.list
sed -i 's|http://security.ubuntu.com|http://mirrors.aliyun.com|g' /etc/apt/sources.list
apt update
apt upgrade -y
apt install -y curl wget gnupg lsb-release ca-certificates software-properties-common
5. 安装LiteLLM
apt install python3-pip -y
pip3 config set global.index-url https://pypi.tuna.tsinghua.edu.cn/simple
pip3 config set install.trusted-host pypi.tuna.tsinghua.edu.cn
python3 -m pip install --no-cache-dir "litellm[proxy]==1.94.0" "fastapi==0.137.0" redisvl
6. 安装Redis,启动向量功能
添加 Redis 官方 GPG 密钥
curl -fsSL https://packages.redis.io/gpg | sudo gpg --dearmor -o /usr/share/keyrings/redis-archive-keyring.gpg添加 Redis 仓库到 apt 源
echo "deb [signed-by=/usr/share/keyrings/redis-archive-keyring.gpg] https://packages.redis.io/deb $(lsb_release -cs) main" | sudo tee /etc/apt/sources.list.d/redis.list更新包列表并安装 redis-stack-server
apt-get update
apt-get install redis-stack-server -y
修改配置
vim /opt/redis-stack/etc/redis-stack.conf增加
bind 0.0.0.0
protected-mode no
后台运行
systemctl enable redis-stack-server
systemctl start redis-stack-server
验证向量支持是否生效
redis-cli MODULE LIST输出中应该能看到类似 "name" 为 "search" 或 "redisearch" 的记录。
7. 配置LiteLLM
我这里用了Qwen的Token Plan,所以api_base和model是Qwen的官方配置,api_key: "sk-xxxxxx",填充你自己的API Key
mkdir -p /root/litellm
cat > /root/litellm/config.yaml << 'EOF'
model_list:
  - model_name: qwen3.8-max-preview
    litellm_params:
      model: dashscope/qwen3.8-max-preview
      api_key: "sk-xxxxxx"
      api_base: https://token-plan.cn-beijing.maas.aliyuncs.com/compatible-mode/v1
      rpm: 30
      tpm: 15000
      headers:
        X-DashScope-Wait-Timeout: "60"

  - model_name: qwen3.7-max
    litellm_params:
      model: dashscope/qwen3.7-max
      api_key: "sk-xxxxxx"
      api_base: https://token-plan.cn-beijing.maas.aliyuncs.com/compatible-mode/v1
      rpm: 30
      tpm: 15000
      headers:
        X-DashScope-Wait-Timeout: "60"

  - model_name: qwen3.7-plus
    litellm_params:
      model: dashscope/qwen3.7-plus
      api_key: "sk-xxxxxx"
      api_base: https://token-plan.cn-beijing.maas.aliyuncs.com/compatible-mode/v1
      rpm: 30
      tpm: 15000
      headers:
        X-DashScope-Wait-Timeout: "60"

  - model_name: qwen3.6-flash
    litellm_params:
      model: dashscope/qwen3.6-flash
      api_key: "sk-xxxxxx"
      api_base: https://token-plan.cn-beijing.maas.aliyuncs.com/compatible-mode/v1
      rpm: 60
      tpm: 30000
      headers:
        X-DashScope-Wait-Timeout: "60"

litellm_settings:
  cache: True
  drop_params: true
  cache_params:
    caches:
      - type: "in_memory"
        namespace: "litellm_in_memory"
        max_size: 1000
        ttl: 300
      - type: "redis"
        namespace: "litellm_redis_exact"
        host: "localhost"
        port: 6379
        ttl: 3600
      - type: "redis-semantic"
        namespace: "litellm_redis_semantic"
        similarity_threshold: 0.92
        redis_semantic_cache_embedding_model: "text-embedding-3-small"
        embedding_dimensions: 1536
        host: "localhost"
        port: 6379
        ttl: 3600
        timeout: 5
        retry_on_timeout: true

router_settings:
  routing_strategy: simple-shuffle
  num_retries: 3
  timeout: 60
  cooldown_time: 10
  allowed_fails: 5

general_settings:
  log_level: "INFO"
  disable_auth: true
EOF
8. 启动LiteLLM
export REDIS_PASSWORD=""
export LITELLM_LOCAL_MODEL_COST_MAP=True
litellm --config /root/litellm/config.yaml --port 4000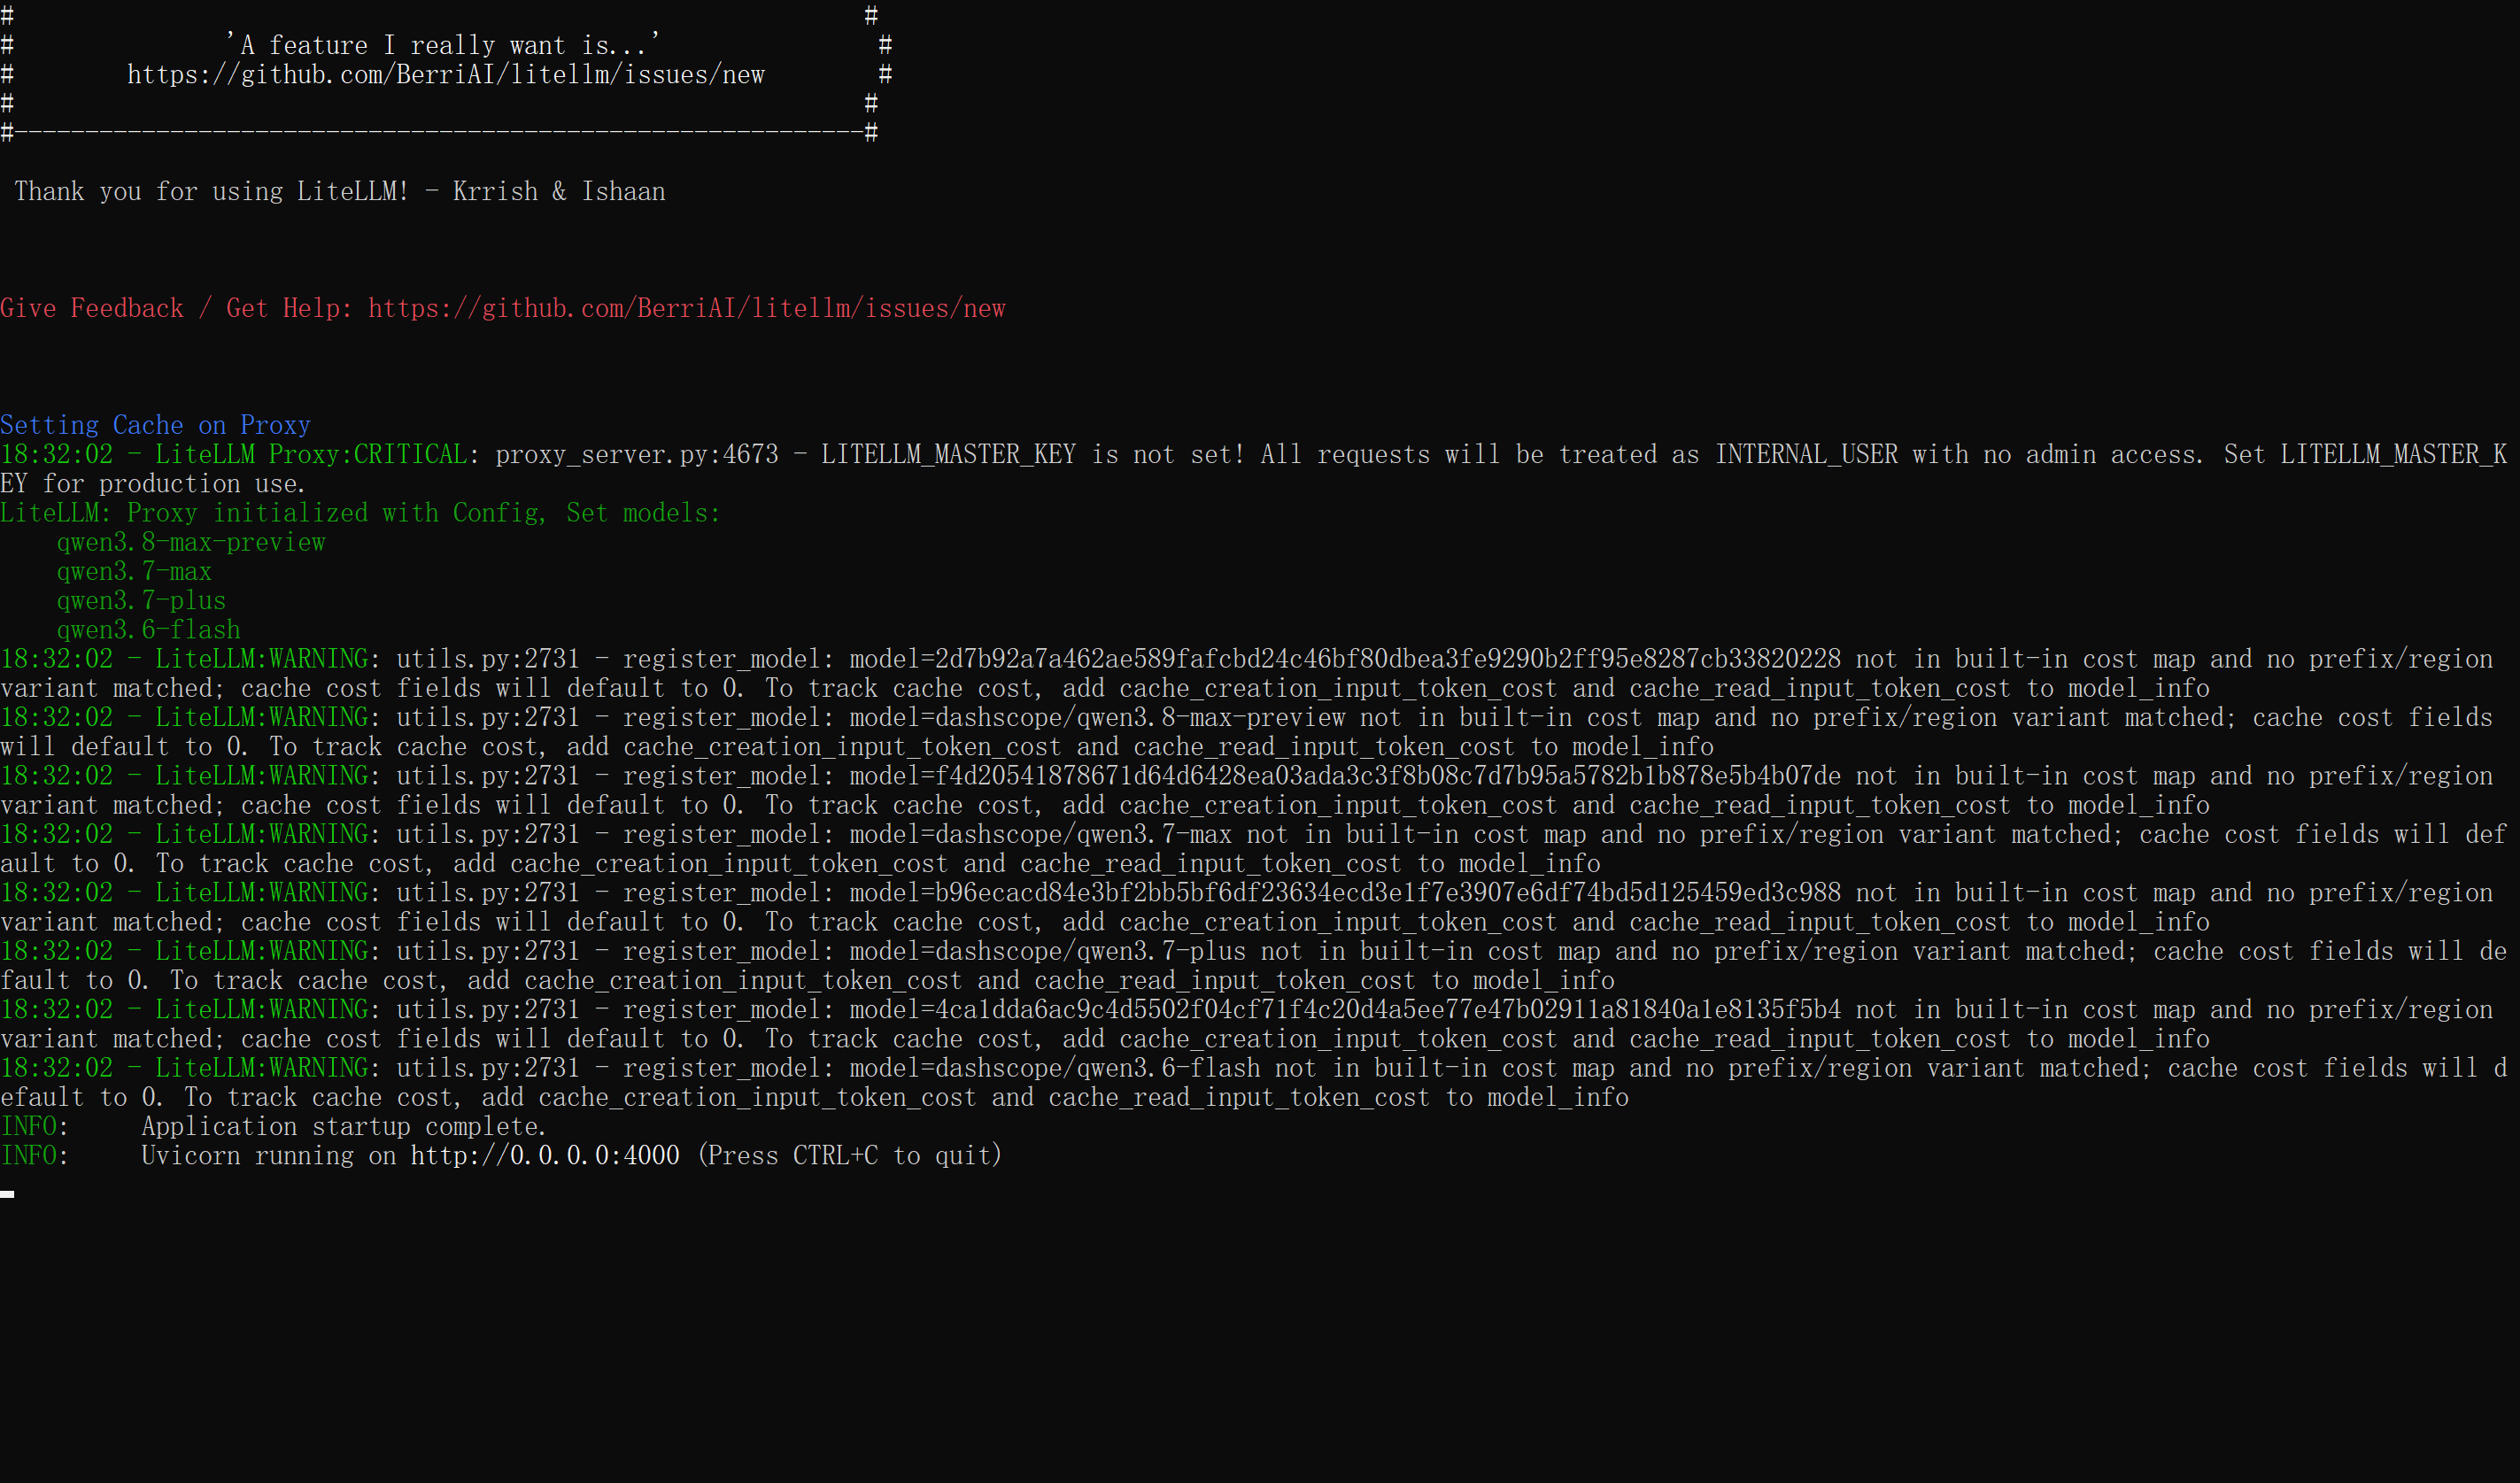
9. 测试LiteLLM
curl http://localhost:4000/v1/modelscurl -X POST http://localhost:4000/v1/chat/completions \
-H "Content-Type: application/json" \
-d '{
"model": "qwen3.8-max-preview",
"messages": [{"role": "user", "content": "你好"}]
}'10. 使用systemd服务长期并开机运行LiteLLM
vim /etc/systemd/system/litellm.service内容:
[Unit]
Description=LiteLLM Proxy
After=network.target redis-server.service

[Service]
Type=simple
User=root
Environment="REDIS_PASSWORD="
Environment="LITELLM_LOCAL_MODEL_COST_MAP=True"
ExecStart=/usr/local/bin/litellm --config /root/litellm/config.yaml --port 4000
Restart=always
RestartSec=10

[Install]
WantedBy=multi-user.target
启用并启动:
systemctl daemon-reload
systemctl enable litellm
systemctl start litellm
查看状态和日志:
systemctl status litellm
journalctl -u litellm -f
11. 安装OpenCode+缓存插件
方法1
curl -fsSL https://opencode.ai/install | bash
echo 'export PATH="/root/.opencode/bin:$PATH"' >> /root/.bashrc
source /root/.bashrc
方法2
首先安装node 22+
补一个文件
创建~/.nvm文件夹
mkdir ~/.nvm下载后上传里面的nvm.sh文件和bash_completion,到~/.nvm文件夹下
复制命令如下
# 将Windows下载目录的myfile.zip复制到WSL的用户主目录(~)
cp /mnt/c/Users/你的Windows用户名/Downloads/myfile.zip ~/
故
cp /mnt/c/Users/USER/Downloads/nvm.sh ~/.nvm/nvm.sh
cp /mnt/c/Users/USER/Downloads/bash_completion ~/.nvm/bash_completion
执行
vim ~/.bash_profile插入
export NVM_DIR="$HOME/.nvm"
[ -s "$NVM_DIR/nvm.sh" ] && . "$NVM_DIR/nvm.sh"
[ -s "$NVM_DIR/bash_completion" ] && . "$NVM_DIR/bash_completion"
执行
source ~/.bash_profile安装nodejs22
nvm install 22;tar.gz放在如下目录,可以自行下载放置
~/.nvm/.cache/bin/node-v22.23.2-linux-x64/node-v22.23.2-linux-x64.tar.xz查看安装情况
node -v;
npm -v;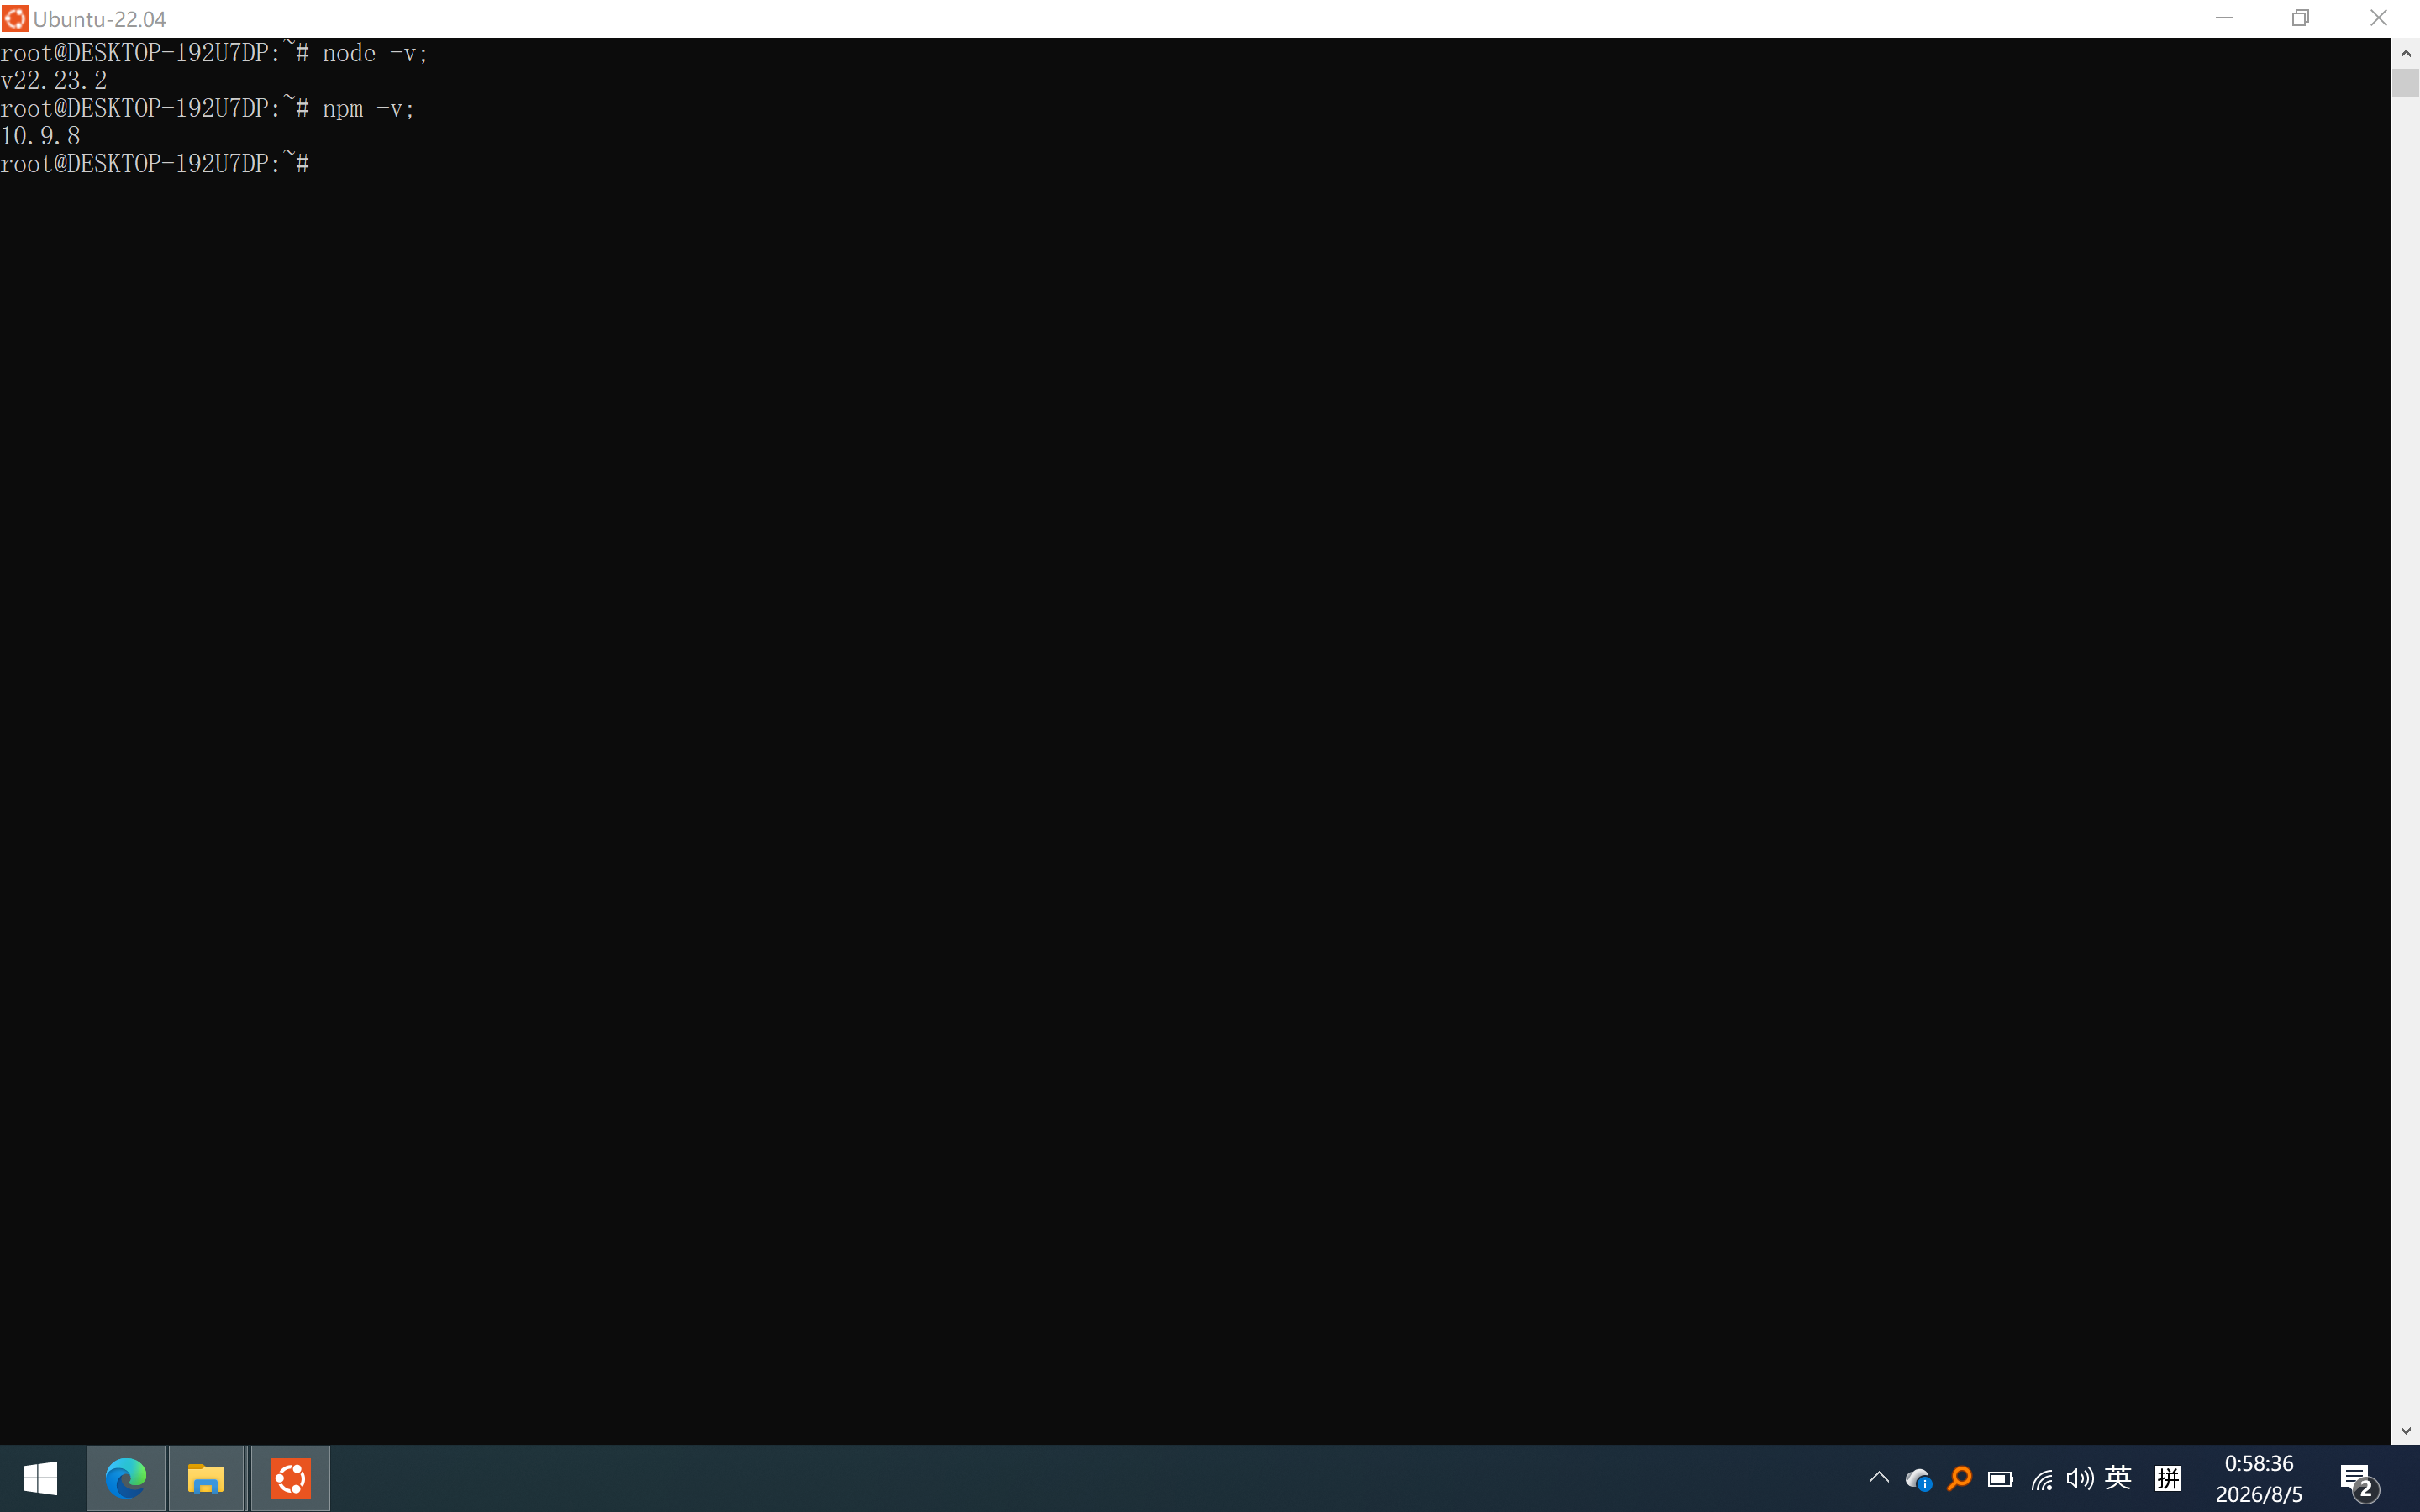
配置npm源,阿里云的镜像站域名已经发生变化
# npm淘宝源
npm config set registry https://registry.npmmirror.com;
安装
npm install -g opencode-ai检查
opencode --version安装插件
opencode plugin opencode-cache-injector
opencode plugin opencode-visual-cache
12. 配置OpenCode
mkdir -p /root/code
cat > /root/code/opencode.json << 'EOF'
{
  "$schema": "https://opencode.ai/config.json",
  "provider": {
    "litellm": {
      "npm": "@ai-sdk/openai-compatible",
      "name": "LiteLLM",
      "options": {
        "baseURL": "http://localhost:4000/v1",
        "litellmProxy": true
      },
      "models": {
        "qwen3.8-max-preview": {
          "name": "Qwen 3.8 Max Preview"
        },
        "qwen3.7-max": {
          "name": "Qwen 3.7 Max"
        },
        "qwen3.7-plus": {
          "name": "Qwen 3.7 Plus",
          "limit": {
            "context": 131072,
            "output": 8192
          }
        },
        "qwen3.6-flash": {
          "name": "Qwen 3.6 Flash",
          "limit": {
            "context": 131072,
            "output": 8192
          }
        }
      },
      "defaultModel": "qwen3.6-flash"
    }
  },
  "compaction": {
    "auto": true,
    "prune": true
  },
  "plugin": [
    "opencode-cache-injector",
    "opencode-cache-hit"
  ]
}
EOF
13. 设置oc快捷别名
echo 'alias oc="cd /root/code && OPENCODE_EXPERIMENTAL_CACHE_AUDIT=1 opencode"' >> /root/.bashrc
source /root/.bashrc
14. OpenCode连接LiteLLM
设置缓存审计
export OPENCODE_EXPERIMENTAL_CACHE_AUDIT=1oc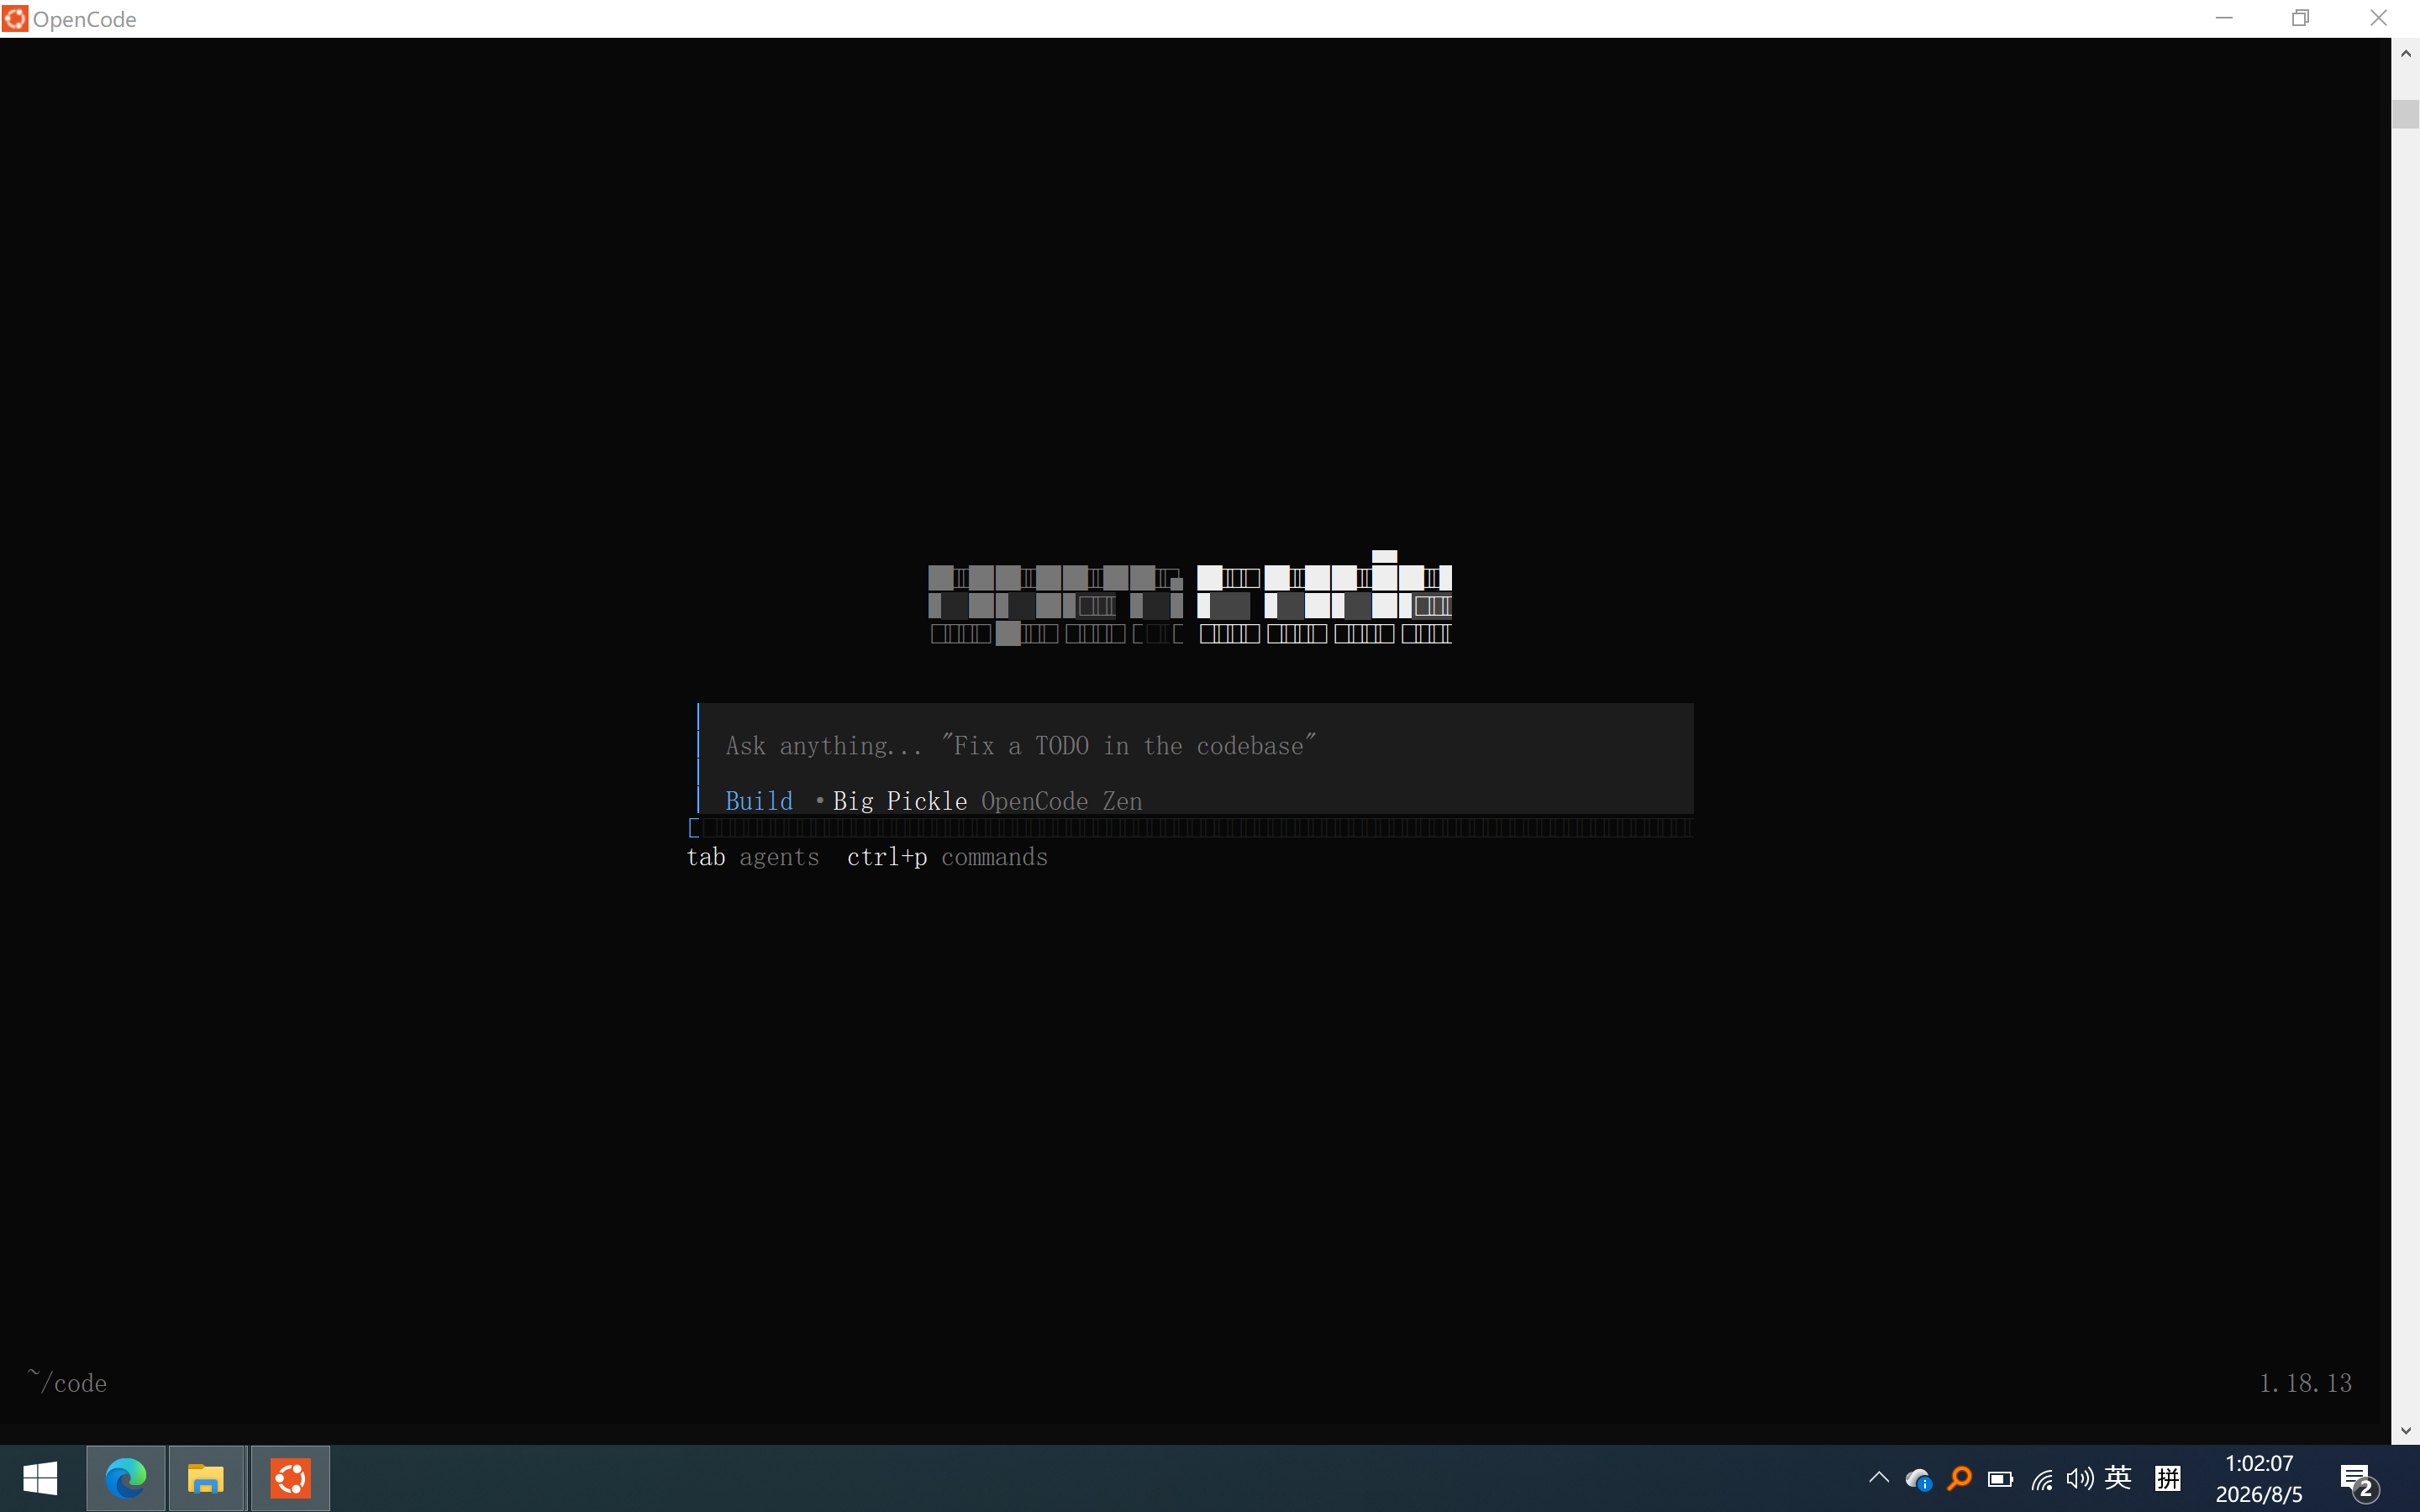
在 OpenCode 聊天界面中执行连接
/connect
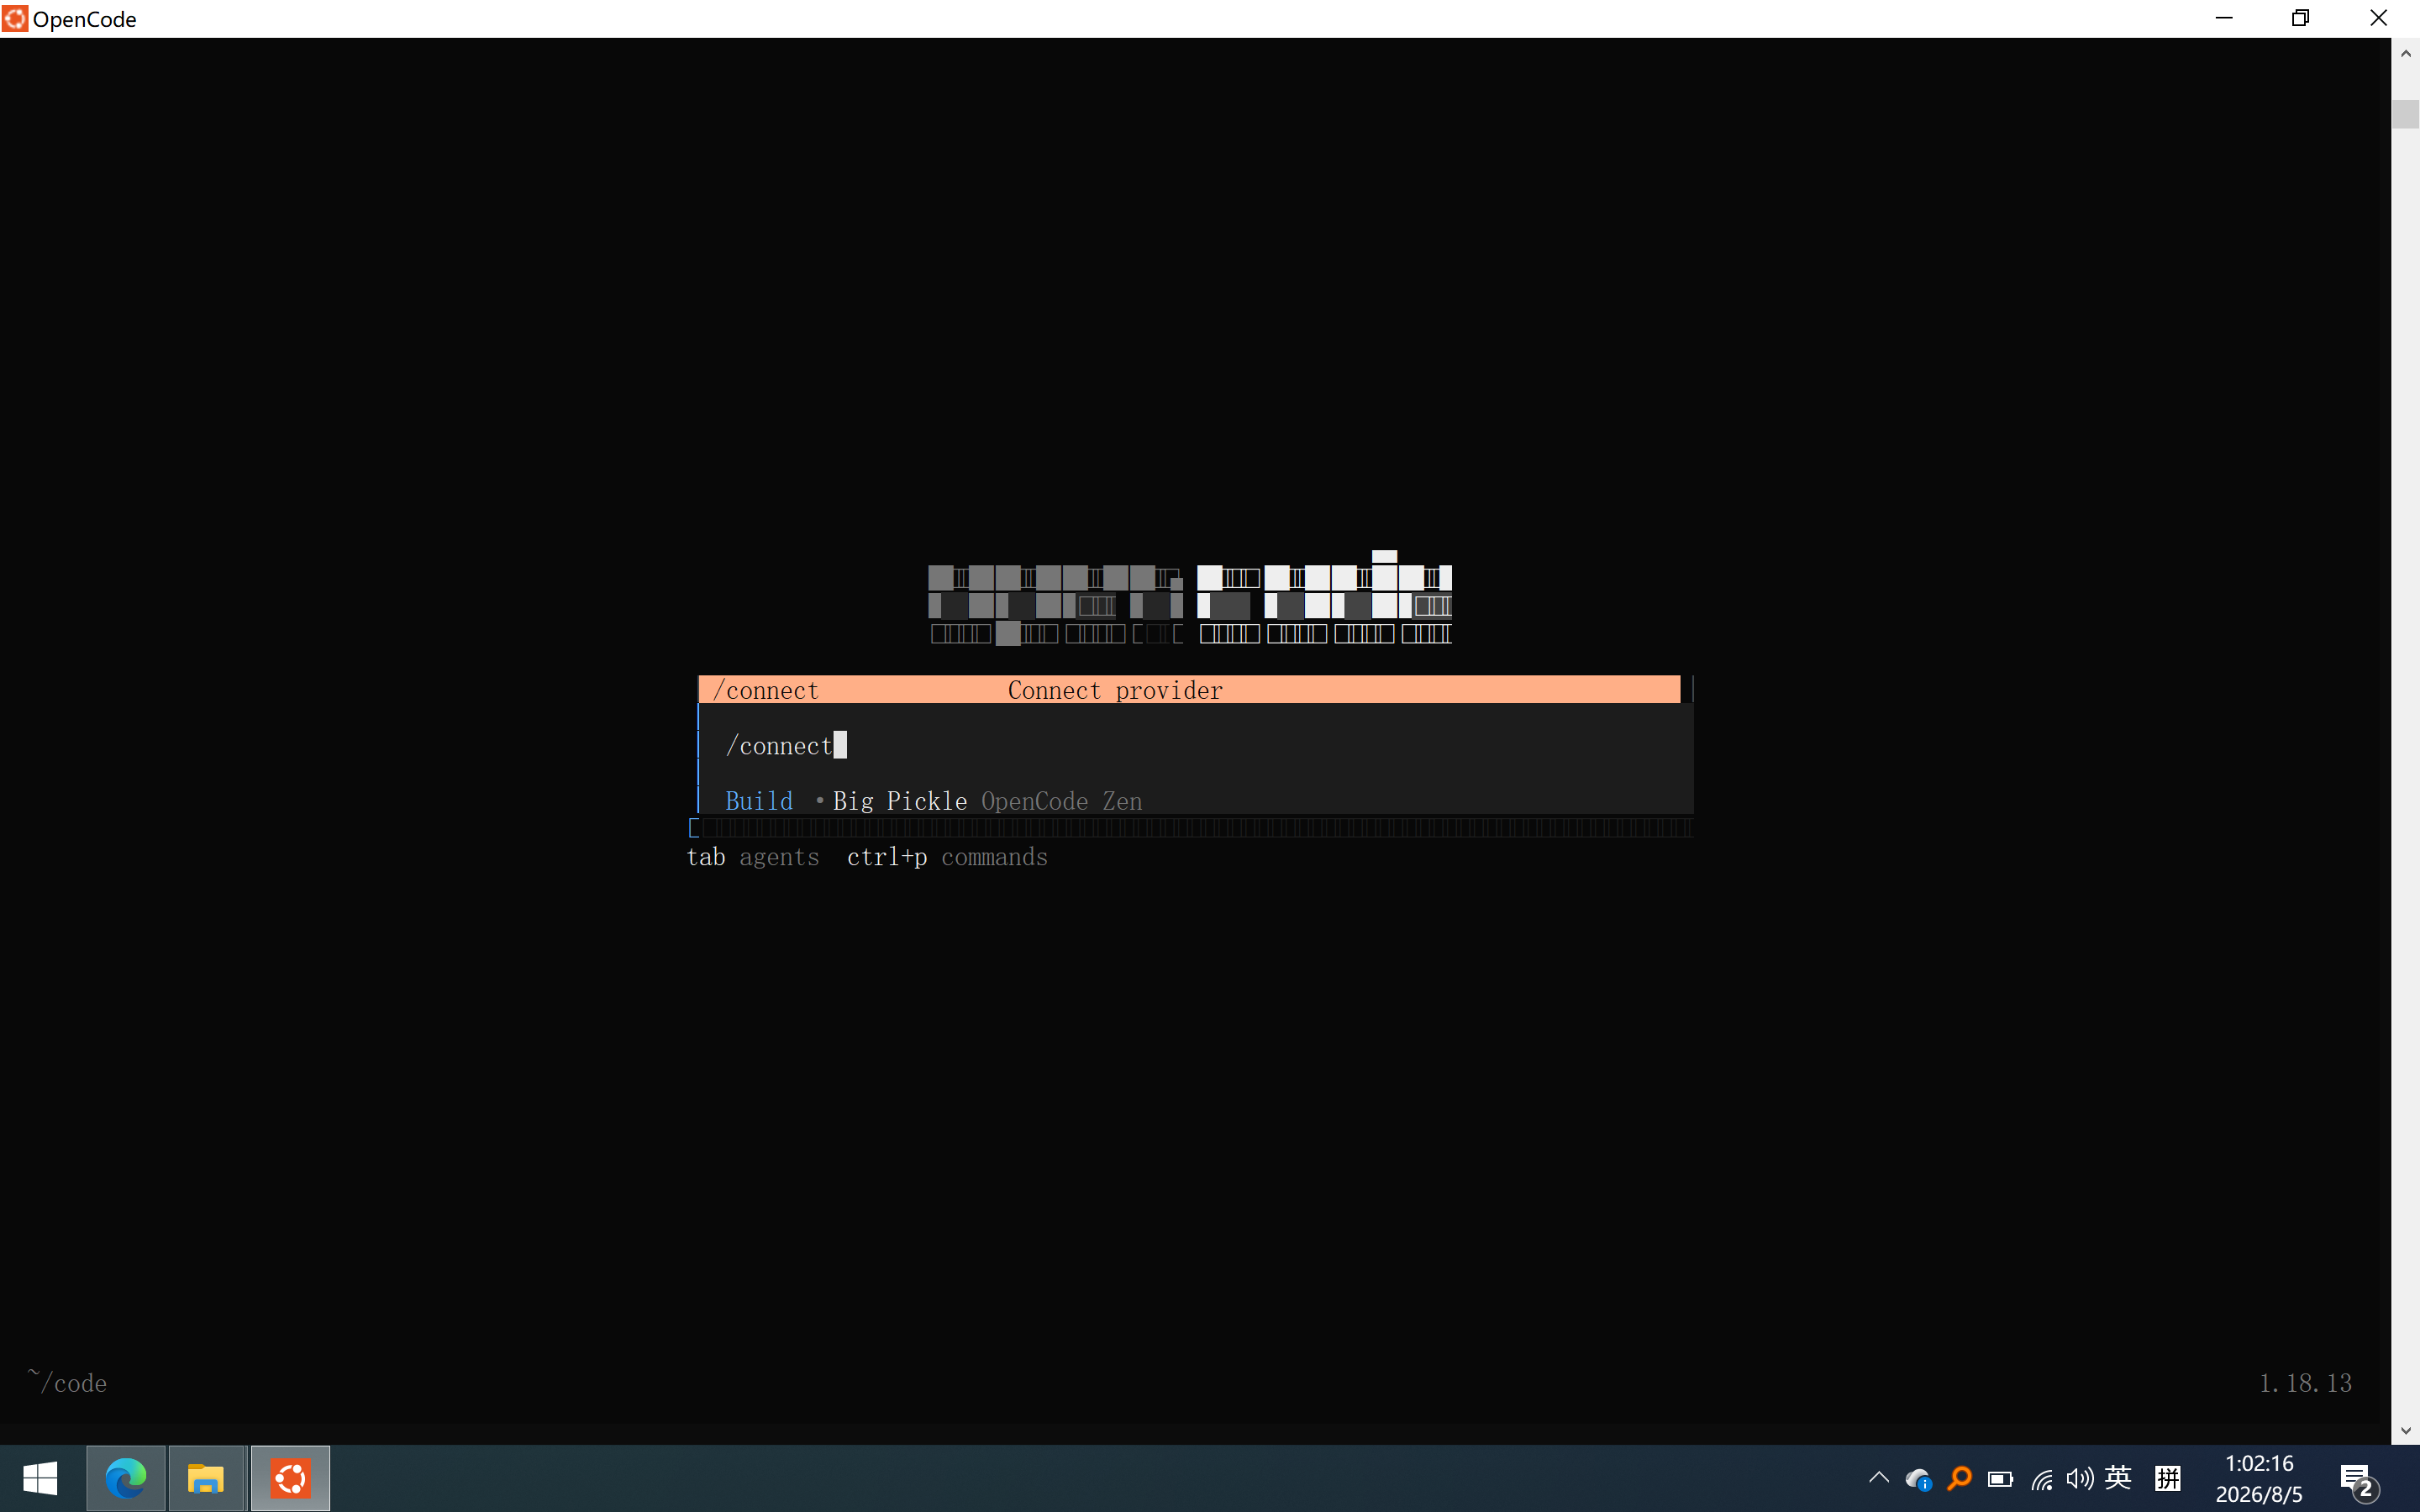
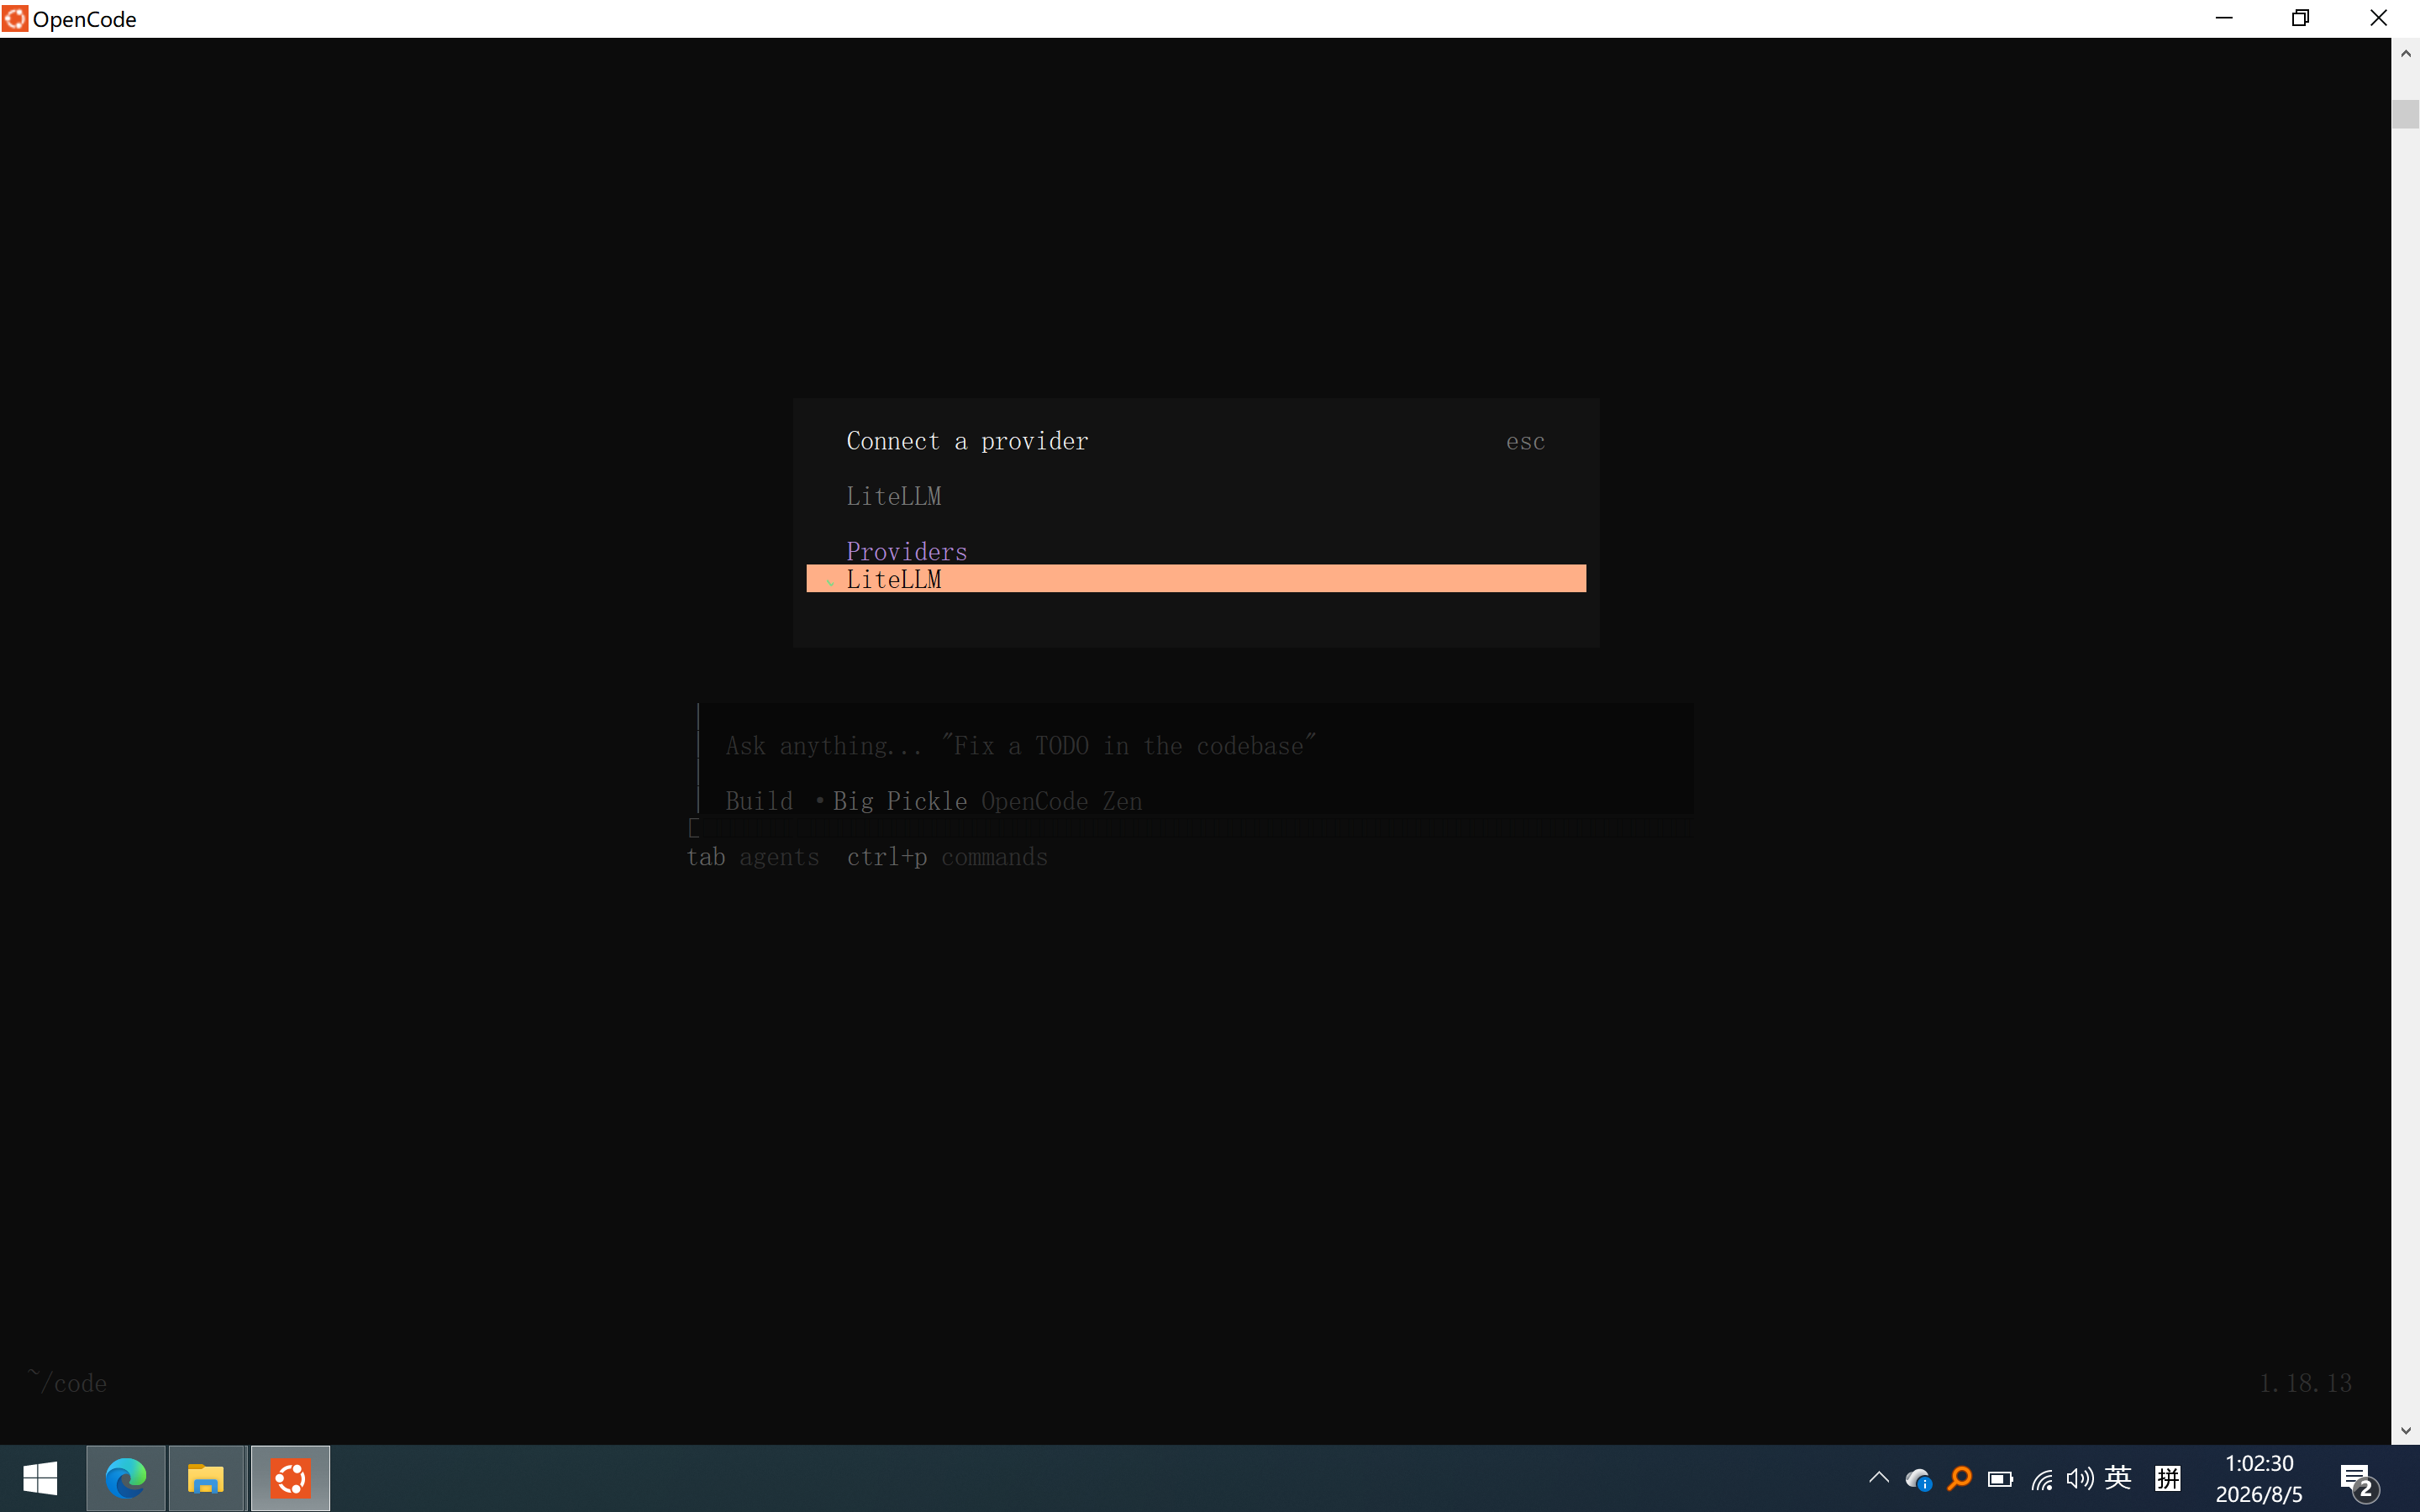
Provider name:LiteLLM(与配置文件中的 "name" 一致)
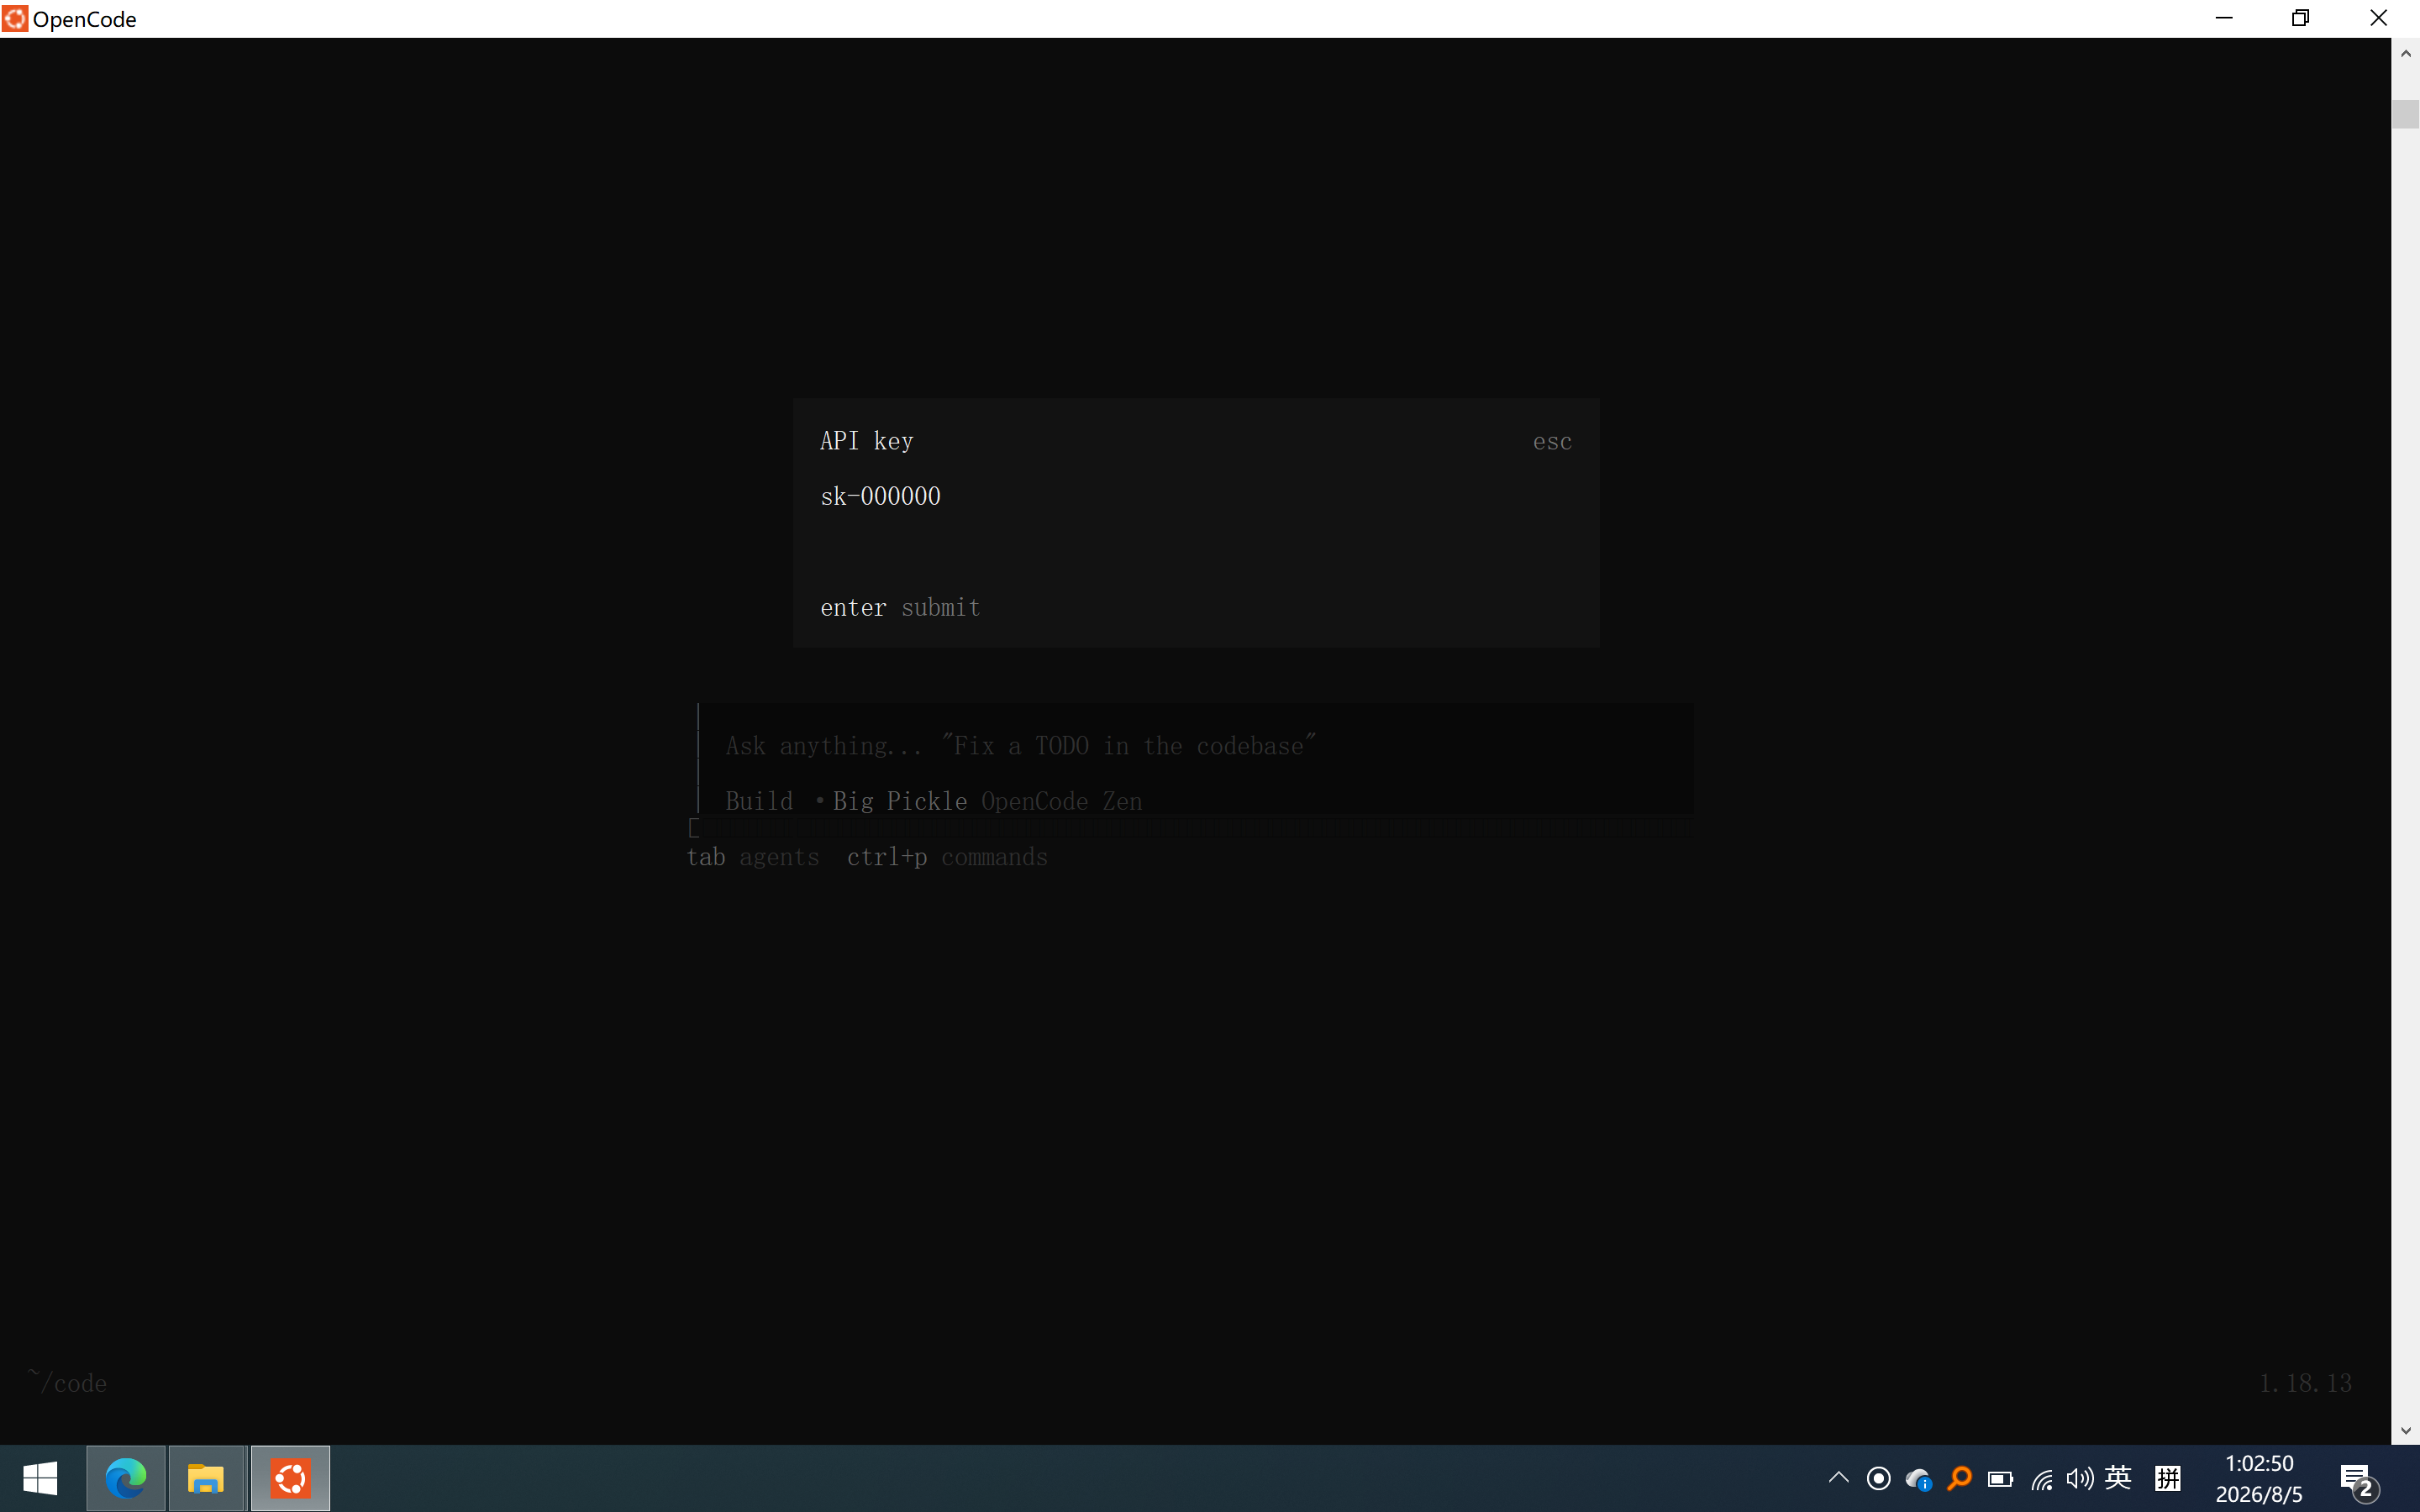
API Key:随意填写(因为 LiteLLM 已关闭认证)
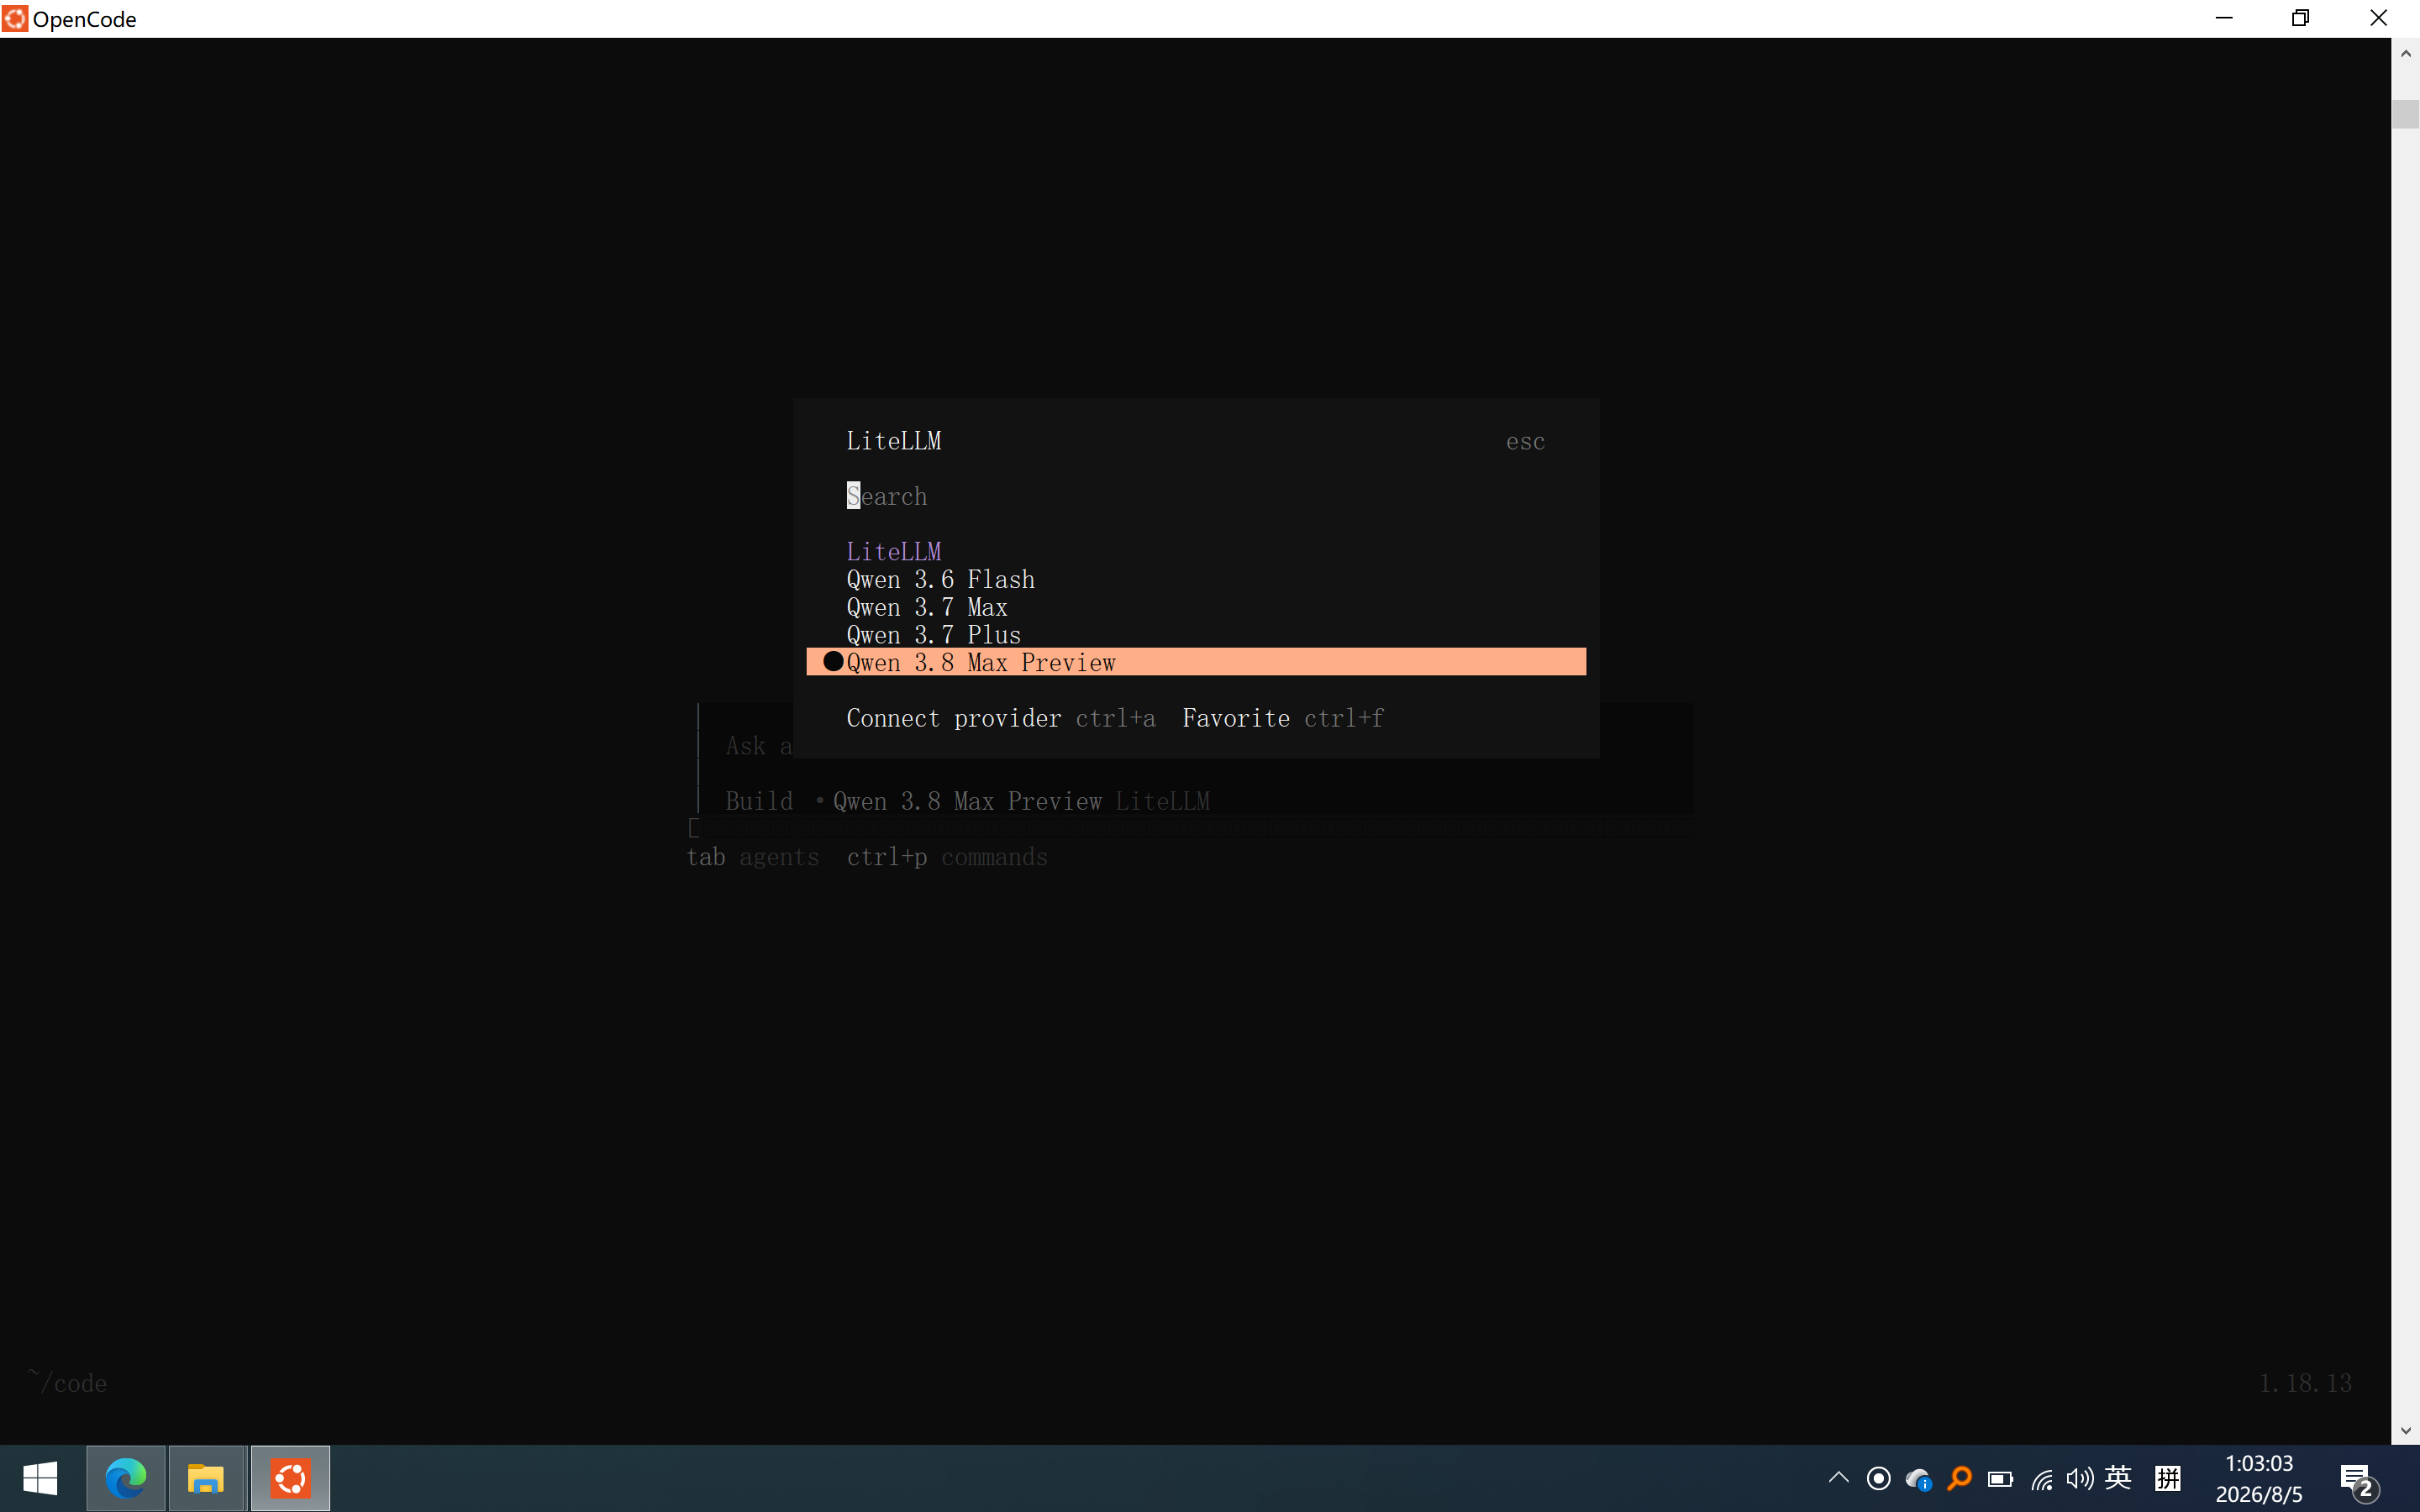
验证模型列表
/models
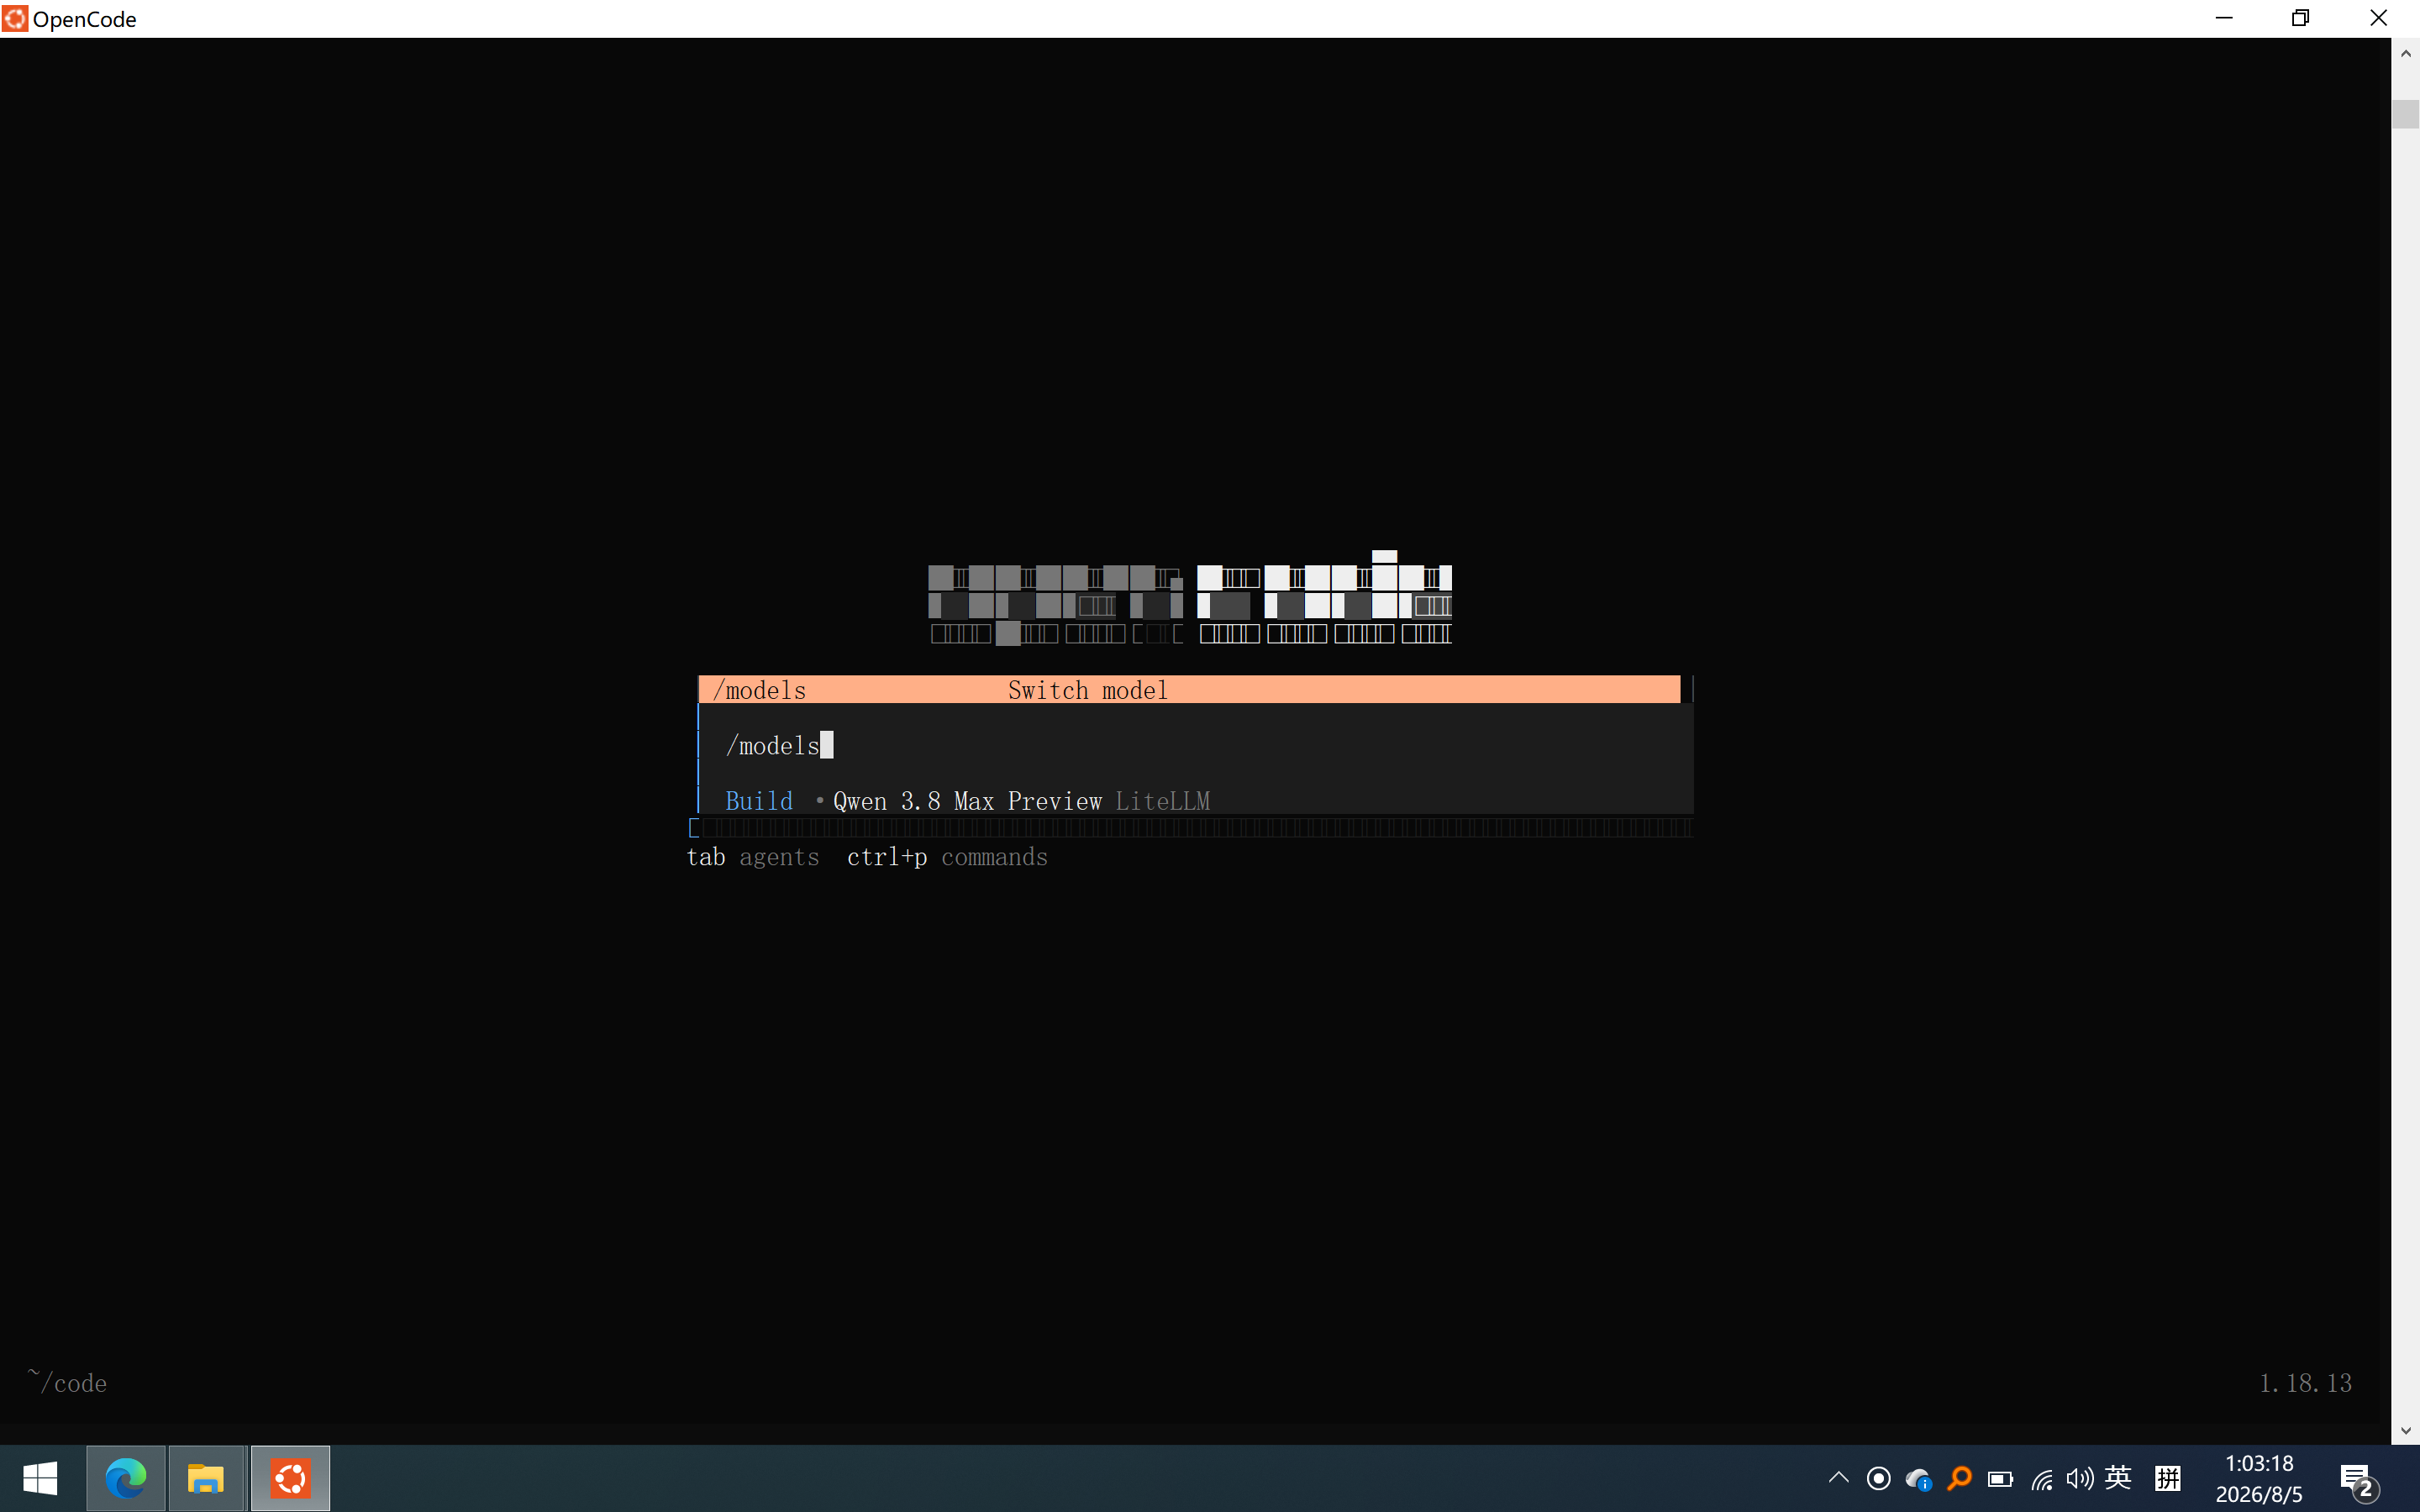
应显示所有已配置的模型
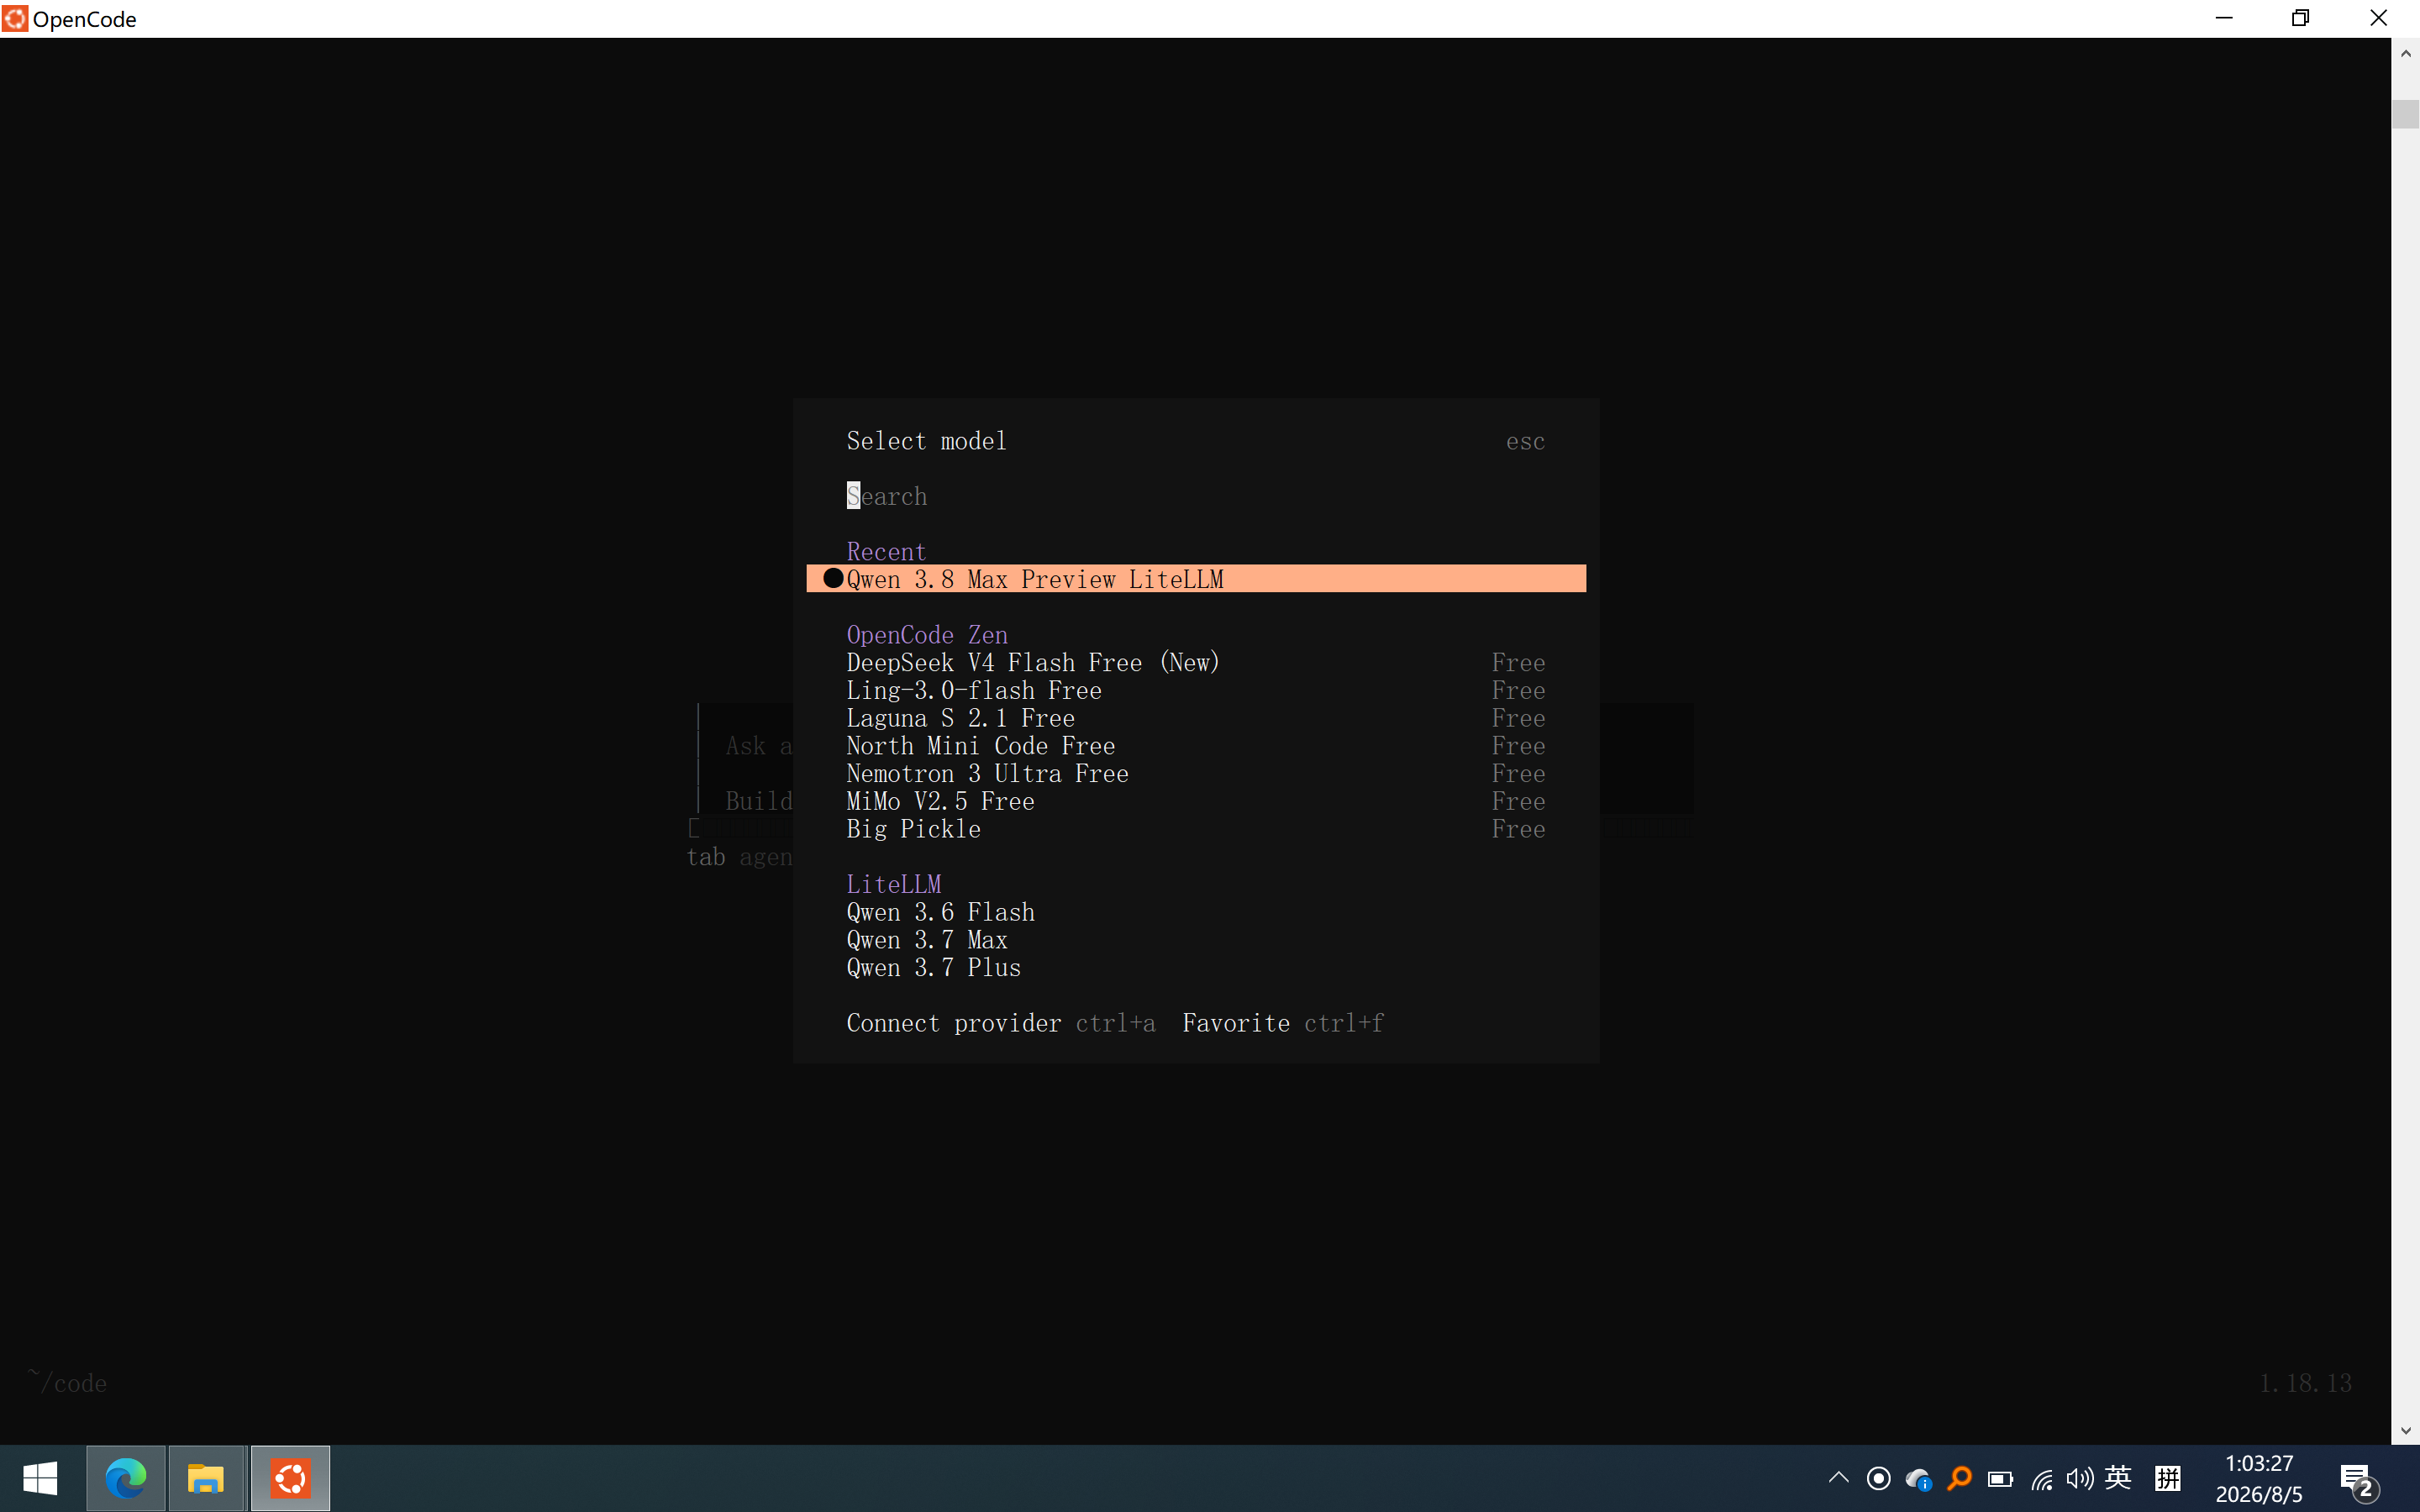
可以自行切换
15. 开始使用
直接在聊天框输入编程任务即可,例如:
- 写一个 Python 快速排序
- 解释这段代码(粘贴代码)
- 优化这个 SQL 查询
16. Windows 连接WSL
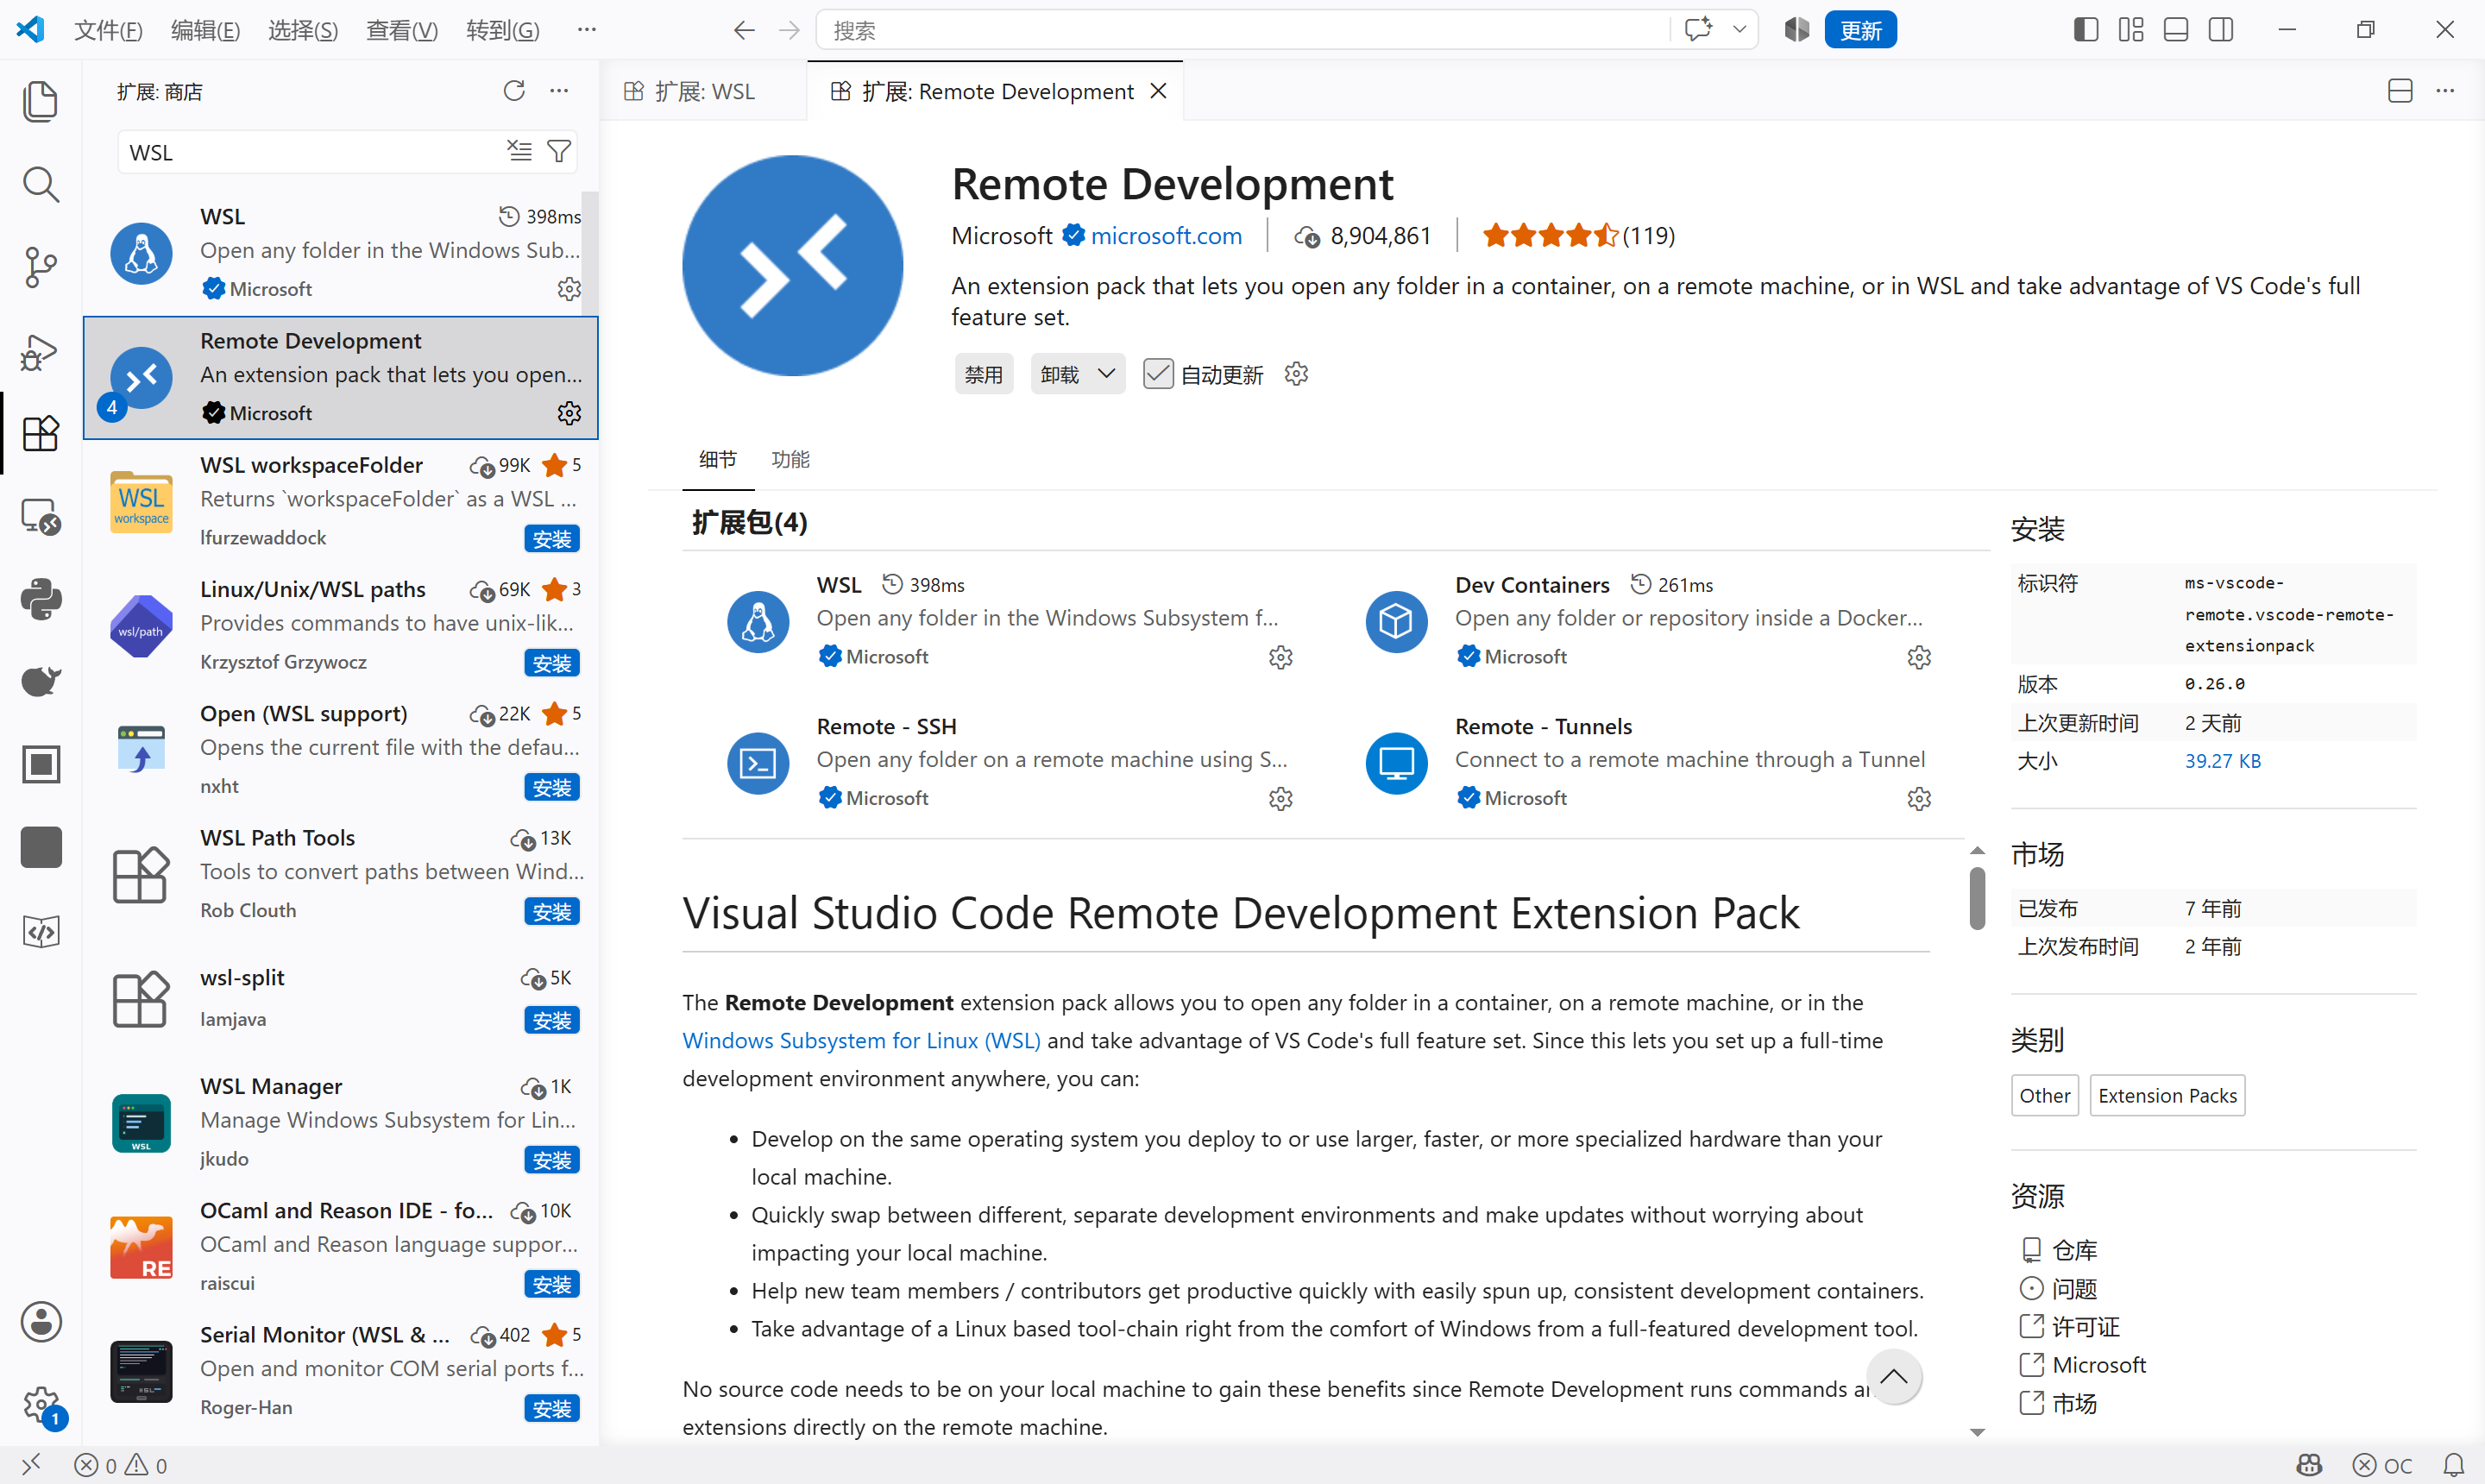
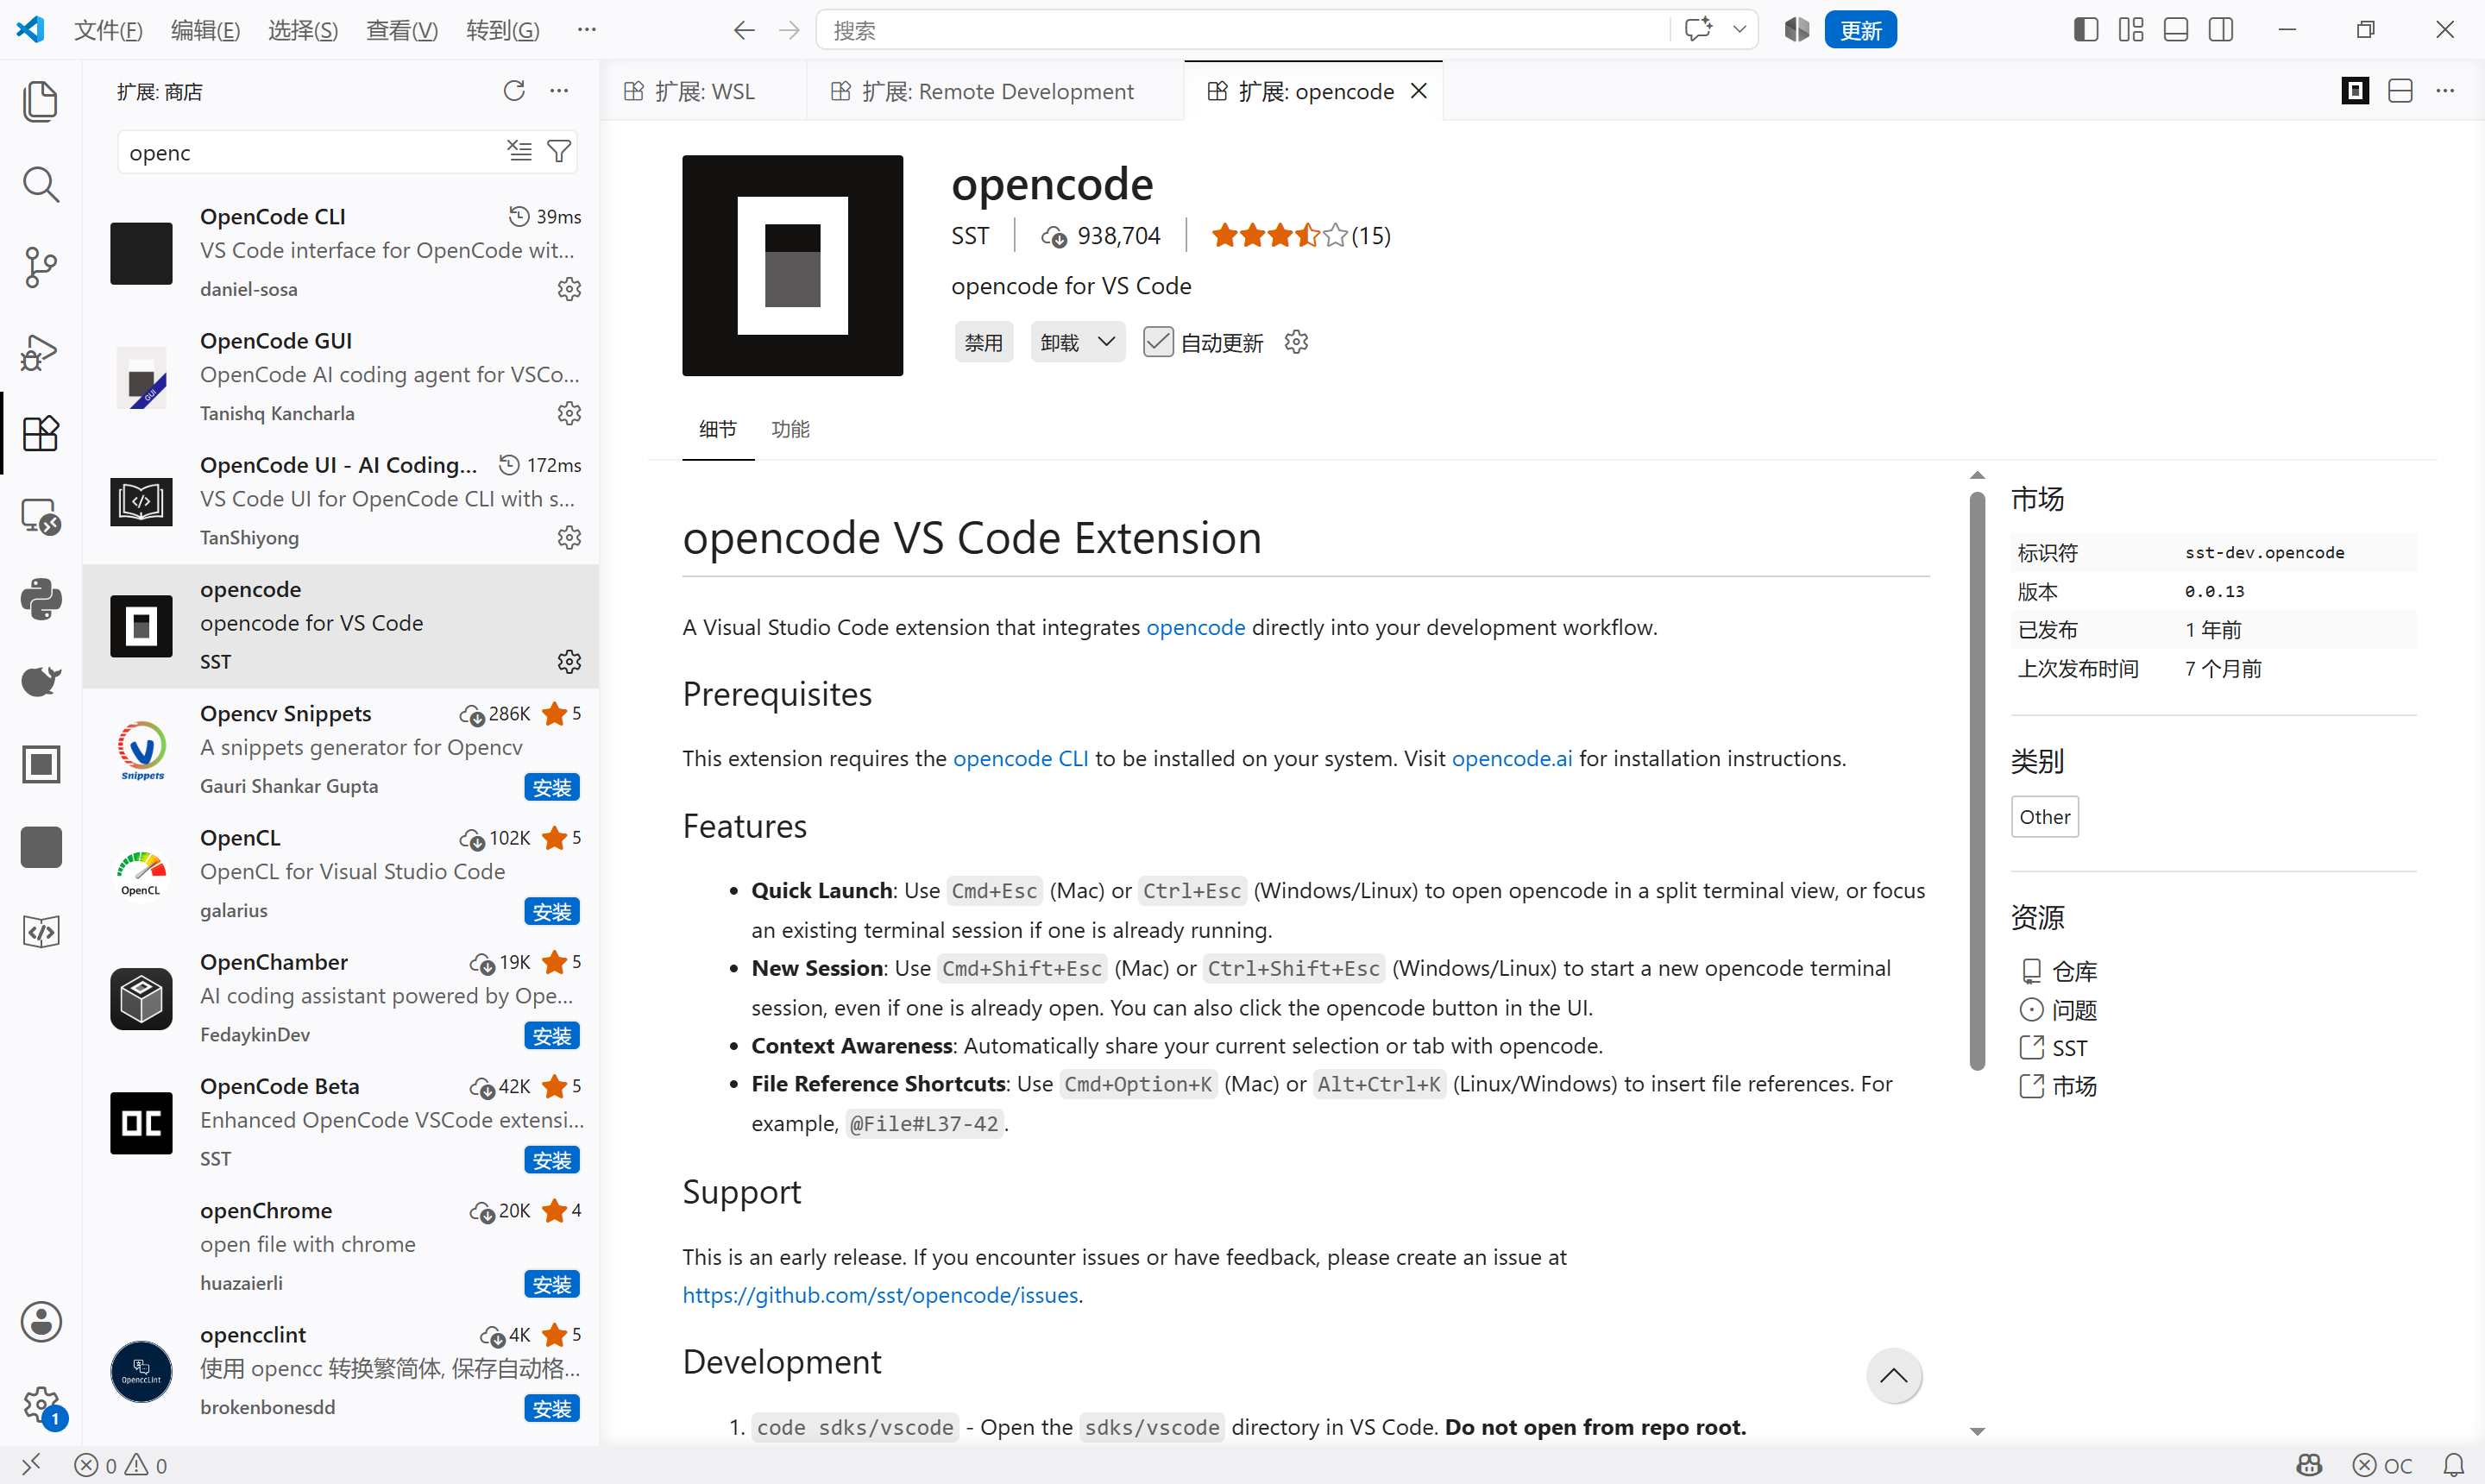
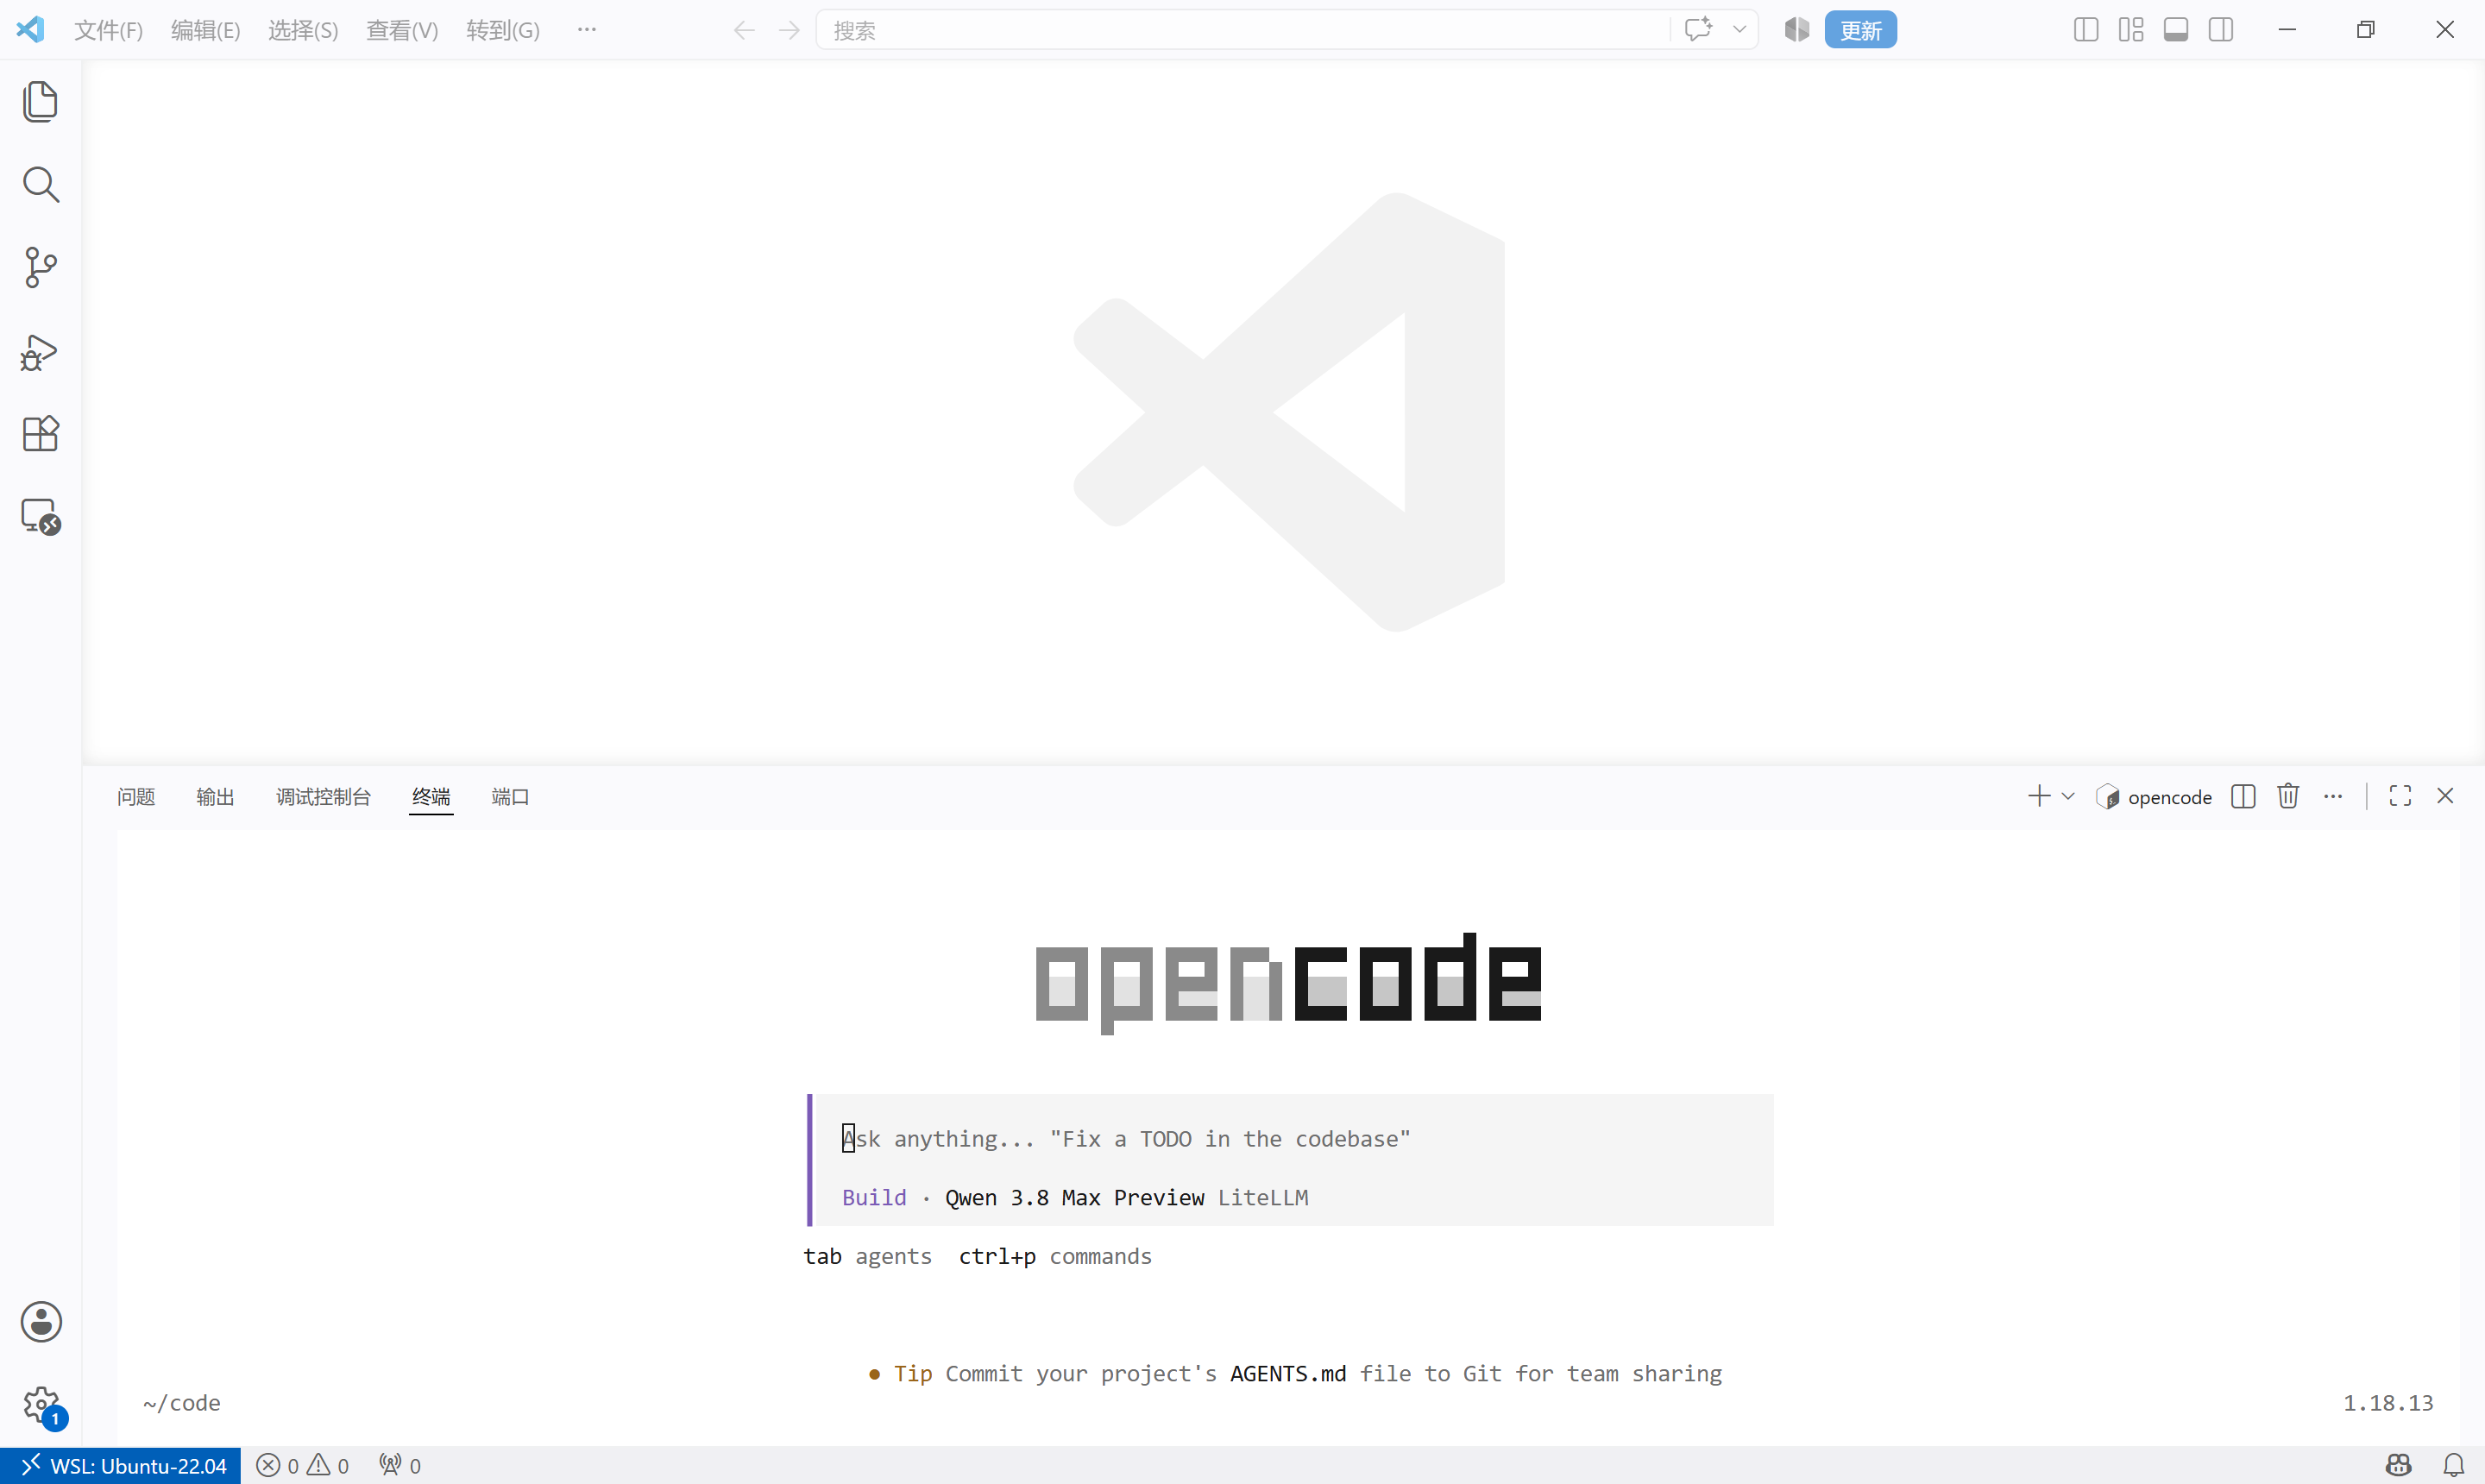
最简单的方案是使用VSCode,安装VSCode,安装插件,WSL,Remote Development,OpenCode
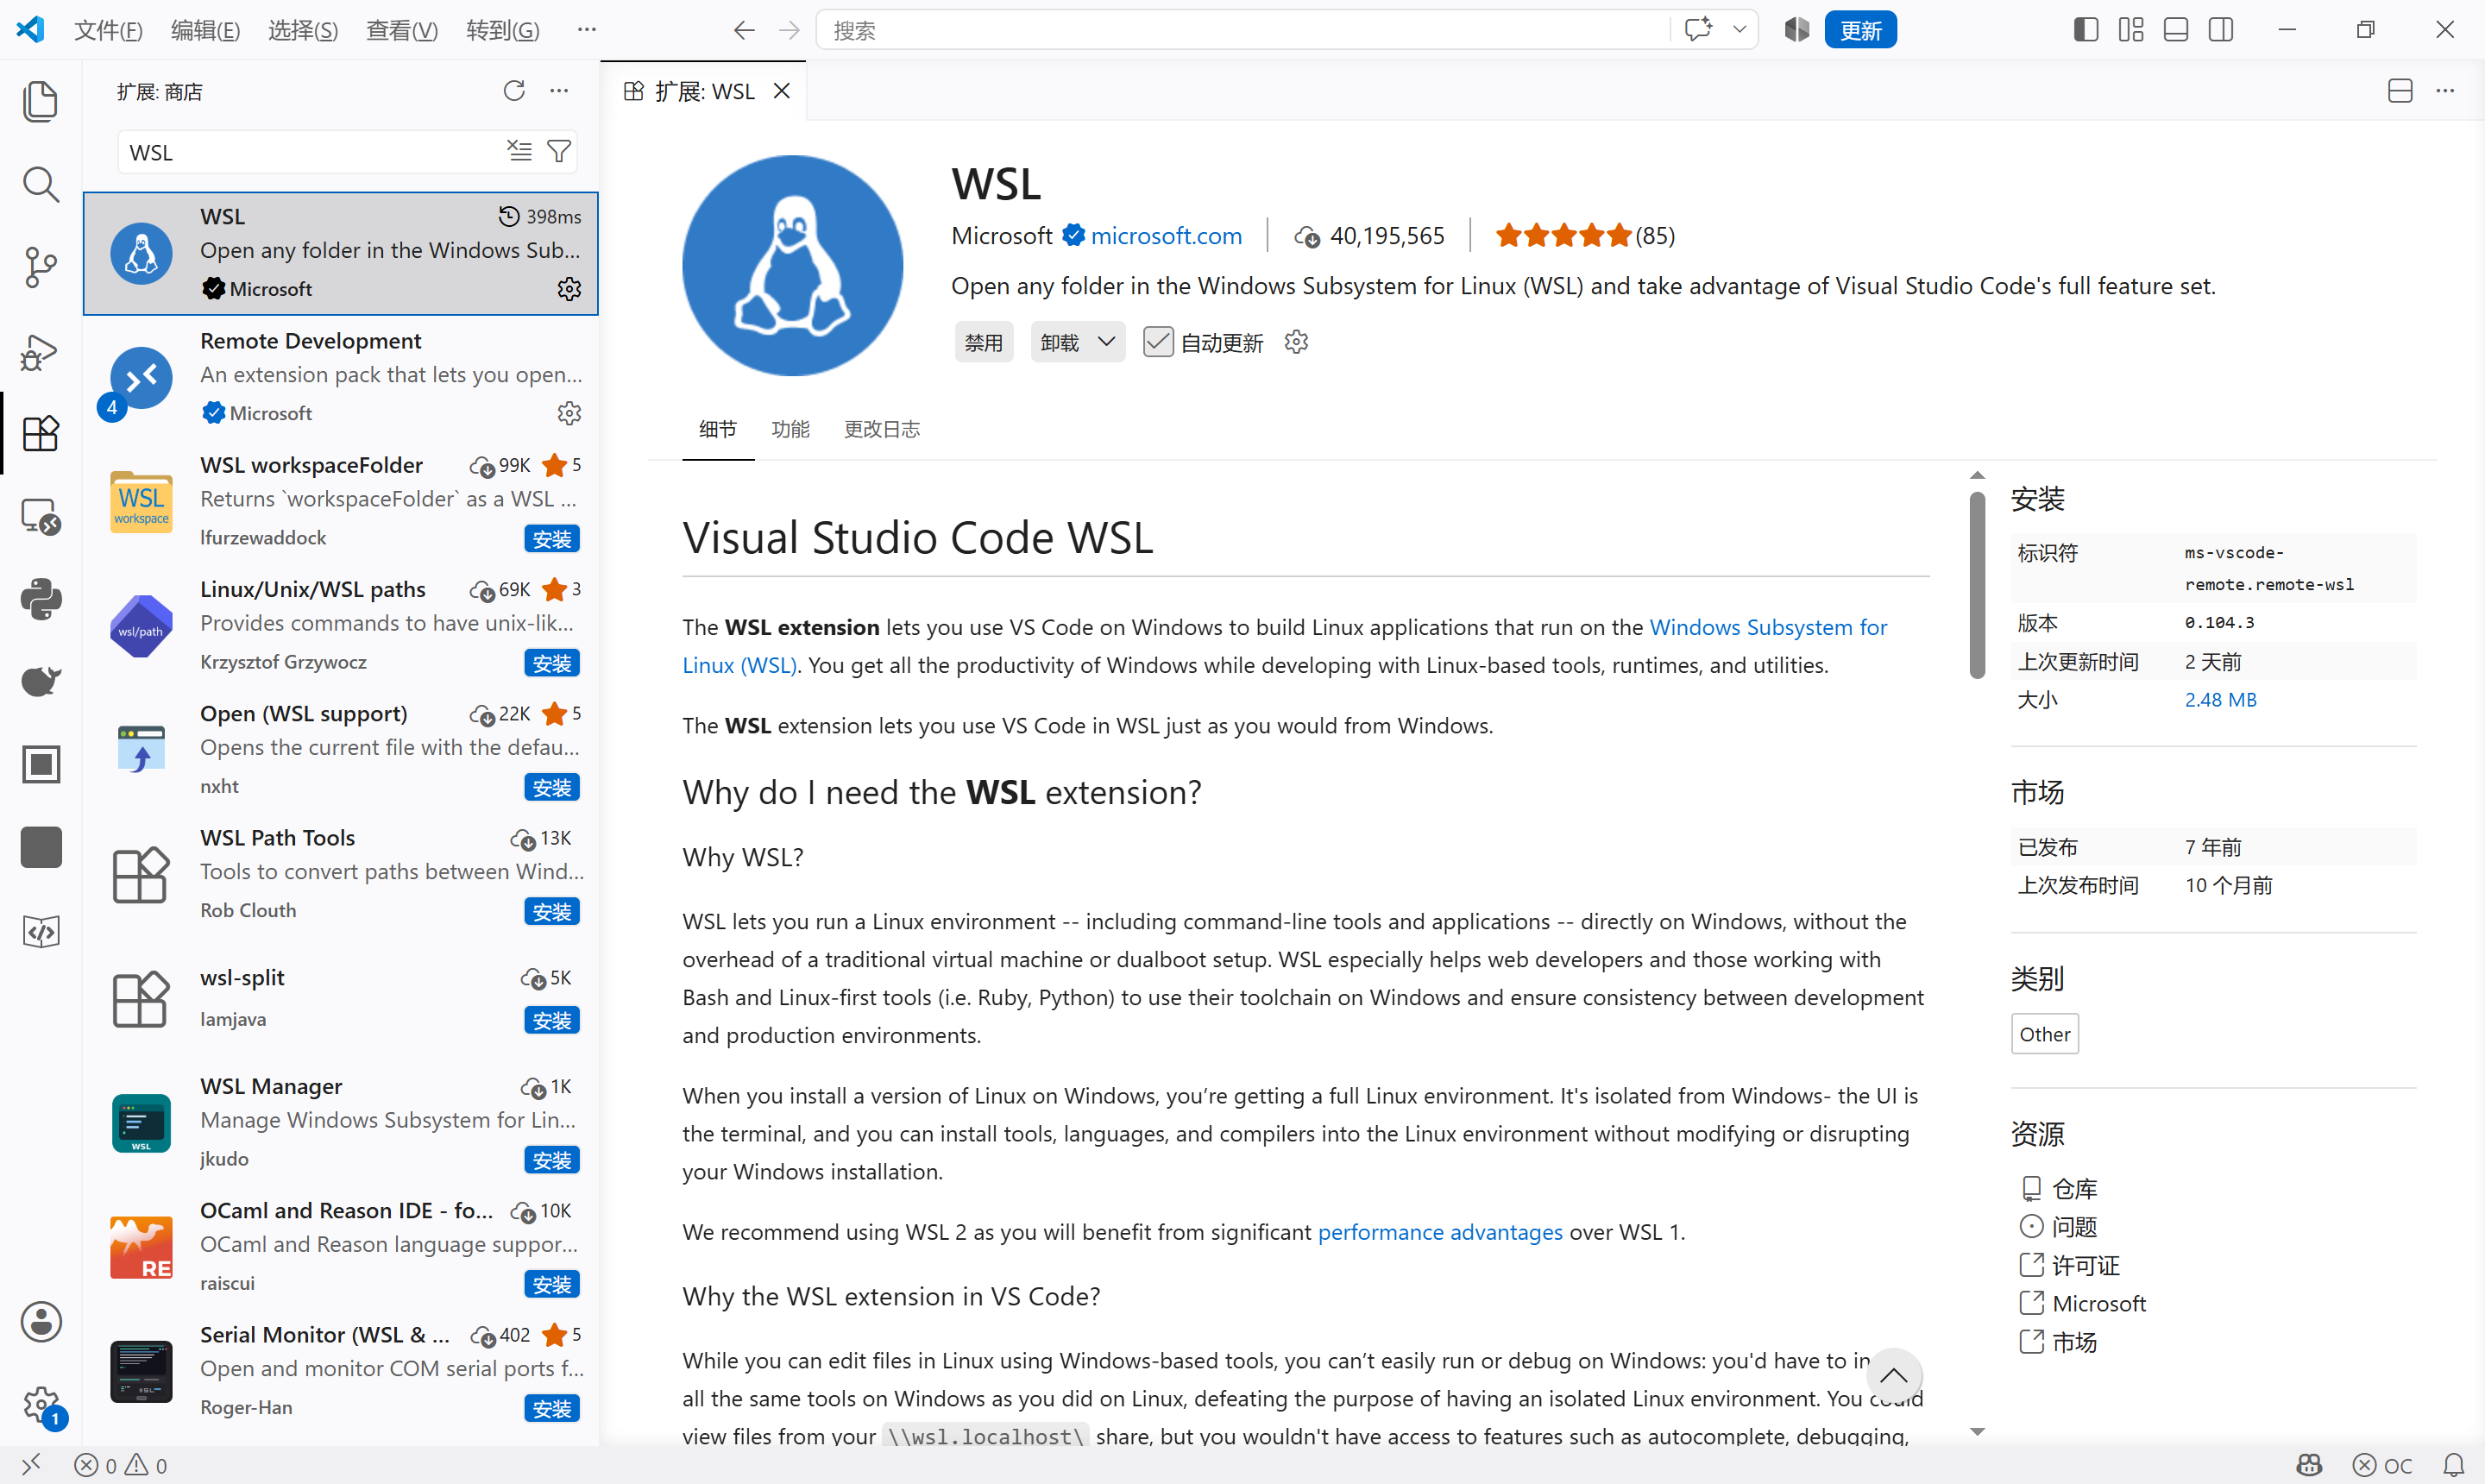
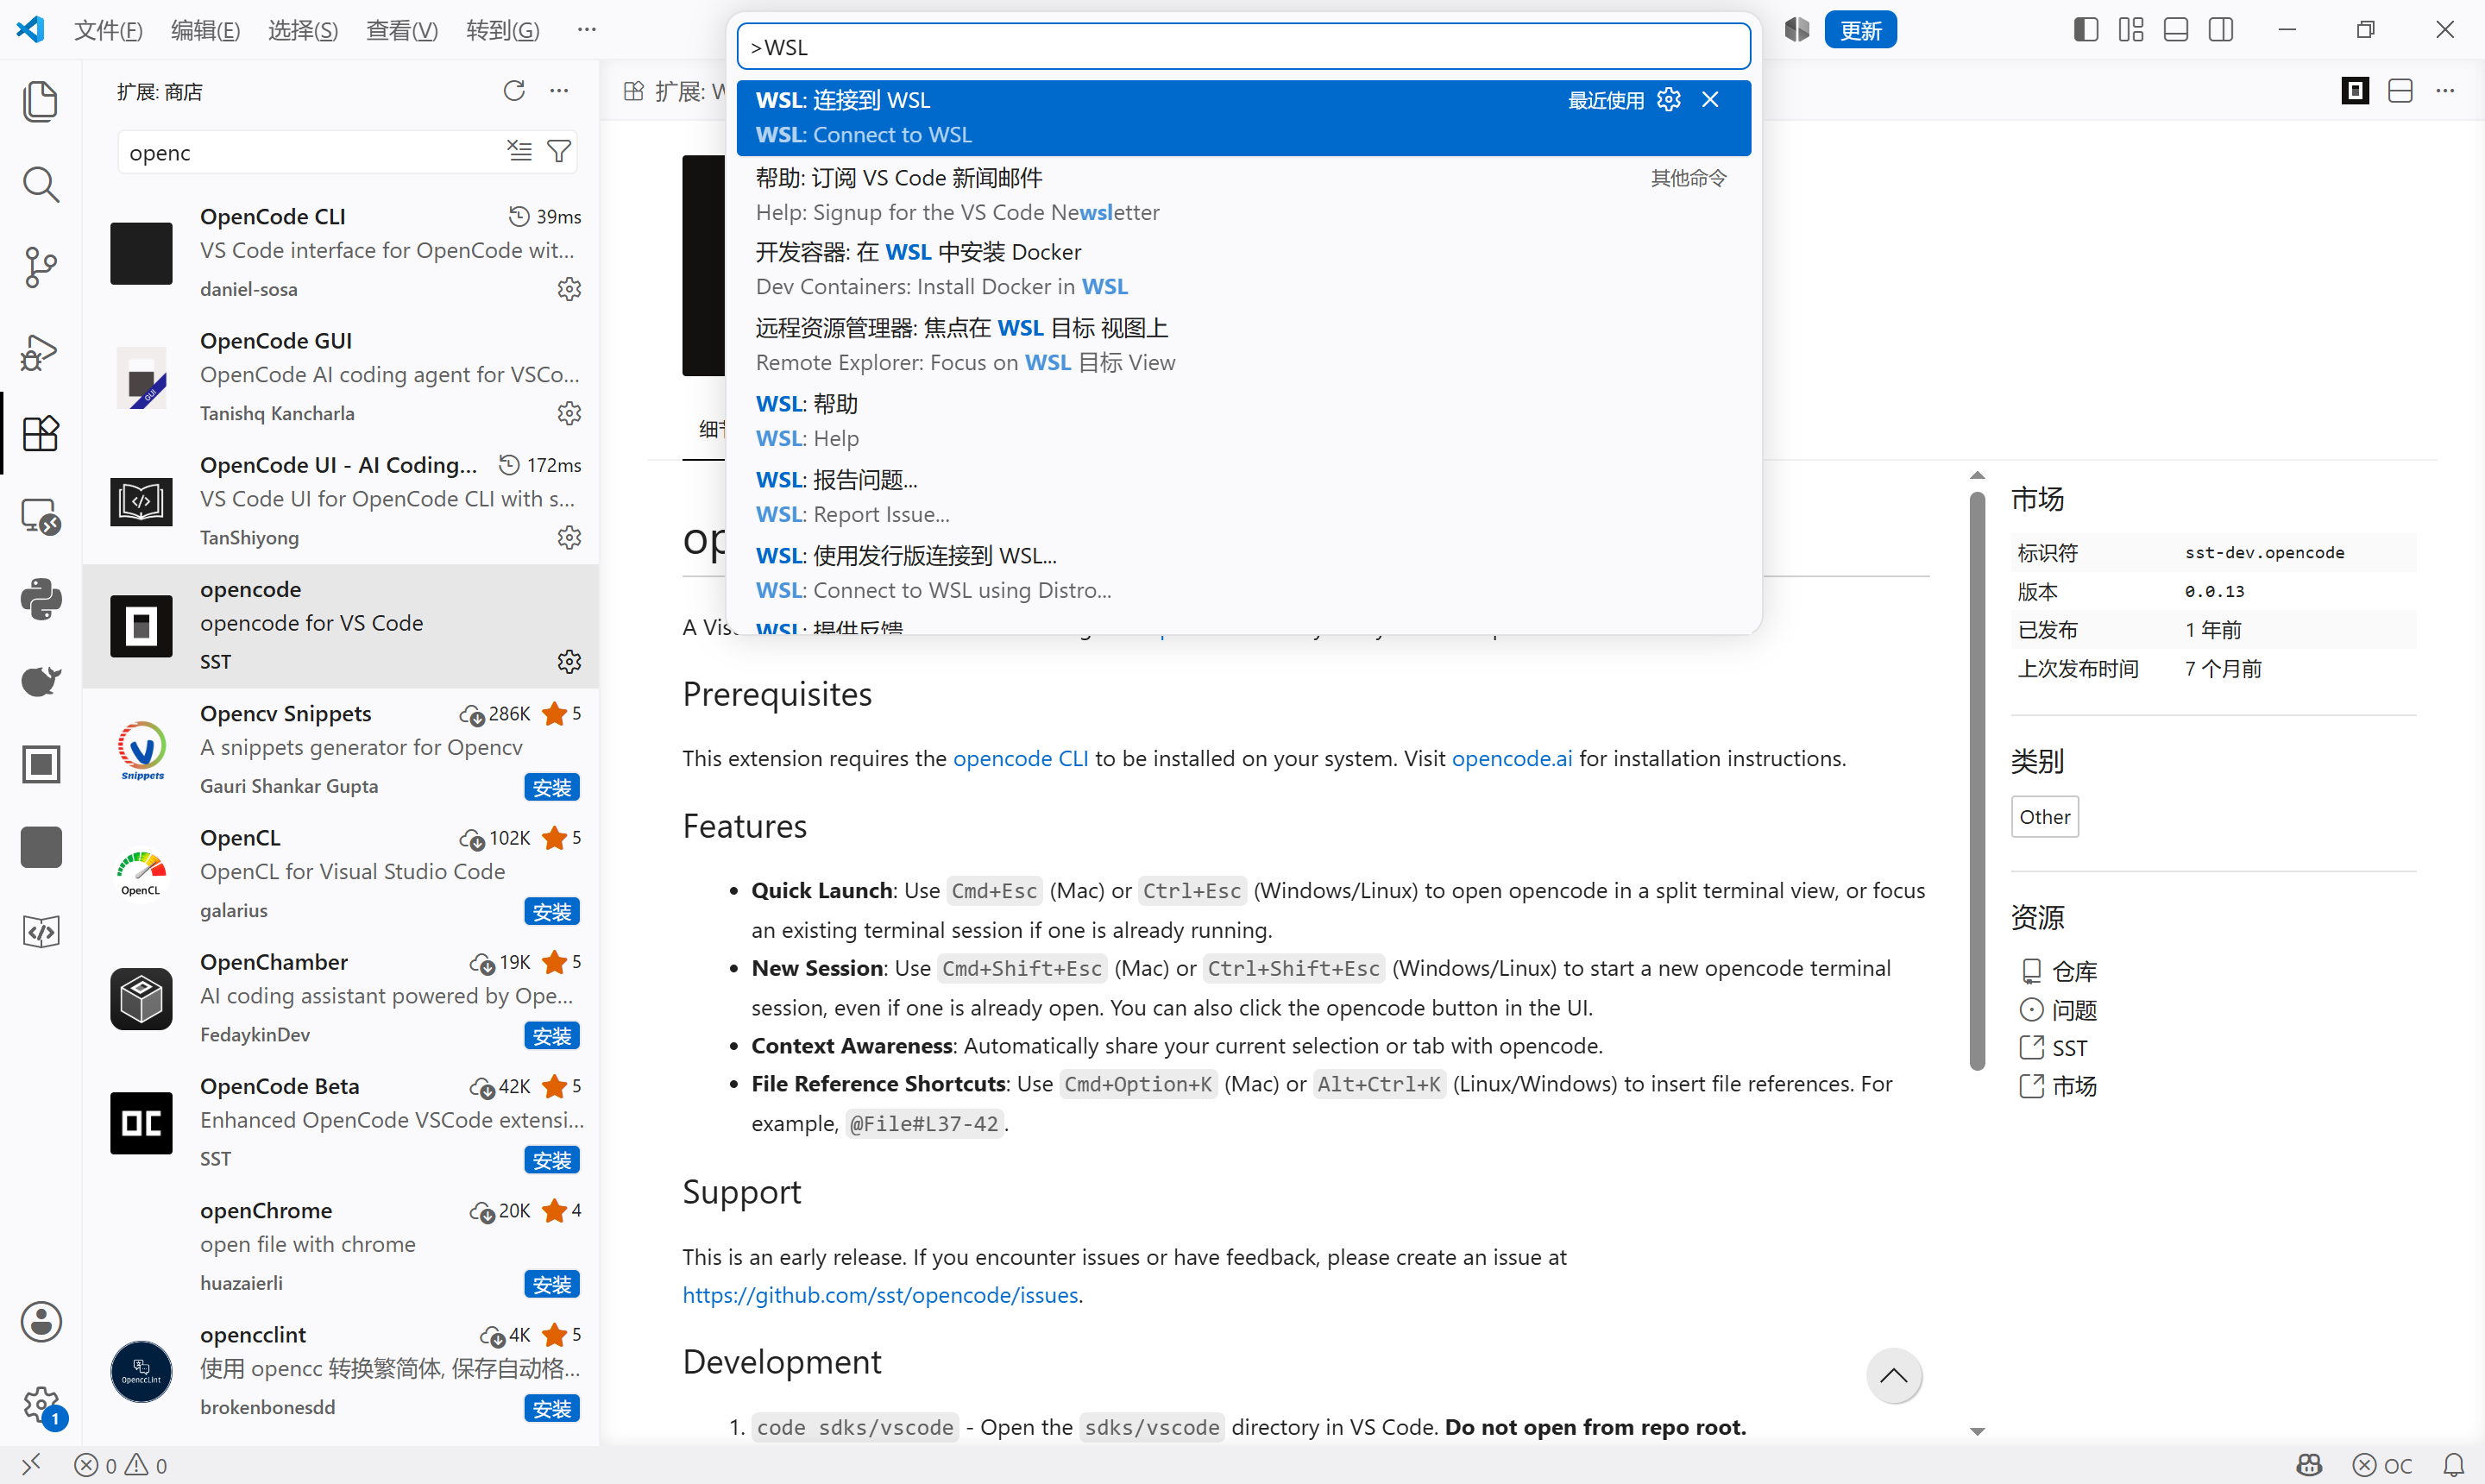
按 Ctrl+Shift+P 打开命令面板
输入 WSL,选择 Remote-WSL: New Window 或 Remote-WSL: Reopen Folder in WSL
选择你的 WSL 发行版(如 Ubuntu)
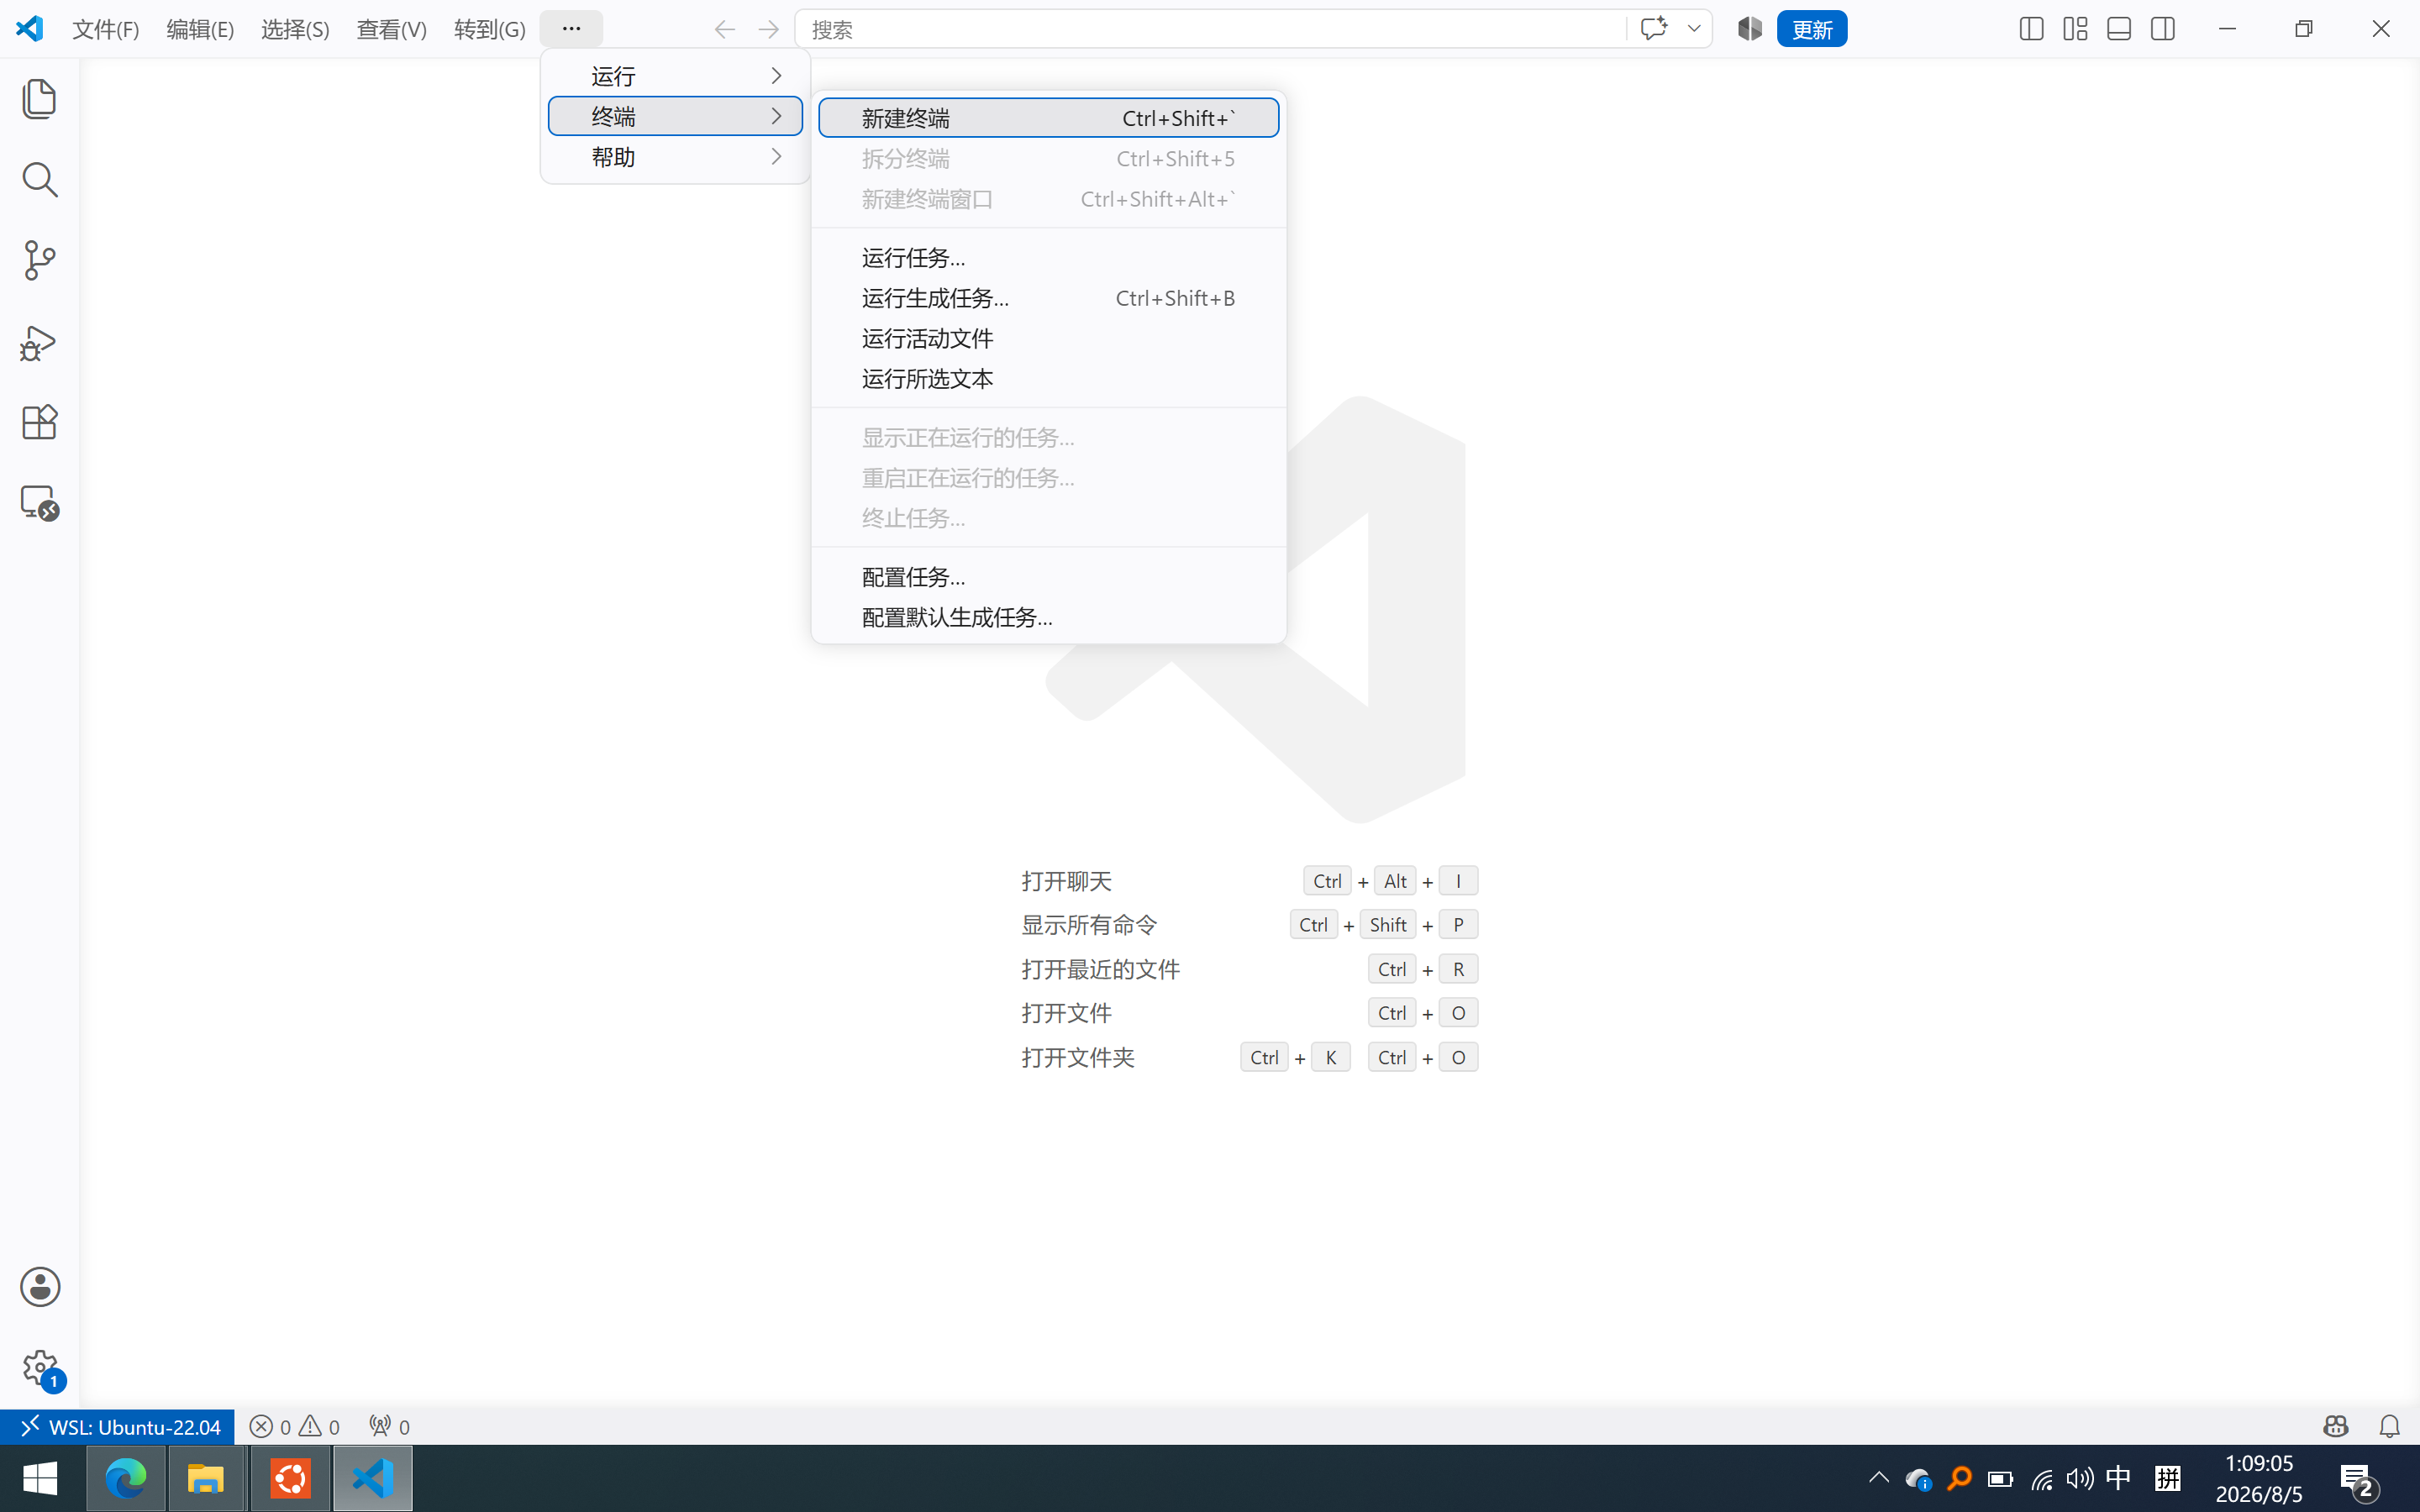
在 VSCode 中使用 OpenCode
运行终端输入oc
17. 注意点
1. 项目文件建议放在 WSL 原生目录(如 ~/code),而不是 Windows 挂载目录(/mnt/c/...),性能可提升约 10 倍。因为跨系统读写文件,非常消耗IO
2. 不能在WSL中直接打开Windows文件夹,会直接跳出WSL环境
3. Windows下的C盘,D盘,E盘,要用/mnt/c/,/mnt/d/,/mnt/e/来代替,打开文件夹要用cd
4. 由于跨系统读写文件非常消耗IO,因此建议用以下方法,D盘,E盘文件等的同步见3
# Windows → WSL(把 Windows 桌面的文件复制到 WSL 家目录)
cp /mnt/c/Users/你的用户名/Desktop/文件.txt ~/

# WSL → Windows(把 WSL 中的文件复制到 Windows 桌面)
cp ~/文件.txt /mnt/c/Users/你的用户名/Desktop/
欢迎加入DeepSeek 技术社区。在这里,你可以找到志同道合的朋友,共同探索AI技术的奥秘。
更多推荐

 4
4 0
0- 0


 已为社区贡献1条内容

所有评论(0)