基于双卡昇腾300i Duo、vllm-ascend部署qwen3
·
1、软硬件与驱动信息
[root@localhost ~]# npu-smi info
+--------------------------------------------------------------------------------------------------------+
| npu-smi 25.5.1                                   Version: 25.5.1                                       |
+-------------------------------+-----------------+------------------------------------------------------+
| NPU     Name                  | Health          | Power(W)     Temp(C)           Hugepages-Usage(page) |
| Chip    Device                | Bus-Id          | AICore(%)    Memory-Usage(MB)                        |
+===============================+=================+======================================================+
| 1       310P3                 | OK              | NA           74                16841 / 16841         |
| 0       0                     | 0000:01:00.0    | 79           35634/ 44278                            |
+-------------------------------+-----------------+------------------------------------------------------+安装过程参考上篇文章:https://blog.csdn.net/TiAmo992/article/details/160218108?spm=1001.2014.3001.5501
2、vllm-ascend部署
2.1 官方文档
贴出官方文档,跟着官方文档没有部署成功,还是跟我流程吧
https://docs.vllm.com.cn/projects/ascend/en/latest/installation.html
2.2 拉取镜像
根据自己系统架构信息和显卡信息,选取合适镜像。
镜像源地址:https://quay.io/repository/ascend/vllm-ascend?tab=tags
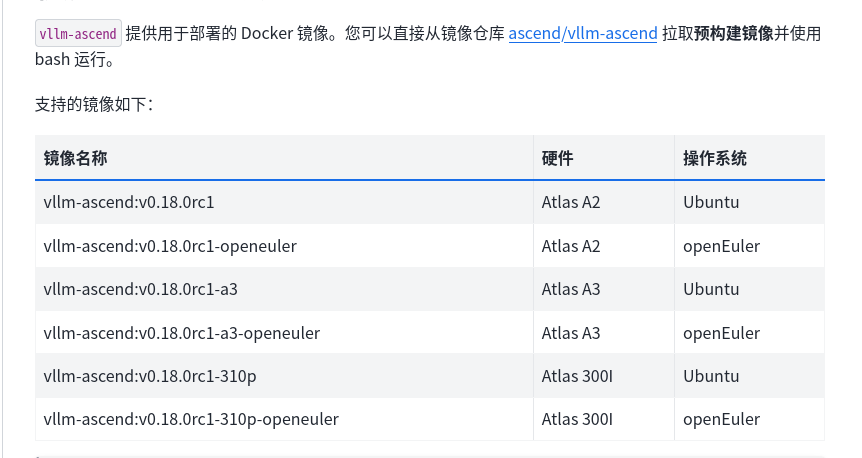
我选用的是0.18版本,310p是昇腾300i Duo的核心标识, 系统使用的是麒麟v11

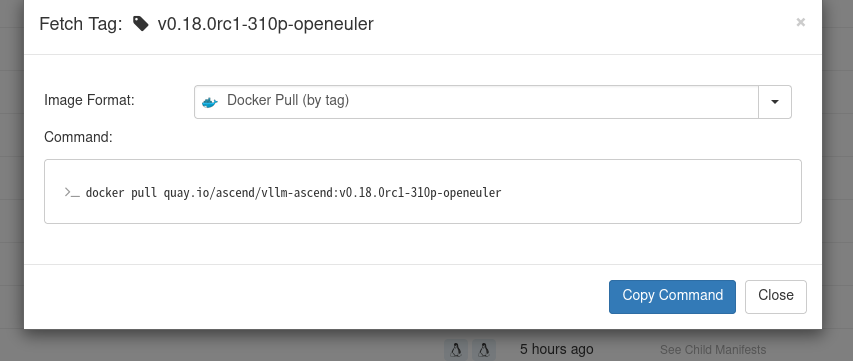
docker pull quay.io/ascend/vllm-ascend:v0.18.0rc1-310p-openeuler2.3 查看镜像
终端输入命令查看镜像,没有安装docker的自行安装。
docker image ls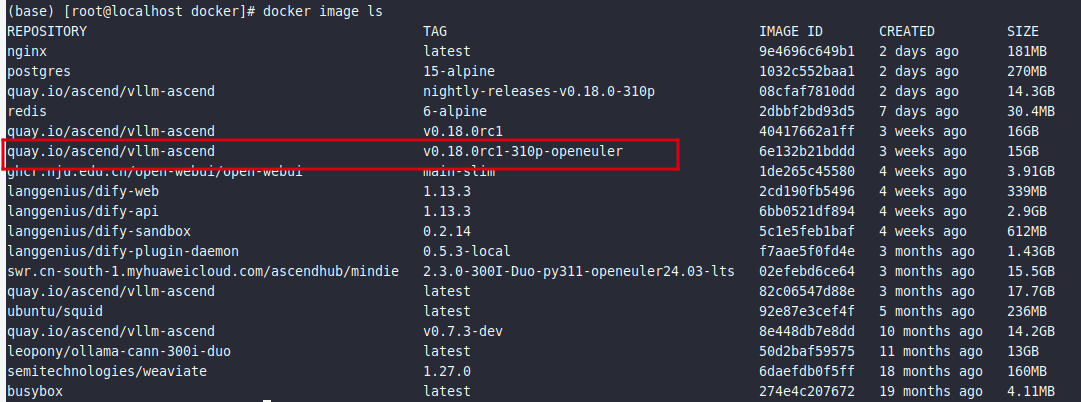
2.4 启动容器
有了镜像信息后,启动容器,命令如下:
docker run --rm \
--name vllm-ascend \
--shm-size=1g \
--device /dev/davinci0 \
--device /dev/davinci1 \
--device /dev/davinci2 \
--device /dev/davinci3 \
--device /dev/davinci_manager \
--device /dev/devmm_svm \
--device /dev/hisi_hdc \
-v /usr/local/dcmi:/usr/local/dcmi \
-v /usr/local/bin/npu-smi:/usr/local/bin/npu-smi \
-v /usr/local/Ascend/driver/lib64/:/usr/local/Ascend/driver/lib64/ \
-v /usr/local/Ascend/driver/version.info:/usr/local/Ascend/driver/version.info \
-v /etc/ascend_install.info:/etc/ascend_install.info \
-v /root/.cache:/root/.cache \
-p 8000:8000 \
-e PYTORCH_NPU_ALLOC_CONF=max_split_size_mb:256 \
-e ASCEND_RT_VISIBLE_DEVICES=0,1,2,3 \
-it quay.io/ascend/vllm-ascend:v0.18.0rc1-310p-openeuler bash
根据自己的情况进行修改完善,注意--rm是容器停止后删除, 模型权重映射地址注意改成自己的,我的模型在这个文件夹里面,所以这样映射。-v /root/.cache:/root/.cache \
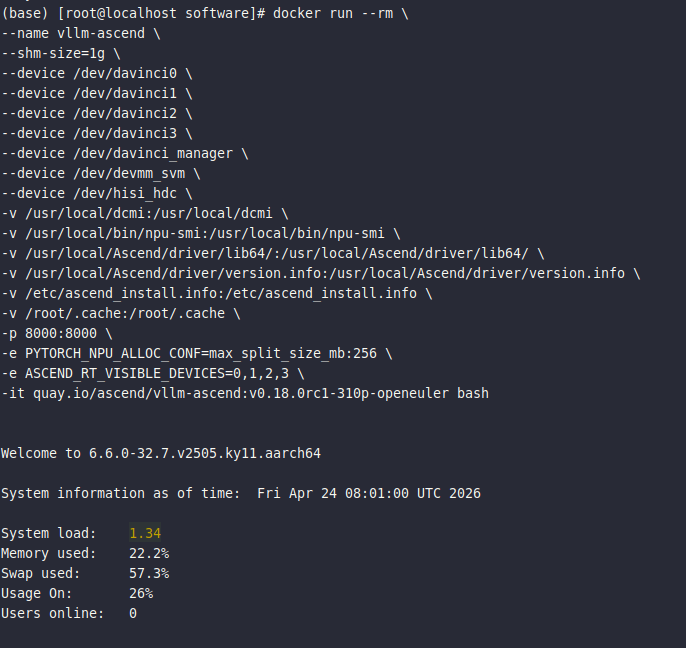
启动成功如下图:
2.5 运行模型
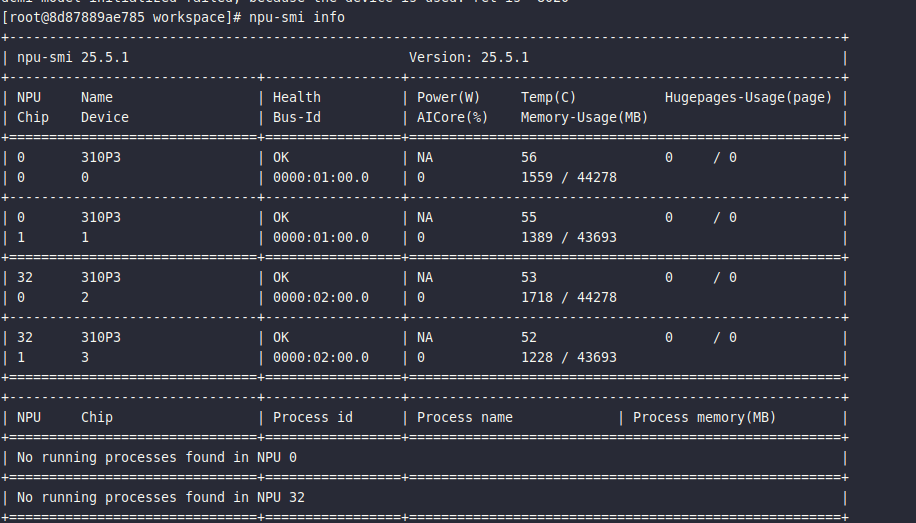
2.5.1 容器内先查看版本信息
表示容器内能识别到显卡信息和驱动。
2.5.2 进行模型推理
根据情况修改自己的模型地址
export ASCEND_RT_VISIBLE_DEVICES=0,1

export PYTORCH_NPU_ALLOC_CONF="expandable_segments:True"
export HCCL_OP_EXPANSION_MODE="AIV"
export HCCL_BUFFSIZE=1024
export OMP_NUM_THREADS=1
export TASK_QUEUE_ENABLE=1

vllm serve /root/.cache/modelscope/hub/Qwen/Qwen3-8B \
--host 0.0.0.0 \
--port 8000 \
--served-model-name qwen3-8b \
--tensor-parallel-size 2 \
--data-parallel-size 1 \
--max-model-len 10240 \
--max-num-batched-tokens 20480 \
--gpu-memory-utilization 0.8 \
--trust-remote-code \
--seed 1024 \
--dtype=float16 \
--no-enable-prefix-caching \
--enforce-eager
注意,在模型权重文件夹中,找到配置文件,将bfloat16改为float16.
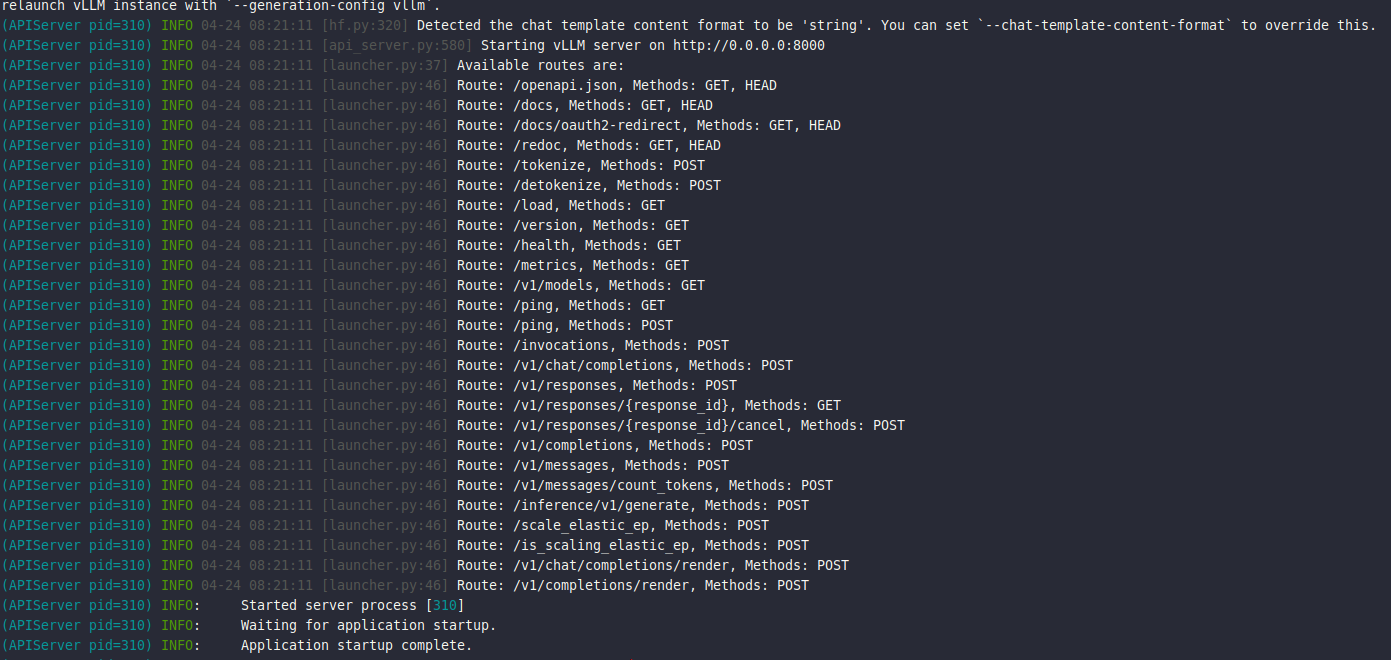
运行成功
3、接入openwebui
部署看我上篇文章
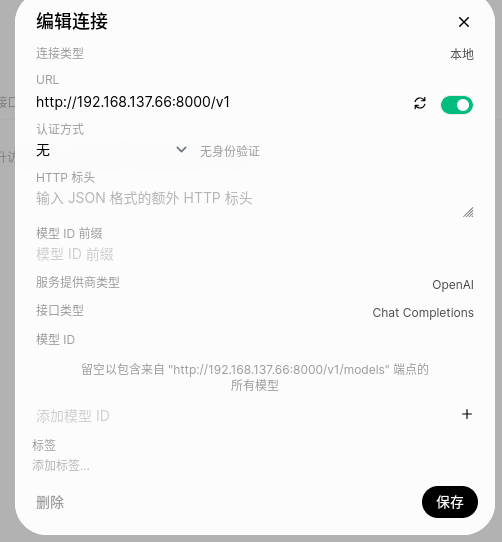
3.1 配置
根据自己ip和端口配置外部连接信息。
3.2 推理测试

后台显示信息

4、可能遇到的问题
这个位置报错,算子的问题,不能使用图编译
Loading safetensors checkpoint shards:   0% Completed | 0/5 [00:00<?, ?it/s]
Loading safetensors checkpoint shards:  20% Completed | 1/5 [00:04<00:18,  4.58s/it]
Loading safetensors checkpoint shards:  40% Completed | 2/5 [00:09<00:14,  4.95s/it]
Loading safetensors checkpoint shards:  60% Completed | 3/5 [00:15<00:10,  5.11s/it]
Loading safetensors checkpoint shards:  80% Completed | 4/5 [00:19<00:04,  4.67s/it]
Loading safetensors checkpoint shards: 100% Completed | 5/5 [00:20<00:00,  3.56s/it]
Loading safetensors checkpoint shards: 100% Completed | 5/5 [00:20<00:00,  4.13s/it]
(EngineCore pid=4949)
(EngineCore pid=4949) INFO 04-21 11:17:34 [default_loader.py:384] Loading weights took 20.69 seconds
(EngineCore pid=4949) INFO 04-21 11:17:35 [model_runner_v1.py:2589] Loading model weights took 17.6043 GB
.(EngineCore pid=4949) INFO 04-21 11:17:45 [backends.py:988] Using cache directory: /root/.cache/vllm/torch_compile_cache/f4cce3e59e/rank_0_0/backbone for vLLM's torch.compile
(EngineCore pid=4949) INFO 04-21 11:17:45 [backends.py:1048] Dynamo bytecode transform time: 9.42 s
(EngineCore pid=4949) ERROR 04-21 11:17:46 [core.py:1099] EngineCore failed to start.
(EngineCore pid=4949) ERROR 04-21 11:17:46 [core.py:1099] Traceback (most recent call last):
(EngineCore pid=4949) ERROR 04-21 11:17:46 [core.py:1099]   File "/vllm-workspace/vllm/vllm/v1/engine/core.py", line 1073, in run_engine_core
(EngineCore pid=4949) ERROR 04-21 11:17:46 [core.py:1099]     engine_core = EngineCoreProc(*args, engine_index=dp_rank, **kwargs)
(EngineCore pid=4949) ERROR 04-21 11:17:46 [core.py:1099]                   ^^^^^^^^^^^^^^^^^^^^^^^^^^^^^^^^^^^^^^^^^^^^^^^^^^^^^
(EngineCore pid=4949) ERROR 04-21 11:17:46 [core.py:1099]   File "/vllm-workspace/vllm/vllm/tracing/otel.py", line 178, in sync_wrapper
(EngineCore pid=4949) ERROR 04-21 11:17:46 [core.py:1099]     return func(*args, **kwargs)
(EngineCore pid=4949) ERROR 04-21 11:17:46 [core.py:1099]            ^^^^^^^^^^^^^^^^^^^^^
使用我的命令启动
export ASCEND_RT_VISIBLE_DEVICES=0,1

export PYTORCH_NPU_ALLOC_CONF="expandable_segments:True"
export HCCL_OP_EXPANSION_MODE="AIV"
export HCCL_BUFFSIZE=1024
export OMP_NUM_THREADS=1
export TASK_QUEUE_ENABLE=1

vllm serve /root/.cache/modelscope/hub/Qwen/Qwen3-8B \
--host 0.0.0.0 \
--port 8000 \
--served-model-name qwen3-8b \
--tensor-parallel-size 2 \
--data-parallel-size 1 \
--max-model-len 10240 \
--max-num-batched-tokens 20480 \
--gpu-memory-utilization 0.8 \
--trust-remote-code \
--seed 1024 \
--dtype=float16 \
--no-enable-prefix-caching \
--enforce-eager
5、下篇测试下qwen3.5

欢迎加入DeepSeek 技术社区。在这里,你可以找到志同道合的朋友,共同探索AI技术的奥秘。
更多推荐

 11
11 0
0- 0


 已为社区贡献2条内容

所有评论(0)