用codex和trae工具实现图像骨架线提取
·
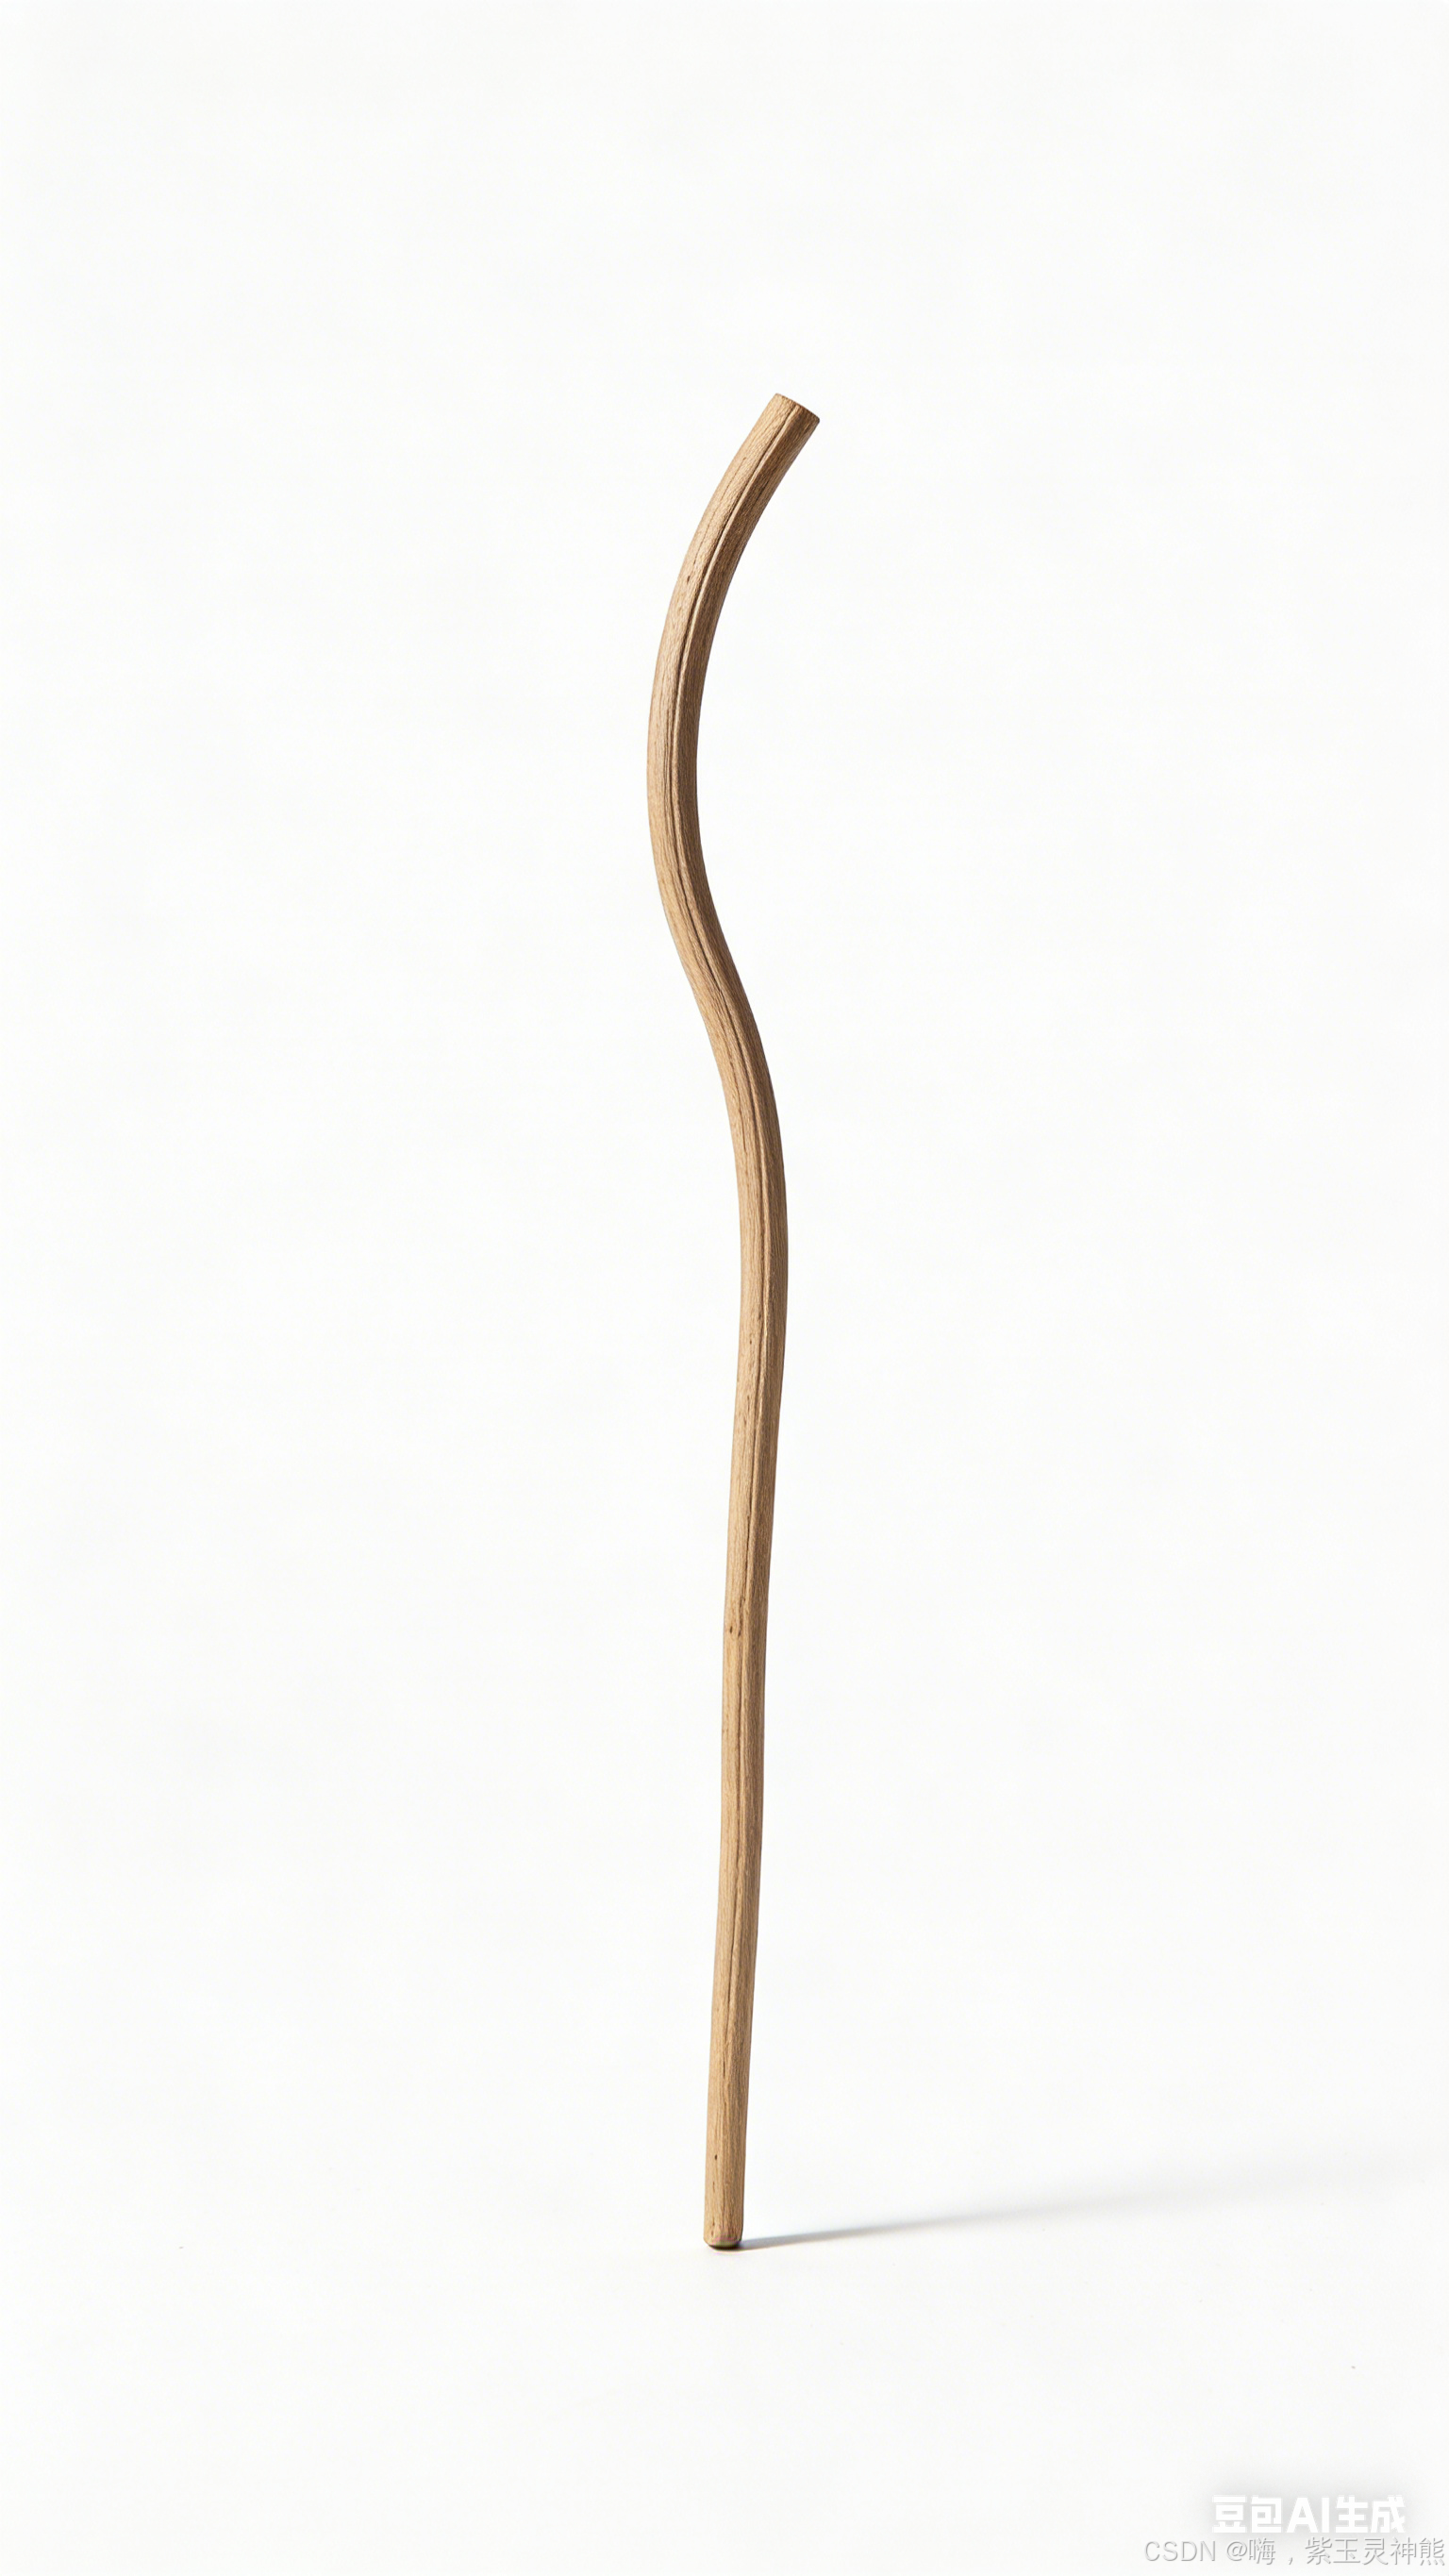
骨架线(Skeleton)又称中轴,是二值图像中目标区域的 1 像素宽中轴线,能够精准保留目标的拓扑结构(如连通性、端点、分支),同时极大压缩数据量。骨架线提取广泛应用于染色体分析、文字识别、工业检测、医学影像等领域。本文将从原理到实战,全面讲解骨架线提取的核心算法,并基于 Python 实现两种主流的骨架提取方案。
一、骨架线提取核心原理
骨架线提取的本质是对二值图像的前景区域进行 “细化”,通过迭代删除满足特定条件的边缘像素,最终保留 1 像素宽的中轴线。目前最主流的算法是Zhang-Suen(张 - 孙)快速并行细化算法,也是skimage等库的核心实现算法。
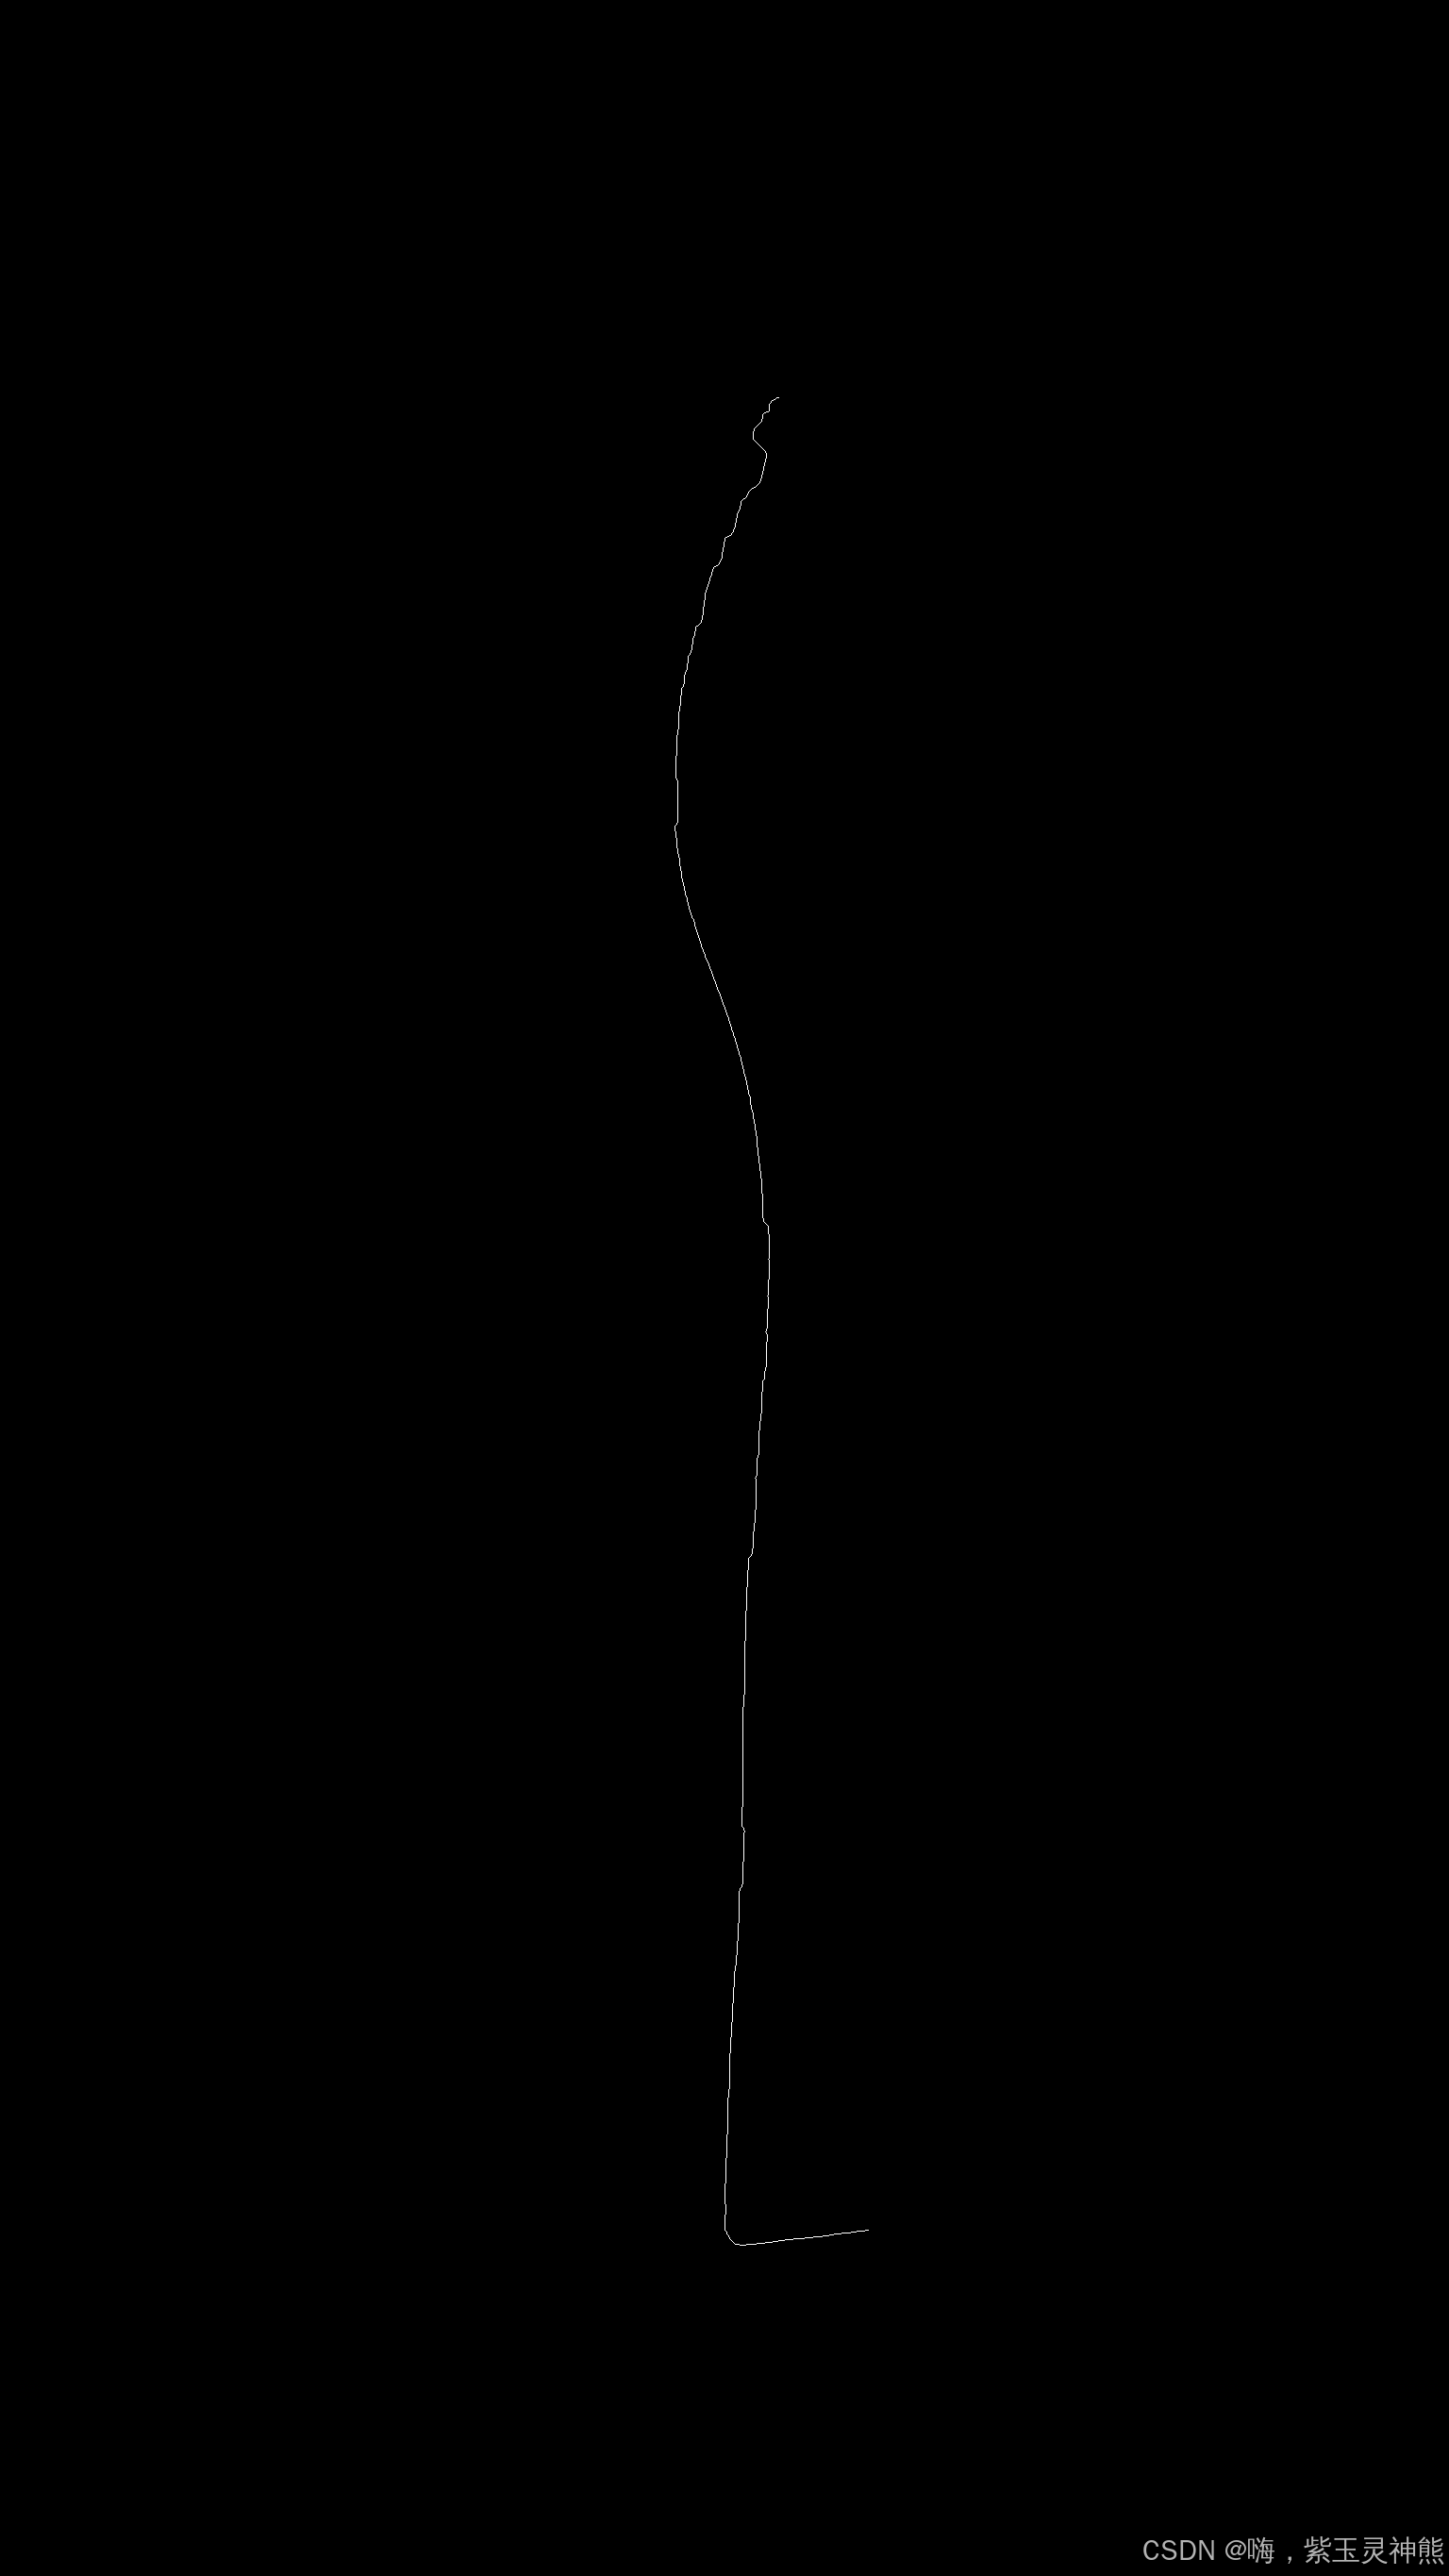
trae给了多种方法实现,使用skimage.morphology.skeletonize方法的提取效果最好。
"""
染色体中心线提取方法合集
包含多种算法来处理弯曲染色体的中心线提取问题
"""
import cv2
import numpy as np
from scipy.ndimage import uniform_filter1d, gaussian_filter, label
from scipy.sparse import csr_matrix
from scipy.sparse.csgraph import shortest_path, dijkstra
from scipy.interpolate import splprep, splev
from collections import deque
import warnings
warnings.filterwarnings('ignore')
class CenterlineExtractor:
"""染色体中心线提取器基类"""
def __init__(self, image):
if len(image.shape) == 3:
image = cv2.cvtColor(image, cv2.COLOR_BGR2GRAY)
self.image = image
self.h, self.w = image.shape
self.binary = self._preprocess()
self.dist = cv2.distanceTransform(self.binary, cv2.DIST_L2, 5)
def _preprocess(self):
"""预处理:二值化"""
binary = (self.image < 200).astype(np.uint8) * 255
kernel = cv2.getStructuringElement(cv2.MORPH_ELLIPSE, (3, 3))
binary = cv2.morphologyEx(binary, cv2.MORPH_CLOSE, kernel)
return binary
def extract(self):
"""子类必须实现的方法"""
raise NotImplementedError
def _create_centerline_image(self, points):
"""根据点创建中心线图像"""
centerline = np.zeros((self.h, self.w), dtype=np.uint8)
for x, y in points:
if 0 <= y < self.h and 0 <= x < self.w:
centerline[y, x] = 255
return centerline
class Method1_RidgeTracing(CenterlineExtractor):
"""
方法1:基于主曲率方向的脊线追踪
沿着染色体的局部切线方向追踪,而不是固定按行/列
"""
def extract(self):
# 平滑距离变换
dist_smooth = cv2.GaussianBlur(self.dist, (5, 5), 0)
# 计算梯度(得到局部方向)
sobelx = cv2.Sobel(dist_smooth, cv2.CV_64F, 1, 0, ksize=3)
sobely = cv2.Sobel(dist_smooth, cv2.CV_64F, 0, 1, ksize=3)
# 找到距离最大的点作为起点
max_dist_idx = np.unravel_index(np.argmax(self.dist), self.dist.shape)
start_y, start_x = max_dist_idx
# 脊线追踪
center_points = []
visited = np.zeros((self.h, self.w), dtype=bool)
# 双向追踪
for direction in [1, -1]:
x, y = start_x, start_y
visited[y, x] = True
center_points.append([x, y])
for _ in range(max(self.h, self.w)):
# 获取当前点的梯度方向
dx = sobelx[y, x]
dy = sobely[y, x]
# 切线方向(垂直于梯度)
tx, ty = -dy * direction, dx * direction
# 归一化
norm = np.sqrt(tx**2 + ty**2)
if norm > 0:
tx, ty = tx/norm, ty/norm
# 在切线方向搜索下一个点
best_next = None
best_score = -1
for step in [0.5, 1.0, 1.5, 2.0]:
nx = int(x + tx * step)
ny = int(y + ty * step)
if 0 <= nx < self.w and 0 <= ny < self.h and not visited[ny, nx]:
if self.binary[ny, nx] > 0:
score = self.dist[ny, nx]
if score > best_score:
best_score = score
best_next = (nx, ny)
if best_next is None:
break
x, y = best_next
visited[y, x] = True
if direction == 1:
center_points.append([x, y])
else:
center_points.insert(0, [x, y])
center_points = np.array(center_points)
# 去重
if len(center_points) > 1:
unique_points = [center_points[0]]
for i in range(1, len(center_points)):
if np.linalg.norm(center_points[i] - center_points[i-1]) > 0.5:
unique_points.append(center_points[i])
center_points = np.array(unique_points)
centerline = self._create_centerline_image(center_points)
return centerline, center_points
class Method2_GraphBased(CenterlineExtractor):
"""
方法2:基于图论的最短路径
构建图,节点是染色体内部像素,边权重基于距离变换
"""
def extract(self):
# 找到染色体内部的像素
y_coords, x_coords = np.where(self.binary > 0)
if len(y_coords) == 0:
raise ValueError("未找到染色体")
# 构建节点到索引的映射
node_map = {}
for i, (y, x) in enumerate(zip(y_coords, x_coords)):
node_map[(y, x)] = i
n_nodes = len(y_coords)
# 构建邻接表(稀疏表示)
row_indices = []
col_indices = []
data = []
for i, (y, x) in enumerate(zip(y_coords, x_coords)):
# 8邻域
for dy in [-1, 0, 1]:
for dx in [-1, 0, 1]:
if dy == 0 and dx == 0:
continue
ny, nx = y + dy, x + dx
if (ny, nx) in node_map:
j = node_map[(ny, nx)]
# 权重:距离变换值越大,权重越小
weight = 1.0 / (self.dist[y, x] + 0.1) + 1.0 / (self.dist[ny, nx] + 0.1)
row_indices.append(i)
col_indices.append(j)
data.append(weight)
# 找到两个端点(距离最远的两个边界点)
boundary_points = []
for i, (y, x) in enumerate(zip(y_coords, x_coords)):
is_boundary = False
for dy in [-1, 0, 1]:
for dx in [-1, 0, 1]:
if dy == 0 and dx == 0:
continue
ny, nx = y + dy, x + dx
if 0 <= ny < self.h and 0 <= nx < self.w:
if self.binary[ny, nx] == 0:
is_boundary = True
break
if is_boundary:
break
if is_boundary:
boundary_points.append(i)
if len(boundary_points) < 2:
# 如果没有明显边界点,使用距离最远的两个点
max_dist = 0
start_idx, end_idx = 0, min(1, n_nodes-1)
for i in range(min(100, n_nodes)): # 限制搜索范围
for j in range(i+1, min(100, n_nodes)):
yi, xi = y_coords[i], x_coords[i]
yj, xj = y_coords[j], x_coords[j]
d = (yi-yj)**2 + (xi-xj)**2
if d > max_dist:
max_dist = d
start_idx, end_idx = i, j
else:
# 找到距离最远的两个边界点
max_dist = 0
start_idx, end_idx = boundary_points[0], boundary_points[1]
for i in boundary_points:
for j in boundary_points:
if i != j:
yi, xi = y_coords[i], x_coords[i]
yj, xj = y_coords[j], x_coords[j]
d = (yi-yj)**2 + (xi-xj)**2
if d > max_dist:
max_dist = d
start_idx, end_idx = i, j
# 使用Dijkstra算法找最短路径
graph = csr_matrix((data, (row_indices, col_indices)), shape=(n_nodes, n_nodes))
dist_matrix, predecessors = dijkstra(csgraph=graph, directed=False,
indices=start_idx, return_predecessors=True)
# 回溯路径
path = [end_idx]
current = end_idx
while current != start_idx and predecessors[current] >= 0:
current = predecessors[current]
path.append(current)
path.reverse()
# 转换为坐标
center_points = np.array([[x_coords[i], y_coords[i]] for i in path])
# 采样以减少点数
if len(center_points) > 200:
indices = np.linspace(0, len(center_points)-1, 200, dtype=int)
center_points = center_points[indices]
centerline = self._create_centerline_image(center_points)
return centerline, center_points
class Method3_SkeletonRefined(CenterlineExtractor):
"""
方法3:基于骨架细化的改进
使用skimage的骨架化,然后进行后处理
"""
def extract(self):
try:
from skimage.morphology import skeletonize
except ImportError:
raise ImportError("需要安装scikit-image: pip install scikit-image")
# 骨架化
binary_bool = self.binary > 0
skeleton = skeletonize(binary_bool).astype(np.uint8) * 255
# 提取骨架点
y_coords, x_coords = np.where(skeleton > 0)
if len(y_coords) == 0:
raise ValueError("未找到骨架")
# 找到两个端点(8邻域中只有一个骨架点的点)
endpoints = []
for y, x in zip(y_coords, x_coords):
neighbor_count = 0
for dy in [-1, 0, 1]:
for dx in [-1, 0, 1]:
if dy == 0 and dx == 0:
continue
if 0 <= y+dy < self.h and 0 <= x+dx < self.w:
if skeleton[y+dy, x+dx] > 0:
neighbor_count += 1
if neighbor_count == 1:
endpoints.append([x, y])
# 如果没有找到端点,使用距离最远的两个点
if len(endpoints) < 2:
max_dist = 0
endpoints = [[x_coords[0], y_coords[0]], [x_coords[0], y_coords[0]]]
for i in range(len(x_coords)):
for j in range(i+1, len(x_coords)):
d = (x_coords[i]-x_coords[j])**2 + (y_coords[i]-y_coords[j])**2
if d > max_dist:
max_dist = d
endpoints = [[x_coords[i], y_coords[i]], [x_coords[j], y_coords[j]]]
# 从一端追踪到另一端(BFS)
start = tuple(endpoints[0])
end = tuple(endpoints[1])
queue = deque([(start, [start])])
visited = set([start])
center_points = None
while queue:
(x, y), path = queue.popleft()
if (x, y) == end:
center_points = np.array([[p[0], p[1]] for p in path])
break
for dy in [-1, 0, 1]:
for dx in [-1, 0, 1]:
if dy == 0 and dx == 0:
continue
nx, ny = x + dx, y + dy
if 0 <= nx < self.w and 0 <= ny < self.h:
if skeleton[ny, nx] > 0 and (nx, ny) not in visited:
visited.add((nx, ny))
queue.append(((nx, ny), path + [(nx, ny)]))
if center_points is None:
# 如果没找到路径,使用所有骨架点并按距离排序
points = np.column_stack([x_coords, y_coords])
# 找到两个最远点
max_dist = 0
start_idx, end_idx = 0, 0
for i in range(len(points)):
for j in range(i+1, len(points)):
d = np.sum((points[i] - points[j])**2)
if d > max_dist:
max_dist = d
start_idx, end_idx = i, j
# 按最近邻排序
ordered = [points[start_idx]]
remaining = set(range(len(points)))
remaining.remove(start_idx)
while remaining:
last = ordered[-1]
nearest = min(remaining, key=lambda i: np.sum((points[i] - last)**2))
ordered.append(points[nearest])
remaining.remove(nearest)
center_points = np.array(ordered)
# 使用样条插值平滑
if len(center_points) > 10:
try:
# 参数化曲线
t = np.linspace(0, 1, len(center_points))
# 使用B样条
window = min(11, len(center_points)//2)
if window % 2 == 0:
window += 1
x_smooth = uniform_filter1d(center_points[:, 0].astype(float), size=window)
y_smooth = uniform_filter1d(center_points[:, 1].astype(float), size=window)
center_points = np.column_stack([x_smooth.astype(int), y_smooth.astype(int)])
except Exception as e:
pass # 如果平滑失败,使用原始点
centerline = self._create_centerline_image(center_points)
return centerline, center_points
class Method4_ActiveContour(CenterlineExtractor):
"""
方法4:基于主动轮廓模型(Snake)
使用主动轮廓拟合中心线
"""
def extract(self, num_points=50):
try:
from skimage.segmentation import active_contour
except ImportError:
raise ImportError("需要安装scikit-image: pip install scikit-image")
# 找到轮廓
contours, _ = cv2.findContours(self.binary, cv2.RETR_EXTERNAL, cv2.CHAIN_APPROX_NONE)
if not contours:
raise ValueError("未找到轮廓")
contour = max(contours, key=cv2.contourArea).reshape(-1, 2)
# 计算轮廓的中心线作为初始蛇
# 使用距离变换的脊线作为初始值
dist_smooth = cv2.GaussianBlur(self.dist, (7, 7), 0)
# 找到距离变换的局部最大值作为初始点
from scipy.ndimage import maximum_filter
local_max = (dist_smooth == maximum_filter(dist_smooth, size=10))
y_max, x_max = np.where(local_max & (self.binary > 0))
if len(y_max) < 2:
# 如果没有足够的局部最大值,使用距离最大的点
max_idx = np.unravel_index(np.argmax(self.dist), self.dist.shape)
y_max, x_max = [max_idx[0]], [max_idx[1]]
# 选择距离最远的两个点作为端点
if len(y_max) >= 2:
max_dist = 0
start_idx, end_idx = 0, 1
for i in range(len(y_max)):
for j in range(i+1, len(y_max)):
d = (y_max[i]-y_max[j])**2 + (x_max[i]-x_max[j])**2
if d > max_dist:
max_dist = d
start_idx, end_idx = i, j
# 在这两点之间插值生成初始蛇
init = []
for t in np.linspace(0, 1, num_points):
x = int(x_max[start_idx] * (1-t) + x_max[end_idx] * t)
y = int(y_max[start_idx] * (1-t) + y_max[end_idx] * t)
init.append([x, y])
init = np.array(init)
else:
# 使用轮廓的中心
M = cv2.moments(self.binary)
if M["m00"] != 0:
cx = int(M["m10"] / M["m00"])
cy = int(M["m01"] / M["m00"])
else:
cx, cy = self.w // 2, self.h // 2
# 垂直线
init = np.array([[cx, y] for y in np.linspace(0, self.h-1, num_points)])
# 反转图像(active_contour需要前景是亮的)
img_inv = 255 - self.image
# 使用主动轮廓模型
try:
snake = active_contour(img_inv, init, alpha=0.01, beta=0.1, gamma=0.01,
w_line=-1, w_edge=1)
center_points = snake.astype(int)
except Exception as e:
# 如果失败,使用初始点
center_points = init.astype(int)
# 确保点在图像内
center_points[:, 0] = np.clip(center_points[:, 0], 0, self.w - 1)
center_points[:, 1] = np.clip(center_points[:, 1], 0, self.h - 1)
centerline = self._create_centerline_image(center_points)
return centerline, center_points
class Method5_DistanceRidge(CenterlineExtractor):
"""
方法5:基于距离变换脊线的改进
使用距离变换的局部最大值,并进行连通性处理
"""
def extract(self):
# 距离变换
dist = self.dist.astype(np.float32)
# 找到局部最大值(脊线)
from scipy.ndimage import maximum_filter
local_max = (dist == maximum_filter(dist, size=5))
# 只保留在染色体内部的局部最大值
ridge = local_max & (self.binary > 0)
# 找到最大的连通区域
labeled, num_features = label(ridge)
if num_features == 0:
raise ValueError("未找到脊线")
# 选择最大的连通区域
largest_label = 1
largest_size = 0
for i in range(1, num_features + 1):
size = np.sum(labeled == i)
if size > largest_size:
largest_size = size
largest_label = i
ridge_main = (labeled == largest_label)
# 提取脊线点
y_coords, x_coords = np.where(ridge_main)
if len(y_coords) == 0:
raise ValueError("未找到脊线点")
# 按距离变换值排序,选择最中心的点
points = np.column_stack([x_coords, y_coords])
dist_values = dist[y_coords, x_coords]
# 找到两个端点(距离最远的点)
max_dist = 0
start_idx, end_idx = 0, 0
for i in range(min(50, len(points))):
for j in range(i+1, min(50, len(points))):
d = np.sum((points[i] - points[j])**2)
if d > max_dist:
max_dist = d
start_idx, end_idx = i, j
# 使用Dijkstra在距离变换图上找到路径
# 构建图
node_map = {}
for i, (y, x) in enumerate(zip(y_coords, x_coords)):
node_map[(y, x)] = i
n_nodes = len(y_coords)
row_indices = []
col_indices = []
data = []
for i, (y, x) in enumerate(zip(y_coords, x_coords)):
for dy in [-1, 0, 1]:
for dx in [-1, 0, 1]:
if dy == 0 and dx == 0:
continue
ny, nx = y + dy, x + dx
if (ny, nx) in node_map:
j = node_map[(ny, nx)]
# 权重:距离越大越好,所以用负值
weight = -dist[y, x] - dist[ny, nx]
row_indices.append(i)
col_indices.append(j)
data.append(weight)
if len(data) == 0:
# 没有连通性,直接按距离排序
center_points = points[np.argsort(-dist_values)]
else:
graph = csr_matrix((data, (row_indices, col_indices)), shape=(n_nodes, n_nodes))
dist_matrix, predecessors = dijkstra(csgraph=graph, directed=False,
indices=start_idx, return_predecessors=True)
# 回溯路径
path = [end_idx]
current = end_idx
while current != start_idx and predecessors[current] >= 0:
current = predecessors[current]
path.append(current)
path.reverse()
center_points = np.array([[x_coords[i], y_coords[i]] for i in path])
# 插值以获得更平滑的曲线
if len(center_points) > 3:
try:
tck, u = splprep([center_points[:, 0].astype(float),
center_points[:, 1].astype(float)], s=len(center_points)*0.5)
u_new = np.linspace(0, 1, len(center_points))
x_new, y_new = splev(u_new, tck)
center_points = np.column_stack([x_new.astype(int), y_new.astype(int)])
except:
pass
centerline = self._create_centerline_image(center_points)
return centerline, center_points
def compare_methods(image_path, save_prefix='comparison'):
"""
对比所有方法的结果
"""
import matplotlib.pyplot as plt
image = cv2.imread(image_path, cv2.IMREAD_GRAYSCALE)
if image is None:
raise ValueError(f"无法读取图像: {image_path}")
methods = [
('Method1: Ridge Tracing', Method1_RidgeTracing),
('Method2: Graph Based', Method2_GraphBased),
('Method3: Skeleton Refined', Method3_SkeletonRefined),
('Method4: Active Contour', Method4_ActiveContour),
('Method5: Distance Ridge', Method5_DistanceRidge),
]
results = []
for name, MethodClass in methods:
try:
extractor = MethodClass(image)
centerline, points = extractor.extract()
results.append((name, centerline, points, None))
except Exception as e:
results.append((name, None, None, str(e)))
# 可视化
n_methods = len(results)
fig, axes = plt.subplots(2, 3, figsize=(18, 12))
axes = axes.flatten()
# 原始图像
axes[0].imshow(image, cmap='gray')
axes[0].set_title('Original Image')
axes[0].axis('off')
for i, (name, centerline, points, error) in enumerate(results):
ax = axes[i + 1]
if error:
ax.text(0.5, 0.5, f'Error:\n{error}',
ha='center', va='center', transform=ax.transAxes)
ax.set_title(name)
else:
overlay = cv2.cvtColor(image, cv2.COLOR_GRAY2BGR)
for x, y in points:
cv2.circle(overlay, (int(x), int(y)), 2, (0, 0, 255), -1)
ax.imshow(cv2.cvtColor(overlay, cv2.COLOR_BGR2RGB))
ax.set_title(f'{name}\n({len(points)} points)')
ax.axis('off')
plt.tight_layout()
plt.savefig(f'{save_prefix}_{image_path}', dpi=150, bbox_inches='tight')
plt.show()
return results
def process_all_images():
"""
处理所有染色体图像
"""
image_files = ['m.png']
for img_file in image_files:
print(f"\n{'='*60}")
print(f"处理: {img_file}")
print('='*60)
try:
results = compare_methods(img_file, save_prefix='comparison')
for name, centerline, points, error in results:
if error:
print(f" {name}: 失败 - {error}")
else:
print(f" {name}: {len(points)} 个点")
# 保存结果
method_name = name.split(':')[0].lower().replace(' ', '_')
cv2.imwrite(f'{method_name}_centerline_{img_file}', centerline)
except Exception as e:
print(f" 处理失败: {e}")
if __name__ == "__main__":
process_all_images()
codex直接使用了skimage.morphology.skeletonize,
#!/usr/bin/env python3
"\"\"\"Extract a continuous centerline that follows the chromosome foreground.\"\""

import argparse
from collections import deque
from pathlib import Path

import cv2
import numpy as np
from skimage.morphology import binary_closing, disk, skeletonize


def load_binary_mask(path: Path) -> np.ndarray:
    img = cv2.imread(str(path), cv2.IMREAD_GRAYSCALE)
    if img is None:
        raise FileNotFoundError(f"unable to read {path}")
    return img < 200


def postprocess_mask(mask: np.ndarray, closing_radius: int) -> np.ndarray:
    if closing_radius <= 0:
        return mask
    selem = disk(closing_radius)
    return binary_closing(mask, selem)


def skeleton_graph(skel: np.ndarray) -> dict[tuple[int, int], list[tuple[int, int]]]:
    neighbors: dict[tuple[int, int], list[tuple[int, int]]] = {}
    h, w = skel.shape
    for r, c in zip(*np.nonzero(skel)):
        node = (int(r), int(c))
        neighbors.setdefault(node, [])
        for dr in (-1, 0, 1):
            for dc in (-1, 0, 1):
                if dr == 0 and dc == 0:
                    continue
                nr, nc = r + dr, c + dc
                if 0 <= nr < h and 0 <= nc < w and skel[nr, nc]:
                    neighbors[node].append((int(nr), int(nc)))
    return neighbors


def bfs_farther(start: tuple[int, int], graph: dict[tuple[int, int], list[tuple[int, int]]]) -> tuple[tuple[int, int], dict[tuple[int, int], tuple[int, int] | None]]:
    queue = deque([start])
    parents = {start: None}
    farthest = start
    while queue:
        node = queue.popleft()
        for neigh in graph.get(node, []):
            if neigh in parents:
                continue
            parents[neigh] = node
            queue.append(neigh)
            farthest = neigh
    return farthest, parents


def diameter_path(graph: dict[tuple[int, int], list[tuple[int, int]]]) -> list[tuple[int, int]]:
    if not graph:
        return []
    start = next(iter(graph))
    far, _ = bfs_farther(start, graph)
    far2, parents = bfs_farther(far, graph)
    path: list[tuple[int, int]] = []
    node = far2
    while node is not None:
        path.append(node)
        node = parents[node]
    path.reverse()
    return path


def draw_centerline(path: list[tuple[int, int]], shape: tuple[int, int]) -> np.ndarray:
    centerline = np.zeros(shape, dtype=np.uint8)
    for y, x in path:
        centerline[y, x] = 255
    return centerline


def ensure_path(path: list[tuple[int, int]]) -> list[tuple[int, int]]:
    if not path:
        raise RuntimeError("skeleton did not produce a valid centerline")
    return path


def write_overlay(image_path: Path, centerline: np.ndarray, overlay_path: Path) -> None:
    orig = cv2.imread(str(image_path))
    if orig is None:
        raise FileNotFoundError(f"unable to read {image_path} for overlay")
    overlay = orig.copy()
    overlay[centerline == 255] = (0, 0, 255)
    cv2.imwrite(str(overlay_path), overlay)


def parse_args() -> argparse.Namespace:
    parser = argparse.ArgumentParser(description="Extract chromosome centerline as a continuous path.")
    parser.add_argument("input", type=Path, help="grayscale image where 255 represents the background")
    parser.add_argument("--output", type=Path, default=Path("centerline.png"), help="where to save the centerline mask")
    parser.add_argument("--overlay", type=Path, help="optional overlay image that paints the centerline red on the source")
    parser.add_argument("--closing-radius", type=int, default=3, help="radius for morphological closing to bridge minor gaps")
    return parser.parse_args()


def main() -> None:
    args = parse_args()
    mask = load_binary_mask(args.input)
    cleaned = postprocess_mask(mask, max(0, args.closing_radius))
    skel = skeletonize(cleaned).astype(bool)
    graph = skeleton_graph(skel)
    path = ensure_path(diameter_path(graph))
    centerline = draw_centerline(path, mask.shape)
    cv2.imwrite(str(args.output), centerline)
    if args.overlay:
        write_overlay(args.input, centerline, args.overlay)
    print(f"Saved centerline ({len(path)} pixels) to {args.output}")
    if args.overlay:
        print(f"Saved overlay to {args.overlay}")


if __name__ == "__main__":
    main()

欢迎加入DeepSeek 技术社区。在这里,你可以找到志同道合的朋友,共同探索AI技术的奥秘。
更多推荐

 1
1 0
0- 0


 已为社区贡献1条内容

所有评论(0)