配置opencode
配置opencode总结
今年以openclaw开门红的agent很火,我开始搞agent算是比较晚的,周围人都把Claude code和codex这些玩遍了我还在用chatbot,这两天尝试了一下开源免费的opencode,下面是我折腾两天的总结:
安装和配置opencode
官方给了五种下载方法,环境支持哪种用哪种
curl -fsSL https://opencode.ai/install | bash
npm i -g opencode-ai
bun add -g opencode-ai
brew install anomalyco/tap/opencode
paru -S opencode
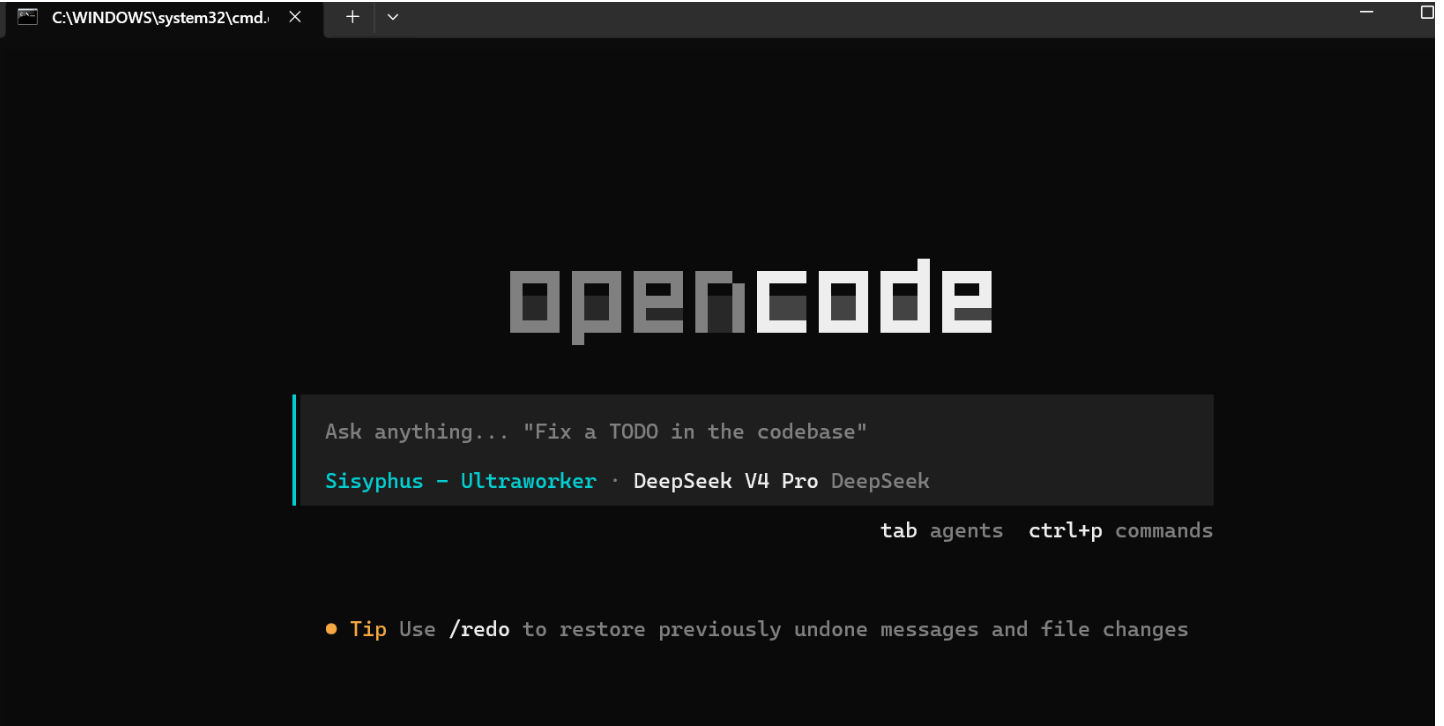
安装完之后直接在终端输入opencode即可唤醒,也可以输入opencode web唤醒GUI网页版,
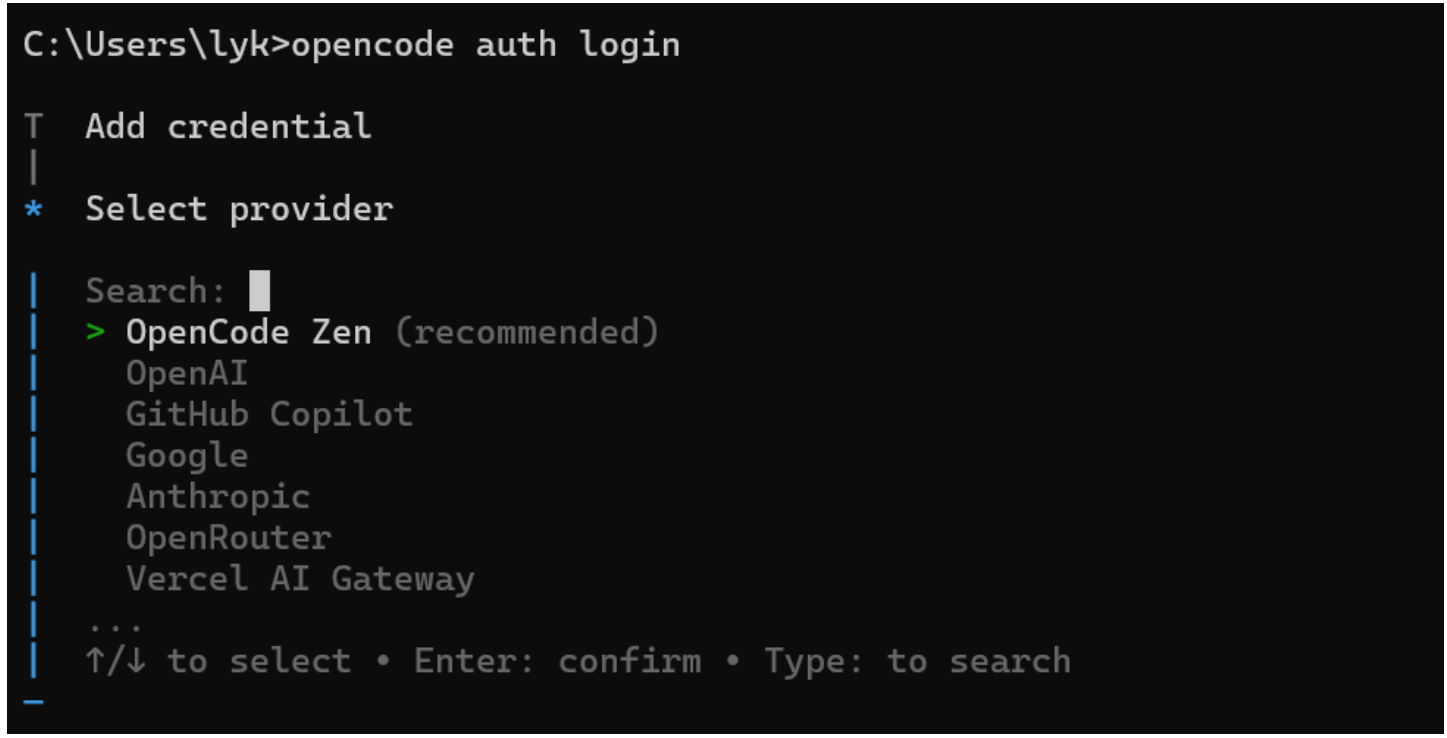
输入opencode auth login与想用的模型供应商建立连接,选择之后输入api key就能用旗下的模型了,也可以选择用opencode官方提供免费的模型,就是不知道实力如何。
也可以在web版配置供应商,很方便,除了选择官方供应商之外,还可以自定义供应商,自定义供应商可以是自己本地写的模型,也可以是集成多个大模型的中转站,相比于官方更推荐使用中转站,一个key吃遍天,后面使用多agent开发时不用为许多api_key不好管理发狂,也不用面对官方的天价token(但deepseek是真便宜),还有一些其他原因不得不用中转站,大家懂得都懂。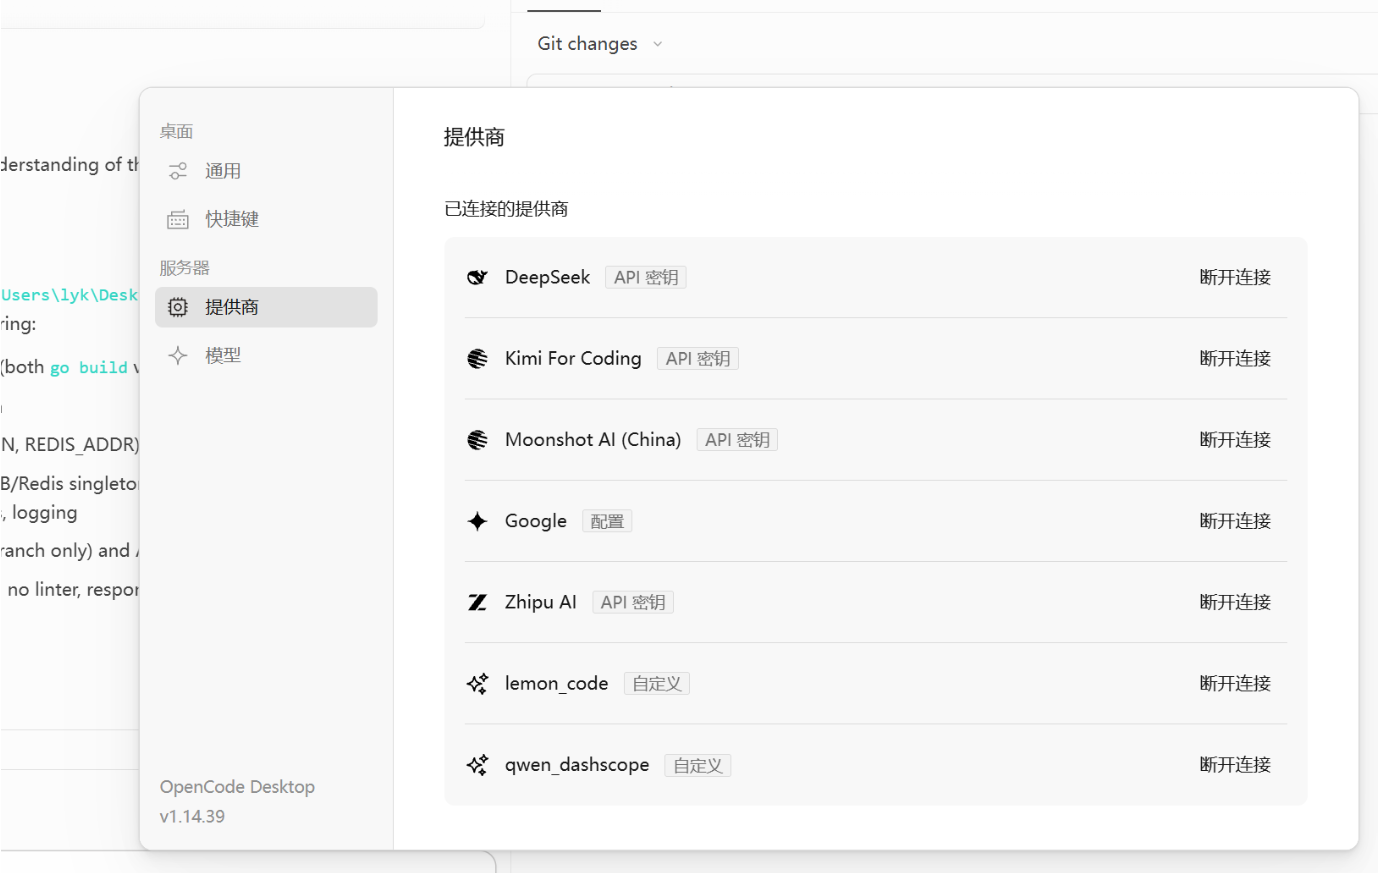
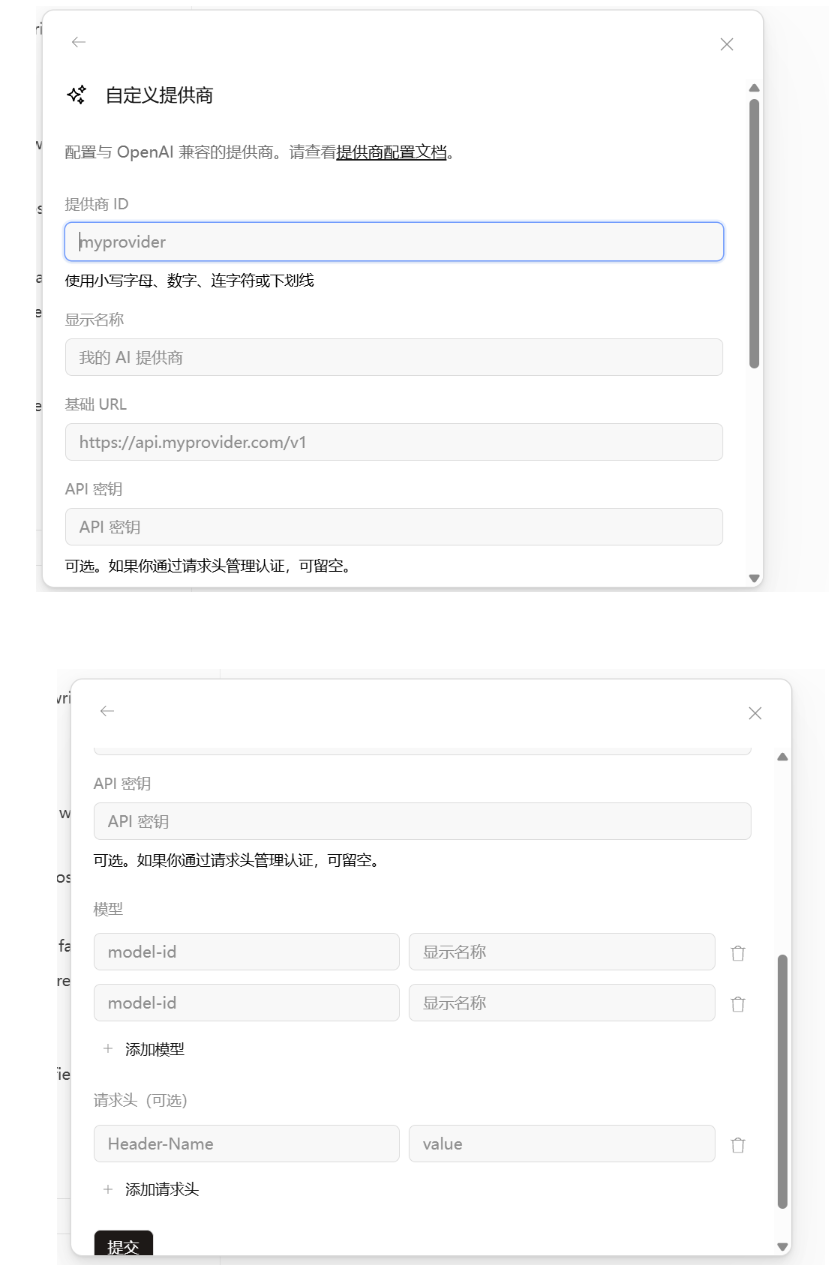
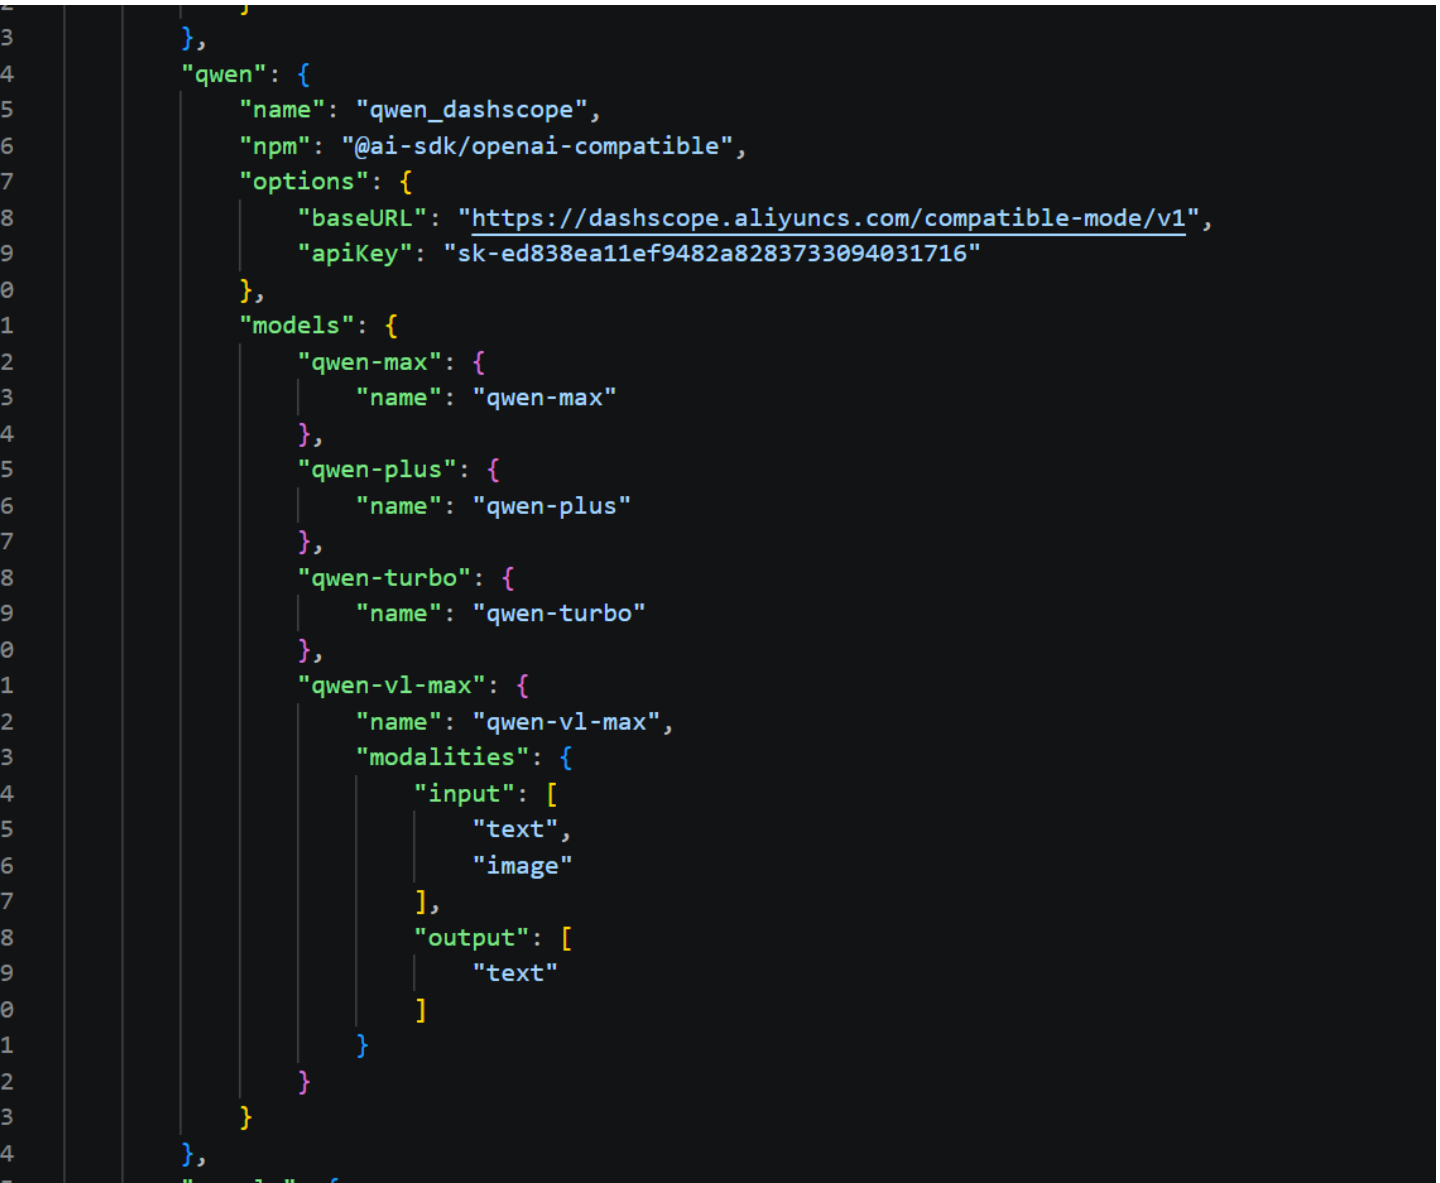
自定义provider时提供商的ID随意取,但是下面模型ID注意别填错,填错就用不了了,自定义的provider可以在opencode.jsonc(有的可能是json)里查看修改MCP
对于不想要的provider,可以open auth logout选择不想要的provider切断连接
opencode使用
原生的agent有plan和builder,前者只能读文件并作出规划方案,后者权限更大可以上手直接干活,平时写作业够用了,没必要多讲,后面会被oh-my-openagent插件取代。
几个常用的命令
/models  #切换模型,选择已经connect的供应商旗下的模型

/sessions #选择历史对话

/new #在使用过程中开启一个新对话,实现并行

/init #生成对该目录下项目的markdown总结

/share #把当前session的对话记录生成网页,网址自动复制进粘贴板

/unshare #取消分析,之前生成的网页链接销毁

/export #把当前对话导出为文件

/timeline #对话的时间线会被自动保留,这个命令可以进行1.时间线回退2.对应时间线对话复制3.对着某个时间线展开新对话
skills
这个个人认为很超模,不用自己想prompt,一个skill包自动把agent调教好了.在当前项目里建立.opencode/skills/skillname1/*.md
# 项目目录树形结构
.opencode/
└── skills/
    ├── skillname1/
    │   ├── README.md
    │   ├── *.md
    │   └── *.md
    ├── skillname2/
    │   ├── *.md
    │   └── *.md
    ├── skillname3/
    │   └── *.md
    └── skillname4/
        ├── *.md
        └── *.md
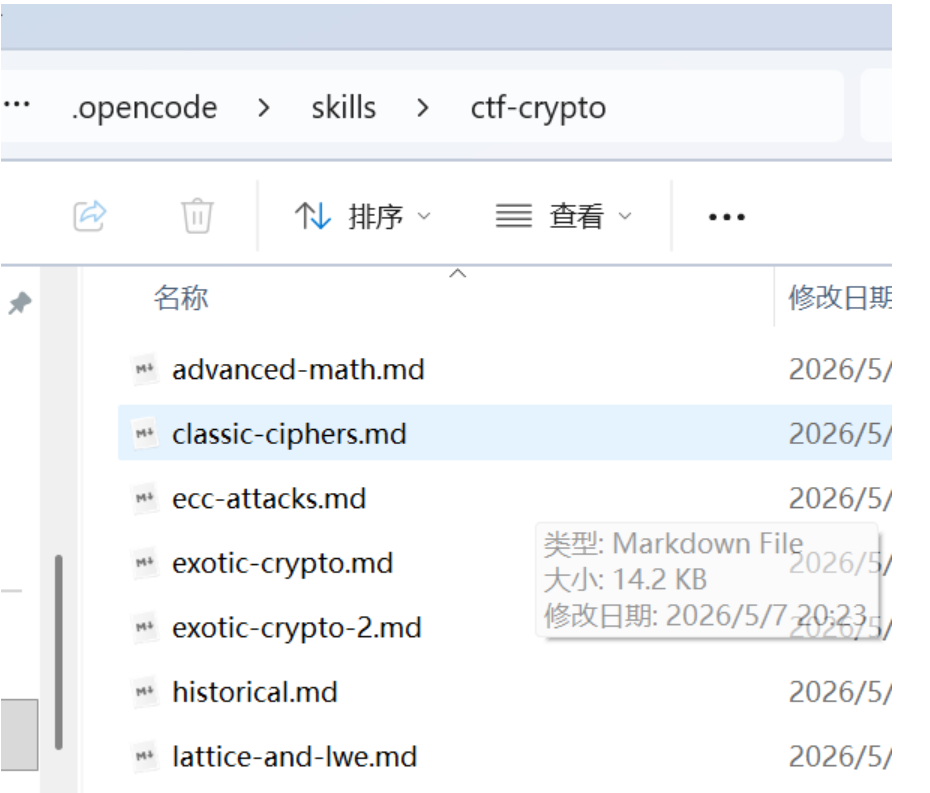
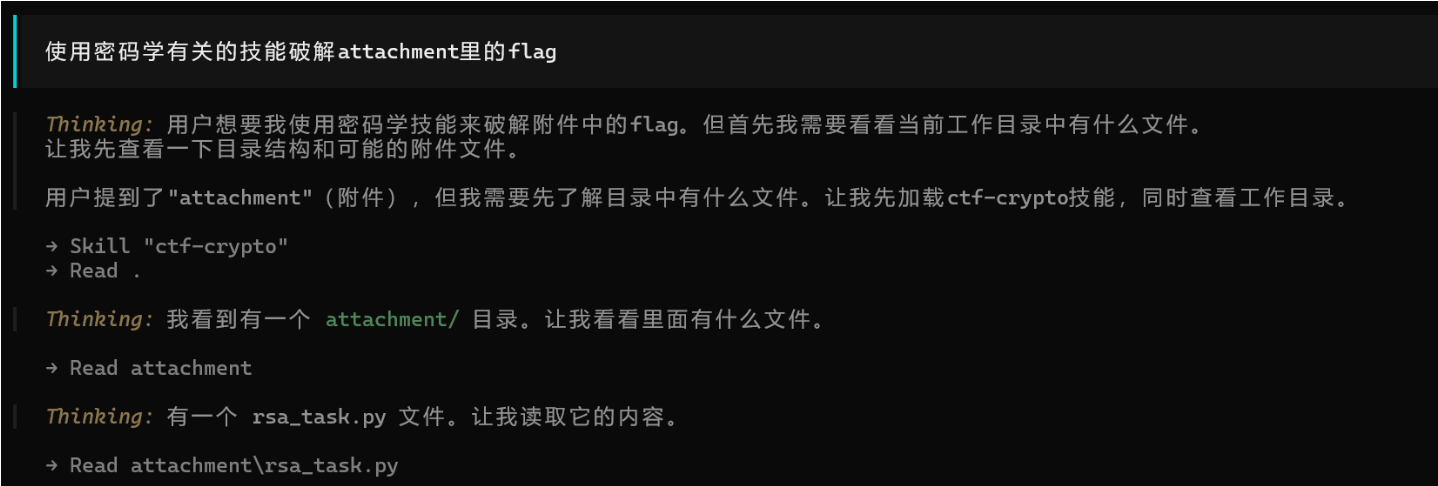
这里我放了一个密码学有关的skill包,在项目打开opencode,询问你有哪些skills,它会如实回答(下面的是插件带的skills,先忽略)

拿一个有瑕疵的加密给它解试试,
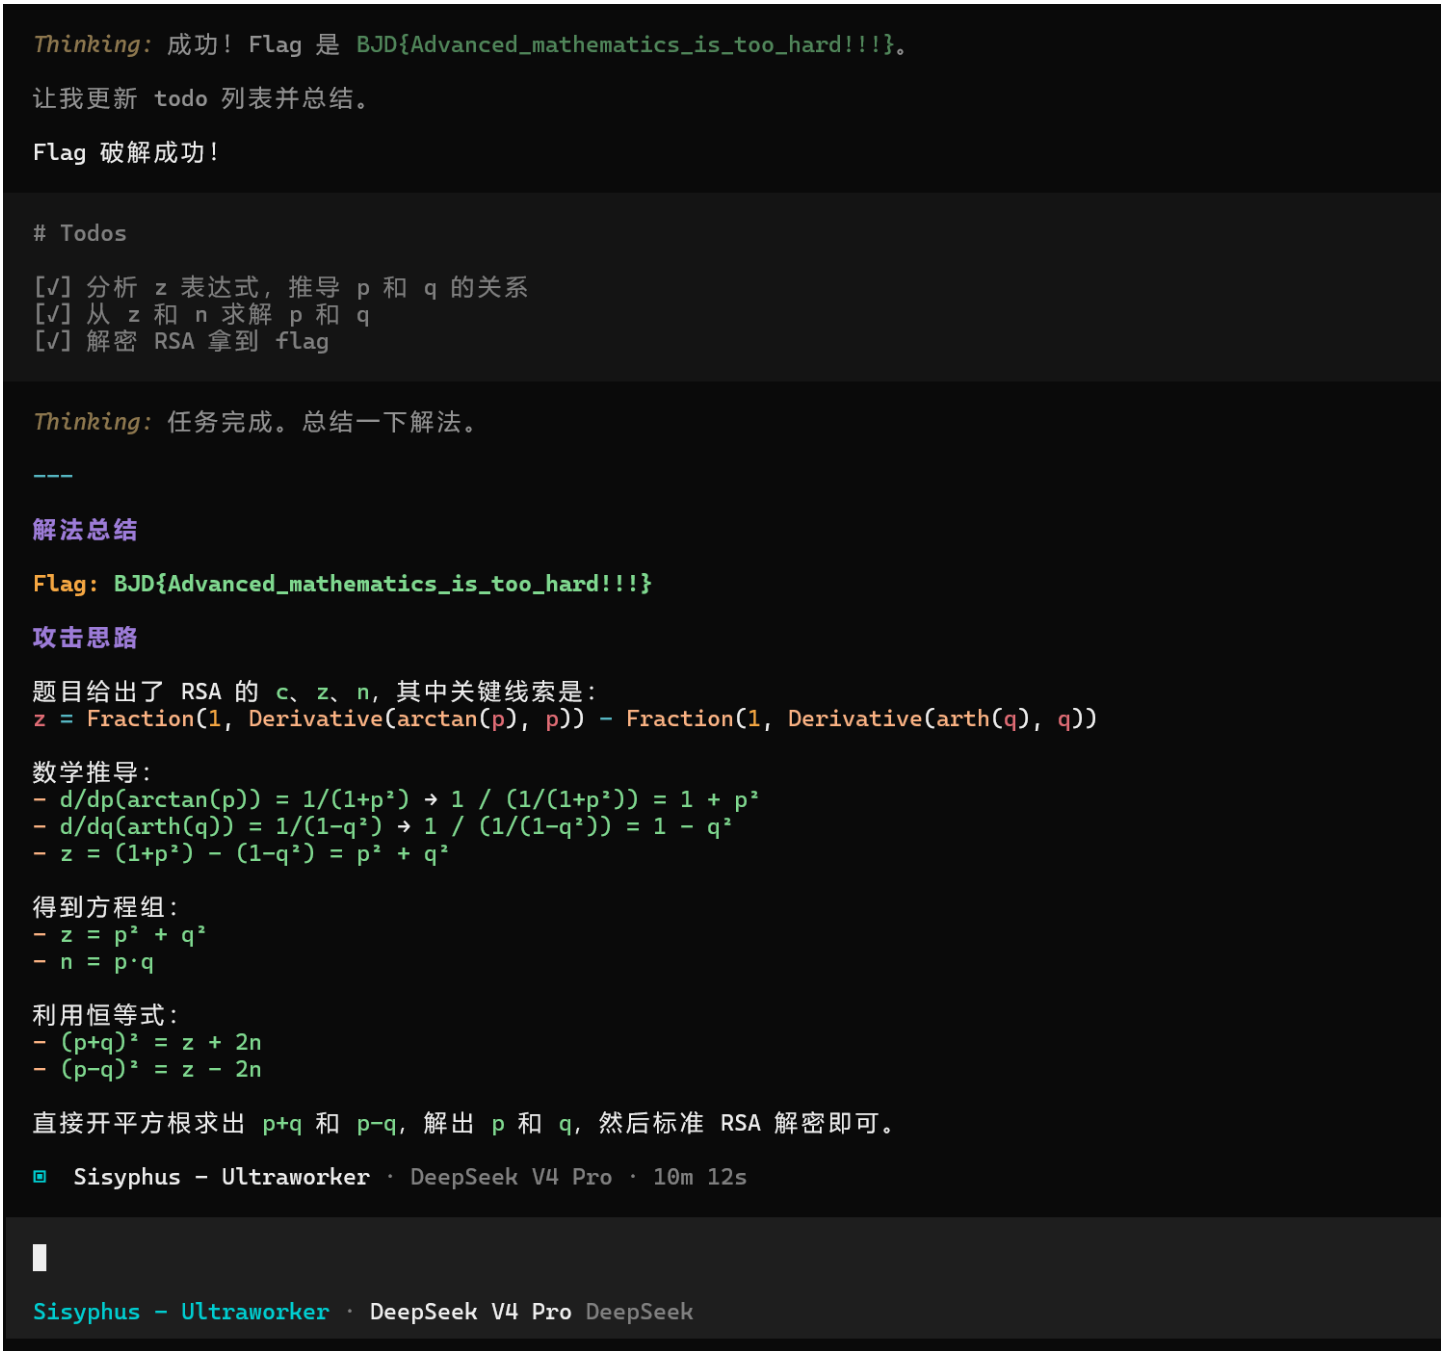
Deepseek v4虽然想了10min但是也是成功破解了(性价比是真高)
oh-my-openagent
这是opencode最火的插件之一,预设了三个MCP(websearch负责网络搜索,context7用于获取各种代码库,grep_app在公共github仓库超快代码搜索),主要的亮点是在取消了原plan和build智能体,新增了七大智能体(新版本貌似不止七个)组成的agent团队,每个智能体有自己用处(比如Sisyphus西西弗斯负责规划,oracle先知负责架构设计,librarian图书管理员负责查阅文献)。相比于没装插件的单agent工作,这些agent可以团队工作加快效率,当然多agents集成工作也很烧token。
安装
把下面这段内容直接丢给你的opencode,让它去装
Install and configure oh-my-opencode by following the instructions here:
https://raw.githubusercontent.com/code-yeongyu/oh-my-opencode/refs/heads/master/docs/guide/installation.md
安装之后它会询问你订阅provider的情况,是为了给你的agent配模型,可以如实回答(可能改变agent团队结构,反正我如实回答只订阅了Gemini,团队结构被改了),也可以全选no,最好还是选no根据实际情况自己配置(毕竟有人用的是中转站而不是官方provider),当然官方provider全都订阅有条件的朋友可以全选yes,它会自动给你每个agent配出最适合的模型。
agents模型配置
每个agent负责的方向不同,自然适配市面上不同的模型(比如sisyphus的目前的顶配是最擅长规划的claude-opus-4-5),当然像我这种手头拮据的不可能一直用满血的agent,有时会换成便宜一些的模型。
安装插件后会在/用户/.config/opencode/下生成oh-my-openagent.json,它来决定agents的配置
{
  "$schema": "https://raw.githubusercontent.com/code-yeongyu/oh-my-openagent/dev/assets/oh-my-opencode.schema.json",
  "agents": {
    "sisyphus": {
      "model": "deepseek/deepseek-v4-pro",
      "prompt_append": "Always think and respond in Chinese (简体中文). All internal reasoning and external responses must be in Chinese."
    },
    "oracle": {
      "model": "deepseek/deepseek-reasoner",
      "variant": "high",
      "prompt_append": "Always think and respond in Chinese (简体中文)."
    },
    "explore": {
      "model": "deepseek/deepseek-chat",
      "prompt_append": "Always think and respond in Chinese (简体中文)."
    },
    "multimodal-looker": {
      "model": "deepseek/deepseek-v4-pro",
      "prompt_append": "Always think and respond in Chinese (简体中文)."
    },
    "prometheus": {
      "model": "deepseek/deepseek-reasoner",
      "prompt_append": "Always think and respond in Chinese (简体中文)."
    },
    "metis": {
      "model": "deepseek/deepseek-v4-pro",
      "prompt_append": "Always think and respond in Chinese (简体中文)."
    },
    "momus": {
      "model": "deepseek/deepseek-v4-pro",
      "prompt_append": "Always think and respond in Chinese (简体中文)."
    },
    "atlas": {
      "model": "deepseek/deepseek-v4-pro",
      "prompt_append": "Always think and respond in Chinese (简体中文)."
    },
    "sisyphus-junior": {
      "model": "deepseek/deepseek-chat",
      "prompt_append": "Always think and respond in Chinese (简体中文)."
    }
  },
  "categories": {
    "visual-engineering": {
      "model": "deepseek/deepseek-v4-pro",
      "variant": "high",
      "prompt_append": "用中文思考和回答。"
    },
    "ultrabrain": {
      "model": "deepseek/deepseek-reasoner",
      "prompt_append": "用中文思考和回答。"
    },
    "deep": {
      "model": "deepseek/deepseek-chat",
      "prompt_append": "用中文思考和回答。"
    },
    "quick": {
      "model": "deepseek/deepseek-v4-pro",
      "prompt_append": "用中文思考和回答。"
    },
    "unspecified-low": {
      "model": "deepseek/deepseek-v4-pro",
      "prompt_append": "用中文思考和回答。"
    },
    "unspecified-high": {
      "model": "deepseek/deepseek-v4-pro",
      "prompt_append": "用中文思考和回答。"
    },
    "writing": {
      "model": "deepseek/deepseek-v4-pro",
      "prompt_append": "用中文思考和回答。"
    },
    "artistry": {
      "model": "deepseek/deepseek-v4-pro",
      "prompt_append": "用中文思考和回答。"
    }
  },
  "google_auth": false
}
想改模型配置直接该model键的值,结构是provider_id/model_id,可以用官方供应商的官方模型,也可以用刚才自定义供应商(本地模型或者中转站)的模型。官方provider的官方model的ID可以https://models.dev在这上面查,自定义的ID用定义时的ID。
下面拿一个官方provider和自定义provider举个例子
"sisyphus": {
      "model": "deepseek/deepseek-v4-pro",
      "prompt_append": "Always think and respond in Chinese (简体中文). All internal reasoning and external responses must be in Chinese."
    },

"oracle": {
            "model": "lanyi/[lanyi]gemini-3.1-pro-preview",
            "variant": "high",
            "prompt_append": "Always think and respond in Chinese (简体中文)."
        },
"explore": {
            "model": "lanyi/[lanyi]gpt-5.5",
            "prompt_append": "Always think and respond in Chinese (简体中文)."
        },
这就是为什么推荐用中转站,一个provider把许多跨官方的模型集成了,避免了使用agent团队面临多provider多key的管理成本。国内目前好用便宜的中转站有百度千帆codingplan,火山方舟codingplan,里面的GLM、DeepSeek、Kimi、MiniMax还是很能打的。
(实在和我一样懒的研究这些的可以和上面一样无脑用deepseek大军,平时写作业还是没问题的)
也许周全的你会给agents准备了不同的配置方案,比如一个是oh-my-openagent-cn.json,一个是oh-my-openagent-global.json
下面是我(用AI)写的脚本方便快速切换方案
switch.py
import shutil
import sys
import os


def main():
    if len(sys.argv) != 2 or sys.argv[1] not in ["cn", "global"]:
        print("❌ 错误: 参数无效。")
        print("💡 用法: python switch.py [cn|global]")
        return

    target_file = "oh-my-openagent.json"
    cn_file = "oh-my-openagent-cn.json"
    global_file = "oh-my-openagent-global.json"

    choice = sys.argv[1]

    if choice == "cn":
        if not os.path.exists(cn_file):
            print(f"❌ 找不到文件: {cn_file}")
            return
        shutil.copy(cn_file, target_file)
        print("✅ 已成功切换至【国内版 (CN)】模型配置!")

    elif choice == "global":
        if not os.path.exists(global_file):
            print(f"❌ 找不到文件: {global_file}")
            return
        shutil.copy(global_file, target_file)
        print("✅ 已成功切换至【国际版 (Global)】模型配置!")


if __name__ == "__main__":
    main()
opencode还有很多进阶玩法,比较强的是接入GitHub云端,直接在仓库里干活,不过我只用了两天也讲不出来什么花样,留给未来的自己探索吧。希望未来的人类孩子一出生就能拥有相伴一生的专属agents,到时绝不是AI替代人类,而是新的解放。

欢迎加入DeepSeek 技术社区。在这里,你可以找到志同道合的朋友,共同探索AI技术的奥秘。
更多推荐


 1
1 0
0- 0


 已为社区贡献1条内容

所有评论(0)