在GitLab上实现简单项目CI/CD流水线步骤
在test环节、由于test.sh 脚本文件包含了 Windows 风格的换行符(CRLF,即 \r\n),而 Linux 系统期望的是 Unix 风格的换行符(LF,即 \n)。在页面创建测试文件main.py、然后创建test.sh脚本、在创建.gitlab-ci.yml。- sed -i 's/\r$//' test.sh#移除 Windows 换行符。- sed -i 's/\r$//'
1、安装必要依赖
# 更新系统
sudo yum update -y
# 安装基础工具
sudo yum install -y curl policycoreutils-python openssh-server postfix
# 启动 Postfix(邮件服务)
sudo systemctl enable postfix
sudo systemctl start postfix
步骤 2:安装 GitLab CE
# 添加 GitLab 仓库
curl https://packages.gitlab.com/install/repositories/gitlab/gitlab-ce/script.rpm.sh | sudo bash
# 安装 GitLab(替换 YOUR_DOMAIN 为你的域名或IP)
sudo EXTERNAL_URL="http://YOUR_DOMAIN" yum install -y gitlab-ce
# 启动 GitLab
sudo gitlab-ctl reconfigure
访问 http://YOUR_DOMAIN,首次登录需设置 root 密码
步骤 3:安装 GitLab Runner
# 添加官方仓库
curl -L https://packages.gitlab.com/install/repositories/runner/gitlab-runner/script.rpm.sh | sudo bash
# 安装 Runner
sudo yum install -y gitlab-runner
# 启动服务
sudo systemctl start gitlab-runner
步骤 4:注册 Runner 到 GitLab
- 在 GitLab 项目页面:
- 进入 Settings > CI/CD > Runners
- 复制 Registration Token
- 在终端执行:
sudo gitlab-runner register
按提示输入:
URL: http://YOUR_DOMAIN/
Token: [粘贴 Registration Token]
描述: centos7-runner
标签: linux,shell
执行器: shell # 简单场景用 shell
步骤 5:创建示例项目
- 在 GitLab 创建新项目(如 my-cicd-project)
- 添加示例文件 main.py:
# main.py
print("Hello GitLab CI/CD!")
- 添加测试脚本 test.sh:
#!/bin/bash
echo "Running tests..."
python main.py | grep "Hello GitLab CI/CD" && exit 0 || exit 1
步骤 6:配置 CI/CD 流水线
在项目根目录创建 .gitlab-ci.yml:
stages:
- build
- test
- deploy
build_job:
stage: build
script:
- echo "Building project..."
- cat main.py
tags:
- linux
test_job:
stage: test
script:
- chmod +x test.sh
- sed -i 's/\r$//' test.sh #移除 Windows 换行符
- ./test.sh
tags:
- linux
deploy_job:
stage: deploy
script:
- echo "Deploying to production..."
- mkdir -p /var/www/myapp
- cp main.py /var/www/myapp/
only:
- main # 仅 main 分支触发部署
tags:
- linux
步骤 7:触发流水线
# 推送代码到仓库
git add .
git commit -m "Add CI/CD pipeline"
git push origin main
流水线将自动触发,在 GitLab 的 CI/CD > Pipelines 查看运行状态。
需要注意的地方有:
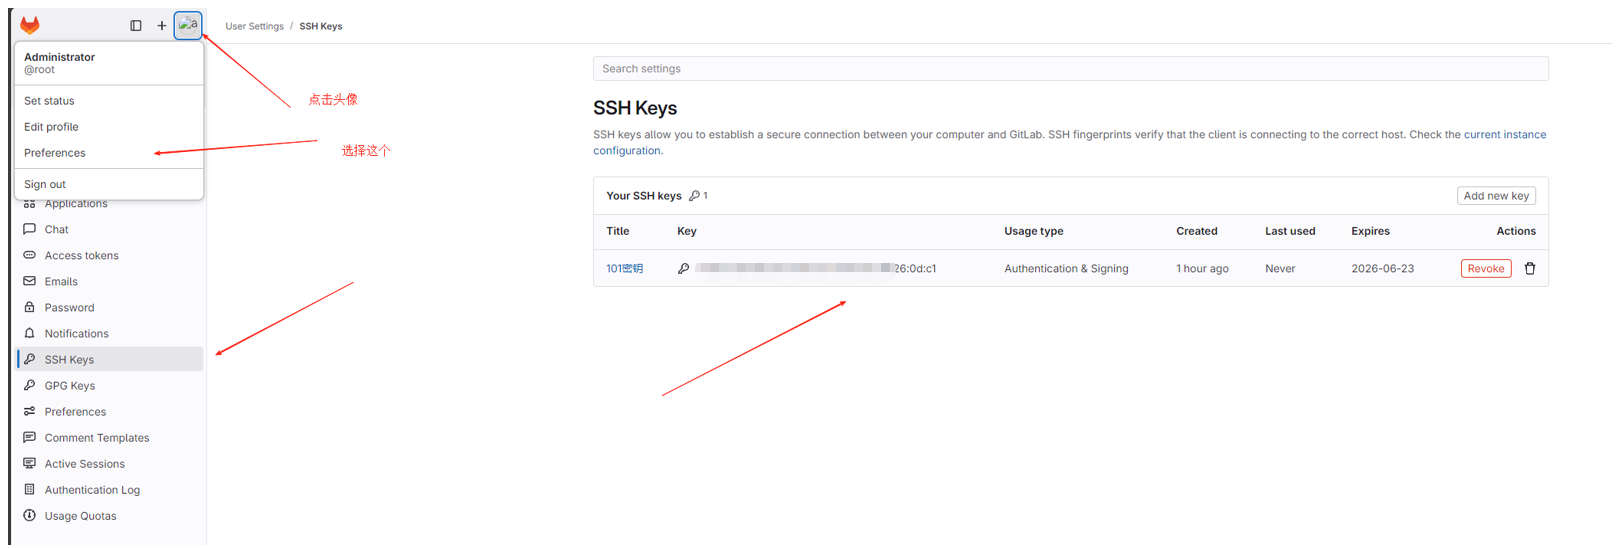
需要先把服务器的密钥上传到GitLab
先查看服务器自身有没有生成密钥 如果没有就输入命令生成密钥并查看密码 然后把密钥上传到GitLab

步骤四需要生成runner的令牌、创建以后会生成令牌、将令牌复制、然后输入命令导入
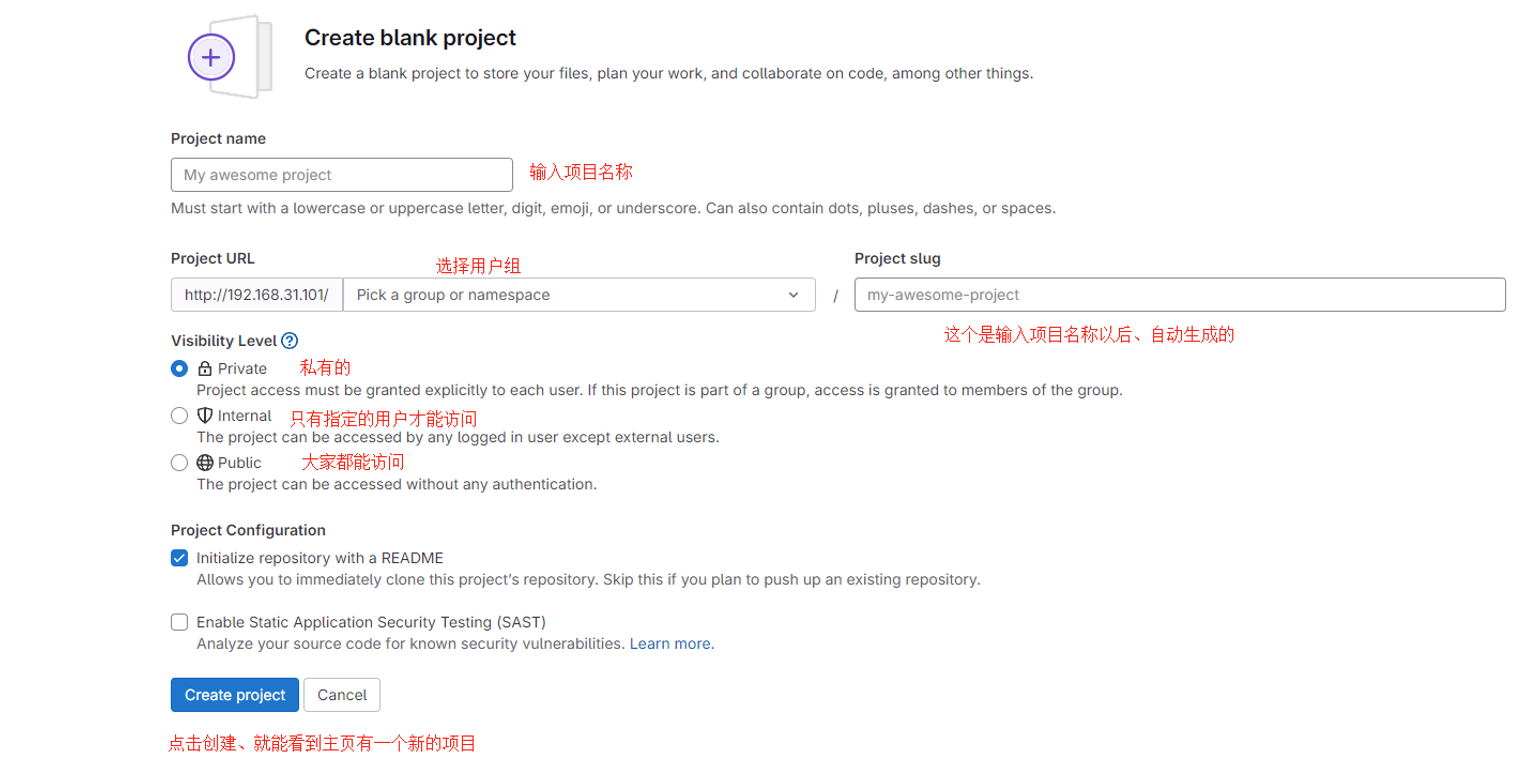
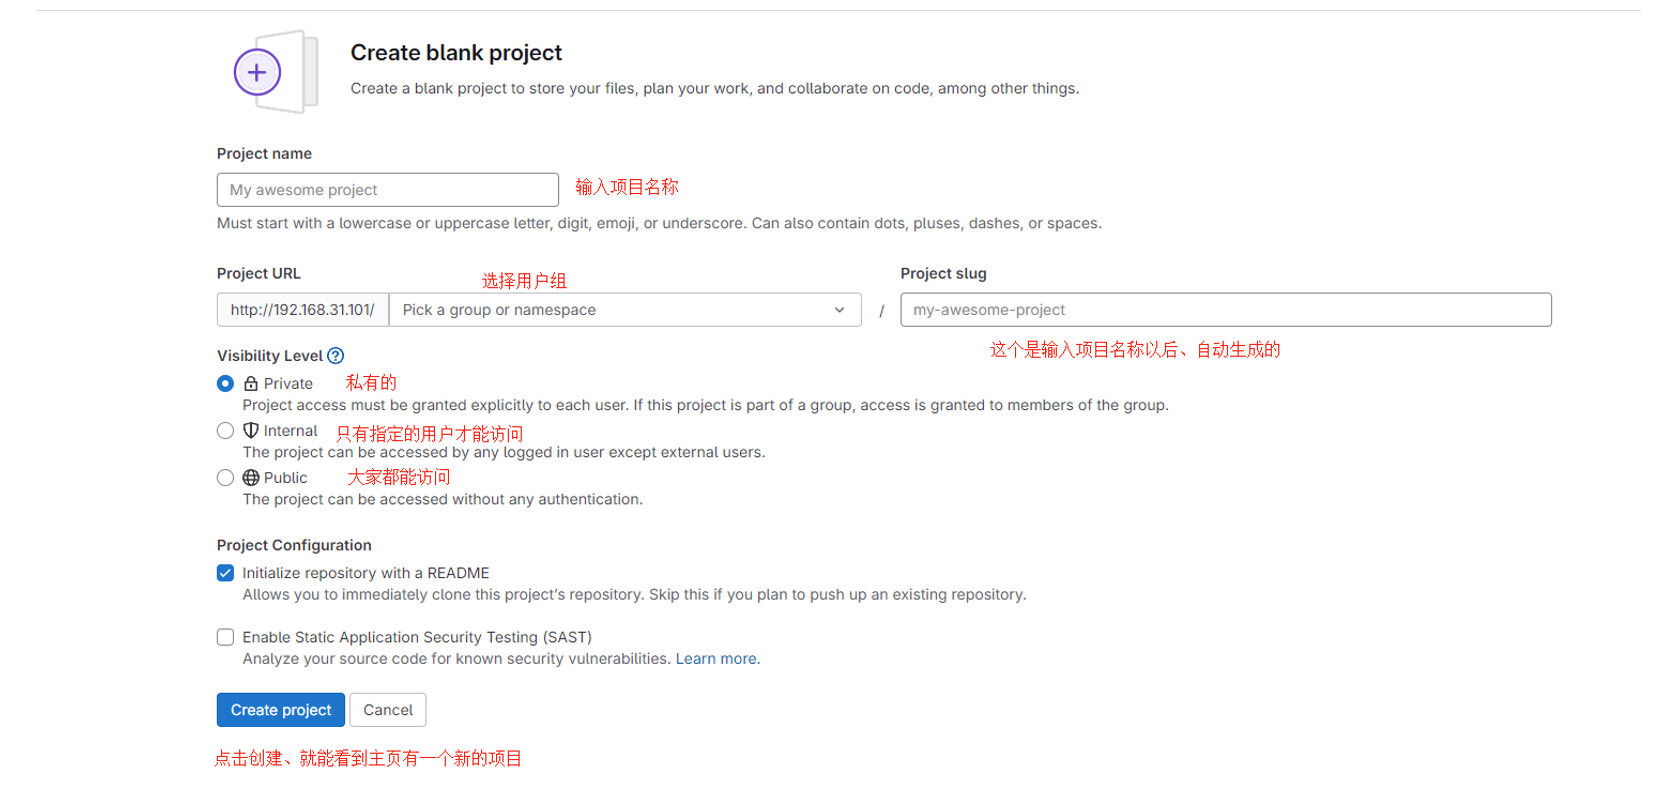
创建项目选择空白项目、如已经有生成好的代码 选择第三个直接导入
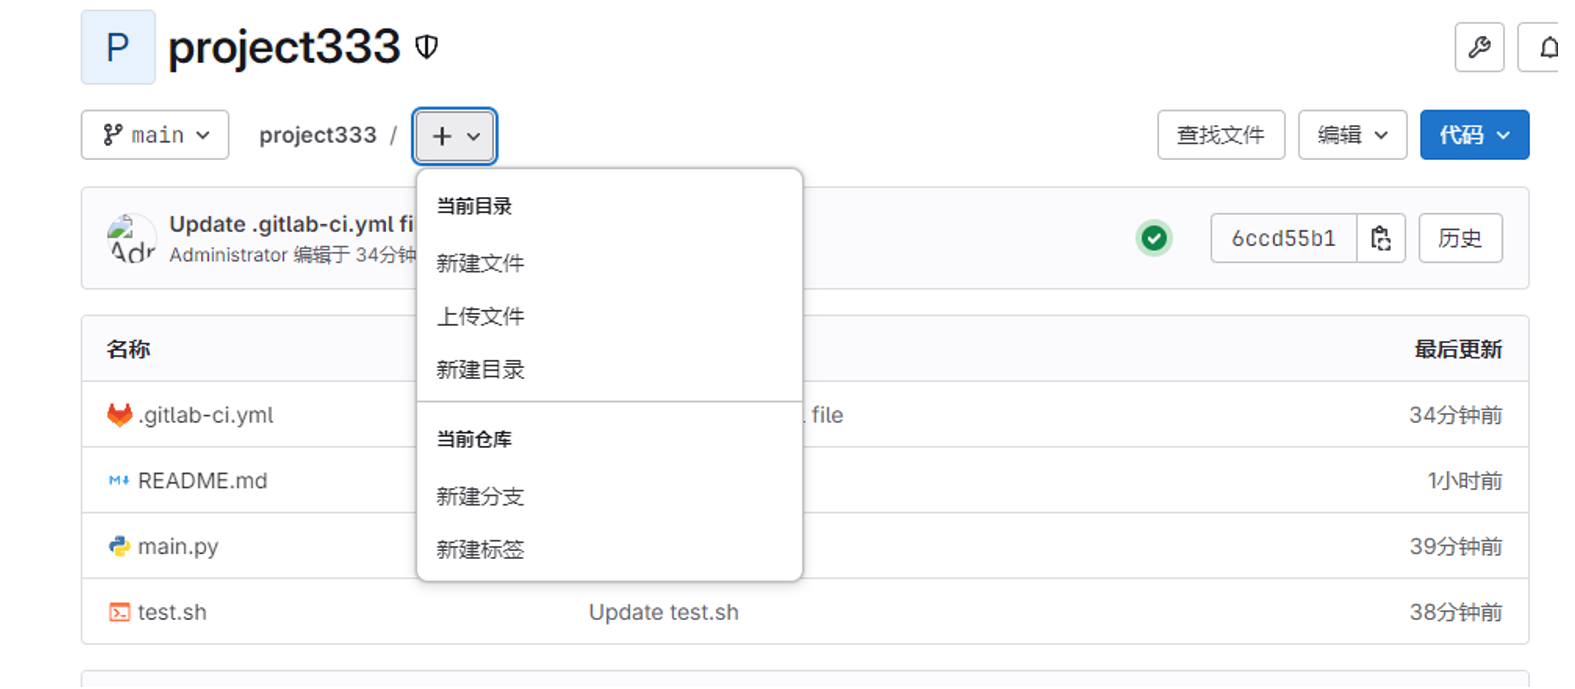
在页面创建测试文件main.py、然后创建test.sh脚本、在创建.gitlab-ci.yml
执行流水线
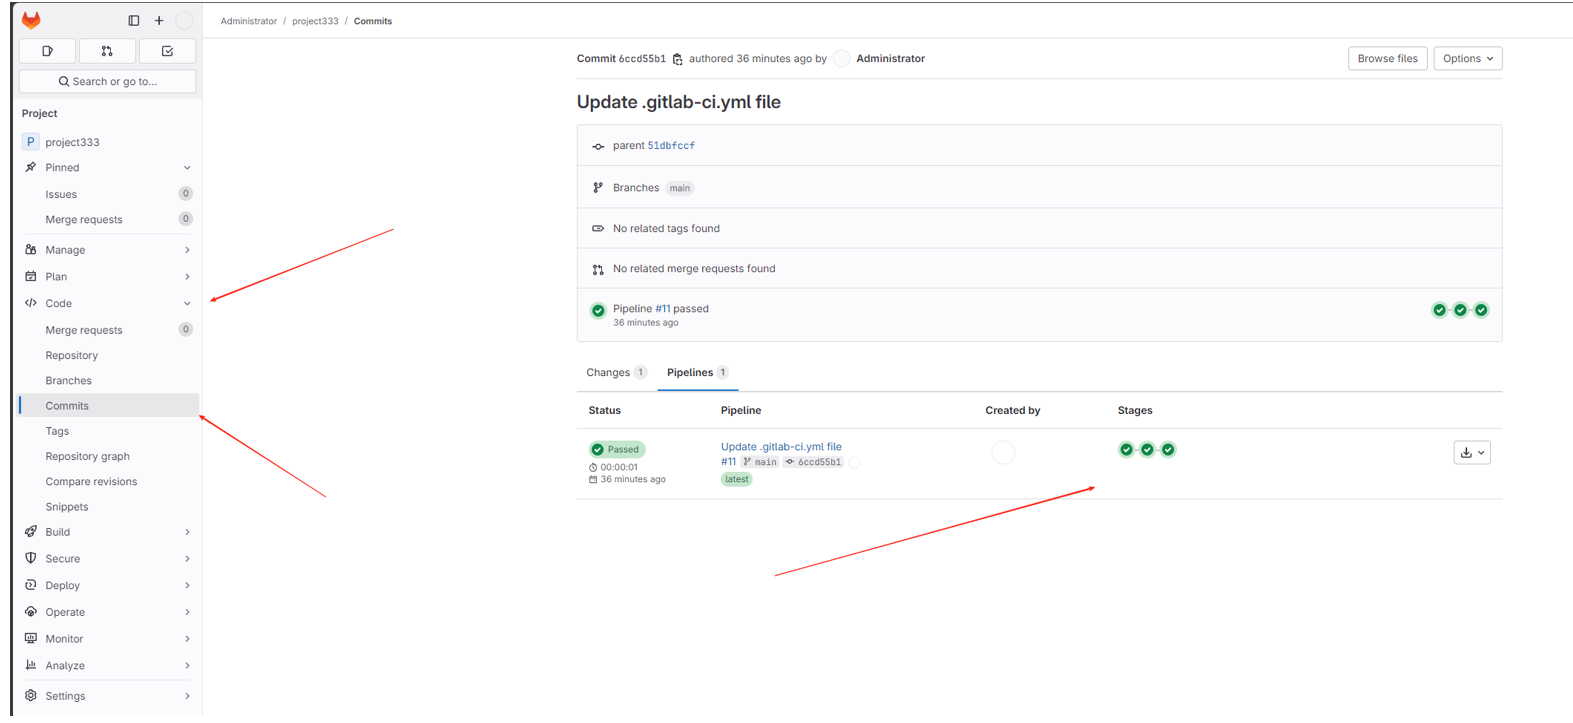 绿色则是全部成功 流水线正常运行
若出现红色 需要点击对应的环节 查看出错原因 并修改
例如以下错误:
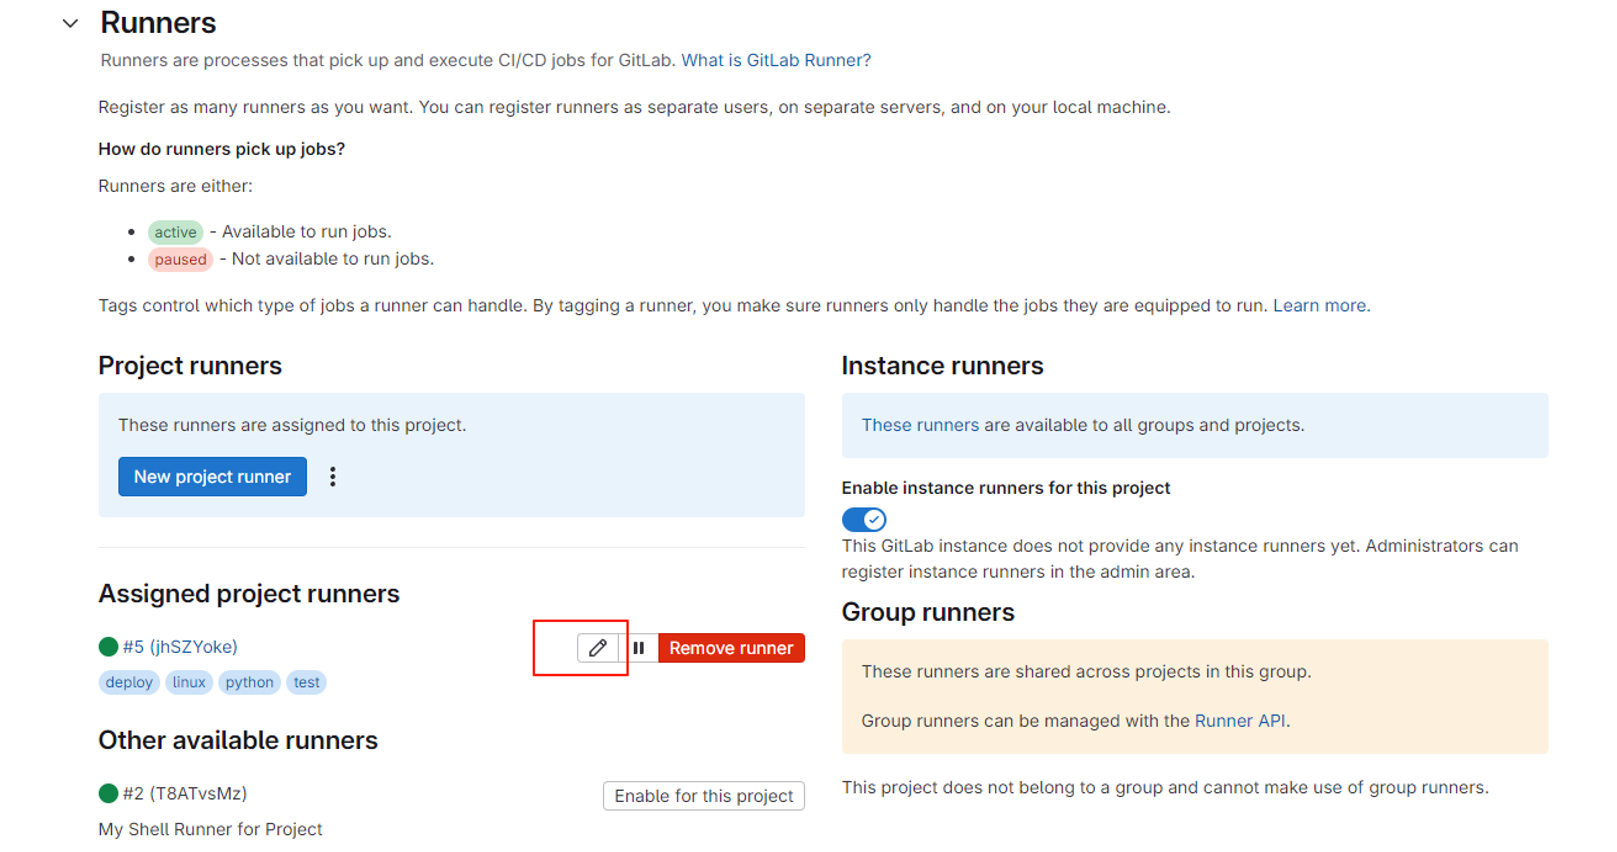
先前由于创建项目没有添加tags标签linux 导致出错 需要在Settings-CI/CD-Runners-点击小铅笔 将标签补上
在test环节、由于test.sh 脚本文件包含了 Windows 风格的换行符(CRLF,即 \r\n),而 Linux 系统期望的是 Unix 风格的换行符(LF,即 \n)。错误信息中的 ^M 就是 Windows 换行符中的回车符(CR)在 Linux 下的显示。
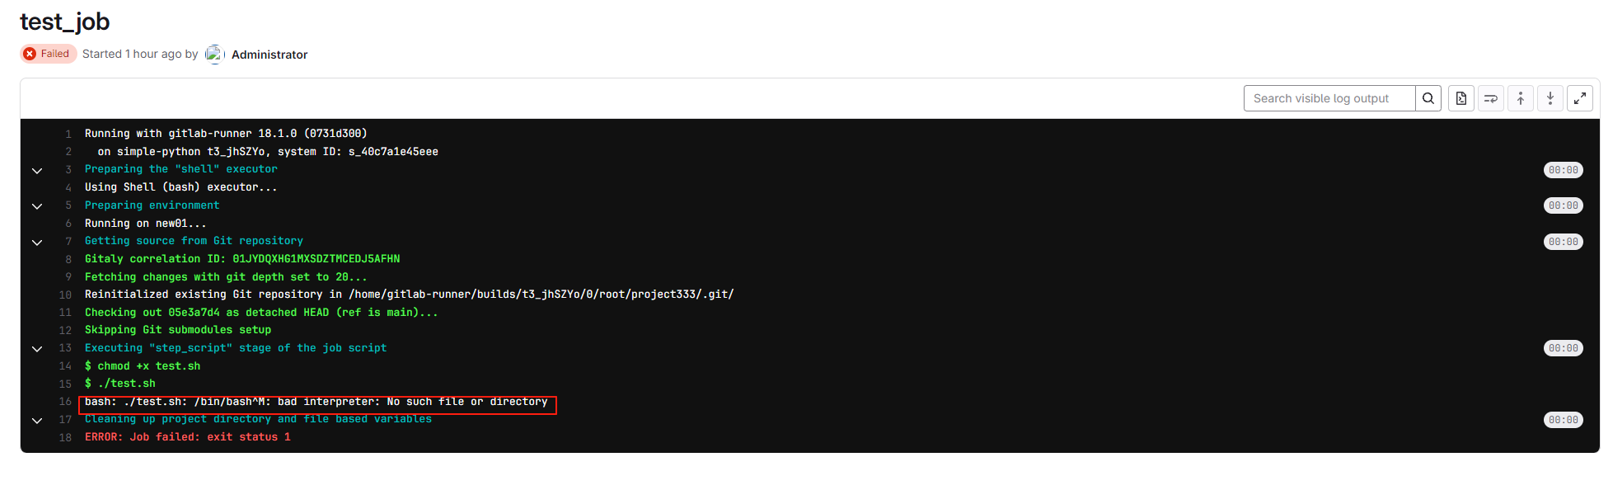
进行修改有多种方法、
方法1:使用 dos2unix 工具转换文件
在本地运行:dos2unix test.sh
或者如果没有 dos2unix,可以使用 sed:sed -i 's/\r$//' test.sh
然后重新提交文件到 Git 仓库。
方法2:在 GitLab CI 脚本中转换 (我选择的是这个方法)
在 .gitlab-ci.yml 文件中,在执行脚本前添加转换命令:
script:
- sed -i 's/\r$//' test.sh # 移除 Windows 换行符
- chmod +x test.sh
- ./test.sh
方法3:配置 Git 自动转换换行符
在本地 Git 仓库中运行:
git config --global core.autocrlf input
然后重新克隆仓库或更新文件。
最后、遇到问题不懂的呢、截图上传至豆包或deepseek、将问题描述清楚、再逐一尝试、问题都能解决。

欢迎加入DeepSeek 技术社区。在这里,你可以找到志同道合的朋友,共同探索AI技术的奥秘。
更多推荐

 6
6 0
0- 0


 已为社区贡献1条内容

所有评论(0)