基于Deepseek-r1-8b使用Unsloth微调医疗大模型实践
关于使用Unsloth微调大模型的文章不少,但大部分都使用了云主机环境和厂商提供的工具平台,本着DIY精神,笔者在普通PC上进行了手搓微调实践。
关于使用Unsloth微调大模型的文章不少,但大部分都使用了云主机环境和厂商提供的工具平台,本着DIY精神,笔者在普通PC上进行了手搓微调实践,分享如下:
分享之前感谢以下作者提供的参考:
LLMs之unsloth:unsloth的简介、安装和使用方法、案例应用之详细攻略-CSDN博客
https://www.datacamp.com/tutorial/fine-tuning-deepseek-r1-reasoning-model
如何在本地微调DeepSeek-R1-8b模型_哔哩哔哩_bilibili
一、主机硬件环境
| 主要部件 | 配置 |
| CPU | Intel i9-13900 32核 2.2GHz |
| 内存 | 64G |
| 显卡 | NVDIA 4070 8G |
建议显卡使用NVDIA 4090 24G,可加载更多训练数据,避免出现内存不足。
二、主机环境配置
由于在Windows下配置安装Unsloth的坑比较多(详见https://github.com/unslothai/unsloth),这里选择在Windows的Ubuntu子系统进行安装。
1.检查Windows下的WSL Linux配置
在开始菜单搜索“启用或关闭Windows功能”。![]()

把“Hyper-V”、“适用于Linux的Windows子系统”、“虚拟机平台”三项勾选上。
2.安装Ubuntu22.04.5系统
建议先将Ubuntu系统安装到系统盘(C盘),然后使用LxRunOffline迁移到非系统盘(建议预留200G空间)。
(1)首先打开微软商店,搜索“ubuntu”

选择安装Ubuntu22.04.5版本。
(2)设置用户名、密码
首次使用需设置用户名、密码。
(3)设置语言和编码
sudo dpkg-reconfigure locales
选择“zh_CN.UTF-8 UTF-8”回车。

选择“zh_CN.UTF-8”回车。
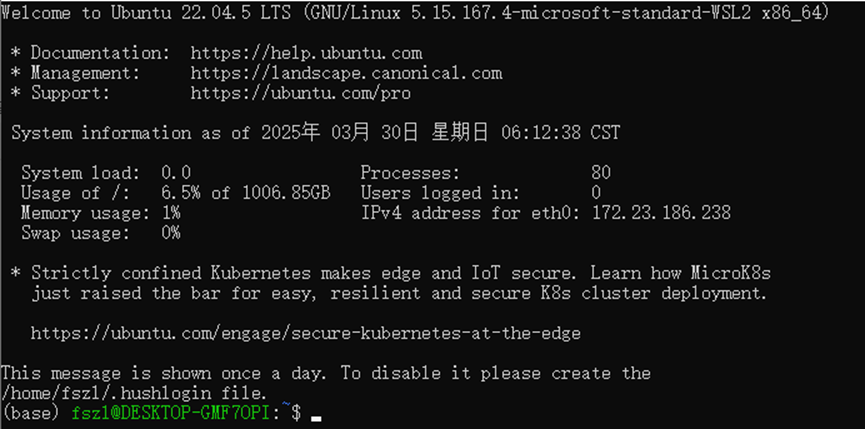
首次启动Ubuntu22.04.5显示如下:
3.查看显卡驱动及CUDA版本
nvidia-smi
4.将ubuntu迁移到非系统盘
先下载安装LxRunOffline(https://github.com/DDoSolitary/LxRunOffline/releases),LxRunOffline-v3.5.0-mingw.zip
运行迁移命令:
.\LxRunOffline.exe move -n Ubuntu-22.04 -d E:\Ubuntu-22.04“E:\Ubuntu-22.04”表示将Ubuntu迁移到E盘的Ubuntu-22.04文件夹。
查看迁移结果:
.\LxRunOffline.exe get-dir -n Ubuntu-22.04在Windows中可以看到Ubuntu映像文件。

5.安装gcc
sudo apt-get update
sudo apt-get upgrade
sudo apt-get install gcc
6.设置镜像源
(提示:设置前需安装好gcc,否则更改镜像源后再gcc在使用过程中会报错)
备份源文件:
sudo cp /etc/apt/sources.list /etc/apt/sources.list.bak修改源文件:
sudo apt-get install nano

sudo nano /etc/apt/sources.list
按住ctrl+k进行删除,将以下内容复制,右键(自动粘贴)
# 默认注释了源码镜像以提高 apt update 速度,如有需要可自行取消注释

deb https://mirrors.tuna.tsinghua.edu.cn/ubuntu/ focal main restricted universe multiverse

# deb-src https://mirrors.tuna.tsinghua.edu.cn/ubuntu/ focal main restricted universe multiverse

deb https://mirrors.tuna.tsinghua.edu.cn/ubuntu/ focal-updates main restricted universe multiverse

# deb-src https://mirrors.tuna.tsinghua.edu.cn/ubuntu/ focal-updates main restricted universe multiverse

deb https://mirrors.tuna.tsinghua.edu.cn/ubuntu/ focal-backports main restricted universe multiverse

# deb-src https://mirrors.tuna.tsinghua.edu.cn/ubuntu/ focal-backports main restricted universe multiverse

deb https://mirrors.tuna.tsinghua.edu.cn/ubuntu/ focal-security main restricted universe multiverse

# deb-src https://mirrors.tuna.tsinghua.edu.cn/ubuntu/ focal-security main restricted universe multiverse
ctrl+x保存退出。
更新软件源:
sudo apt-get update

sudo apt-get upgrade
三、运行环境配置
1.安装Anacoda3
Anaconda 是一个开源的 Python发行版,专门为数据科学、机器学习和科学计算设计。它通过集成多种工具和预装库,简化了开发环境的配置与管理。
(1)下载Anaconda
到www.anaconda.com下载Anaconda。可以直接在Windows中下载文件(如:下载好的文件为E盘下anaconda.sh),然后拷贝到Ubuntu下:
cp /mnt/e/anaconda.sh ~(2)安装Anaconda
sh anaconda.sh
按回车键后出现license预览,一直按ctrl+F键直到完成license预览,出现以下提示:

输入“yes”接受协议,然后回车。
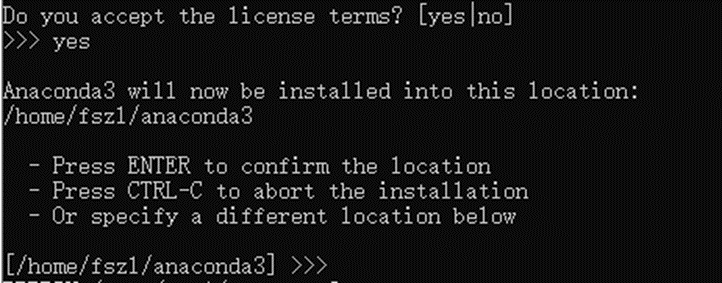
出现以上提示后,继续回车,开始安装Anaconda。

安装会持续一段时间,安装完成后会提示是否更新shell profile(是否每次打开shell都激活base虚拟环境),这里建议选“no”。

出现下提示说明Anaconda已安装成功。

(3)配置虚拟环境
激活base虚拟环境:
eval "$(/home/fszl/anaconda3/bin/conda shell.bash hook)"初始化环境:
conda init查看虚拟环境:
conda env list
2.安装Unsloth
Unsloth 是一款专注于加速AI模型微调的开源工具,通过动态4-bit量化、内存优化、计算图优化与硬件适配加速等核心技术,实现了训练速度较传统方法提升2-5倍的目标,同时保持模型精度,让本地低配算力资源情况下进行模型微调成为可能。
典型应用场景包括:
大语言模型(LLM)微调:支持Hugging Face Transformers库的模型(如Llama、Mistral)。
低资源环境训练:通过4-bit量化与显存优化,在单卡GPU上完成大规模模型微调。
快速原型验证:缩短实验周期,加速AI产品迭代。
具体安装过程如下:
(1)修改镜像源
为加快下载安装速度,建议修改镜像源。
conda config --add channels https://mirrors.tuna.tsinghua.edu.cn/anaconda/pkgs/main
conda config --add channels https://mirrors.tuna.tsinghua.edu.cn/anaconda/pkgs/r
conda config --add channels https://mirrors.tuna.tsinghua.edu.cn/anaconda/pkgs/msys2
conda config --add channels https://mirrors.tuna.tsinghua.edu.cn/anaconda/cloud/pytorch

conda config --set show_channel_urls yes
conda config --show channels

(2)创建Unsloth虚拟环境
进入https://unsloth.ai/,选择右上角![]() 进入Unsloth的Github地址(https://github.com/unslothai/unsloth)
进入Unsloth的Github地址(https://github.com/unslothai/unsloth)
按照“Conda Installation (Optional)”部分内容进行创建:
conda create --name unsloth_env \
    python=3.11 \
    pytorch-cuda=12.1 \
    pytorch cudatoolkit xformers -c pytorch -c nvidia -c xformers \
    -y

出现以上提示说明虚拟环境创建成功。
激活虚拟环境:
conda activate unsloth_env![]()
执行“conda”可查看canda命令使用方法,以下是常用的conda命令:
conda init:初始化conda shell
conda create:创建虚拟环境
conda list env:查看有哪些虚拟环境
conda activate:激活虚拟环境
conda deactivate :退出虚拟环境
(3)安装Unsloth
pip install unsloth耗时比较长,中途如出现网络错误,再次执行该命令即可继续。安装完成后提示如下:

3.安装wandb(可选项)
可将训练数据发送到wandb中,从而可视化训练过程。
安装wandb
pip install wandb
然后到https://www.wandb.ai注册获取API Key

4.测试环境是否安装成功
进入Python,执行“from unsloth import FastLanguageModel”看系统有无报错,根据报错信息进行对应处理。笔者之前遇到C编译环境报错,重新安装gcc后问题排除。

然后又出现xformers更新警告,重新安装对应版本xformers后警告排除。
pip3 install -U xformers --index-url https://download.pytorch.org/whl/cu124

5.配置Pycharm(可选项)
关于Python运行IDE需看个人习惯,可以使用Jupyter Notebook,也可以使用Pycharm或Vscode等等。
Jupyter Notebook安装配置相对简单:
安装:在虚拟环境执行
pip install jupyter notebook启动:在虚拟环境执行
jupyter notebook然后按照提示,在浏览器打开本地链接,即可开始使用。
下面以Pycharm为例,介绍环境配置。
(1)配置远程开发环境
打开Pycharm,选择“远程开发”——》“WSL” ——》 “新建项目”
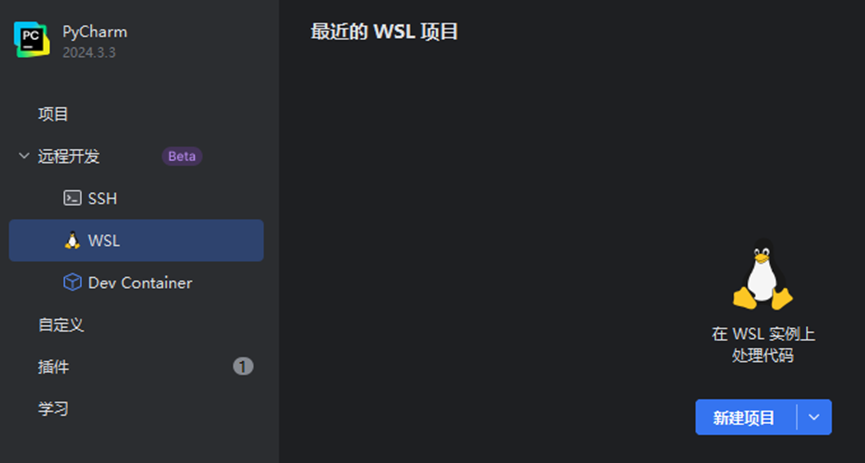
选择WSL实例为Ubuntu,

设置项目路径后选择“下载IDE并连接”

等待安装完成打开刚创建的WSL项目

(2)新建项目
进入后选择新建项目,分别设置“自定义环境”——》 “选择现有”——》“Conda”——》“已创建的conda虚拟环境”——》“创建”

(3)配置Python解释器
添加Python解释器,“选择现有”——》“Conda” ——》“已创建的conda虚拟环境”——》“确定”

四、准备微调模型和数据
1、准备训练数据
这里我们以训练医疗模型为例,训练数据可在huggingface上下载。进入huggingface 网站,选择“Datasets”并搜索“Medical”。

选择“FreedomIntelligence/medical-o1-reasoning-SFT”数据集,该数据集支持中文和英文,后面我们使用中文数据集进行微调。
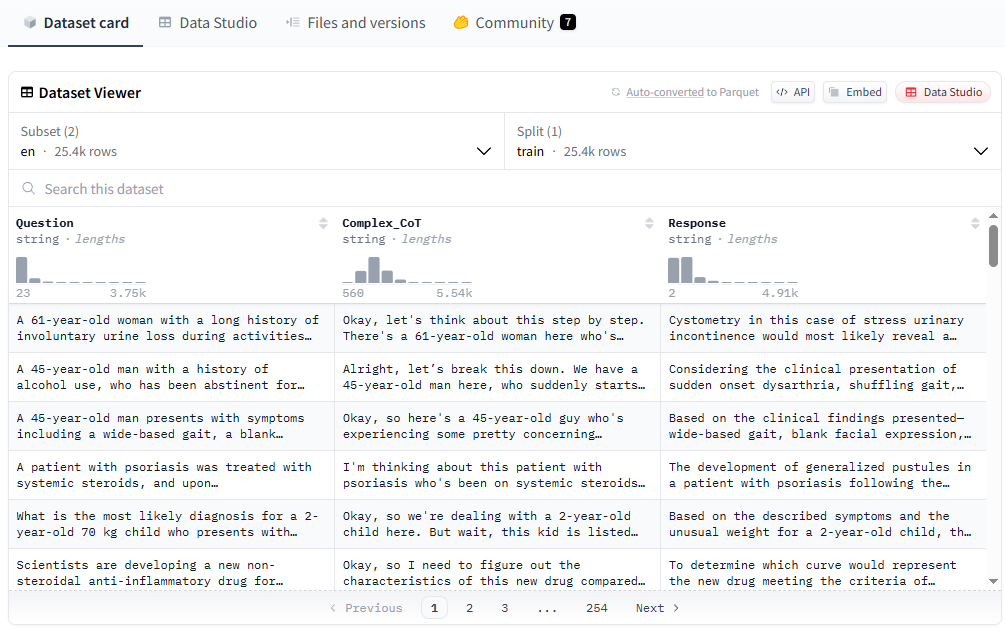

然后选择“Files and versions”页面进行下载。

将下载好的训练数据文件复制到虚拟环境“unsloth_env”下(如:\data_model)。
2、准备基座模型
这里基座模型我们选择DeepSeek-R1-Distill-Llama-8B。基座模型可在huggingface的“Models”中搜索“unsloth/deepSeek-r1-distill-llama-8B”并进行下载:

模型文件如下:

将下载好的训练数据文件复制到虚拟环境“unsloth_env”下(如:\data_model\base_model)
五、微调模型
具体微调模型可参考:
https://www.datacamp.com/tutorial/fine-tuning-deepseek-r1-reasoning-model,
1、初始化参数
from unsloth import FastLanguageModel
import torch
max_seq_length = 2048
dtype = None
load_in_4bit = True  #4位量化
执行成功显示:

2、创建wandb项目可视化跟踪微调过程
#在wandb创建一个新项目,用来跟踪微调过程。
import wandb

wandb.login(key="cc1a7047f2d3e**************f60bfda3") #在wandb官网申请API Key
run = wandb.init(
    project='fine-tuning on deepseek r1 with medical data', #项目名称
    job_type="training",
    anonymous="allow"
)
执行成功显示:

View project at https://wandb.ai/******.
View run at https://wandb.ai/******.(浏览器打开该地址可可视化跟踪微调过程)
3、加载模型和tokenizer
model, tokenizer = FastLanguageModel.from_pretrained(
    model_name = "/home/fszl/data_model/base_model",  #这里为之前下载好的本地模型路径。
    max_seq_length = max_seq_length,
    dtype = dtype,
    load_in_4bit = load_in_4bit, #4位量化加载模型
)
执行成功显示:

4、微调前的模型推理
(1)为模型创建提示样式
prompt_style = """Below is an instruction that describes a task, paired with an input that provides further context.
Write a response that appropriately completes the request.
Before answering, think carefully about the question and create a step-by-step chain of thoughts to ensure a logical and accurate response.

### Instruction:
You are a medical expert with advanced knowledge in clinical reasoning, diagnostics, and treatment planning.
Please answer the following medical question.

### Question:
{}

### Response:
<think>{}"""
(2)提出一个医疗问题
question = "一位既往有高血压病史的老年男性患者,因胃肠炎就诊,在输液过程中突然出现呼吸困难,不能平卧,剧烈咳嗽,并咳出大量粉红色泡沫痰。在这种情况下,最宜使用哪种药物进行处理?"


FastLanguageModel.for_inference(model)  # Unsloth has 2x faster inference!
inputs = tokenizer([prompt_style.format(question, "")], return_tensors="pt").to("cuda")

outputs = model.generate(
    input_ids=inputs.input_ids,
    attention_mask=inputs.attention_mask,
    max_new_tokens=1200,
    use_cache=True,
)
response = tokenizer.batch_decode(outputs)
print(response[0].split("### Response:")[1])
(3)执行成功将显示其回答

5、加载和处理数据集
相较于微调前,稍微改变处理数据集的提示样式
train_prompt_style = """Below is an instruction that describes a task, paired with an input that provides further context.
Write a response that appropriately completes the request.
Before answering, think carefully about the question and create a step-by-step chain of thoughts to ensure a logical and accurate response.

### Instruction:
You are a medical expert with advanced knowledge in clinical reasoning, diagnostics, and treatment planning.
Please answer the following medical question.

### Question:
{}

### Response:
<think>
{}
</think>
{}"""
编写 Python 函数,在数据集中创建一个“文本”列,该列由训练提示样式组成。用问题、文本链和答案填充占位符。
EOS_TOKEN = tokenizer.eos_token  # Must add EOS_TOKEN


def formatting_prompts_func(examples):
    inputs = examples["Question"]
    cots = examples["Complex_CoT"]
    outputs = examples["Response"]
    texts = []
    for input, cot, output in zip(inputs, cots, outputs):
        text = train_prompt_style.format(input, cot, output) + EOS_TOKEN
        texts.append(text)
    return {
        "text": texts,
    }
从数据集加载前 100 个样本,并通过formatting_prompts_func函数映射列。
from datasets import load_dataset

dataset = load_dataset("/home/fszl/data_model", "zh",split = "train[0:20]") #这里同样为之前下载好的数据集的本地路径。
dataset = dataset.map(formatting_prompts_func, batched = True,)
dataset["text"][0]
6、建立模型
model = FastLanguageModel.get_peft_model(
    model,
    r=16,
    target_modules=[
        "q_proj",
        "k_proj",
        "v_proj",
        "o_proj",
        "gate_proj",
        "up_proj",
        "down_proj",
    ],
    lora_alpha=16,
    lora_dropout=0,
    bias="none",
    use_gradient_checkpointing="unsloth",  # True or "unsloth" for very long context
    random_state=3407,
    use_rslora=False,
    loftq_config=None,
)
7、设置训练参数和训练器
from trl import SFTTrainer
from transformers import TrainingArguments
from unsloth import is_bfloat16_supported

trainer = SFTTrainer(
    model=model,
    tokenizer=tokenizer,
    train_dataset=dataset,
    dataset_text_field="text",
    max_seq_length=max_seq_length,
    dataset_num_proc=2,
    args=TrainingArguments(
        per_device_train_batch_size=1,
        gradient_accumulation_steps=4,
        # Use num_train_epochs = 1, warmup_ratio for full training runs!
        warmup_steps=5,
        max_steps=60,
        learning_rate=2e-4,
        fp16=not is_bfloat16_supported(),
        bf16=is_bfloat16_supported(),
        logging_steps=10,
        optim="adamw_8bit",
        weight_decay=0.01,
        lr_scheduler_type="linear",
        seed=3407,
        output_dir="/home/fszl/data_model/outputs",
    ),
)
8、模型训练
trainer_stats = trainer.train()执行成功显示:

9、训练数据上传wandb
wandb.finish()执行成功显示:

并提示wandb微调过程可视化链接。
10、登录wandb查看微调过程
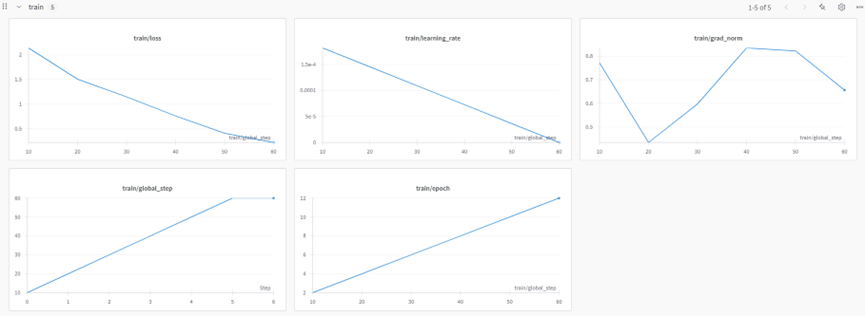

多次训练也可显示:

11、微调后的模型推理
使用微调前的同一问题提问:
question = "一位既往有高血压病史的老年男性患者,因胃肠炎就诊,在输液过程中突然出现呼吸困难,不能平卧,剧烈咳嗽,并咳出大量粉红色泡沫痰。在这种情况下,最宜使用哪种药物进行处理?"


FastLanguageModel.for_inference(model)  # Unsloth has 2x faster inference!
inputs = tokenizer([prompt_style.format(question, "")], return_tensors="pt").to("cuda")

outputs = model.generate(
    input_ids=inputs.input_ids,
    attention_mask=inputs.attention_mask,
    max_new_tokens=1200,
    use_cache=True,
)
response = tokenizer.batch_decode(outputs)
print(response[0].split("### Response:")[1])
执行成功将显示其回答:

12、本地保存模型
new_model_local = "DeepSeek-R1-Medical-FT"
model.save_pretrained(new_model_local) # Local saving
tokenizer.save_pretrained(new_model_local)
以上就是整个微调过程。
六、避坑指南
1、Ubuntu-22.04直接安装在非系统盘不能使用
首次直接把Ubuntu-22.04安装在非系统盘,发现不能使用,但迁移到系统盘后又正常。为确保硬盘空间足够,最后先把Ubuntu-22.04安装在系统盘,然后再迁移到非系统盘后恢复正常。
2、更改镜像源后安装的gcc不能正常使用
首次准备好软硬件环境,在执行“”报缺少C编译环境,然后安装gcc又报一堆错误。经多次尝试发现,需卸载后面安装的gcc,将镜像源改回原来设置,再重新安装gcc后恢复正常。
3、微调过程内存不足
如由于本地计算机配置原因,微调过程中出现内存不足。

对此,可以采取以下措施:
(1)调整WSL内存。默认情况下WSL会分配一半的主机内存给Linux,我们可以通过手工进行调整。
先在Ubuntu下查看一下内存和交换空间大小:
free-h然后关闭WSL:
wsl --shutdown创建或修改C:\Users\用户名\下的“.wslconfig”文件,增加以下内容:
[wsl2]

memory=32GB

swap=8G

processors=32
重新启动Ubuntu,通过free-h查看是否修改成功。

(2)修改微调参数
将“per_device_train_batch_size=2, ”修改为“per_device_train_batch_size=1”
(3)减少样本数据量
将“dataset = load_dataset("/home/fszl/data_model", "zh",split = "train[0:500]")” 修改为“dataset = load_dataset("/home/fszl/data_model", "zh",split = "train[0:100]")”

欢迎加入DeepSeek 技术社区。在这里,你可以找到志同道合的朋友,共同探索AI技术的奥秘。
更多推荐


 27
27 1
1- 0


 已为社区贡献4条内容

所有评论(0)