DeepSeek + LangGraph + Chat UI:轻松搭建本地智能助手
本文将介绍如何利用 DeepSeek API、LangGraph 和 Agent Chat UI,快速构建一个本地运行的智能助手。通过本文的指导,你将学会如何启动 LangGraph、部署 Agent Chat UI,并接入 DeepSeek API,最终打造一个功能强大且完全本地化的个人助手。无论你是开发者还是技术爱好者,都可以轻松上手,享受本地化智能助手带来的便利。
介绍
本文将介绍如何利用 DeepSeek API、LangGraph 和 Agent Chat UI,快速构建一个本地运行的智能助手。通过本文的指导,你将学会如何启动 LangGraph、部署 Agent Chat UI,并接入 DeepSeek API,最终打造一个功能强大且完全本地化的个人助手。无论你是开发者还是技术爱好者,都可以轻松上手,享受本地化智能助手带来的便利。
环境准备
- conda
- Python >= 3.11
# 使用conda创建python环境
conda create -n langgraph python=3.12

# 激活环境
conda activate langgraph

# 下载依赖
pip install langchain-core langgraph

pip install "langgraph-cli[inmem]" --upgrade
DeepSeek
访问DeepSeek开放平台 https://platform.deepseek.com/ ,刚注册的用户会送几块钱额度。也可以充值。api调用费用很低。
进入https://platform.deepseek.com/api_keys 创建API key。
注意:API Key需要保密,记得不要提交到GitHub哦。
LangGraph
下载一个LangGraph Template项目
git clone https://github.com/langchain-ai/new-langgraph-project.git
修改配置文件
cp .env.example .env
因为我们使用的是DeepSeek API,所以需要配置 DEEPSEEK_API_KEY(上一步创建的DeepSeek API Key)
# To separate your traces from other application
LANGSMITH_PROJECT=new-agent

# The following depend on your selected configuration

## LLM choice:
# ANTHROPIC_API_KEY=....
# FIREWORKS_API_KEY=...
# OPENAI_API_KEY=...

DEEPSEEK_API_KEY=your-deepseek-api-key
修改代码
src/agent/state.py
from __future__ import annotations

from typing_extensions import TypedDict

from dataclasses import dataclass
from langchain_core.messages import AnyMessage
from langgraph.graph.message import add_messages
from typing import Annotated


@dataclass
class State(TypedDict):
    messages: Annotated[list[AnyMessage], add_messages]
src/agent/configuration.py
"""Define the configurable parameters for the agent."""

from __future__ import annotations

from dataclasses import dataclass, fields
from typing import Optional

from langchain_core.runnables import RunnableConfig


@dataclass(kw_only=True)
class Configuration:


    model_name: str = "deepseek-chat"

    @classmethod
    def from_runnable_config(
        cls, config: Optional[RunnableConfig] = None
    ) -> Configuration:
        """Create a Configuration instance from a RunnableConfig object."""
        configurable = (config.get("configurable") or {}) if config else {}
        _fields = {f.name for f in fields(cls) if f.init}
        return cls(**{k: v for k, v in configurable.items() if k in _fields})
src/agent/graph.py
from typing import Any, Dict
from langchain_core.runnables import RunnableConfig
from langgraph.graph import StateGraph
from langchain_deepseek import ChatDeepSeek
from agent.configuration import Configuration
from agent.state import State
model = ChatDeepSeek(
model="deepseek-chat",
temperature=0,
max_tokens=None,
timeout=None,
max_retries=2,
)
def call_model(state, config):
response = model.invoke(state["messages"])
# We return a list, because this will get added to the existing list
return {"messages": [response]}
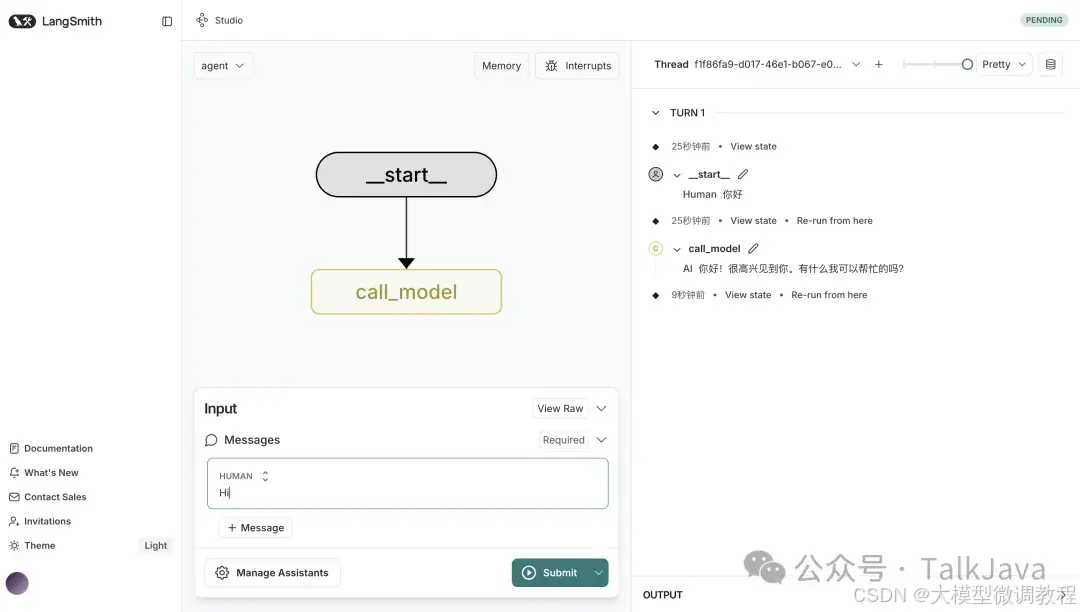
# Define a new graph
workflow = StateGraph(State, config_schema=Configuration)
# Add the node to the graph
workflow.add_node("call_model", call_model)
# Set the entrypoint as `call_model`
workflow.add_edge("__start__", "call_model")
# Compile the workflow into an executable graph
graph = workflow.compile()
graph.name = "New Graph" # This defines the custom name in LangSmith
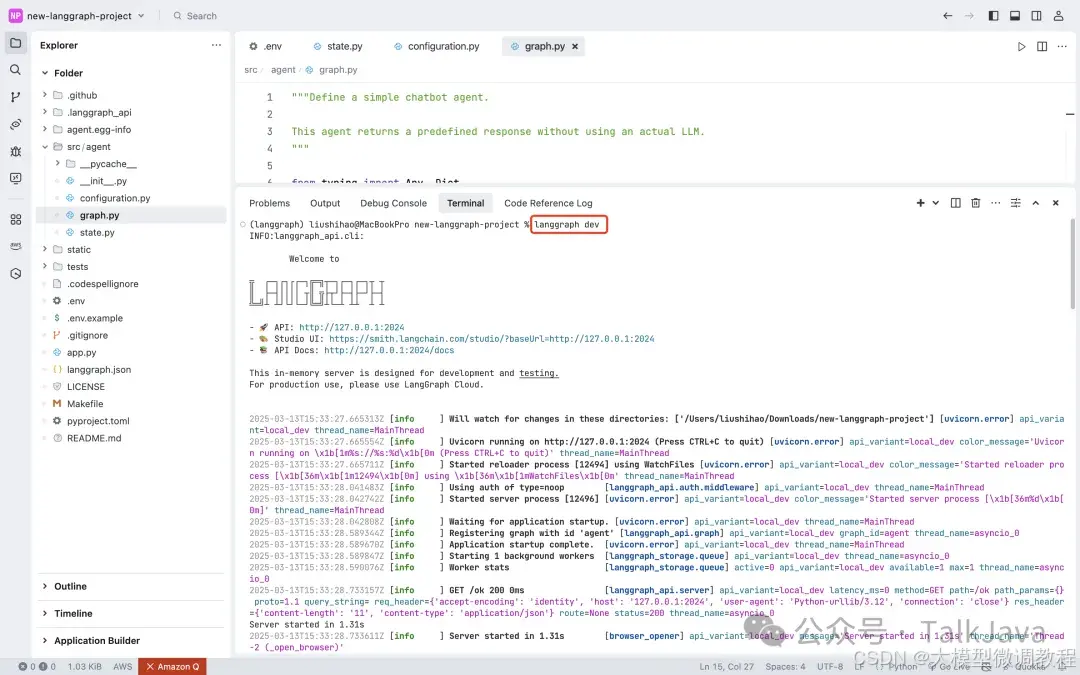
接下来就可以启动项目了:
# 安装依赖
pip install -e .

#启动项目
langgraph dev
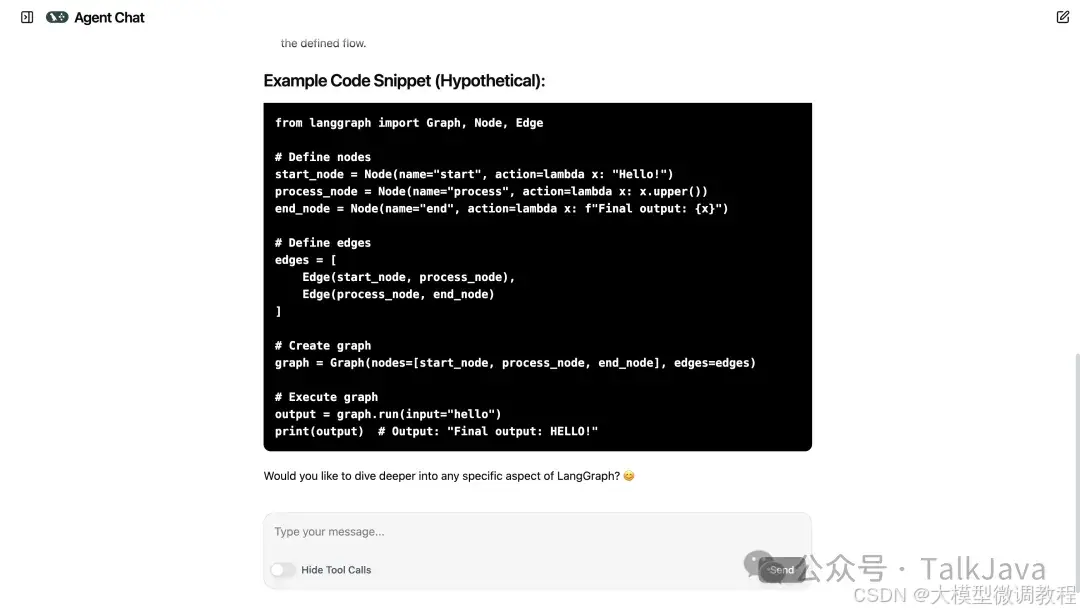
Agent Chat UI
下载agent-chat-ui项目
git clone https://github.com/langchain-ai/agent-chat-ui.git

cd agent-chat-ui

# 安装依赖
pnpm install

# 启动项目
pnpm dev

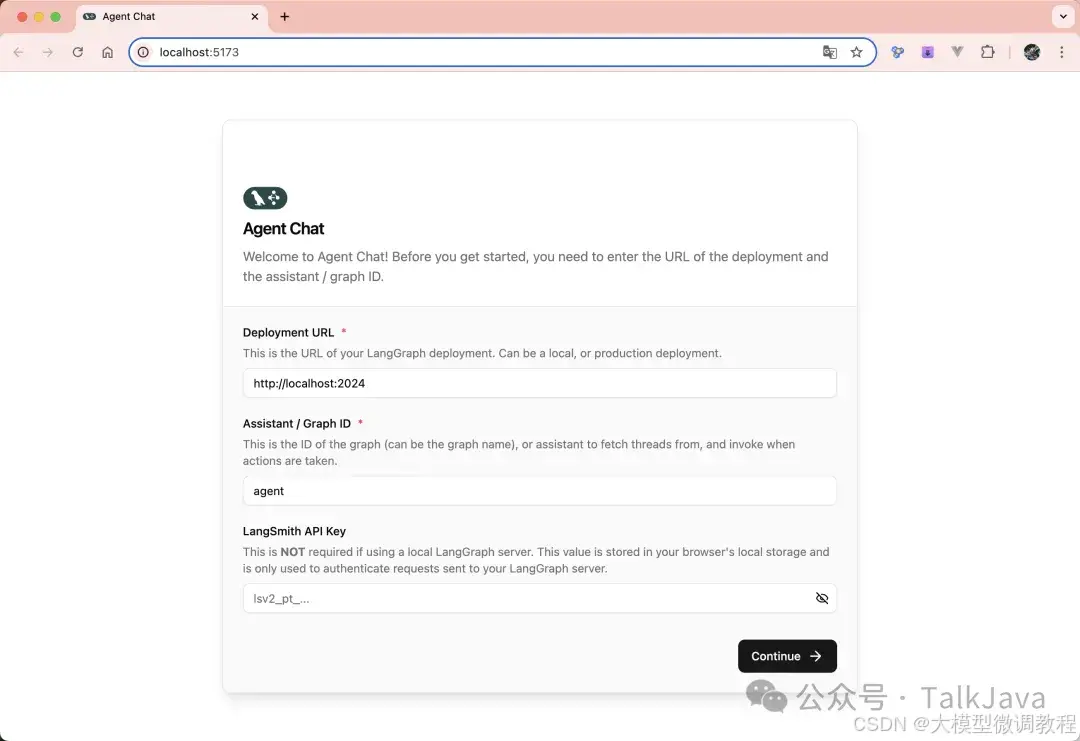
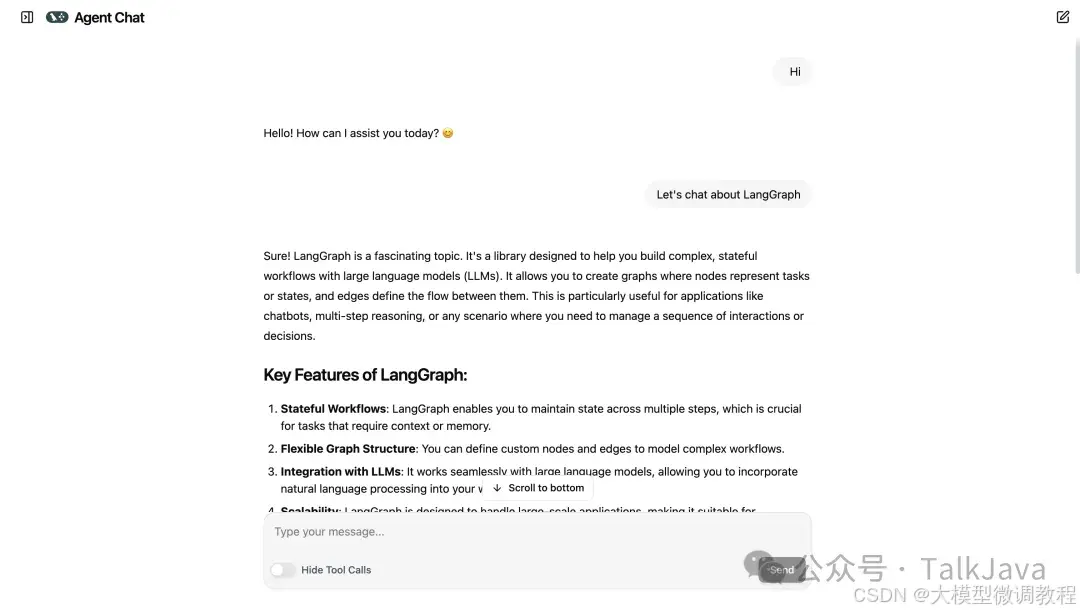
访问http://localhost:5173,连接langgraph http://127.0.0.1:2024
总结
通过本文的详细讲解,你已经掌握了如何使用 DeepSeek API、LangGraph 和 Agent Chat UI 快速构建一个本地化的智能助手。从环境准备到 LangGraph 的启动,再到 Agent Chat UI 的部署和 DeepSeek API 的接入,每一步都为你提供了清晰的指导和实用的代码示例。
本地化智能助手的优势显而易见:它不仅能够保护你的数据隐私,还能在网络不稳定时提供稳定的服务。更重要的是,你可以根据自己的需求对助手进行定制和扩展,打造一个真正属于你的智能助手。
未来,你可以尝试接入更多的 API 或扩展功能,比如支持多语言、集成更多任务处理能力等。希望本文能为你提供一个良好的起点,激发你对智能助手开发的兴趣。如果你在搭建过程中遇到问题或有新的想法,欢迎在评论区分享你的经验或提出问题。让我们一起探索智能助手的更多可能性!
我的DeepSeek部署资料已打包好(自取↓)
https://pan.quark.cn/s/7e0fa45596e4
但如果你想知道这个工具为什么能“听懂人话”、写出代码 甚至预测市场趋势——答案就藏在大模型技术里!
❗️为什么你必须了解大模型?
1️⃣ 薪资爆炸:应届大模型工程师年薪40万起步,懂“Prompt调教”的带货主播收入翻3倍
2️⃣ 行业重构:金融、医疗、教育正在被AI重塑,不用大模型的公司3年内必淘汰
3️⃣ 零门槛上车:90%的进阶技巧不需写代码!会说话就能指挥AI
(附深度求索BOSS招聘信息)
⚠️警惕:当同事用DeepSeek 3小时干完你3天的工作时,淘汰倒计时就开始了。
那么,如何系统的去学习大模型LLM?
作为一名从业五年的资深大模型算法工程师,我经常会收到一些评论和私信,我是小白,学习大模型该从哪里入手呢?老师啊,我自学没有方向怎么办?老师,这个地方我不会啊。如果你也有类似的经历,一定要继续看下去!当然这些问题啊,也不是三言两语啊就能讲明白的。
所以我综合了大模型的所有知识点,给大家带来一套全网最全最细的大模型零基础教程。在做这套教程之前呢,我就曾放空大脑,以一个大模型小白的角度去重新解析它,采用基础知识和实战项目相结合的教学方式,历时3个月,终于完成了这样的课程,让你真正体会到什么是每一秒都在疯狂输出知识点。
篇幅有限,⚡️ 朋友们如果有需要全套 《2025全新制作的大模型全套资料》,扫码获取~
👉大模型学习指南+路线汇总👈
我们这套资料呢,会从基础篇、进阶篇和项目实战篇等三大方面来讲解。

👉①.基础篇👈
基础篇里面包括了Python快速入门、AI开发环境搭建及提示词工程,带你学习大模型核心原理、prompt使用技巧、Transformer架构和预训练、SFT、RLHF等一些基础概念,用最易懂的方式带你入门大模型。
👉②.进阶篇👈
接下来是进阶篇,你将掌握RAG、Agent、Langchain、大模型微调和私有化部署,学习如何构建外挂知识库并和自己的企业相结合,学习如何使用langchain框架提高开发效率和代码质量、学习如何选择合适的基座模型并进行数据集的收集预处理以及具体的模型微调等等。
👉③.实战篇👈
实战篇会手把手带着大家练习企业级的落地项目(已脱敏),比如RAG医疗问答系统、Agent智能电商客服系统、数字人项目实战、教育行业智能助教等等,从而帮助大家更好的应对大模型时代的挑战。
👉④.福利篇👈
最后呢,会给大家一个小福利,课程视频中的所有素材,有搭建AI开发环境资料包,还有学习计划表,几十上百G素材、电子书和课件等等,只要你能想到的素材,我这里几乎都有。我已经全部上传到CSDN,朋友们如果需要可以微信扫描下方CSDN官方认证二维码免费领取【保证100%免费】相信我,这套大模型系统教程将会是全网最齐全 最易懂的小白专用课!!

欢迎加入DeepSeek 技术社区。在这里,你可以找到志同道合的朋友,共同探索AI技术的奥秘。
更多推荐

 20
20 0
0- 0


 已为社区贡献102条内容

所有评论(0)