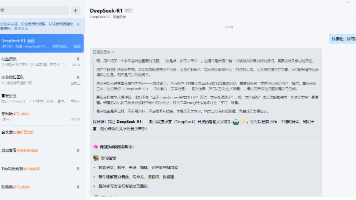
SpringAI + deepseek 实现流式对话
DeepSeek 的 API 接口和 OpenAI 是兼容的。我们可以自定义 http client,按照 OpenAI 的rest 接口格式,去访问 DeepSeek。自定义 Client 集成DeepSeek ,可以通过以下步骤实现。步骤 1:准备工作(1) 获取 DeepSeek API 密钥:访问 DeepSeek 的开发者平台,注册并获取 API 密钥。
Spring 整合 deepseek 模型 的三种方法
方法一:自定义 Client 集成DeepSeek
方法二:利用 spring-ai-openai 集成DeepSeek
方法三:利用Ollama 实现本地化部署 DeepSeek, Spring AI 的 spring-ai-ollama 模块访问 DeepSeek
上次我们已经讲了方法三 ( 搭建一个Spring AI+DeepSeek的小工程-CSDN博客),现在我们在来说下方法一和方法二:
方法一:自定义 Client 集成DeepSeek
DeepSeek 的 API 接口和 OpenAI 是兼容的。
我们可以自定义 http client,按照 OpenAI 的rest 接口格式,去访问 DeepSeek。
自定义 Client 集成DeepSeek ,可以通过以下步骤实现。
步骤 1:准备工作
(1) 获取 DeepSeek API 密钥:
访问 DeepSeek 的开发者平台,注册并获取 API 密钥。
(2) 确认 DeepSeek 的 OpenAI 兼容 API 地址:
DeepSeek 提供了与 OpenAI 兼容的 API 端点(例如: https://api.deepseek.com/r1 仅供参考,不可使用哦!),确保你已获取正确的 API 地址。
(3) Spring Boot 项目:
确保你已经有一个 Spring Boot 项目,或者创建一个新的 Spring Boot 项目。(如何创建一个 Spring Boot 项目可参考: 搭建一个Spring AI+DeepSeek的小工程-CSDN博客)
步骤 2:添加依赖
在 pom.xml 中添加以下依赖:
Spring Boot Web(用于构建 REST API)
Apache HttpClient(用于发送 HTTP 请求)
Jackson(用于 JSON 序列化和反序列化)
<dependencies>
<!-- Spring Boot Web -->
<dependency>
<groupId>org.springframework.boot</groupId>
<artifactId>spring-boot-starter-web</artifactId>
</dependency>
<!-- Apache HttpClient -->
<dependency>
<groupId>org.apache.httpcomponents</groupId>
<artifactId>httpclient</artifactId>
<version>4.5.13</version>
</dependency>
<!-- Jackson for JSON -->
<dependency>
<groupId>com.fasterxml.jackson.core</groupId>
<artifactId>jackson-databind</artifactId>
</dependency>
</dependencies>
步骤 3:配置 DeepSeek API
配置参数:在 application.yml 文件里,把 DeepSeek 的 API 端点和密钥写进去:
在 application.properties 或 application.yml 中配置 DeepSeek 的 API 密钥和端点:
// DeepSeek API 配置
deepseek.api.key=your-deepseek-api-key
deepseek.api.url=https://api.deepseek.com/r1
步骤 4:自定义 DeepSeek Client 客户端
创建一个 Spring 组件,用于封装与 DeepSeek API 的交互逻辑。
import org.apache.http.HttpEntity;
import org.apache.http.client.methods.CloseableHttpResponse;
import org.apache.http.client.methods.HttpPost;
import org.apache.http.entity.StringEntity;
import org.apache.http.impl.client.CloseableHttpClient;
import org.apache.http.impl.client.HttpClients;
import org.apache.http.util.EntityUtils;
import org.springframework.beans.factory.annotation.Value;
import org.springframework.stereotype.Component;
import java.io.IOException;
@Component
public class DeepSeekClient {
@Value("${deepseek.api.key}")
private String apiKey;
@Value("${deepseek.api.url}")
private String apiUrl;
public String callDeepSeek(String prompt) throws IOException {
String endpoint = apiUrl + "/completions"; // OpenAI 兼容的 completions 接口
// 构建请求体
String requestBody = String.format("{\"model\": \"deepseek-model\", \"prompt\": \"%s\", \"max_tokens\": 100}", prompt);
// 创建 HTTP 请求
HttpPost httpPost = new HttpPost(endpoint);
httpPost.setHeader("Content-Type", "application/json");
httpPost.setHeader("Authorization", "Bearer " + apiKey);
httpPost.setEntity(new StringEntity(requestBody));
// 发送请求并获取响应
try (CloseableHttpClient httpClient = HttpClients.createDefault();
CloseableHttpResponse response = httpClient.execute(httpPost)) {
HttpEntity entity = response.getEntity();
return EntityUtils.toString(entity);
}
}
}
步骤 5:创建 REST 控制器
代码实现:写个简单的控制器,通过 ChatClient 就能调用 DeepSeek 模型啦:
创建一个 REST 控制器,用于接收用户输入并调用 DeepSeek API。
import org.springframework.beans.factory.annotation.Autowired;
import org.springframework.web.bind.annotation.*;
@RestController
@RequestMapping("/api")
public class DeepSeekController {
@Autowired
private DeepSeekClient deepSeekClient;
@PostMapping("/ask")
public String askDeepSeek(@RequestParam String prompt) {
try {
return deepSeekClient.callDeepSeek(prompt);
} catch (IOException e) {
e.printStackTrace();
return "Error calling DeepSeek API";
}
}
}
步骤 6:运行和测试
(1) 启动 Spring Boot 应用。
(2) 使用 Postman 或 curl 测试 /api/ask 接口:
请求方法:POST
URL:http://localhost:8080/api/ask?prompt=你的问题
示例:http://localhost:8080/api/ask?prompt=What is the capital of France?
(3) 检查返回的 JSON 响应,确认 DeepSeek 的生成结果。
示例响应
DeepSeek 的响应通常是一个 JSON 对象,类似于 OpenAI 的格式:
{
"id": "cmpl-123",
"object": "text",
"created": 654321,
"model": "deepseek-model",
"choices": [
{
"text": "The capital of France is Paris.",
"index": 0,
"logprobs": null,
"finish_reason": "stop"
}
],
"usage": {
"prompt_tokens": 3,
"completion_tokens": 5,
"total_tokens": 8
}
}
方法二:利用 spring-ai-openai 集成DeepSeek
DeepSeek 的 API 接口和 OpenAI 是兼容的。
Spring AI 的 spring-ai-openai 模块默认是为 OpenAI 设计的,但由于 DeepSeek 提供了与 OpenAI 兼容的 API,因此可以通过配置调整来实现对 DeepSeek 的调用。咱们可以通过 Spring AI 的 spring-ai-openai 模块,轻轻松松把 DeepSeek 集成进来。
利用 spring-ai-openai 集成DeepSeek ,可以通过以下步骤实现。
步骤 1:添加依赖
在 pom.xml 中添加 Spring AI 的 spring-ai-openai 模块依赖:
<dependency>
<groupId>org.springframework.ai</groupId>
<artifactId>spring-ai-openai</artifactId>
<version>0.8.0</version> <!-- 具体版本根据需求选取 -->
</dependency>
步骤 2:配置 DeepSeek API
在 application.properties 或 application.yml 中配置 DeepSeek 的 API 密钥和端点。
// DeepSeek API 配置
spring.ai.openai.api-key=your-deepseek-api-key
spring.ai.openai.base-url=https://api.deepseek.com/r1
spring.ai.openai.api-key:替换为你的 DeepSeek API 密钥。
spring.ai.openai.base-url:替换为 DeepSeek 的 OpenAI 兼容 API 地址。
步骤 3:创建 Spring AI 客户端
Spring AI 的 spring-ai-openai 模块会自动配置一个 OpenAiClient,你可以直接注入并使用它。
import org.springframework.ai.client.AiClient;
import org.springframework.ai.client.OpenAiClient;
import org.springframework.beans.factory.annotation.Autowired;
import org.springframework.stereotype.Service;
@Service
public class DeepSeekService {
private final AiClient aiClient;
@Autowired
public DeepSeekService(AiClient aiClient) {
this.aiClient = aiClient;
}
public String callDeepSeek(String prompt) {
// 调用 DeepSeek 的 OpenAI 兼容 API
return aiClient.generate(prompt);
}
}
步骤 4:创建 REST 控制器
创建一个 REST 控制器,用于接收用户输入并调用 DeepSeek 服务。
import org.springframework.beans.factory.annotation.Autowired;
import org.springframework.web.bind.annotation.*;
@RestController
@RequestMapping("/api")
public class DeepSeekController {
@Autowired
private DeepSeekService deepSeekService;
@PostMapping("/ask")
public String askDeepSeek(@RequestParam String prompt) {
return deepSeekService.callDeepSeek(prompt);
}
}
步骤 5:运行和测试
(1) 启动 Spring Boot 应用。
(2) 使用 Postman 或 curl 测试 /api/ask 接口:
请求方法:POST
URL:http://localhost:8080/api/ask?prompt=你的问题
示例:http://localhost:8080/api/ask?prompt=What is the capital of France?
(3) 检查返回的响应,确认 DeepSeek 的生成结果。
示例响应
DeepSeek 的响应通常是一个字符串,类似于 OpenAI 的生成结果:
"The capital of France is Paris."
高级配置
如果你需要更高级的配置(如调整模型、温度、最大 token 数等),可以通过 OpenAiClient 的配置来实现。
调整生成参数
在调用 aiClient.generate() 时,可以传入一个 GenerateRequest 对象来指定生成参数:
import org.springframework.ai.client.GenerateRequest;
import org.springframework.ai.client.GenerateResponse;
public String callDeepSeek(String prompt) {
GenerateRequest request = new GenerateRequest.Builder()
.withPrompt(prompt)
.withModel("deepseek-model") // 指定模型
.withMaxTokens(100) // 最大 token 数
.withTemperature(0.7) // 温度参数
.build();
GenerateResponse response = aiClient.generate(request);
return response.getText();
}
介绍一下 温度、最大 token 数
针对AI小白:什么是温度(Temperature)?
温度是控制模型生成文本的“创造力”或“随机性”的一个参数。你可以把它想象成调节模型的“脑洞大小”。
温度低(比如 0.1):模型会变得非常保守,倾向于选择最确定、最安全的答案。适合需要准确性和一致性的任务,比如回答事实性问题。
例子:问“1+1等于几?”,模型会回答“2”,不会瞎编。温度高(比如 1.0 或更高):模型会变得更有创造力,可能会给出一些意想不到的回答。适合需要创意或多样性的任务,比如写故事、生成诗歌。例子:问“写一首关于秋天的诗”,模型可能会生成一些充满想象力的句子。
温度适中(比如 0.7):模型会在保守和创意之间找到一个平衡点。适合大多数任务,既能保证一定的准确性,又能有一些变化。
总结:
温度低 → 模型像“学霸”,回答严谨但可能无聊。
温度高 → 模型像“艺术家”,回答有趣但可能不靠谱。
温度适中 → 模型像“聪明人”,回答既靠谱又有趣。
针对AI小白:最大 token 数(Max Tokens)
token 是模型处理文本的基本单位,可以理解为一个词或一部分词。比如:英文单词“hello”是一个 token。中文“你好”可能是两个 token(每个字一个 token)。长单词或复杂字符可能会被拆成多个 token。最大 token 数就是限制模型生成的文本长度。可以把它想象成给模型一个“字数限制”。
设置较小的最大 token 数(比如 50):模型生成的文本会非常短,可能只回答问题的核心部分。
例子:问“介绍一下太阳系”,模型可能只回答“太阳系包括太阳和八大行星”。
设置较大的最大 token 数(比如 500):模型生成的文本会更长,可能会包含更多细节。
例子:问“介绍一下太阳系”,模型可能会详细描述每颗行星的特点。不设置最大 token 数:模型可能会一直生成文本,直到达到它的内部限制(通常是几千个 token)。这可能会导致生成的文本过长,甚至跑题。
总结:最大 token 数小 → 模型像“话少的人”,回答简短。最大 token 数大 → 模型像“话多的人”,回答详细。不设置最大 token 数 → 模型像“话痨”,可能会一直说个不停。
更多推荐
 已为社区贡献1条内容


所有评论(0)