【多模态大模型】Janus-Pro+ms-swift 推理-微调
我们介绍使用ms-swift对deepseek-ai/Janus-Pro-7B进行微调(注意:目前只支持图像理解的训练而不支持图像生成)。这里,我们将展示可运行的微调demo,并给出自定义数据集的格式。conda create -n swift #创建虚拟环境。如果要使用自定义数据集进行训练,你可以参考以下格式,并指定。在开始微调之前,请确保您的环境已准备妥当。微调完成,保存到output。是一个
·
模型推理
安装依赖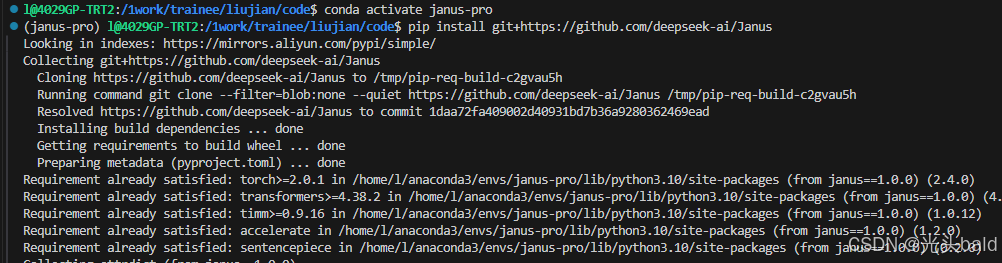
下载模型 -从modelscope
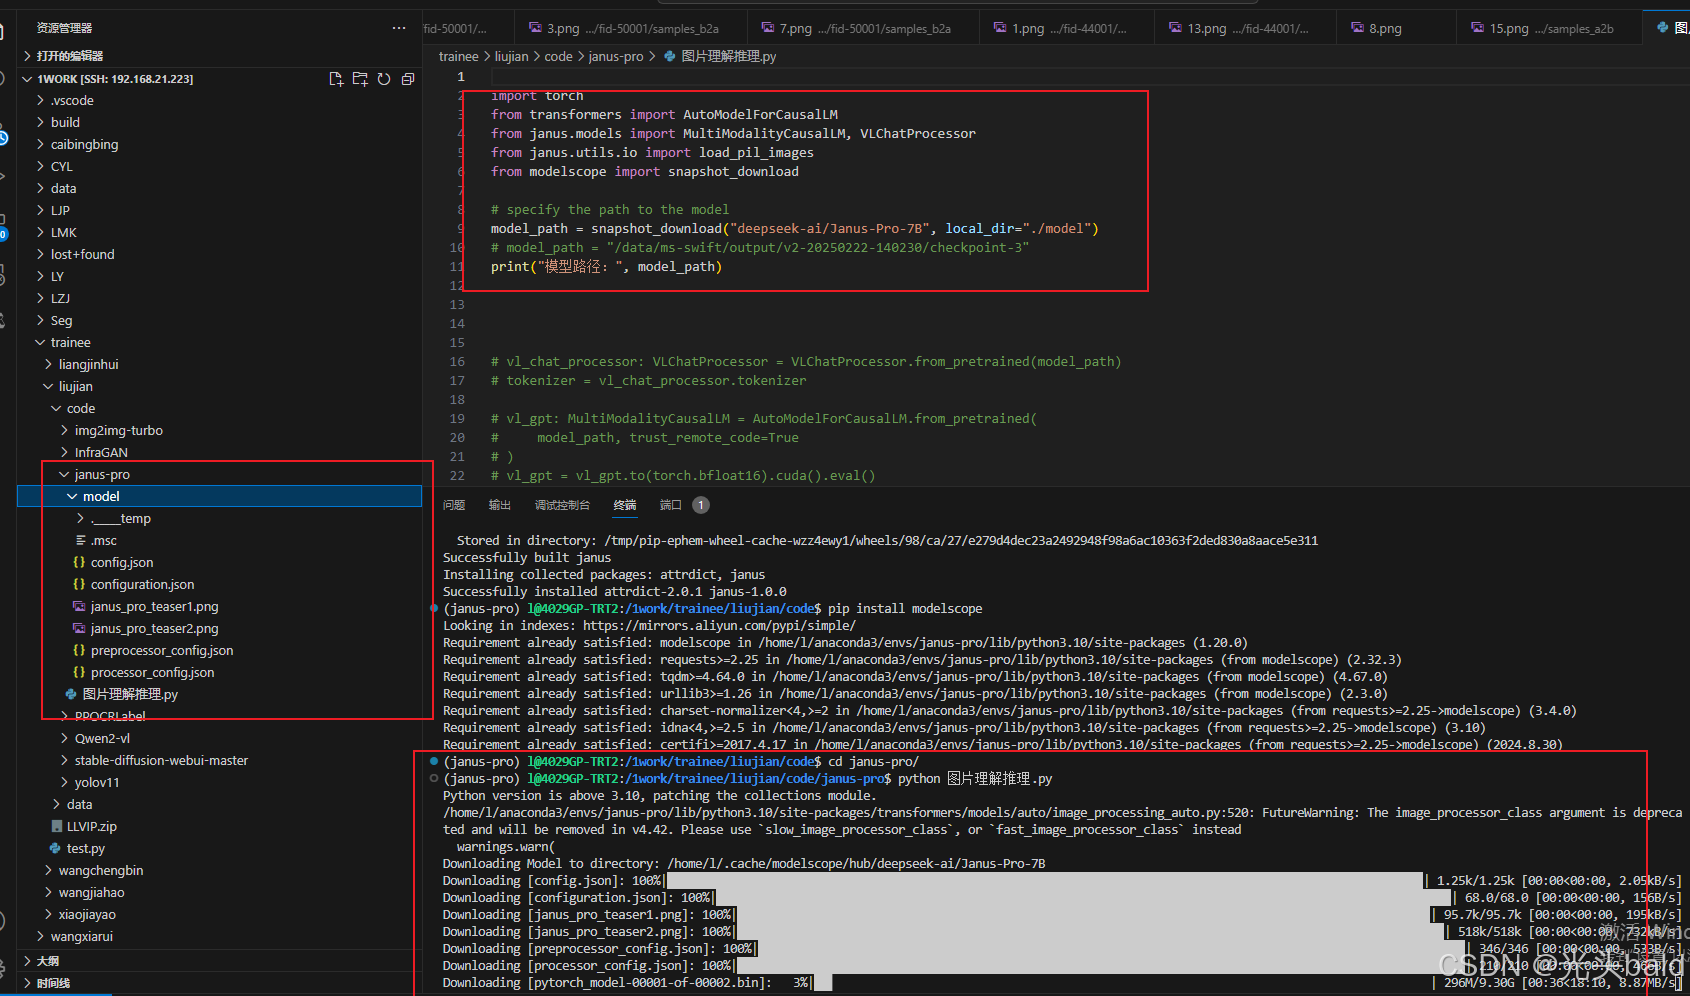 调用多模态图像理解 -推理
import torch
from transformers import AutoModelForCausalLM
from janus.models import MultiModalityCausalLM, VLChatProcessor
from janus.utils.io import load_pil_images
from modelscope import snapshot_download

# specify the path to the model
# model_path = snapshot_download("deepseek-ai/Janus-Pro-7B", local_dir="./model")   #未下载可以使用modelscope下载
model_path = "/1work/trainee/liujian/code/janus-pro/model"
print("模型路径:", model_path)

vl_chat_processor: VLChatProcessor = VLChatProcessor.from_pretrained(model_path)
tokenizer = vl_chat_processor.tokenizer     #分词器分词

vl_gpt: MultiModalityCausalLM = AutoModelForCausalLM.from_pretrained(
    model_path, trust_remote_code=True
)
vl_gpt = vl_gpt.to(torch.bfloat16).cuda().eval()    # 转换为BF16精度并移至GPU

question = "discribe the image"

# 构造对话格式的输入  prompt
image = "/1work/trainee/liujian/code/janus-pro/data/dog_and_girl.jpeg"
conversation = [
    {
        "role": "<|User|>",
        "content": f"<image_placeholder>\\n{question}",
        "images": [image],
    },
    {"role": "<|Assistant|>", "content": ""},
]

# load images and prepare for inputs
pil_images = load_pil_images(conversation)
prepare_inputs = vl_chat_processor(
    conversations=conversation, images=pil_images, force_batchify=True
).to(vl_gpt.device)       #视觉特征与文本嵌入的融合

# # run image encoder to get the image embeddings
inputs_embeds = vl_gpt.prepare_inputs_embeds(**prepare_inputs)

# # run the model to get the response
outputs = vl_gpt.language_model.generate(
    inputs_embeds=inputs_embeds,
    attention_mask=prepare_inputs.attention_mask,
    pad_token_id=tokenizer.eos_token_id,
    bos_token_id=tokenizer.bos_token_id,
    eos_token_id=tokenizer.eos_token_id,
    max_new_tokens=512,   # 最大生成token数

    do_sample=False,
    use_cache=True,    # 启用KV缓存加速

)

answer = tokenizer.decode(outputs[0].cpu().tolist(), skip_special_tokens=True)
print(f"{prepare_inputs['sft_format'][0]}", answer)
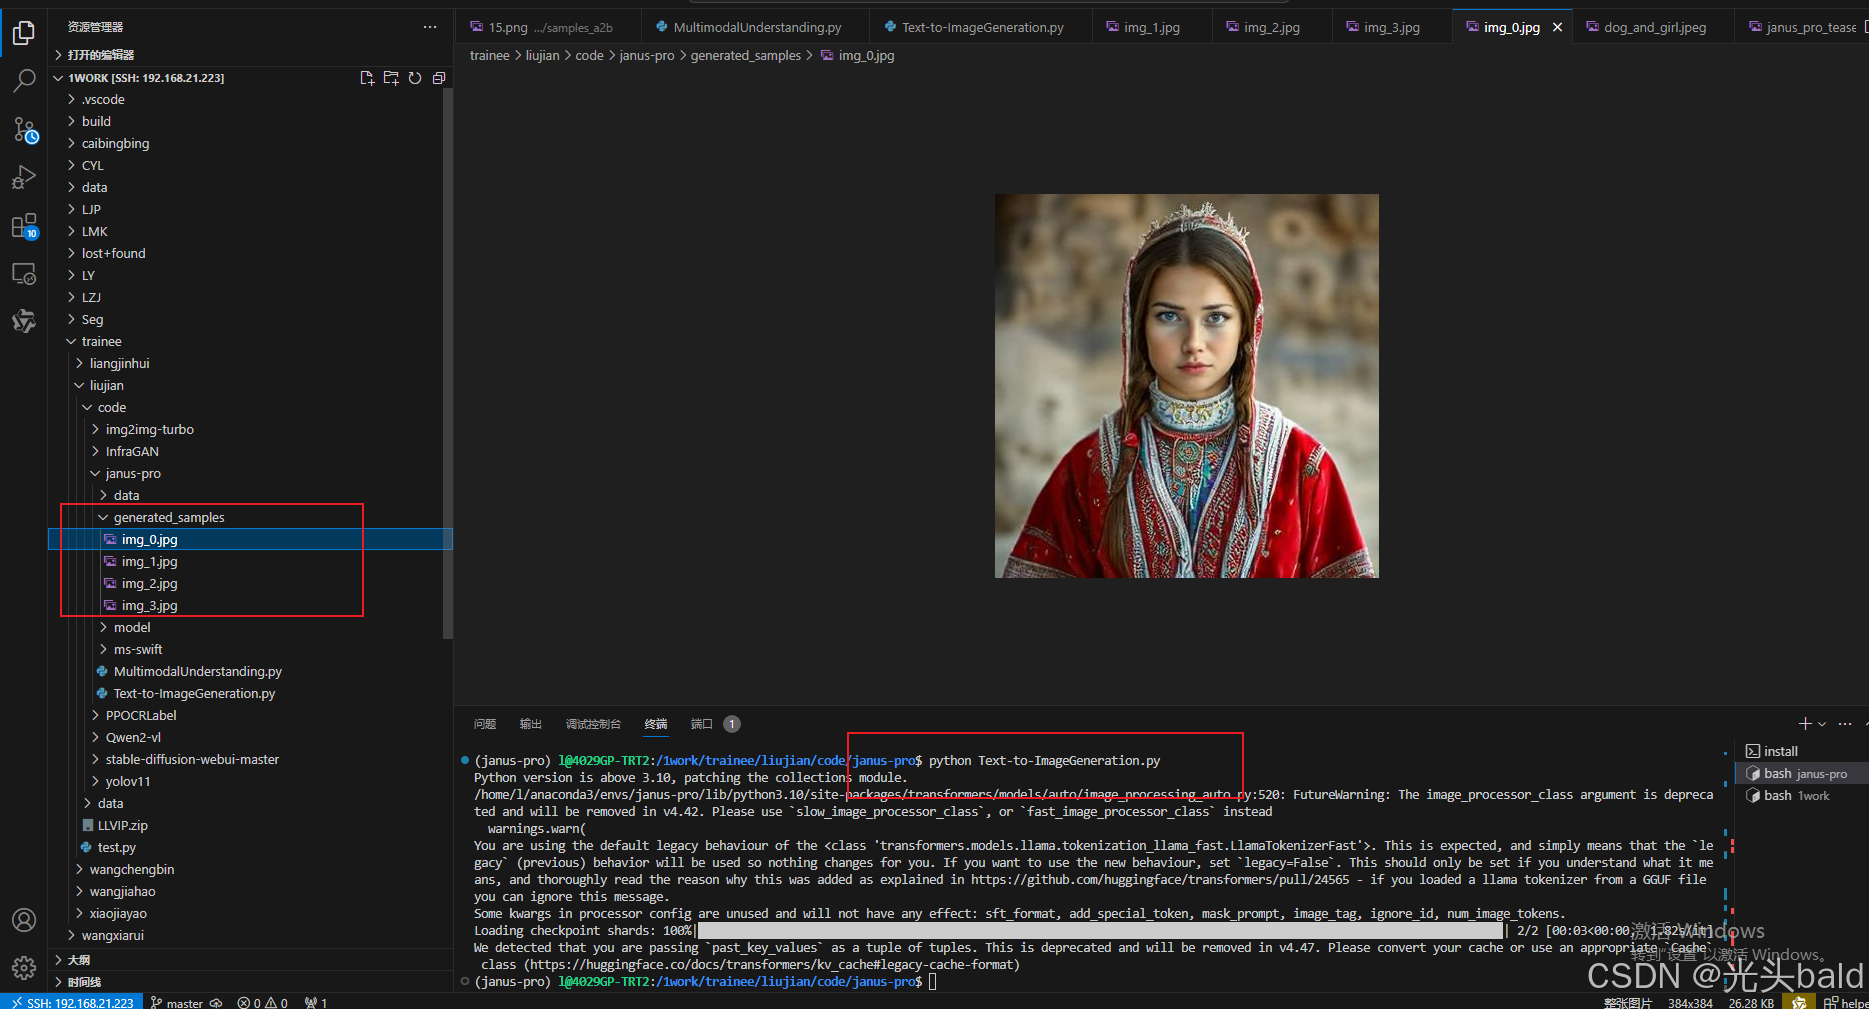 调用文本生成图像-推理

模型微调
环境配置
我们介绍使用ms-swift对deepseek-ai/Janus-Pro-7B进行微调(注意:目前只支持图像理解的训练而不支持图像生成)。这里,我们将展示可运行的微调demo,并给出自定义数据集的格式。
在开始微调之前,请确保您的环境已准备妥当。
conda create -n swift #创建虚拟环境
conda activate swift

# pip install git+https://github.com/modelscope/ms-swift.git
git clone <https://github.com/modelscope/ms-swift.gitcd> ms-swift
cd ms-swift
pip install -e .
阿里云 没包换源

微调的数据集
是一个ocr的数据集 如图

如果要使用自定义数据集进行训练,你可以参考以下格式,并指定--dataset <dataset_path>。
{"messages": [{"role": "user", "content": "浙江的省会在哪?"}, {"role": "assistant", "content": "浙江的省会在杭州。"}]}
{"messages": [{"role": "user", "content": "<image><image>两张图片有什么区别"}, {"role": "assistant", "content": "前一张是小猫,后一张是小狗"}], "images": ["/xxx/x.jpg", "/xxx/x.png"]}
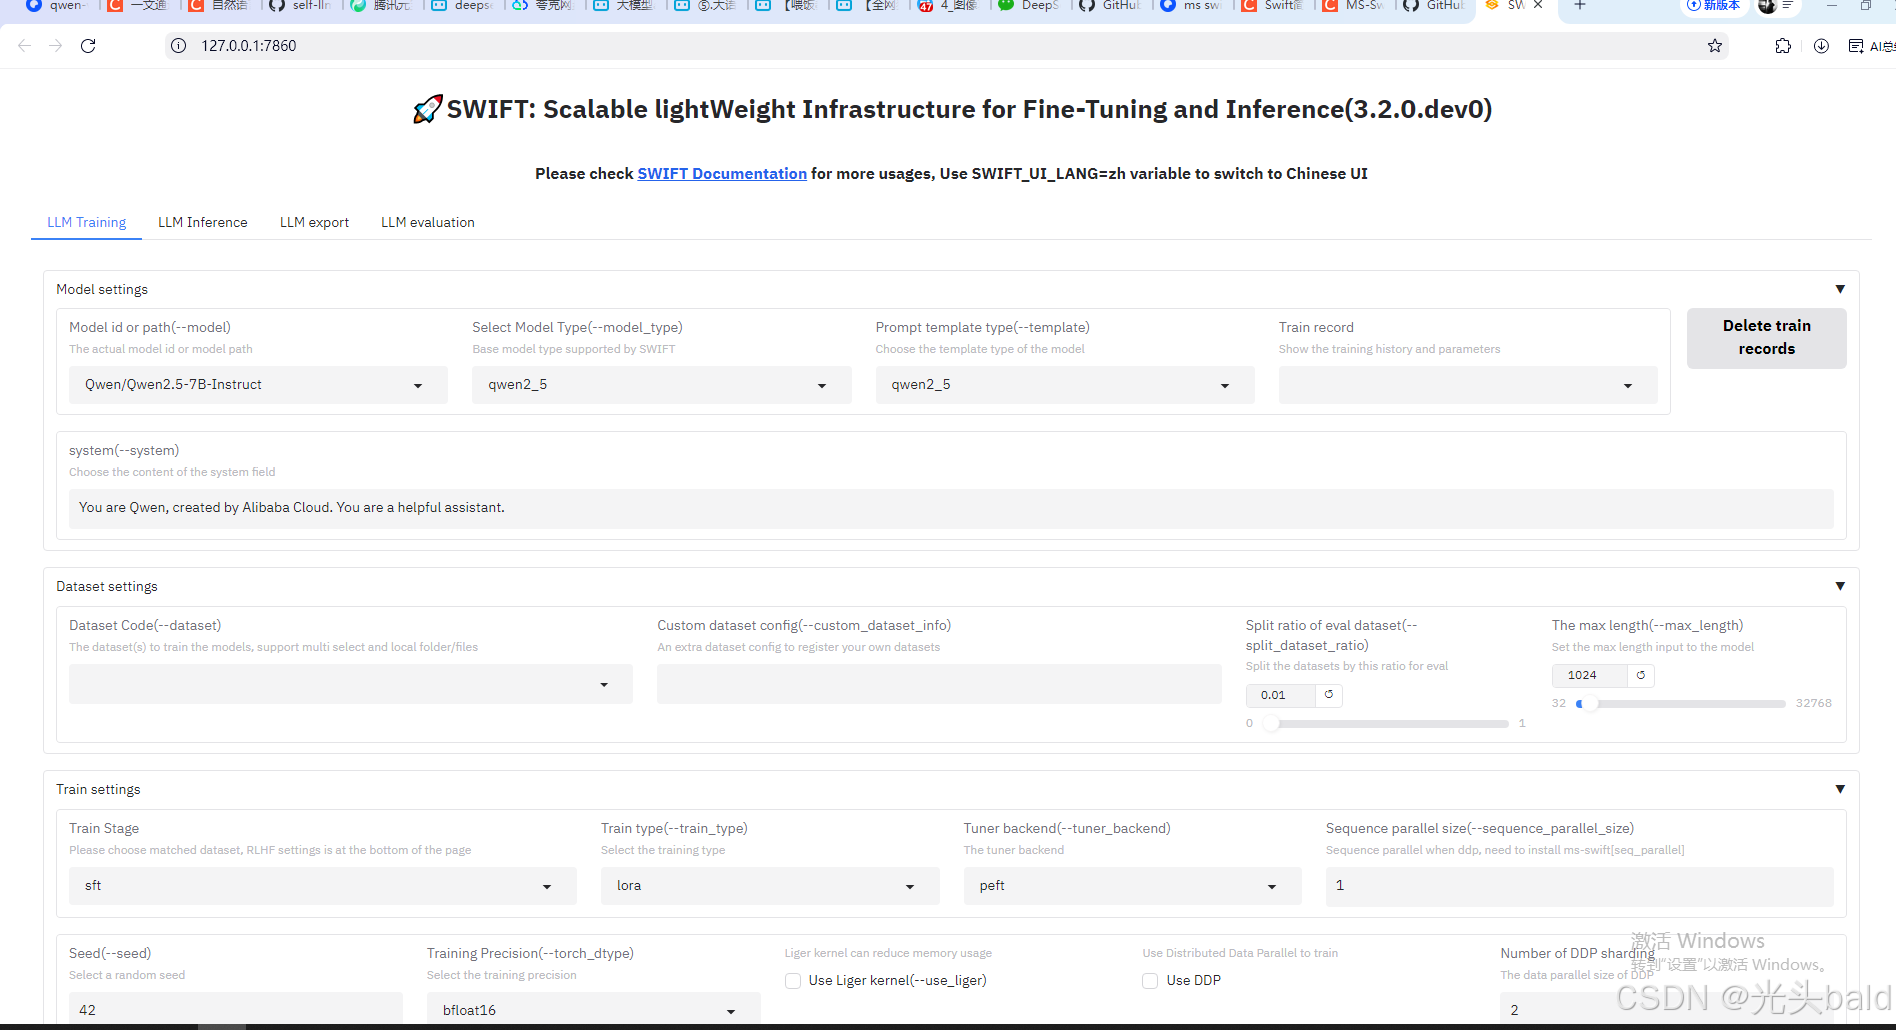
webui微调
支持中英文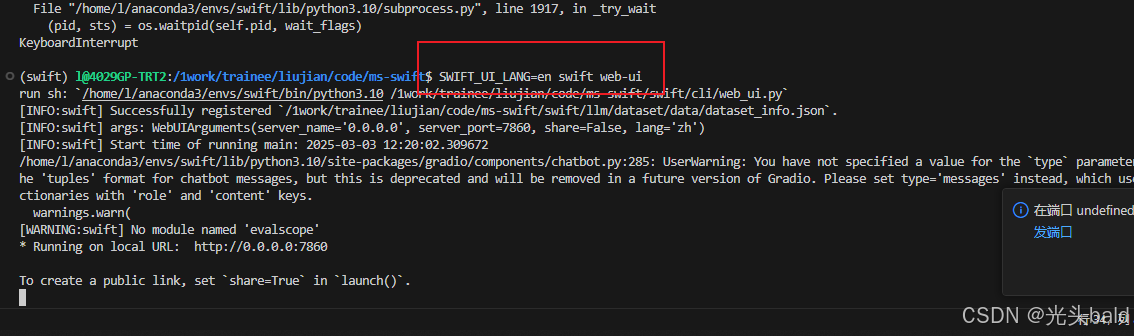
命令行微调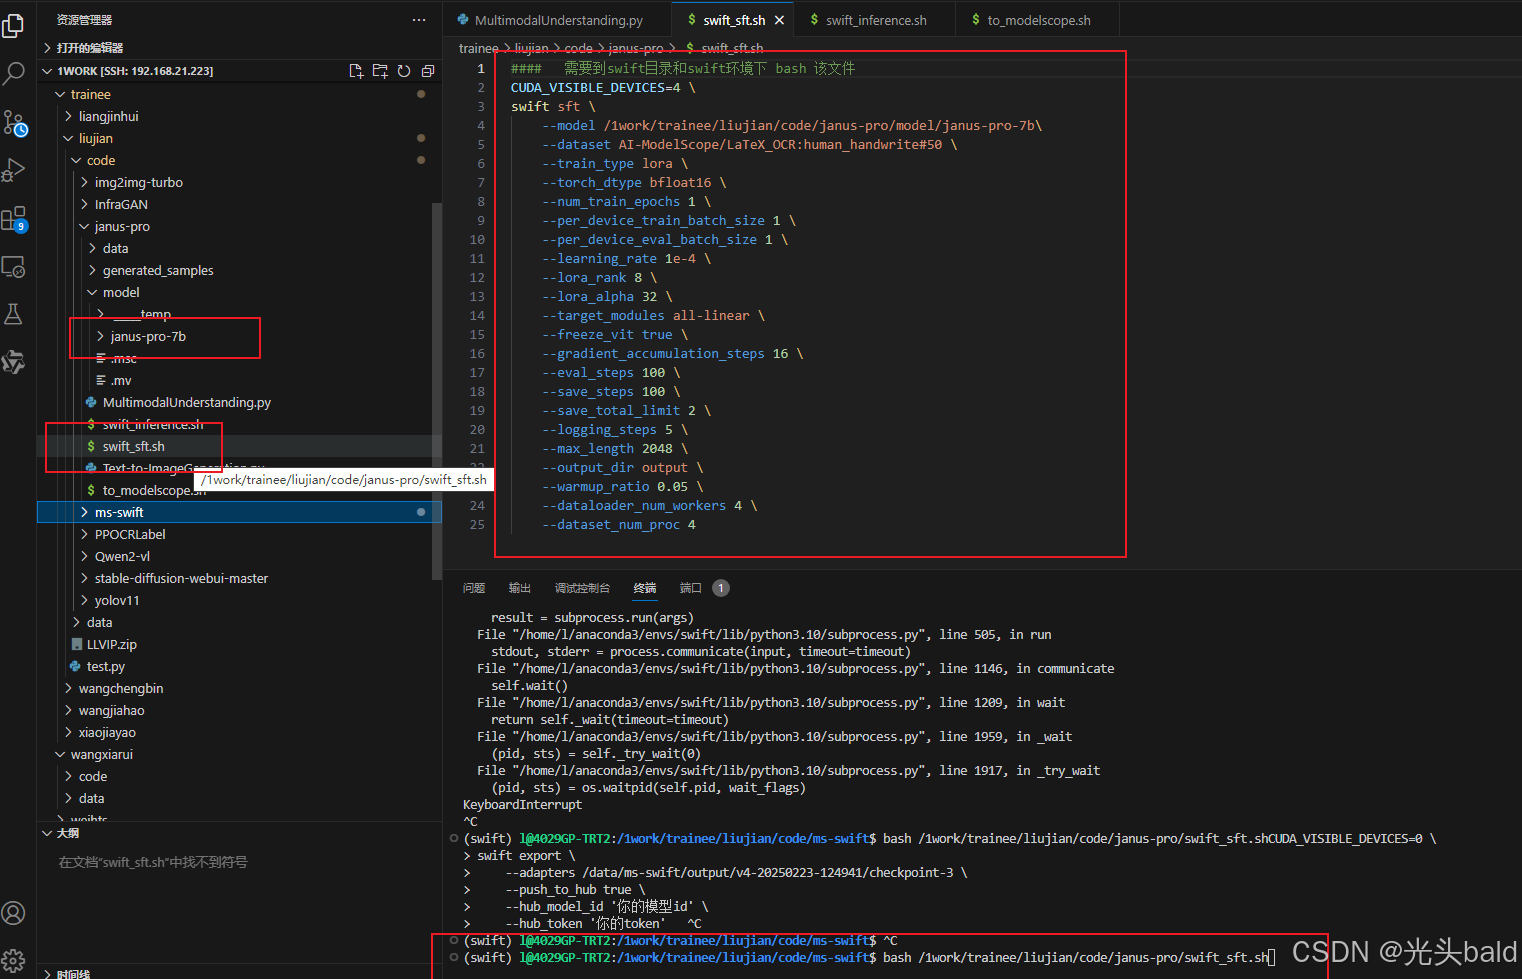
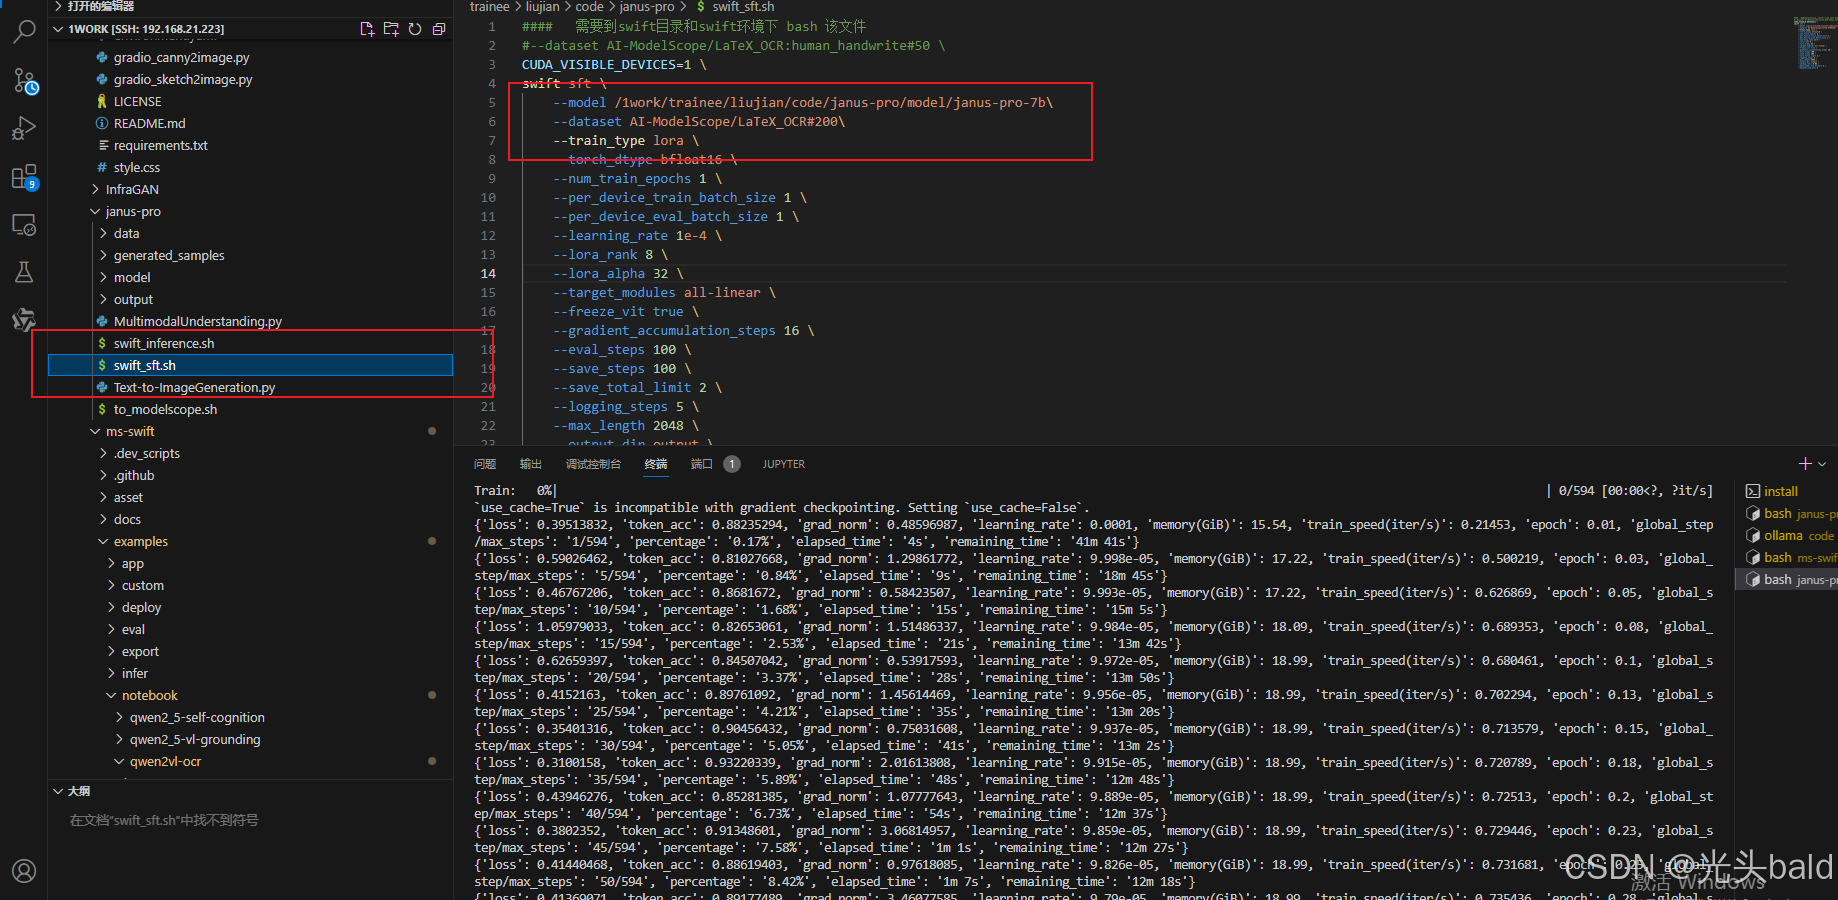
微调完成,保存到output。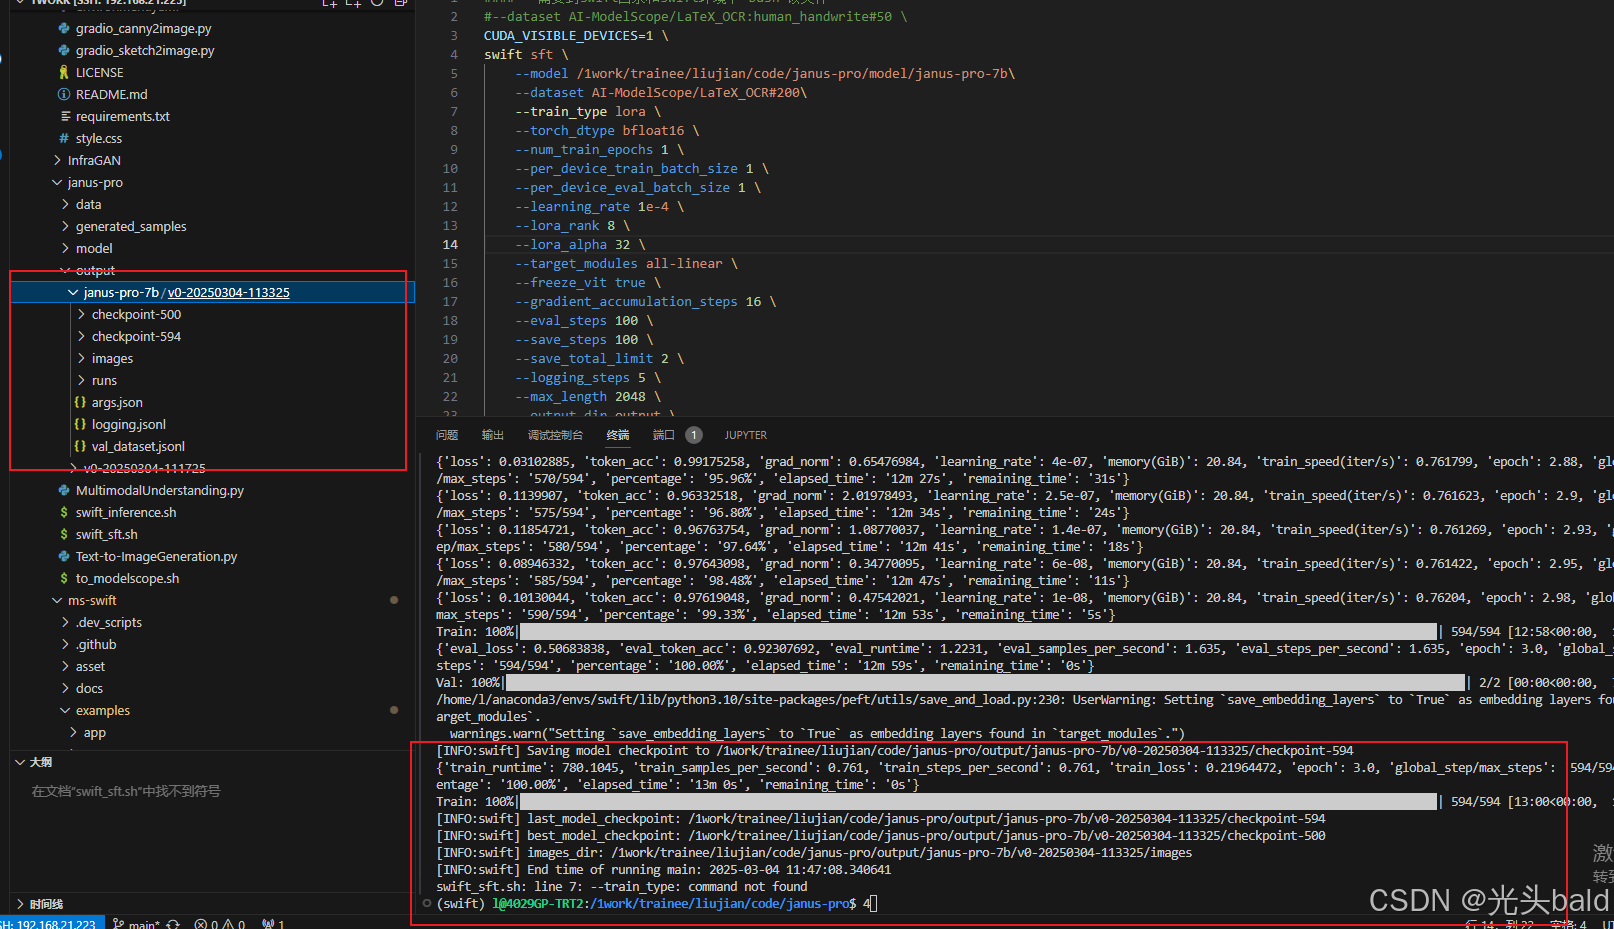
推理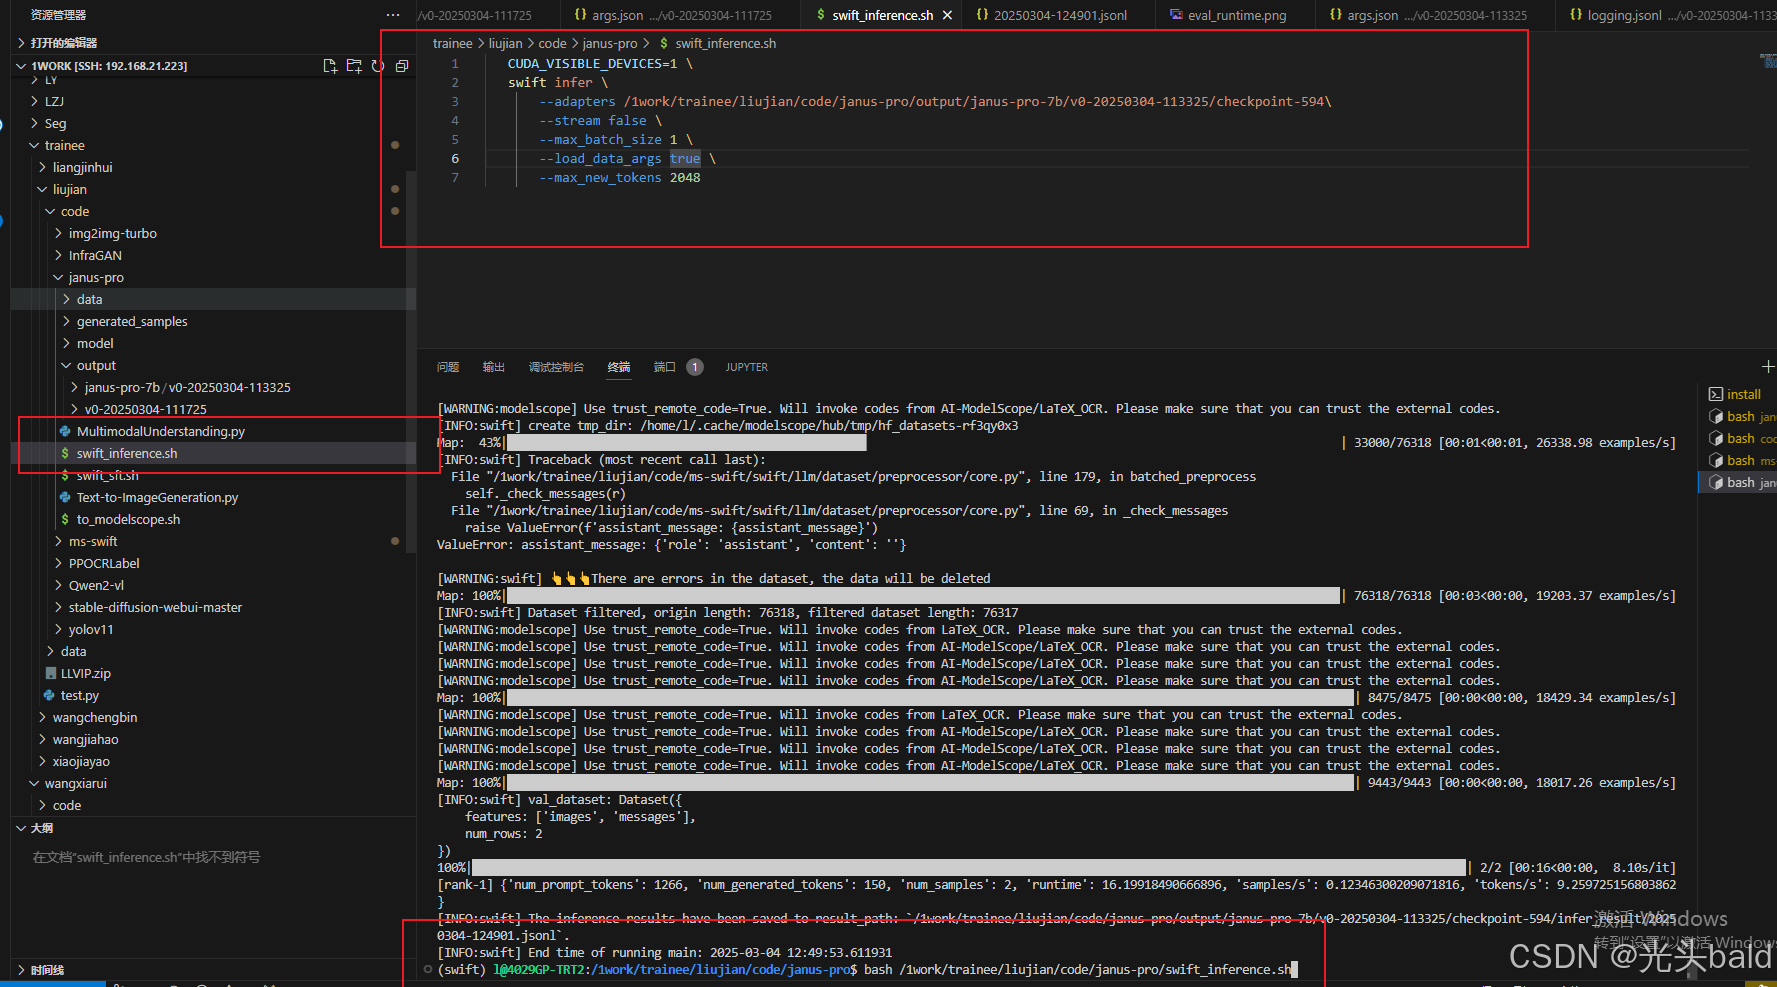

欢迎加入DeepSeek 技术社区。在这里,你可以找到志同道合的朋友,共同探索AI技术的奥秘。
更多推荐


 5
5 0
0- 0


 已为社区贡献1条内容

所有评论(0)