在openHarmony开发板上开发deepseek的可视化应用(1.处理流式数据)
发送请求并监听实现数据转换,HTTPRequest.on('dataReceive',(...))订阅HTTP流式响应数据接收事件,HTTPRequest.on('dataEnd',(...))订阅HTTP流式响应数据接收完毕事件。通过上面JSON对象可以看出,response属性的值就是deepseek所生成的回答,而这种JSON数据是一个一个返回过来的,所以每当新的字符串返回来时,我们都需要及
目录
开发准备:
系统:open Harmony4.1
Api:Api11
前提:本地部署启动ollama
调用接口:http://localhost:11434/api/generate
开发步骤:
1.分析:
通过查看ollama文档我们可以得知返回的JSON数据会因为请求体中的stream的值不同而发生改变,请求体格式如下:
{
  "model": "deepseek",
  "prompt": "Why is the sky blue?",
  "stream": false
}
其中stream的值设为true时返回JSON对象流,如下:
{
  "model": "deepseek",
  "created_at": "2023-08-04T08:52:19.385406455-07:00",
  "response": "The",
  "done": false
}
通过上面JSON对象可以看出,response属性的值就是deepseek所生成的回答,而这种JSON数据是一个一个返回过来的,所以每当新的字符串返回来时,我们都需要及时进行处理和渲染。而显然stream为true时,对于用户的体验感会更好。
而处理流式数据时,我们平时常用的HttpRequest.request网络请求方法是做不到的,而这时就需要把这个方法改为httpRequest.requestInStream.官方示例如下:
import http from '@ohos.net.http';

class Header {
  public contentType: string;

  constructor(contentType: string) {
    this.contentType = contentType;
  }
}

let httpRequest = http.createHttp();
let promise = httpRequest.requestInStream("EXAMPLE_URL", {
  method: http.RequestMethod.GET,
  connectTimeout: 60000,
  readTimeout: 60000,
  header: new Header('application/json')
});
promise.then((data: number) => {
  console.info("requestInStream OK!" + data);
}).catch((err: Error) => {
  console.info("requestInStream ERROR : err = " + JSON.stringify(err));
});
2.具体实现:
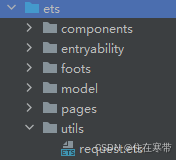
首先在ets目录下创建utils目录,将我们封装的http请求放在这里。
把http请求封装成一个PostStream函数,函数设置四个参数:
export function PostStream(
  url:string, //数据地址
  data:DataType,//请求数据
  onChunkParsed: (parsedData: StreamResType) => void, // 每次解析到数据块时的回调
  onChunkDone:(isDone:boolean)=>void // 数据传输完毕之后返回的回调
){
//....实现代码
}
在PostStream函数体内创建http请求,设置请求参数:
 // 创建 HTTP 请求对象
  const httpRequest = http.createHttp();
  // 设置请求参数
  const options: http.HttpRequestOptions = {
    method: http.RequestMethod.POST, // 请求方法
    header: {
      'Content-Type': 'application/json', // 请求头
    },
    extraData: data, // 请求体
    readTimeout: 1200000000, // 读取超时时间
    connectTimeout: 120000000, // 连接超时时间
  };
发送请求并监听实现数据转换,HTTPRequest.on('dataReceive',(...))订阅HTTP流式响应数据接收事件,HTTPRequest.on('dataEnd',(...))订阅HTTP流式响应数据接收完毕事件。在监听过程中我们需要将ArrayBuffer二进制数据转换为字符串,并通过buffer不断接受合并新的数据,从而达到不断更新回答的过程。最后当数据传递结束,将通过onChunkDone(true)的方式让结束信号返回从而更方便实现业务功能。
 let buffer:string = ''//用于存储未解析的流式数据

  // let receivedData:ArrayBuffer = new ArrayBuffer(0)//用于存储接收到的二进制数据
  //监听数据传输
  httpRequest.on('dataReceive', (chunk:ArrayBuffer) => {
    console.info("ArrayBuffer",chunk)
    //将二进制数据转换为字符串
    const chunkString:string = String.fromCharCode(...new Uint8Array(chunk));
    // console.info("转换为字符串"+chunkString)
    buffer += chunkString
    console.info("数据:"+JSON.stringify(chunkString))
    onChunkParsed(JSON.parse(chunkString))

  });

  //数据传输结束
  httpRequest.on('dataEnd', () => {
    console.info('No more data in response, data receive end');
    onChunkDone(true)
    httpRequest.off('dataReceive');
    httpRequest.off('dataEnd');
    httpRequest.destroy()

  });

  // 发送请求
  httpRequest.requestInStream(url, options).then((data) => {
    console.info("requestInStream OK!");
    httpRequest.off('headersReceive');
    console.info("Data:   "+JSON.stringify(data))
    httpRequest.destroy();
  }).catch((err: BusinessError) => {
    console.info("requestInStream ERROR : " + JSON.stringify(err));
  })
3.数据类型:
//流式返回数据类型
export interface StreamResType{
  model:string,
  created_at: string,
  response: string,
  done: boolean,
}
//请求数据
export interface  DataType{
  model:string,
  prompt:string,
  stream:boolean
}
4.调用:
  PostStream('http://localhost:11434/api/generate', this.sendData, (res) => {
                   //...对返回的数据对象进行处理
                  },(isDone)=>{
                    if (isDone) {
                      //传输数据结束之后的处理
                    }
                  })
欢迎加入DeepSeek 技术社区。在这里,你可以找到志同道合的朋友,共同探索AI技术的奥秘。
更多推荐


 23
23 0
0- 0


 已为社区贡献1条内容

所有评论(0)